background image

5

5-43

Printing the Configuration page

Printing the Configuration page

The Configuration page lists the settings in effect for the current Setup. After you 
have performed Setup, print a Configuration page to confirm your settings.

The other pages you can print from Command WorkStation include the test page, 
Job Log, color charts, and Font List. For information on these E-820 pages, see the

 Job 

Management Guide

.

T

O


PRINT


THE

 C

ONFIGURATION


PAGE

1.

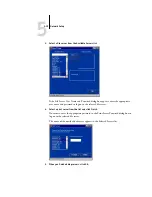
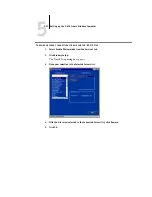
In Command WorkStation, choose Print Pages from the File menu.

2.

Click Configuration.

3.

Click Print.

Post the current Configuration page near the server for quick reference. Users need 
the information on this page, such as the current printer default settings.

Summary of Contents for Fiery E-820

Page 1: ...Color Controller E 820 CONFIGURATION GUIDE For use with the following color copiers Ricoh Aficio Color 6513 Gestetner CS213d RexRotary CS813d nashuatec CS513d infotec 7513 Savin SDC413 Lanier 5813 ...

Page 2: ...ters The Color Guide provides information on managing the color output of the E 820 It explains how to calibrate your copier and take advantage of the EFI Fiery ColorWise color management system as well as features in ColorWise Pro Tools The Fiery Color Reference addresses concepts and issues associated with managing color output of the E 820 and outlines key workflow scenarios In addition it offe...

Page 3: ...Chips Splash Velocity Velocity Balance Velocity Build Velocity Design Velocity Estimate Velocity Scan and VisualCal are trademarks of Electronics For Imaging Inc All other terms and product names may be trademarks or registered trademarks of their respective owners and are hereby acknowledged Legal Notices APPLE COMPUTER INC APPLE MAKES NO WARRANTIES EXPRESS OR IMPLIED INCLUDING WITHOUT LIMITATION...

Page 4: ...ss geschirmte Ausführungen benützt werden Für die Beschaffung richtiger Ausführungen ist der Betreiber verantwortlich Software License Agreement YOU SHOULD CAREFULLY READ THE FOLLOWING TERMS AND CONDITIONS BEFORE USING THIS SOFTWARE IF YOU DO NOT AGREE TO THE TERMS AND CONDITIONS OF THIS AGREEMENT DO NOT USE THE SOFTWARE INSTALLING OR USING THE SOFTWARE INDICATES THAT YOU AGREE TO AND ACCEPT THE T...

Page 5: ...REEMENT OR COMMUNICATION WITH YOU AND EFI SPECIFICALLY DISCLAIMS ANY IMPLIED WARRANTY OR CONDITION OF MERCHANTABILITY OR FITNESS FOR A PARTICULAR PURPOSE OR NONINFRINGEMENT OF THIRD PARTY RIGHTS Limitation of Liability TO THE MAXIMUM EXTENT PERMITTED BY LAW EFI AND ITS SUPPLIERS SHALL NOT BE LIABLE FOR ANY DAMAGES INCLUDING LOSS OF DATA LOST PROFITS COST OF COVER OR OTHER SPECIAL INCIDENTAL CONSEQ...

Page 6: ......

Page 7: ...rts Windows NT 4 0 2000 XP with TCP IP 2 2 Configuring a Windows NT 4 0 2000 server to communicate with the E 820 2 3 E 820 on a NetWare 4 x or 5 x network 2 8 Tips for experts IPX networks 2 9 Overview of IPX printing to the E 820 2 9 Configuring a NetWare 4 x server for printing 2 10 E 820 on a NetWare 5 x network with NDPS 2 14 Tips for experts NetWare 5 x networks 2 14 Configuring a NetWare 5 ...

Page 8: ...eration of the E 820 on a network 3 10 About the E 820 default password 3 12 Chapter 4 Performing Setup from the Control Panel E 820 Setup from the Control Panel 4 1 E 820 Control Panel 4 2 Safety warnings 4 2 Activity light 4 3 Buttons 4 3 Display window 4 4 Functions menu 4 6 Accessing Setup options 4 8 About the Control Panel Setup interface 4 8 Types of Setup screens 4 9 Server Setup options 4...

Page 9: ...p options 5 4 Job Log Setup 5 6 Network Setup 5 7 Adapters Ports 5 7 Protocols 5 9 Services 5 14 Windows Print Sharing with Server Message Block SMB 5 32 Printer Setup options 5 37 Printer Connections 5 37 PS PostScript Setup 5 38 Color Setup 5 40 Setting up printing groups 5 41 Exiting Setup 5 42 Printing the Configuration page 5 43 Chapter 6 Configuring Fiery WebTools Configuring the E 820 and c...

Page 10: ...l E 820 performance 7 10 Starting and shutting down the E 820 7 11 Starting the E 820 7 11 Restart the E 820 7 12 Shutting down the E 820 7 12 Appendix A Token Ring Network Option E 820 Token Ring option A 1 Connecting Token Ring hardware A 1 IPX SPX installations A 3 TCP IP installations A 3 Setting up Token Ring on the E 820 A 3 Setting up NetWare Windows clients A 3 Appendix B Troubleshooting T...

Page 11: ...lor Controller E 820 The name Aero is used in illustrations to represent the E 820 The term Windows 9x is used in this manual to represent Windows 95 Windows 98 and Windows Me The E 820 includes support for the EFI Fiery WebTools and software for EFI Command WorkStation which allow an operator to manage all jobs sent to the E 820 Although it may not be the case at all sites the documentation for t...

Page 12: ...ing Fiery WebTools Chapter 3 describes how to prepare for E 820 Setup including planning system security through access levels Chapter 4 describes E 820 configuration Setup from the Control Panel Chapter 5 describes E 820 Setup from a Windows computer Chapter 6 describes setting up the E 820 for WebTools Chapter 7 summarizes some administrative features of E 820 software that are available for IPX...

Page 13: ...ber to publish print connections between the print server and a remote computer The http protocol is commonly used for Web pages on the Internet and on intranets IPX SPX Novell IPX SPX stands for Internetwork Packet Exchange Sequenced Packet Exchange These protocols rules that enable computers on a network to communicate with each other are supported on Mac OS Windows and UNIX platforms and can ru...

Page 14: ...Configuring the network server When network servers are required you need to configure those servers to provide client access to the E 820 as a color PostScript printer For information on configuring network servers in Windows and UNIX network environments see Chapter 2 Setting up the E 820 Configure the E 820 for your particular printing and network environment First read Chapter 2 and then see s...

Page 15: ...le on the network Network server UNIX Mac OS Windows E 820 E 820 Prepare a network node Connect the E 820 to the copier and the network If you use a computer running Command WorkStation software connect it to the network Configure UNIX Windows NT 4 0 2000 and IPX Novell servers to specify E 820 print queues and E 820 users No special configuration of AppleShare servers is required On the E 820 Con...

Page 16: ...only use a star configuration around a hub rather than a bus arrangement The design of physical networks is beyond the scope of this manual If your network uses more than one protocol or more than one type of workstation combine the setups listed for each component of your system Multiple protocols shown in the diagrams as parallel lines can run on the same cable A solid connection from the E 820 ...

Page 17: ...computers can print directly Mac OS computer Mac OS computer 2 E 820 connected to copier Printing on this network Mac OS computers can print directly using the AppleTalk protocol For using Fiery Utilities Fiery utilities can be used with the AppleTalk protocol To use ColorWise Pro Tools and Fiery Link TCP IP is required For using WebTools A Mac OS computer with TCP IP http loaded TCP IP http for W...

Page 18: ...er with SPX page 2 9 Printing on this network All Windows computers can print through the NetWare server For using WebTools A Windows computer with TCP IP http loaded 1 3 3 4 IPX protocol Another supported protocol TCP IP http for WebTools IPX SPX protocol TCP IP or AppleTalk possible 3 Windows computer NetWare client running SPX Windows computer NetWare client Windows computer NetWare client 2 E ...

Page 19: ... clients can print using a protocol available on the Windows NT 4 0 2000 print server Windows computers can print using TCP IP with the lpd protocol For running Fiery utilities and WebTools A Windows computer with TCP IP loaded NETBEUI or other protocol available on the clients and the server TCP IP lpd for printing TCP IP http for WebTools TCP IP for Fiery utilities 1 Windows computer with TCP IP...

Page 20: ...y to setup 1 Windows computer User Software Installation Guide 2 E 820 Setup Chapter 4 TCP IP nbt For Windows printing Windows SMB printing enabled on the E 820 Windows NetBios and TCP IP enabled on the computer 1 1 1 Another supported protocol TCP IP nbt protocol Windows computer 2 E 820 connected to copier ...

Page 21: ...other supported protocol TCP IP client PC 4 Printing on this network UNIX workstations with the TCP IP lpd protocol can print directly and act as host for shared printing TCP IP clients can print through UNIX server or directly requires TCP IP and the lpr print service loaded For running Fiery utilities and WebTools Windows computers with TCP IP loaded can use these applications 1 3 TCP IP lpd htt...

Page 22: ...mation about connecting to a Token Ring network see Appendix A Turn off the E 820 before attaching it to any network device If the E 820 has just finished processing wait five seconds after the system reaches the Idle state before using the power switch to turn it off For the proper shutdown procedure see page 7 11 Back view of the E 820 10 100BaseT Ethernet RJ 45 Copier interface connector Dongle...

Page 23: ...s used to refer to 100BaseTX TO CONNECT TO THE ETHERNET BOARD Connect the network cable to the RJ 45 connector on the back of the E 820 NOTE For 100BaseT you must use a Category 5 unshielded twisted pair cable network cable Token Ring connection For Token Ring connections the E 820 supports Unshielded Twisted Pair UTP cabling with an RJ 45 connector and Shielded Twisted Pair STP with a DB 9 connec...

Page 24: ......

Page 25: ...not discussed in this chapter except for use in a Windows NT 4 0 2000 environment see E 820 on a TCP IP network with Windows NT 4 0 2000 XP in the following section If your network is based on Windows NT 4 0 2000 proceed to the following section For information on UNIX workstations proceed to page 2 17 E 820 on a TCP IP network with Windows NT 4 0 2000 XP When a Windows NT 4 0 2000 XP computer is ...

Page 26: ...g from Windows NT 4 0 2000 XP using TCP IP protocols is similar to setting up UNIX workstations with TCP IP When TCP IP network connections are made from Windows NT 4 0 2000 XP workstations note the following Make sure you have a valid IP address for the E 820 and any workstations that will print to it or run the Fiery utilities In E 820 Setup enable TCP IP and enter the IP address subnet mask and...

Page 27: ...follow these general steps More detail is provided in subsequent sections in this chapter and in your Microsoft documentation Load the TCP IP network protocol on the server and configure it with an IP address subnet mask and gateway Enter the host name of the E 820 in the host database used by your system see page 2 4 Perform E 820 Setup On the Windows NT 4 0 2000 server create a printer for each ...

Page 28: ... IP loaded and will use the Fiery utilities The Windows NT 4 0 2000 hosts file provides compatibility with the UNIX hosts file The hosts file is used as a local Domain Name Services DNS equivalent It has the same format as the etc hosts file on UNIX servers The format of the hosts entry is IP Address TAB host name TAB comments where TAB indicates that you press the Tab key To determine the IP addr...

Page 29: ...int through the server You can specify sharing of the printer during installation of the E 820 printer files If you have not yet installed the E 820 printer files on the Windows NT 4 0 2000 print server computer do so now following the instructions in the User Software Installation Guide During installation enter the information necessary to share the E 820 If you have already installed the E 820 ...

Page 30: ...ter Wizard dialog box appears Follow the procedures in the User Software Installation Guide For Windows NT 4 0 Workstation clients Before printing connect to the print server computer and select the E 820 Right click and choose the Open command When prompted click Yes to have Windows set up the printer For Windows 2000 XP clients Before printing install the printer driver with the User Software CD...

Page 31: ...ized in the following list and you can find more detail in your Microsoft documentation Print a Configuration page see page 7 9 Use the information on this page to determine the current E 820 settings Load the TCP IP network protocol on the computer for Windows 9x Me load File and printer sharing for Microsoft Network For Windows 2000 XP load Client for Microsoft Networks Verify the Workgroup name...

Page 32: ...e server running NetWare 4 x or 5 x in emulation mode The term NDS is used to describe components of a NetWare operating system running NetWare 4 x or 5 x in native mode NetWare clients print to the E 820 through the Novell network server Server setup and client network setup are outlined in this chapter client printing setup is described in the User Software Installation Guide and printing is des...

Page 33: ... Ethernet via Token Ring or both The E 820 looks for print jobs on one NetWare print server per bindery server Each print server can store jobs for any print connection on the E 820 Overview of IPX printing to the E 820 NetWare file servers support the creation of print queues which are storage areas for print jobs When a client on a remote computer decides to print the job is directed to a print ...

Page 34: ...obtain print jobs from the NetWare server For each NetWare file server that you configure follow these general steps More detail is provided in subsequent sections and in your NetWare documentation Make sure the server is connected to a functioning IPX network Log in as the Supervisor on a PC connected to the NetWare file server For NetWare 4 x installations set up an NDS connection see page 2 12 ...

Page 35: ... Set Polling Interval Install user software For printing Connect client to PQs that you set up on the NetWare FS associated with the PS selected in NDS Setup For running Fiery utilities Configure the connection to the E 820 On Bindery FS In Setup from Command WorkStation On client workstation In PCONSOLE Select NetWare FS up to 8 For each FS Configure PS Configure PQ Configure users of the PQ Port...

Page 36: ...jects Access to objects is controlled by rights that are defined as properties of each object Rights are established by network administrators Setting the NetWare 4 x bindery context You can connect only one directory tree to the E 820 If you need to connect additional NetWare 4 x servers you can do so by using bindery emulation You can connect up to eight bindery servers to the E 820 NOTE The fil...

Page 37: ...to the Netware print server or servers on which you defined a NetWare print queue for the E 820 After the Novell server and the E 820 have been set up client setup consists of Installing the networking protocol binding it to the network adapter card and permitting the client to log in to the NetWare file server On Windows 9x Me workstations load both the IPX SPX compatible protocol and the Client ...

Page 38: ...for clients to download from Windows 9x Me and Windows NT 4 0 2000 XP computers The E 820 can receive print jobs from NetWare clients over Ethernet or Token Ring network topologies For information on the Token Ring option see Appendix A During E 820 Setup you select the frame type or types that will be used for communication between the E 820 and network servers Frame type refers to the format of ...

Page 39: ...l Setting up the E 820 printer driver To install the corresponding printer driver files from the User Software CD you first need to create a directory forWindows NT 4 0 2000 XP or a folder for Windows 9x Me in the NetWare server for NDPS TO SET UP THE PRINTER DRIVER FOR WINDOWS NT 4 0 2000 XP 1 Log on to the Novell file server as a superuser or Administrator 2 In the SYS ndps resdir Prndrv NT4 200...

Page 40: ... TO SET UP THE E 820 AS A PUBLIC ACCESS PRINTER 1 In NetWare Administrator double click the NDPS Manager object you created 2 In the Details window for the NDPS Manager object click Printer Agent List The list of Printer Agents appears 3 Click New 4 In the Printer Agent PA Name field enter a name 5 Under Gateway Types select Novell Printer Gateway and click OK 6 In the Configure Novell PDS for Pri...

Page 41: ...rs simply submit print jobs to a named printer The job management tools along with the other Fiery utilities and WebTools are unavailable on the UNIX platform A Windows or Mac OS computer on the same network as the UNIX computer that is set up to use TCP IP for printing to the E 820 can use the job management tools to manage print jobs that originate from all workstations on the network Tips for e...

Page 42: ...s the Name of printer or print queue on that lpd host server in the Add LPR Compatible Printer dialog box For the Windows 2000 XP printer driver enter the remote printer name for Queue Name under LPR Settings in the Configure Standard TCP IP Port Monitor dialog box Setting up the E 820 on TCP IP networks Every machine host on a TCP IP network including the E 820 must have a unique 32 bit internet ...

Page 43: ...rinters 2 In the file or utility used by your network specify the remote printer name the print server protocol the queue and the spool file for the E 820 name you assigned 3 Make the E 820 available as a printer to other network users 4 To verify the TCP IP connection ping the IP address or the host name From any computer on the network at the command prompt type ping IP address Type the E 820 IP...

Page 44: ...X command line Managing print jobs UNIX network administrators can use UNIX utilities for viewing the list of jobs and for printing and removing jobs that are spooled on UNIX servers If the network includes a Windows NT 4 0 2000 XP workstation that has TCP IP protocols loaded you can use Command WorkStation or Fiery Downloader to download fonts and files You can also use the job management tools t...

Page 45: ...arged with certain duties all users have equal access to the system and job management tools Maximum control might be appropriate for a high volume printing environment where an administrator or operator controls the job flow and all printing jobs sent by users are spooled stored to the E 820 disk until the operator decides it is time to print them In addition only the administrator and operator h...

Page 46: ...e This is the standard E 820 queue Jobs sent to the Print queue are processed and printed in the order they are received Jobs prioritized by an operator with the job management tools and jobs sent via the Direct connection can take priority over jobs sent to the Print queue Direct connection The Direct connection transmits jobs directly to the E 820 but only when the E 820 is Idle If the E 820 is ...

Page 47: ...of Setup is the highest level of control since the person who has access to Setup can control the printing and job management environment Administrator privileges include publishing print connections setting passwords deleting fonts controlling print jobs from the job management tools overriding job settings clearing the E 820 of all job data performing calibration defining default color profiles ...

Page 48: ...you with current information on the jobs processing and printing on the E 820 It is not affected by passwords For more information see the Printing Guide WebSpooler The WebSpooler interface is very similar to that of Command WorkStation It allows remote users to preview manipulate reorder reprint and delete jobs currently spooling processing or printing on the E 820 It also allows the administrato...

Page 49: ...the Internet or your organization s intranet For more information see the Printing Guide WebDownloader WebDownloader allows you to print PostScript EPS PDF and TIFF files directly to the E 820 without first opening the file in an application For information on supported file versions see the User Software Installation Guide WebSetup WebSetup allows you to view and modify E 820 Setup options from a...

Page 50: ...rs including printing to all E 820 print connections and managing all jobs from the job management tools 3 An administrator and an operator Only an administrator can perform Setup calibration and other administrator functions and only an operator or administrator can control jobs from the job management tools Users can print to all E 820 print connections 4 An administrator and an operator no WebT...

Page 51: ...g and printing of jobs as well as job accounting the Job Log storage and retrieval When the Server is not running jobs cannot be received by the E 820 job processing cannot occur job data cannot be transferred to the copier for printing and Command WorkStation cannot connect to the E 820 In the event that you need to restart the Server process right click the FieryBar and choose Restart Fiery Comm...

Page 52: ... functions on the E 820 require the Fiery Advanced Controller Interface option For more information contact your authorized service support technician If you do not configure the remaining Setups the E 820 uses default settings You need to make settings appropriate for the printing environment at your site Local Setup from the E 820 You can also perform Setup locally at the E 820 using Server Setu...

Page 53: ...at you make changes to other Setup options as well NOTE You must configure the E 820 with the correct Windows NT 2000 domain name This is especially important for Windows printing also known as SMB printing For E 820 systems that include the Fiery Advanced Controller Interface open the Start Menu Settings Control Panel Network Identification tab and enter the correct domain name You must also sele...

Page 54: ...4 With both the copier and the E 820 turned off connect the network cable to the E 820 as described in Chapter 1 The network should already be installed and operational 5 Turn on the copier and then the E 820 Proceed to E 820 Setup described in Chapter 4 Ensuring virus free operation of the E 820 on a network The E 820 is prone to computer viruses since it uses Windows NT system architecture We hi...

Page 55: ...nistrative functions and do not appear in the Windows Explorer window To map the C administrative hidden share enter the following information in the Map Network Drive dialog box In the Drive field enter an arbitrary alphabet letter such as X In the Path field enter the E 820 name for example E 820 name c Confirm the E 820 name on the Configuration Page 4 Click OK 5 If you are prompted to enter a ...

Page 56: ...from a Windows 98 Me client computer by using the following procedure If you have the Fiery Advanced Controller Interface you can change the E 820 administrator password in the same way you set the password for a Windows NT 4 0 workstation NOTE If you leave the password blank or specify too short of a password you are prompted to set a new one TO CHANGE THE E 820 DEFAULT PASSWORD FROM WINDOWS 98 M...

Page 57: ...ceed to step 2 2 In the Windows Security dialog box click Change Password and then enter the following For example if you want to change to Fiery 2 For User name administrator For Domain Windows NT 4 0 or Log on to Windows 2000 XP E 820 name For Old Password Fiery 1 For New Password Fiery 2 For Confirm New Password Fiery 2 3 Click OK The new password Fiery 2 is now set NOTE E 820 name depends on y...

Page 58: ......

Page 59: ... to specify system options Network Setup to specify all the active network systems that transmit print jobs to the E 820 Printer Setup to specify how print jobs and queues are managed PS Setup to specify PostScript settings Color Setup to specify color settings Job Log Setup to specify how the E 820 handles its log of printed jobs The Change Password option in the Setup menu allows you to create a...

Page 60: ...l Panel even when Command WorkStation is not connected to the server or is not running The Control Panel is located on the front of the E 820 Safety warnings The E 820 display window is a liquid crystal display LCD made of glass and it can break Do not subject it to strong shocks If the display window breaks and the liquid crystal material leaks out do not inhale ingest or touch it If the material...

Page 61: ...aracter appears in the display window next to the button Up and down arrow buttons Use these buttons to scroll to different screens in multi screen lists select Setup options from a list of available options and scroll through alphanumeric characters Menu button Press this button to view other screens Under normal operation the Control Panel displays the Info RIP or Print Status screen with inform...

Page 62: ... the E 820 is printing a job the Print Status screen appears This screen displays the following Cancel Job Press the top line selection button to cancel the job currently printing User name The name of the user who sent the job currently processing Pages Total The number of copies of the current job printed and the total number of copies of the job requested RIP Status When the E 820 is processing...

Page 63: ...hard disk for example 756MB Version The system software version running on the E 820 Functions You can press the Menu button to display the Functions menu Use the up and down arrow buttons to scroll through the list Press the line selection button to the right of a command to select that command For more information see page 4 6 Network The Network icon appears at the lower left of any of the othe...

Page 64: ...t calibration and the Ethernet and Token Ring addresses of the E 820 Job Log Prints a log of the last 55 jobs For information on the fields in the Job Log and on printing it in other forms see the Job Management Guide Control Panel Map Prints the Control Panel Map which is an overview of the screens you can access from the Control Panel Color Charts Prints samples of the RGB CMY and PANTONE colors...

Page 65: ...masters in the FreeForm window Consult with your administrator or operator before choosing Clear Server If an Administrator password has been set you must enter it to access Clear Server Run Setup Enter the Setup menu and change Setup option settings Run Diagnostics This function is provided for service representatives only For information about running diagnostics contact your authorized service ...

Page 66: ...u button on the Control Panel to go to the Functions menu 3 Scroll down with the down arrow button and press the line selection button next to Run Setup If an Administrator password has been set on the E 820 you are prompted to enter it before you can perform Setup see page 7 2 4 When prompted confirm your choice to proceed to Setup 5 Press the line selection button to choose a Setup menu or comma...

Page 67: ...time in highlighted text The currently selected or default value appears first Use the up and down arrow buttons to scroll through the choices and choose OK when the correct information is displayed Information entry options You must specify the information for your site the printer name or IP address Use the up and down arrow buttons to scroll through the alphanumeric symbols to make your selecti...

Page 68: ...rrect number is displayed press the right arrow button to move to the third field Press the left arrow button to go back and edit or press OK to select the choice and continue From the starting position press the up or down arrow buttons to enter the first character When the correct character appears press the right arrow button to move the cursor to the next position Press the up or down arrow bu...

Page 69: ...he options appear in sequence as follows Default values where applicable appear in square brackets Words shown in italics indicate that a product or site specific value is displayed Server Name Default server name Enter a name for the E 820 up to 15 characters long This name appears in the Chooser on an AppleTalk network NOTE Do not use the device name r7 as the server name Also if you have more t...

Page 70: ...Printing Groups Yes No Yes Specify whether to enable printer groups for Member Printing If you enable this option you must use Command WorkStation to define user groups and passwords Users must then enter their group name and password when they print Enable Printed Queue Yes No Yes Specify whether to enable the Printed queue which creates a storage location on the E 820 disk for recent jobs that w...

Page 71: ...t automatically switches to the correct protocol when it receives a print job In the Setup menu choose Network Setup where you specify network addresses and names to be used by workstations servers and the E 820 when they communicate with each other The Network Setup menu includes three submenus that allow you to choose port types protocols and network services You must perform Port Setup and enab...

Page 72: ...tomatically TCP IP over Ethernet Ethernet Setup TCP IP Setup Ethernet Setup LPD Setup Web Services Setup Windows Setup Port 9100 Setup IPP Setup Windows 9x Me 2000 XP IPX SPX over Ethernet Ethernet Setup IPX SPX Setup PServer Setup NDS Bindery or both For this Network or Connection Type Use this Port Setup Use this Protocol Setup Use this Service Setup TCP IP over Token Ring Token Ring Setup TCP I...

Page 73: ... settings 5 If the Token Ring option is installed choose Token Ring Setup and enter the appropriate settings 6 When you have finished entering port settings choose Exit Port Setup and then choose Protocol Setup 7 Enter the appropriate settings for the protocol or protocols you will use 8 When you have finished entering protocol settings choose Exit Protocol Setup and then choose Service Setup 9 En...

Page 74: ... left of each menu heading Network Setup Port Setup Ethernet Setup Enable Ethernet Yes No Yes Select Yes if you have Ethernet cabling connected to the E 820 Ethernet Speed Auto Detect 100 Mbps 10 Mbps Auto Detect Select Auto Detect if your network environment is mixed or if you do not know the network speed If you know the speed of the network to which the E 820 is attached 10 Mbps or 100 Mbps sel...

Page 75: ... the list to select the AppleTalk zone in which you want the E 820 to appear If your segment has only one zone the E 820 is assigned to that zone automatically The message No AppleTalk zone found may mean your network has no zones or the network cable is not connected see Appendix B Choose OK to dismiss the message To configure the E 820 choose each protocol and enter the settings for that protoco...

Page 76: ...ave enabled Token Ring in Port Setup NOTE If TCP IP is running on both an Ethernet and a Token Ring network it is assumed that the two networks are already routed to each other The E 820 does not function as a router NOTE Concurrent use of Ethernet and Token Ring is not supported on the E 820 Network Setup Protocol Setup TCP IP Setup Ethernet Setup Enable TCP IP for Ethernet Yes No Yes Select Yes ...

Page 77: ...E 820 might be assigned a different address after you restart the E 820 With the DHCP setting the E 820 can be assigned a different address even if it is not restarted Make sure the network is already configured properly for the protocol you select Get Gateway Address Automatically Yes No Yes Use this option to assign the gateway address automatically for printing with TCP IP This option appears o...

Page 78: ...you selected RARP as the protocol Use this option to set the gateway address for printing with TCP IP If your network uses a gateway you must change the default to a correct gateway address for your network TCP IP Setup with Token Ring Enable TCP IP for Token Ring and enter the IP address and subnet mask If your TCP IP network has a gateway and users outside the gateway plan to print to the E 820 ...

Page 79: ...ifferent address after you reboot the E 820 With the DHCP setting the E 820 can be assigned a different address even if it is not rebooted Make sure the network is already configured properly for the protocol you select Get Gateway Address Automatically Yes No Yes Use this option to get the gateway address automatically for printing with TCP IP This option appears only if you selected DHCP or BOOT...

Page 80: ...nt from that listed Gateway Address 127 0 0 1 This option appears only if you answered No to Get Gateway Address Automatically Use this option to set the gateway address for printing with TCP IP If your network uses a gateway you must change the default to a correct gateway address for your network IPX SPX Setup options To specify the frame types the E 820 uses for IPX SPX protocols choose IPX SPX...

Page 81: ...anges exit Setup restart the E 820 and print a Configuration page The Configuration page lists only one of the frame types that were successfully bound If you answer No to this option you can select frame types manually You must choose at least one frame type to enable IPX SPX protocols The frame selection screen allows you to make multiple selections Depending on your Port Setup selection only Et...

Page 82: ... to allow lpd printing For more information see Setting up the E 820 on TCP IP networks on page 2 18 Network Setup Service Setup PServer Setup Enable PServer Yes No No Select Yes if you have a Novell network connected to the E 820 Choose NDS Setup if your network uses NetWare 4 x 5 x in native mode Choose Bindery Setup if your network uses NetWare 4 x 5 x in bindery emulation mode If your network ...

Page 83: ...ice Setup PServer Setup NDS Setup Before entering NDS settings make sure the E 820 is connected to the network and that you have configured an NDS directory tree with a Printer Print Server and one or more Print Queue objects for E 820 jobs see page 2 13 To perform NDS Setup you may need permission to browse the NDS tree If access to the Print Server is restricted you need a login password The mai...

Page 84: ...ist Browsing to find the User Login object begins with the NDS tree that you selected previously with Select NDS Tree Use the up and down arrow buttons to scroll through a list of objects in the tree beneath the Root in the hierarchy or use the navigation symbol to go up one level at a time In each subsequent browse screen the top line represents your current location The second line contains A li...

Page 85: ...presents your current location The second line contains A list of objects in the current container directly below your current location The symbol to go up one level With a container object selected choose OK to travel down the tree or choose to go up the tree When you select an object and choose OK that object is displayed on the top line and the second line lists objects directly below it When t...

Page 86: ... the NDS tree to the Print Queue subtree Browsing to find the container object begins with the NDS tree that you selected previously with Select NDS Tree In each subsequent browse screen the top line represents your current container The second line contains A list of objects directly below your current location The symbol to go up one level The symbol to select the current container object displa...

Page 87: ...g software Because you can set up more than one Novell server to handle E 820 print jobs an additional menu is displayed for this purpose The options are Add File Server creates a new file server connection to the E 820 You can set up a maximum of eight file server connections After you have finished adding a new server you return to the Bindery Setup menu where you can set up another server View ...

Page 88: ...f your network does not have a large number of file servers Choose Search by Name if the number of file servers is so large that scrolling through the list would take a long time If you selected From List If you selected Search by Name Add Server List of all servers The E 820 obtains a list of NetWare file servers by querying the IPX network Use the up and down arrow buttons to select a NetWare fi...

Page 89: ...our login name or select guest Enter Your File Server Password Enter the password for logging in to your NetWare file server NetWare Print Server Print Server Name Select the name of the print server that you configured in the NetWare utility PCONSOLE This print server will route print jobs to the E 820 from computers on IPX networks Enter Your Print Server Password This option appears only if you...

Page 90: ...word Network Setup Service Setup PServer Setup Bindery Setup View Server List Supported servers This option allows you to view the list of file servers currently connected to the E 820 that is servers you have added in Bindery Setup You are notified if there are none When you choose OK you return to the Bindery Setup menu Network Setup Service Setup PServer Setup Bindery Setup Edit Connection On e...

Page 91: ...d remove the connection to it You are notified that you have removed the connection and the Bindery Setup menu appears If you change your mind and do not want to remove any of the file servers press the Menu button Network Setup Service Setup PServer Setup Bindery Setup Exit Bindery Setup Choose Exit Bindery Setup after you view a list of IPX file servers remove a file server from the list or conn...

Page 92: ...e and proceed to the Server Name option Choose No to proceed to the Use WINS Name Server option where you specify whether to use a WINS name server and then to the WINS IP Address option where you specify its IP address Network Setup Service Setup Windows Setup Enable Windows Printing Yes No Yes Enabling Windows Printing enables Server Message Block SMB the file and printer sharing protocol built ...

Page 93: ...on the network for accessing the E 820 via SMB The default name is the same as the server name assigned in Server Setup see page 4 11 Server Comments Server comments optional can contain information about the printer These comments are listed in the E 820 Properties in Network Neighborhood and can be up to 15 characters Set Domain Name Select from list Enter manually Select from list This option p...

Page 94: ...ser and computer requirements see the Quick Start Guide Network Setup Service Setup IPP Setup Enable IPP Yes No Yes Select Yes to enable printing with the Internet Printing Protocol IPP You must enable Web Services For information on setting up user computers to use IPP printing see the User Software Installation Guide Network Setup Service Setup Port 9100 Setup Enable Port 9100 Yes No Yes This op...

Page 95: ...cally the part of the e mail address that precedes the symbol For example in the address pat test com the user name is pat Fiery E mail Domain Name Enter the name of the domain in which the user has an account This is typically the part of the e mail address that follows the symbol For example in the address pat test com the domain name is test com Network Setup Service Setup E mail Setup Enable E...

Page 96: ...il address that follows the symbol For example in the address pat test com the domain name is test com The administrator authorizes a unique e mail address to remotely administer the Fiery E mail Services via e mail If an error occurs while you are executing a scan to e mail the e mail service sends an error message to that administrator e mail address The administrator can authorize additional e ...

Page 97: ...ns default values where applicable appear in brackets NOTE For users to use the Fiery utilities and WebTools or print to the E 820 over a TCP IP network you must publish at least the Hold queue or the Print queue Publish Direct Connection Yes No Yes This option allows users to print or download jobs to the E 820 without spooling Jobs printed to the Direct connection are not saved in the Printed qu...

Page 98: ...changes made in the Printer Setup select No to return to the main Setup menu without making any changes PostScript Setup options PS PostScript Setup allows you to set defaults for the E 820 Users can override most of these defaults on a job by job basis However users printing from UNIX or DOS command lines cannot override defaults from their applications Therefore you must set defaults in PostScri...

Page 99: ...7 A4 A3 and Default Paper Sizes is set to US then jobs are printed A4 A3 size This also includes E 820 system pages such as the Start Page Test Page and Job Log Page Order Forward Reverse Reverse Select Forward to print the pages of your job from first to last Select Reverse to print the pages of your job from last to first Color Mode CMYK Grayscale CMYK Specify whether to print color CMYK or Gray...

Page 100: ...cript error occurs and the Print to PS Error option is set to Yes the cover page lists the PostScript error message instead of the job status Toner Reduction On Off Off Specify whether to minimize the effects of blasting which occurs when excess amounts of toner on certain media types blast beyond the color density boundaries defined in the print job Halftone Screen available with the EFI Fiery Gr...

Page 101: ...ry Graphic Arts Package 0 360 0 Specify the Yellow halftone screen angle Choose the angle to correctly register the halftone shape Halftone Angle Black available with the Fiery Graphic Arts Package 0 360 45 Specify the Black halftone screen angle Choose the angle to correctly register the halftone shape Halftone Dot Shape available with the Fiery Graphic Arts Package Round Square Default Line Elli...

Page 102: ...Color Guide NOTE In addition to the defaults described in this section additional settings are available to Mac OS and Windows users from the printer drivers TO ACCESS COLOR SETUP OPTIONS In the list of options that follows default values where applicable appear in square brackets RGB Source Profile EFIRGB sRGB PC Apple Standard None EFIRGB The RGB source is the color space used to control color f...

Page 103: ...to simulate printed output on a commercial press so that the E 820 output can be used for proofing The SWOP Coated standard is used in the United States DIC in Japan and Euroscale in Europe Custom simulations are user defined and named The simulations provided with the E 820 have the designation EFI after their names If users create and load custom simulations on the E 820 with ColorWise Pro Tools...

Page 104: ...pages With this option On black text and line art are printed with black toner only With the option Off black text and line art are printed using all four colors of toner For more information see the Color Guide Black Overprint On Off On With this option On black text overprints on colored backgrounds With this option Off black text knocks out color backgrounds Generally this option should be On F...

Page 105: ...ether they originate from a user workstation a networked server or the E 820 The Job Log can be printed from the Control Panel or from the job management tools The printed Job Log lists accounting information about each job including user name document name time and date printed and number of pages Windows NT 4 0 and Mac OS users can enter job specific notes that appear in the Job Log By default t...

Page 106: ...or printing the Job Log Regardless of page size 55 jobs are listed on a page The paper size used depends on the Default Paper Sizes setting in PS Setup If the Default Paper Sizes setting is US the Job Log is printed on Tabloid or Letter size paper with Tabloid the default Save Changes Yes No Yes Select Yes to activate any changes made in Job Log Setup select No to return to the main Setup menu wit...

Page 107: ... Setup options are listed in the order in which they appear on the local Setup window Some Setup options cannot be accessed from remote Setup use local Setup or the E 820 Control Panel instead Regardless of how you access Setup you must log in as Administrator both at the E 820 and within the Setup application you use After the E 820 restarts log in to the Windows NT Logon window with the Administ...

Page 108: ... Set Up Fiery Start Command WorkStation and choose Setup from the Server menu The Setup window appears You see the available settings only when you select the particular option For example to view or change the setting for the Character Set option click Character Set The available settings appear at the bottom of the window After making your selections in the window click Apply if it is present Wh...

Page 109: ... the E 820 home page appears click WebSetup TO ACCESS SETUP FROM COMMAND WORKSTATION 1 Start the Command WorkStation application 2 Log in as Administrator 3 Choose Setup from the Server menu Regardless of how you access Setup remotely the following window appears NOTE The interface of remote Setup from Command WorkStation and Fiery WebSetup is identical The remote Setup illustrations in this chapt...

Page 110: ...inting NOTE The interface of local E 820 Setup and remote Setup is similar The following instructions describe setup from Command WorkStation Major differences between the two are noted Server Name Specify a name for the E 820 This is the name that appears in the Chooser on an AppleTalk network If you are using local Setup click Modify click Change and then enter the Server Name in the Computer Na...

Page 111: ...y how often to delete scan jobs from the E 820 hard disk Choose Manually to delete scan jobs manually on a job by job basis Click Delete Scan Jobs Now to delete all scan jobs immediately Use Character Set Specify whether the Control Panel and the job management tools should use the Macintosh DOS or Windows character set for displaying file names This is important if a file name includes accented o...

Page 112: ... and date printed number of pages and other job information Auto Clear Job Log Every 55 Jobs Specify whether the E 820 clears the Job Log after every 55 jobs If you do not select this option the E 820 saves a file containing a record of all jobs ever printed Since this file takes up space on the E 820 hard disk clearing the Job Log frees up additional disk space You can clear the Job Log manually ...

Page 113: ...ork settings in Network Setup Adapters and ports view currently configured network adapters and port settings Protocols including AppleTalk IPX SPX and TCP IP Print Services including LPD printing TCP IP NetWare printing PServer Windows print sharing SMB HTTP support WWW Internet Printing Protocol IPP printing and Port 9100 printing E mail Service specify the Fiery E mail Service Adapters Ports In...

Page 114: ...work administrator at your site If you are uncertain of the setting to use select the default value 4202 Transmission Speed Choose Auto Sense if your network environment is mixed or choose the speed of the network to which the E 820 is attached 4 Mbps or 16 Mbps Enable Source Routing Select if your network supports source routing Request All Routes This option is active only if you select enable S...

Page 115: ...rom remote Setup you change these settings on the Protocol1 and Protocol2 tabs Local Setup works in conjunction with the Windows NT Network Control Panel When you click the Modify or Advanced button next to the setting in local Setup the system opens the Network Control Panel where you complete the settings ...

Page 116: ...Bindings tab of the Network Control Panel TO CHANGE PROTOCOL SETTINGS IN LOCAL SETUP 1 Click Modify or Advanced next to the setting The Windows NT Network Control Panel opens 2 Click the Protocols tab 3 Select the protocol to modify Unless you have installed additional protocols the choices are AppleTalk NWLink IPX SPX Compatible Transport and TCP IP 4 Click Properties make your selections and cli...

Page 117: ...55 11 Network Setup AppleTalk The current AppleTalk zone is displayed IPX SPX Use this option to specify IPX SPX frame types ...

Page 118: ...t II and Ethernet SNAP For Token Ring the supported frame types are Token Ring and Token Ring SNAP You can also allow the E 820 to select the frame type automatically TCP IP Specify TCP IP settings The current settings for IP address subnet mask and default gateway address are displayed For information about setting up printing with TCP IP see Chapter 2 ...

Page 119: ...han 128 255 255 0 0 if the IP address starts with a number from 128 through 191 255 255 255 0 if the IP address starts with a number greater than 191 NOTE Confirm the subnet mask setting with your network administrator before proceeding In some cases the required setting may be different from those listed If your TCP IP network has a gateway and users outside the gateway plan to print to the E 820...

Page 120: ...nable or disable LPD print services NetWare Printing PServer specify NDS and Bindery services see page 5 16 Windows Print Sharing SMB enable or disable SMB print services HTTP Support WWW enable or disable support for WebTools Port 9100 enable or disable support for Port 9100 printing E mail Setup specify the Fiery E mail Service ...

Page 121: ...55 15 Network Setup LPD Printing Enable LPD Print Services Select to enable or disable LPD printing services Enable Web Services Select to enable or disable web services ...

Page 122: ...E 820 NDS Setup Bindery Setup Poll Interval Setting up the E 820 for NDS printing Only one NDS tree can be connected To specify or change the NDS Tree click Modify and specify settings in the NDS Print Server dialog box as follows The currently selected NDS Tree and Print Server are displayed TO SPECIFY THE NDS TREE SETTING FROM LOCAL E 820 SETUP 1 Select Enable NDS and click Modify ...

Page 123: ...55 17 Network Setup 2 In the NDS Connection dialog box that appears double click an NDS tree in the list on the left 3 Navigate to the NDS container and click OK If necessary enter the password ...

Page 124: ...omputer 4 Select a container from the Containers list 5 Double click a print server from the Select Print Server list The full path to the print server appears Another way to change the path is to click Edit and type the path to the print server ...

Page 125: ...55 19 Network Setup 6 Click OK The Server Setup dialog box appears displaying the path to the selected print server on the Network Setup tab ...

Page 126: ...20 from a Windows Computer TO SPECIFY THE NDS TREE SETTING FROM REMOTE E 820 SETUP 1 Select Enable NDS and click Change Trees 2 In the NDS Configuration window that appears double click an NDS tree in the Available Trees list ...

Page 127: ...etwork Setup 3 In the Select User Login window select Use Default User Information or enter your password and click Next 4 Navigate to the NDS container select it and click Next If necessary enter the password ...

Page 128: ...55 22 Setting up the E 820 from a Windows Computer 5 Select Use Default Print Queue Root or navigate to the Print Queue Root and click Finish ...

Page 129: ...55 23 Network Setup 6 Click OK The NDS Configuration window appears displaying information about the print server ...

Page 130: ...etup tab specify Bindery services The currently connected servers are displayed A maximum of eight bindery servers can be connected To add remove or change bindery connections click Modify and specify settings in the Bindery Connections dialog box as described in the following section ...

Page 131: ...odify in the Bindery Setup dialog box The Bindery Connections dialog box appears 2 Select a file server from the Select File Server list If the File Server User Name and Password dialog box appears enter the appropriate user name and password to log on to the selected file server ...

Page 132: ...omputer 3 Select a print server from the Select Print Server list and click Add The name of the newly added server appears in the Connected Servers list To add another server repeat the preceding steps You can connect a maximum of eight servers ...

Page 133: ...55 27 Network Setup 4 When you finish adding servers click OK When you return to the Network Setup tab the connected servers appears in the Bindery Settings area ...

Page 134: ...ialog box appears 2 Make your selections in the Select File Server and Select Print Server lists The name of the connected server appears in the Connected Servers list 3 With the File Server selected in the Connected Servers list click Remove 4 Click OK TO ADD BINDERY CONNECTIONS FROM REMOTE E 820 SETUP 1 Select Enable PServer mode from the Service1 tab 2 Click Bindery Setup ...

Page 135: ...ate user name and password to log on to the selected file server 4 Select a print server from the list and click Finish If necessary enter the appropriate password in the Print Server Password dialog box to log on to the selected file server The name of the newly added server appears in the Selected Servers list 5 When you finish adding servers click OK ...

Page 136: ...CTIONS FROM REMOTE E 820 SETUP 1 Select Enable PServer mode from the Service1 tab 2 Click Bindery Setup The Novell Setup dialog box appears 3 Make your selection in the Selected Servers list 4 With the file server selected in the Connected Servers list click Remove 5 Click OK ...

Page 137: ...55 31 Network Setup Poll Interval local Setup or PServer Poll Interval remote Setup Specify the polling interval in seconds for NetWare printing ...

Page 138: ... Windows Print Sharing with Server Message Block SMB For setting up the Windows printing service text fields may include uppercase letters numerals spaces and the following characters _ NOTE Lowercase letters are not allowed except in the Comment field ...

Page 139: ...Control Panel in Windows NT 4 0 Server Name Enter the server name that will appear on the network It can but does not have to be the same name as the server name assigned to the E 820 see page 5 4 Comment Enter information about the printer up to 15 characters These comments are listed in the Properties of the E 820 in Network Neighborhood Lowercase letters are allowed in this field Domain or Work...

Page 140: ...ddress are required for each user For details on supported browsers and computer requirements see the Quick Start Guide Enable Internet Printing Protocol IPP Select Yes to enable printing with the IPP You must enable Web Services For information on setting up users computers to use IPP printing see the User Software Installation Guide Port 9100 printing Enable Port 9100 Enables applications to ope...

Page 141: ...s Enable Print via E mail If selected print jobs sent via e mail are accepted If this option is cleared print jobs sent via e mail are ignored Incoming Mail Server Specify the IP address of the server POP3 IMAP that handles incoming e mail Server Type Specify the e mail protocol used to communicate with the incoming mail server ...

Page 142: ...sent as a URL Mailbox Account Name Enter the mailbox name specified on the mail server This name tells the Fiery client mail service which account contains e mail messages for the E 820 NOTE The account name entered in this field must first be specified on the mail server by the administrator Fiery E mail Address Enter the name of the e mail account For example pat test com Password Enter a passwo...

Page 143: ... in the Printer Setup tab Printer Connections PS PostScript Setup Color Setup NOTE In the following illustrations Device name represents the model of the copier connected to the E 820 which is r7 Printer Connections Specify whether to publish the Print Queue Hold Queue or Direct Connection ...

Page 144: ...s for three user defined halftone screens For each of these screens you may define frequency lpi screen angles and dot shapes Custom allows you to enter PostScript functions for dot shapes When Custom is clicked the dialog box displays information on the last Dot Shape selected For example if Custom is clicked after Square has been previously selected the dialog box displays the Dot Shape function...

Page 145: ...e of the user who sent the job the document name the server name the time the job was printed the number of pages printed and the status of the job If a PostScript error occurs and the Print to PS Error option is set to Yes the Cover Page lists the PostScript error message instead of the job status Allow Courier Substitution Specify whether to substitute Courier for unavailable fonts When you choo...

Page 146: ...ent tools after the job has been sent to the E 820 NOTE In the following illustration Device name represents the model of the copier connected to the E 820 which is r7 RGB Source Profile Specify the RGB source space to be applied to RGB data Rendering Style Specify the Rendering Style to be applied to RGB data CMYK Simulation Profile Specify the simulation to be applied to CMYK data CMYK Simulatio...

Page 147: ...ONE colors When this option is cleared PANTONE colors are printed using the CMYK values defined in the originating applications Setting up printing groups The E 820 administrator can arrange users into groups and allow members of a group to print only if they supply a password at print time This method of printing is known as Printing Groups or Member Printing This section describes how to set up ...

Page 148: ...alog box and click Remove 3 Click OK Exiting Setup When you have finished specifying Setup options click OK and close the Setup dialog box You are notified that the E 820 must be restarted for the new settings to take effect You can restart now or later If Command WorkStation is running the connection to the E 820 is lost and you must log on again when the server has restarted If you changed the n...

Page 149: ...u can print from Command WorkStation include the test page Job Log color charts and Font List For information on these E 820 pages see the Job Management Guide TO PRINT THE CONFIGURATION PAGE 1 In Command WorkStation choose Print Pages from the File menu 2 Click Configuration 3 Click Print Post the current Configuration page near the server for quick reference Users need the information on this pa...

Page 150: ......

Page 151: ...in remote management You can access the WebTools from a Windows or Mac OS computer TO SET UP WEBTOOLS ON THE E 820 1 In E 820 Network Setup enable TCP IP 2 Set a valid unique IP address for the E 820 and then set the subnet mask Set a gateway address if required 3 Enable Web Services 4 In E 820 Printer Setup confirm that the Print Queue is published TO SET UP WEBTOOLS ON A COMPUTER 1 Enable TCP IP...

Page 152: ... in Network Setup and Printer Setup You also must prepare each user s workstation to communicate with the E 820 over the Internet or intranet For more information about Network Setup see Chapter 2 TO SET UP WEBTOOLS ON THE E 820 1 Set Enable Ethernet to Yes in Network Setup Port Setup Ethernet Port Setup 2 Set Enable TCP IP for Ethernet to Yes in Network Setup TCP IP Ethernet Setup 3 Set Enable We...

Page 153: ...has been set TO CHANGE THE WEBLINK DESTINATION 1 Start your Internet browser 2 Enter the IP address or the DNS name of the E 820 The E 820 home page appears 3 Enter the Administrator password if required and click OK 4 Press the Control key Mac OS or Ctrl key Windows as you click WebLink The Update WebLink dialog box appears 5 Enter the new WebLink address URL and click OK ...

Page 154: ......

Page 155: ...e printing environment Setting printer defaults including modes imaging paper size handling error handling Printer Setup pages 4 39 and 5 37 PS Setup pages 4 40 and 5 38 Color Guide Printing Guide Setting up the job environment Publishing the Direct connection Print queue or Hold queue to end users on various platforms Printer Setup Chapter 2 pages 4 39 and 5 37 Protecting integrity of users jobs ...

Page 156: ...ting users started with printing Printing to the E 820 Setting job specific options Using Fiery utilities Printing Guide Job Management Guide Controlling the job flow Using WebTools Command WorkStation and Fiery utilities and for managing job priorities tracking current jobs canceling jobs printing jobs in the Hold queue and reprinting from the Printed or Hold queue Printing Guide Job Management G...

Page 157: ...rs from left to right since the left arrow button is also a Delete key The password can be any combination of letters and numbers up to 19 characters Choose OK when you are done Be sure to keep track of the password NOTE The only way to remove a password that you cannot remember is to reinstall the system software Verify New Password Reenter the new password exactly as you entered it initially If ...

Page 158: ...rivileges also include Operator privileges Operator Controls access to job management functions via the job management tools NOTE For more information on E 820 passwords and the access privileges they allow see page 3 3 By default no passwords are set If you do not specifically set passwords all users will have access to important functions such as Setup including setting passwords and job control...

Page 159: ...s clears the Administrator password and allows you to set a new one Clearing the E 820 The Clear Server command allows you to clear all queued print jobs from the E 820 jobs in the E 820 Print Hold and Printed queues Jobs can also be deleted either individually or as a group using the job management tools Clear Server also clears all jobs archived on the E 820 hard disk the index of archived jobs ...

Page 160: ...em 4 Immediately press the top line selection button and hold it down until the diagnostics have finished For the location of the line selection button see E 820 Control Panel on page 4 2 During reboot a progress bar indicates when the diagnostics have been completed 5 Choose Restore Backup Managing Address books The E mail Service feature allows an administrator to import a list of e mail address...

Page 161: ...receive an e mail stating that the print job was not accepted The default wildcard character is stored in the Print address book This allows any user to print to the E 820 until the administrator adds the first entry in the Print address book The administrator can manage the address books by sending an e mail to the E 820 with command codes in the subject and message fields The E 820 responds by e...

Page 162: ...ress Book name of address book not cleared For example Address Book User cleared If the address book is not cleared the reason is given To delete an address from an address book DeleteAddressFrom name of address book For example DeleteAddressFrom User name domain or display name name domain Removed from Address Book name of address book For example Removed from Address Book User Deleted Address 1 ...

Page 163: ...he E 820 to restart and return to Idle before printing a Configuration page In particular the restart is necessary if you specified the DHCP BOOTP or RARP protocol to obtain an IP address automatically for the E 820 Post the current Configuration page near the server for quick reference Users need the information on this page such as the current printer default settings Other pages you can print f...

Page 164: ...ing print jobs or jobs that are not urgent to the Hold queue At low traffic times the administrator or a user of the job management tools with Operator privileges can move or copy all the Hold queue jobs to the Print queue for printing Reduce unnecessary two way communication Large numbers of users running Fiery utilities especially with frequent updates may have a significant effect on E 820 perf...

Page 165: ... Contact your service representative if the E 820 encounters problems while running the diagnostics The E 820 continues starting up and displays the message Idle when it is ready to receive data NOTE If an Administrator password has been set you are required to enter it to access Setup If you press a button the following options appear Choose To do this Exit Setup Exit the Setup menus the E 820 re...

Page 166: ... so fonts downloaded to the hard disk are not deleted Print jobs in the Hold and Printed queues and jobs that have been processed but not printed are not deleted and are available for printing when you restart the E 820 TO SHUT DOWN THE E 820 1 Make sure the E 820 is not receiving processing or printing a job Make sure the status message on the Control Panel reads Idle If a job has just finished p...

Page 167: ...oose Shut Down 4 Use the line selection button to choose Shut Down System Proceed to the next step when the screen displays the message It is now safe to power off the server 5 Turn off the E 820 by moving the power switch on the back to the Off position NOTE After turning off the E 820 turn off the copier ...

Page 168: ......

Page 169: ... units MAUs that act as network hubs for the ring connection This appendix describes the Token Ring option and cable connections and refers you to the remaining configuration required for printing to the E 820 E 820 Token Ring option The E 820 supports Token Ring networks that use IPX and TCP IP protocols To use the E 820 with a Token Ring network you must install a Token Ring network interface ca...

Page 170: ...ice NOTE Do not attach cable to both Token Ring connectors TO CONNECT CABLE TO THE E 820 1 Turn off the E 820 2 Connect the cable from the Token Ring MAU to the E 820 Token Ring card Configure the NetWare Windows NT 2000 or UNIX server to print to the E 820 see the following two sections then proceed to page 4 1 for E 820 Setup Token Ring connectors ...

Page 171: ...h Token Ring configure at least one printer and one E 820 queue on a Windows NT 2000 server see Configuring a Windows NT 4 0 2000 server to communicate with the E 820 on page 2 3 or UNIX server see Setting up the E 820 on TCP IP networks on page 2 18 Setting up Token Ring on the E 820 Token Ring Setup on the Control Panel is similar to Ethernet Setup From Network Setup perform Port Setup Protocol ...

Page 172: ......

Page 173: ...n This message Means Enable AppleTalk Network Setup Protocol Setup AppleTalk Setup No AppleTalk zone found The Ethernet network cable is not attached to the connector on the E 820 or the network cable is not plugged into the hub or network If your AppleTalk network has zones and you want to specify a zone for the E 820 you must connect the network cable to the E 820 before performing AppleTalk Set...

Page 174: ...to the Token Ring network first before connecting the E 820 Enable NDS Network Setup Service Setup PServer Setup NDS Setup No NDS trees found No NDS trees were found on the Novell network Check to see that the frame types on the E 820 are properly configured Select NDS Tree Network Setup Service Setup PServer Setup NDS Setup Warning Selecting a new NDS tree deletes Bindery setup You have previousl...

Page 175: ...ound when E 820 queried the network to create a list of supported servers or a list of all servers Check cable connections and make sure the NetWare server is turned on Enter First Letters of Server Name Network Setup Service Setup PServer Setup Bindery Setup File server name not found Try again No file server with those letters was found when E 820 queried the network Check the name of the NetWar...

Page 176: ...or make sure Your IPX Novell network is connected to the E 820 The NetWare server you are trying to access is running Add Server Enter Your Login Name Enter Your File Server Password Network Setup Service Setup PServer Setup Bindery Setup No NetWare print server found No print server was found when E 820 queried the file server you selected You must configure a print server and a print queue for e...

Page 177: ... connected to a file server but is unable to log in to the file server or print server because the password has expired for the login account name or the named print server Select a different login account or print server The error screen exits to the File Server Login screen if login to file server failed or NetWare Print Server screen if login to Print Server failed Pressing the Menu button retu...

Page 178: ...820 You must enter names in specific places The required names are TCP IP host name also known as the DNS name which is defined by your organization Enter the host name as the Server Name in E 820 Setup Remote printer internal machine name Use one of the following print hold nnn Notify IPX Novell Administrator Indicates other network errors when the E 820 is already connected to a file server Some...

Page 179: ... name DNS name TCP IP host name page 2 1 Windows NT setup for TCP IP lpd host name DNS name TCP IP host name page 2 1 Name of printer on lpd host machine print or hold UNIX etc printcap file BSD rp line print or hold page 2 17 Solaris lpadmin queuename print or hold NetWare administration utility print queues must be all lowercase and in English _direct _print _hold page 2 8 Add New Server dialog ...

Page 180: ...820 is initially turned on The E 820 restarts You have changed settings affecting the server address and have not reconfigured the connection to the server If you see this problem try the following solutions in this order A remote workstation running Fiery utilities or WebTools may be interfering by obtaining status information If possible close the remote application and try to connect again Rest...

Page 181: ...ng the WebLink destination 3 5 6 3 privileges 3 3 Alert Status screen 4 4 Allow Courier Substitution option 4 42 5 39 AppleTalk 1 5 color server name 4 11 5 4 network diagram 1 5 protocol setup 4 17 5 9 supported on Ethernet only 1 4 with Windows NT 2 2 zone 4 17 5 11 AppleTalk Setup from Control Panel 4 17 from Control Panel summary 4 14 from Windows computer 5 11 AppleTalk zone 4 17 5 11 Auto Cl...

Page 182: ...ult 4 41 CMYK Simulation Method option 4 45 5 40 CMYK Simulation Profile option 4 45 5 40 Color Charts 4 6 Color Mode option 4 41 color server back view showing connectors 1 10 back view with Token Ring option A 2 Control Panel 4 1 display window 4 1 maintaining and improving performance 7 10 naming 4 11 5 4 network installation summary 1 3 power switch 1 10 Setup see Setup Color Setup 4 44 5 40 C...

Page 183: ...1 5 39 Delete Scan Jobs option 5 5 delete symbol in Setup display 4 9 destination Fiery WebLink 6 3 device name 4 11 5 5 5 37 5 38 5 40 B 7 DHCP protocol 4 18 4 19 4 21 diagrams of network setup 1 4 to 1 9 Direct connection described 3 1 3 2 publishing 4 39 5 37 required for downloading fonts 3 2 disconnecting a Bindery file server 4 29 4 33 disk space 7 10 display window 4 4 DNS Domain Name Serve...

Page 184: ...t Bindery Setup 4 33 4 39 explained 4 29 Exit Setup option 7 11 exiting Setup Control Panel 4 10 4 48 F Fiery E mail Domain Name option E mail Setup 4 37 Fiery E mail User Name option E mail Setup 4 37 Fiery WebDownloader described 3 5 Fiery WebLink 3 5 setting the destination 6 3 Fiery WebSetup described 3 5 Fiery WebSpooler described 3 4 reprinting jobs in Printed queue 4 12 Fiery WebTools 6 1 t...

Page 185: ...vell 2 8 to 2 13 Bindery file server connecting 4 29 NDS Novell Directory Services 2 12 4 24 5 14 NetWare client setup 2 13 NetWare server setup 2 10 network diagram 1 6 overview of printing 2 9 setting up printing 2 10 terms used to describe 4 29 tips for experts 2 9 IPX SPX installing with Token Ring A 3 polling interval 5 31 protocol setup 4 22 selecting frame types 4 23 Setup 4 22 summary of S...

Page 186: ...4 Bindery Services 4 24 Directory Services 4 24 5 14 error messages B 4 B 5 NDS Novell Directory Services 2 12 print server poll interval 4 34 setting up network on the Control Panel 4 24 NetWare File Server Bindery connecting 4 29 4 30 finding available servers 4 30 removing connection 4 33 selecting for editing 4 32 setting up more than one 4 29 NetWare Print Console 2 13 NetWare Print Server po...

Page 187: ...e option 5 34 Port 9100 Setup 4 36 Port Setup from Control Panel 4 15 Ethernet Setup 4 16 Token Ring Setup 4 16 PostScript error 4 41 PostScript Setup option see PS Setup option PostScript Setup see PS Setup power switch 7 11 Print Cover Page option 4 42 5 39 Print Pages command Control Panel 4 6 Print queue 3 2 4 12 4 40 5 37 described 3 1 3 2 publishing 4 40 print queues 4 12 NDS 4 28 NetWare se...

Page 188: ...k Text Graphics option 4 46 5 41 Q queues clearing all 7 5 publishing 4 40 5 37 R RARP protocol 4 18 4 19 4 21 Remove File Server Bindery Setup 4 33 explained 4 29 removing Bindery file server connection 4 33 Rendering Style option 4 45 5 40 reprinting jobs 3 2 Request All Routes Token Ring source routing 4 17 5 8 Respond All Routes Token Ring source routing 4 17 5 8 Resume Printing command Contro...

Page 189: ...Panel 4 7 SMB see Windows printing Source Routing Token Ring Setup 4 16 5 8 Spot Color Matching option 4 46 5 41 Start Page printing 4 12 starting the server 7 11 status screens Control Panel 4 4 Status WebTool see Fiery WebTools STP shielded twisted pair cable A 1 Subnet Mask option 4 20 4 22 superuser 2 19 Support option 5 5 Supported Servers Bindery Setup 4 32 Suspend Printing command from Cont...

Page 190: ...rinting to color server 2 20 remote printer name B 7 setting up printing to color server 2 19 tips for experts 2 17 up button 4 3 Use Character Set option 4 12 5 5 Use WINS Name Server option 4 35 5 33 utilities enabling protocol on the server 4 18 4 20 required print connections 4 39 UTP unshielded twisted pair cable A 1 V View Server List Bindery Setup 4 32 explained 4 29 W warning display windo...

Reviews: