background image

5. Copier and Document Server

Features

This chapter describes user tools in the Copier / Document Server Features menu.

Accessing User Tools

This section describes how to access User Tools menu.
User Tools allow you to change or set defaults.

• Operations for system settings differ from normal operations. Always quit User Tools when you

have finished. For details about how to end User Tools, see “Quitting User Tools”.

• Any changes you make with User Tools remain in effect even if the main power switch or operation

switch is turned off, or the [Energy Saver] or [Clear Modes] key is pressed.

• p.200 "Quitting User Tools"

Changing Default Settings

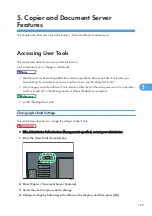
This section describes how to change the settings of User Tools.

• If the Administrator Authentications Management is specified, contact your administrator.

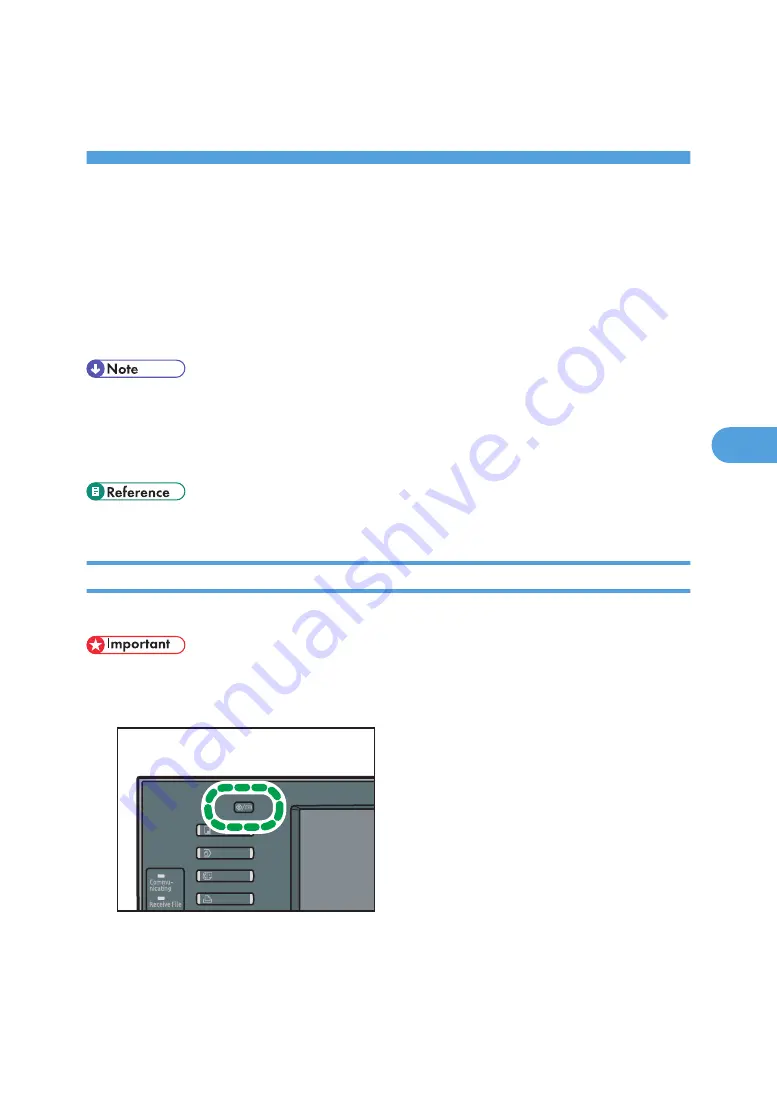
1.

Press the [User Tools/Counter] key.

CHB029

2.

Press [Copier / Document Server Features].

3.

Select the user tool you want to change.

4.

Change settings by following instructions on the display, and then press [OK].

199

5

Summary of Contents for Aficio MP 2352

Page 1: ...Operating Instructions Copy and Document Server Reference For safe and correct use be sure to read the Safety Information in About This Machine before using the machine ...

Page 2: ......

Page 3: ...iginals Originals 17 Sizes and Weights of Recommended Originals 17 Sizes Detectable with Auto Paper Select 18 Missing Image Area 21 Placing Originals 22 Original Orientation 22 Left Original Beeper 24 Placing Originals on the Exposure Glass 24 Placing Originals in the Auto Document Feeder 25 Batch Mode 27 SADF Mode 27 Mixed Sizes Mode 28 Specifying Original Sizes 30 2 Basic Copying Basic Procedure...

Page 4: ...51 Reducing or Enlarging Originals 55 Preset Reduce Enlarge 55 Zoom 57 Auto Reduce Enlarge 60 Duplex Copying 62 Originals and Copy Orientation 65 Combined Copying 66 One Sided Combine 66 Two Sided Combine 70 Finishing 74 Sort 74 Stack 79 Staple 81 Punch 88 Storing Data in the Document Server 91 Managing Jobs 93 Job List Screen 93 Checking Jobs in the Job List 94 Changing the Order of Jobs 95 Holdi...

Page 5: ...lecting the Original Type 110 Selecting Copy Paper 112 Auto Paper Select 112 Manual Paper Select 114 Advanced Reduce Enlarge Copying 115 Size Magnification 115 Directional Magnification 116 Directional Size Magnification mm mainly Europe and Asia 119 Directional Size Magnification inch mainly North America 121 Create Margin 122 Stamps 124 Background Numbering 124 Preset Stamp 125 User Stamp 128 Da...

Page 6: ...e Password of a Stored Document 184 Checking the Details of a Stored Document 184 Searching for Stored Documents 185 Printing Stored Documents 187 Deleting a Stored Document 193 Displaying Stored Documents with Web Image Monitor 194 Downloading Stored Documents with Web Image Monitor 195 Registering Frequently Used Functions for Printing Stored Documents from the Document Server 196 Changing the D...

Page 7: ...amp 212 Background Numbering 212 Preset Stamp 212 User Stamp 214 Date Stamp 215 Page Numbering 216 Input Output 219 Administrator Tools 222 6 Appendix Function Compatibility 223 Trademarks 225 INDEX 227 5 ...

Page 8: ... manual introduces the machine s various functions It also explains the control panel preparation procedures for using the machine how to enter text how to install the CD ROMs provided and how to replace paper toner staples and other consumables Troubleshooting Provides a guide for resolving common usage related problems Copy and Document Server Reference Explains Copier and Document Server functi...

Page 9: ...ions or user and administrator authentication PostScript 3 Supplement Explains how to set up and use PostScript 3TM VM Card Extended Feature Settings Device Reference Explains how to set up the extended features settings with the machine VM Card Extended Feature Settings Web Reference Explains how to set up the extended features settings using Web Image Monitor Other manuals UNIX Supplement Quick ...

Page 10: ...result of handling or operating the machine For good output quality the manufacturer recommends that you use genuine toner from the manufacturer The manufacturer shall not be responsible for any damage or expense that might result from the use of parts other than genuine parts from the manufacturer with your office products 8 ...

Page 11: ...d further relevant information Indicates the names of keys on the machine s display or control panels mainly Europe and Asia mainly North America Differences in the functions of Region A and Region B models are indicated by two symbols Read the information indicated by the symbol that corresponds to the region of the model you are using For details about which symbol corresponds to the model you a...

Page 12: ...htly different from the machine Certain options might not be available in some countries For details please contact your local dealer Depending on which country you are in certain units may be optional For details please contact your local dealer 10 ...

Page 13: ...hecks passports driver s licenses The preceding list is meant as a guide only and is not inclusive We assume no responsibility for its completeness or accuracy If you have any questions concerning the legality of copying or printing certain items consult with your legal advisor This machine is equipped with a function that prevents making counterfeit bank bills Due to this function the original im...

Page 14: ...ic Read the information under the symbol that corresponds to the region of your machine mainly Europe and Asia If the label contains the following your machine is a region A model CODE XXXX 27 29 67 69 220 240V mainly North America If the label contains the following your machine is a region B model CODE XXXX 17 57 120 127V Dimensions in this manual are given in two units of measure metric and inc...

Page 15: ...her 500 sheet finisher 1000 sheet finisher or booklet finisher Staple Center Booklet finisher Punch Internal finisher and punch unit or booklet finisher and punch unit Job Preset HDD Background Numbering HDD Preset Stamp HDD User Stamp HDD Store File Document Server HDD Booklet Magazine HDD To install the 500 sheet finisher the bridge unit is required To install the 1000 sheet finisher or booklet ...

Page 16: ...ion Ratio 3 Displays the numbers of originals scanned copies set and copies made 4 Press the key to confirm the current settings 5 Displays the Shortcut keys You can register frequently used functions under General Features in User Tools For details see General Features 6 Displays the Sort Stack Staple and Punch functions 7 Displays available functions Press a function to display its menu When you...

Page 17: ...ow to switch to the simplified display When you press the Simplified Display key the screen changes from the initial display to the simplified display Letters and keys are displayed at a larger size making operations easier CHB027 Example of a simplified display CHF003 1 1 Key Colour Press to increase screen contrast by changing the color of the keys This is available only for the simplified displ...

Page 18: ... To return to the initial display press the Simplified Display key again Certain keys do not appear on the simplified display 16 ...

Page 19: ... weight Exposure glass Up to A3 11 17 ADF One sided originals A3 A5 11 17 51 2 81 2 40 128 g m2 11 34 lb Bond Two sided originals A3 A5 11 17 51 2 81 2 52 105 g m2 14 28 lb Bond 11 17 64 105 g m2 17 28 lb Bond About 50 originals can be loaded in the ADF Non compatible originals for the Auto Document Feeder Placing unsuitable originals in the ADF can cause paper misfeeds or black lines or result in...

Page 20: ...es or translucent paper Originals that are still wet with ink or correction fluid The original might become dirty if it is written with a pencil or a similar tool Sizes Detectable with Auto Paper Select This section describes sizes detectable by the exposure glass and ADF mainly Europe and Asia Size A3 B4 JIS 1 A4 B5 JIS A5 A5 11 17 81 2 11 81 2 13 Original location Exposure glass 2 2 2 3 2 2 2 4 ...

Page 21: ...101 2 A3 A4 Original location Exposure glass 1 ADF Detectable size Undetectable size 1 Default is 81 2 11 If you want to switch the detectable size from 81 2 11 to A4 contact your service representative 2 If you want to make 51 2 81 2 size detectable contact your service representative 3 Default is 11 17 If you want to switch the detectable size from 11 17 to 11 15 contact your service representat...

Page 22: ...p 31 Custom sizes Sizes difficult to detect It is difficult for the machine to detect the sizes of the following originals so select the paper size manually Originals with indexes tags or other projecting parts Transparent originals such as OHP transparencies or translucent paper Dark originals with a lot of text and drawings Originals which partially contain a solid image Originals which have sol...

Page 23: ... or on the exposure glass correctly margin of a few millimeters on all four sides of the original might not be copied BZH047 1 2 2 5 1 5 mm 0 08 0 10 0 06 inches 2 0 5 mm 0 02 inches or more 3 2 1 5 mm 0 08 0 06 inches 4 3 2 mm 0 12 0 08 inches Originals 21 1 ...

Page 24: ... using the ADF place it face up BZH048 1 ADF 2 Exposure glass When you cannot place the original as the above you may not make copies as you want with particular functions If this happens change the orientation by selecting the unreadable orientation Readable orientation Select this mode when the original orientation is the same as the copy paper orientation Unreadable orientation Select this mode...

Page 25: ...CHF040 Wrong position Correct position 1 Press Special Original 2 Select the original orientation and then press OK Placing Originals 23 1 ...

Page 26: ...ral Features Placing Originals on the Exposure Glass Place originals on the exposure glass Do not lift the ADF forcefully Otherwise the cover of the ADF might open or be damaged 1 Lift the exposure glass cover or ADF Be sure to lift the exposure glass cover or ADF by more than 30 degrees Otherwise the size of the original might not be detected correctly 2 Place the original face down on the exposu...

Page 27: ...d 2 Sided function has been set press the key after all originals have been scanned p 30 Specifying Original Sizes Placing Originals in the Auto Document Feeder Place originals in the ADF Be sure not to block the sensor or load the original untidily Doing so may cause the machine to detect the size of the original incorrectly or display a paper misfeed message Also be sure not to place originals o...

Page 28: ...t stack originals beyond the limit mark The first page should be on the top CHF005 1 2 1 Limit mark 2 Document guide For details about how to specify the original size see Specifying Original Sizes Straighten curls in the originals before placing them in the ADF To prevent multiple sheets from being fed at once fan the original before placing it in the ADF Set the original squarely p 27 Batch Mode...

Page 29: ...d place the next part then press the Start key When SADF is displayed instead of Batch specify the Batch mode under Switch to Batch in User Tools For details about Switch to Batch see Input Output To copy subsequent originals in this mode repeat step 4 When the Sort Combine or 1 Sided 2 Sided function has been set press the key after all originals have been scanned You cannot switch between 1 side...

Page 30: ...et within a specified time after the previous original has been fed You can adjust this time under SADF Auto Reset in User Tools For details see Input Output You cannot switch between 1 sided and 2 sided originals during copying p 219 Input Output Mixed Sizes Mode If you apply this mode you can place originals of different sizes together in the ADF The machine will automatically detect the size of...

Page 31: ...DF 6 Press the Start key Since small originals may not be correctly aligned with the original guide the copy image may be slanted You can place originals of two different sizes at a time Copying speed and scanning speed will be reduced The weight range for originals in the Mixed Sizes mode is 52 105 g m2 14 28 lb Bond When using this function with 1 Sided 2 Sided mode always ensure that the origin...

Page 32: ... Regular sizes Select the size of the originals from the regular sizes 1 Press Special Original 2 Press Original Size 3 Press Regular Size 4 Select the size of original and then press OK twice 5 Place the originals and then press the Start key 1 Placing Originals 30 1 ...

Page 33: ...However the size range of copy paper is limited to 148 0 600 0 mm 5 83 23 62 inches horizontally and 90 0 305 0 mm 3 55 12 00 inches vertically 1 Press Special Original 2 Press Original Size 3 Press Custom Size 4 Enter the horizontal size with the number keys and then press 5 Enter the vertical size with the number keys and then press 6 Press OK twice 7 Place the originals and then press the Start...

Page 34: ...1 Placing Originals 32 1 ...

Page 35: ...assword For details see When the Authentication Screen is Displayed About This Machine To copy onto paper other than plain paper specify the paper type in User Tools For details see System Settings Network and System Settings Reference 1 Make sure Ready appears on the screen If any other function is displayed press the Copy key on the left side of the control panel Initial copy screen 2 Make sure ...

Page 36: ...s press Check Modes You can change the maximum copy quantity under Max Copy Quantity in User Tools For details about Max Copy Quantity see General Features p 201 General Features Interrupt Copy Use this function if you want to interrupt a long copy job to make urgently needed copies You cannot use the Interrupt Copy function when fax originals are being scanned or the scanner function is being use...

Page 37: ...e copying and then press the Start key Following the instructions on the display The previous copy job settings are restored Simply press the Start key to continue copying from where it left off Job Preset You can make settings for the next copy job during copying If a long copy job is in progress and you do not want to wait for it to finish you can use this function to set up the next copy job in...

Page 38: ... 4 Press Exit The initial copy display appears After the current copy job the next copy job starts automatically You can switch the display to the current copy job by pressing To Copying Screen You can switch the display to the preset job by pressing To Reserv Screen Preset copy jobs are registered under job numbers in the Reserv Screen You can confirm and delete preset jobs For details about the ...

Page 39: ... adhesive label paper you must specify the paper type For details see Copying onto Special Paper from Tray 1 If the paper size shown on the key for tray 1 is different from that of the paper loaded in tray 1 paper might misfeed Be sure to remove any paper left in the tray after copying Paper size and type specified by pressing the key are cleared and reset when Auto Clear has been performed when t...

Page 40: ... tray 1 and that of the paper loaded in tray 1 are the same Copying onto Custom Size Paper from Tray 1 Makes copies onto custom size paper from tray 1 The Duplex function cannot be performed on custom size paper If 1 Sided 2 Sided is selected cancel the setting Paper will be delivered automatically to the internal tray 1 Select tray 1 and then press the key 2 Basic Copying 38 2 ...

Page 41: ...r a new value To register the custom size entered in step 5 press Program and then press Exit in the confirmation screen Only one custom size can be stored To recall the custom size stored press Recall If you do not register the custom size the size you set is deleted when modes are cleared Copying onto Special Paper from Tray 1 When copying onto special paper such as OHP transparencies thick pape...

Page 42: ...ss Paper Type 3 Select the paper type and then press OK 4 Specify the paper size and then press OK twice 5 Place the originals and then press the Start key Special paper can also be loaded in the bypass tray For the details about copying onto special paper see Copying onto Special Paper from the Bypass Tray The maximum limit for stacking special paper is different to that for plain paper For detai...

Page 43: ... For details about supported envelope types see Envelopes About This Machine Some kinds of envelopes might cause misfeeds or wrinkle If this happens push down the envelope lever of the fusing unit The Duplex function cannot be used with envelopes If 1 Sided 2 Sided is selected cancel the setting Envelope orientation When loading envelopes in the landscape orientation set them print side up with th...

Page 44: ...e envelope lever of the fusing unit on the left CHF037 3 Close the right cover CHF038 4 Select tray 1 and then press the key 5 Press Paper Size 6 Select the envelope size and then press OK twice 7 Place the originals and then press the Start key 2 Basic Copying 42 2 ...

Page 45: ...plain paper without returning the lever to its original position the copy quality might be reduced Envelopes can also be loaded in the bypass tray For the details about copying onto envelopes see Copying onto Envelopes from the Bypass Tray p 51 Copying onto Envelopes from the Bypass Tray Copying from Tray 1 43 2 ...

Page 46: ...y paper mainly Europe and Asia A3 A4 A5 B4 JIS B5 JIS B6 JIS mainly North America 11 17 81 2 11 51 2 81 2 When copying onto custom size paper paper will be delivered automatically to the internal tray If the paper you want to copy onto is not shown on the Paper Type screen or its paper weight is between 82 105 g m2 21 28 lb Bond you must specify the paper type under Tray Paper Settings in User Too...

Page 47: ...per 5 Press OK 6 Place the originals and then press the Start key 7 When the copy job is finished press the Clear Modes key to clear the settings Certain types of paper might not be detected properly when placed on the bypass tray If this happens remove the paper and place it on the bypass tray again Load only as much paper as can be held between the guides on the bypass tray Overloading the bypas...

Page 48: ...sert paper into the bypass tray For details about Panel Key Sound see System Settings Network and System Settings Reference Depending on the environment where the machine is being used you might at times hear a rustling noise from paper moving through the machine This noise does not indicate a malfunction Copying onto Regular Size Paper from the Bypass Tray Makes copies onto regular size paper fro...

Page 49: ... paper from the bypass tray The Duplex function cannot be performed on custom size paper If 1 Sided 2 Sided is selected cancel the setting 1 Open the bypass tray and then insert the paper face down until you hear the beep 2 Align the paper guides to the paper size 3 Press Bypass and then press the key 4 Press Paper Size 5 Press Custom Size Copying from the Bypass Tray 47 2 ...

Page 50: ...m paper size For details see Registering a custom size You can also recall the registered custom paper size For details see Recalling the registered custom size p 48 Registering a custom size p 49 Recalling the registered custom size Registering a custom size Register a custom paper size 1 Press Bypass and then press the key 2 Press Paper Size 3 Press Custom Size 4 Enter the horizontal size with t...

Page 51: ...ou want to change and then enter a new value You can specify only one custom size Recalling the registered custom size Recalls the registered paper size 1 Press Bypass and then press the key 2 Press Paper Size 3 Press Custom Size 4 Press Recall The registered size is displayed 5 Press OK twice Copying from the Bypass Tray 49 2 ...

Page 52: ...l the setting Select Thick Paper if the paper weight is 106 g m2 28 lb Bond or greater Postcards should be fed from tray 1 or the bypass tray 1 Open the bypass tray and then insert the paper face down until you hear the beep Load OHP transparencies one by one to prevent them jamming 2 Align the paper guides to the paper size 3 Press Bypass and then press the key 4 Press Paper Type 5 Select the pap...

Page 53: ... Paper Type Bypass Tray in User Tools in advance For the paper type select Envelope Specify the paper thickness depending on the thickness of the envelopes For details see System Settings Network and System Settings Reference Before loading self adhesive envelopes be sure to fan them thoroughly This will prevent them sticking together If fanning does not prevent them sticking together load them on...

Page 54: ...ing toward the back of the machine Push the envelopes into the machine until you hear the beep CHF041 5 Align the paper guides to the envelope size 6 Press Bypass and then press the key 7 Press Paper Size 8 Select the envelope size and then press OK twice 9 Place the originals and then press the Start key 2 Basic Copying 52 2 ...

Page 55: ...int side down with their flaps open and pointing away from the machine Load envelopes with flaps fully open Otherwise they might not feed into the machine CHF009 When loading envelopes in the portrait orientation place the original on the exposure glass with the bottom edge aligned to the left scale or place the original in the ADF with the bottom edge inserted To copy onto custom size envelopes y...

Page 56: ...s recommended that you set the right left top and bottom print margin to at least 15 mm 0 6 inches each Load only one size and type of envelope at a time Before loading envelopes flatten leading edges the side going into the machine by pressing a pencil or ruler across them Before loading envelopes check they are rectangular in shape Printing on envelopes may be slower than printing on plain paper...

Page 57: ...d Reduce Enlarge Copying Preset Reduce Enlarge This function allows you to reduce or enlarge images by selecting a preset ratio You can register up to three frequently used reproduction ratios other than the preset Reduce Enlarge ratios BZH062 Base Point The base point of reduce enlarge differs depending on how the original is scanned When the original is placed on the exposure glass the upper lef...

Page 58: ...1 Base point when placed on the exposure glass 2 Base point when placed in the ADF 1 Press Reduce Enlarge 2 Select a ratio and then press OK 3 Place the originals and then press the Start key 2 Basic Copying 56 2 ...

Page 59: ...s You can select a ratio regardless of the size of an original or copy paper With some ratios parts of the image might not be copied or margins will appear on copies p 205 Reproduction Ratio Zoom You can specify the reproduction ratio in increments of 1 BZH064 The reproduction ratios you can specify are 25 400 You can select a ratio regardless of the size of an original or copy paper With some rat...

Page 60: ...ss or changes the ratio in increments of 1 Pressing and holding down or changes it in increments of 10 4 Press OK 5 Place the originals and then press the Start key To change the value you specified readjust it with and Entering the ratio with the number keys Enter a ratio using the number keys 2 Basic Copying 58 2 ...

Page 61: ...eys 3 Enter the desired ratio with the number keys and then press 4 Press OK twice 5 Place the originals and then press the Start key To change the value you entered press Clear and then enter a new value Reducing or Enlarging Originals 59 2 ...

Page 62: ...he same size paper If the orientation in which your original is placed is different from that of the paper you are copying onto the machine rotates the original image by 90 degrees and fits it on the copy paper Rotate Copy For example to reduce A3 11 17 originals to fit onto A4 81 2 11 paper select a paper tray containing A4 81 2 11 paper and then press Auto Reduce Enlarge The image is automatical...

Page 63: ...nal size and orientation Exposure glass 11 17 81 2 14 81 2 11 51 2 81 2 ADF 11 17 81 2 14 81 2 11 51 2 81 2 10 14 71 4 101 2 A3 A4 1 Press Auto Reduce Enlarge 2 Select the paper size 3 Place the originals and then press the Start key You can place originals of different sizes in the ADF at once The machine selects reproduction ratios of between 25 and 400 p 113 Rotate Copy Reducing or Enlarging Or...

Page 64: ...nd 1 Sided 2 Sided Copies two 1 sided pages on one 2 sided page BZH028 2 Sided 2 Sided Copies one 2 sided page on one 2 sided page BZH029 Original orientation and completed copies The resulting copy image will differ according to the orientation in which you place your originals or The table shows the orientation of images on the front and back of copies not the orientation of delivery 2 Basic Cop...

Page 65: ...BZH066 1 Press Dup Combine Series 2 Make sure that Duplex is selected If Duplex is not selected press Duplex Duplex Copying 63 2 ...

Page 66: ...ed directly by pressing the copy function key In that case proceed to step 5 You can specify the margins under Edit in User Tools For details about Edit see Edit You can use the following copy paper with this function A3 A4 A5 B4 JIS B5 JIS 12 18 11 17 11 15 11 14 10 15 10 14 81 2 14 81 2 13 81 2 11 81 4 14 81 4 13 8 13 8 101 2 8 10 71 4 101 2 51 2 81 2 8K 16K You cannot use the following copy pap...

Page 67: ...o Top BZH067 Top to Bottom BZH068 1 Press Orientation 2 Select orientation Top to Top Top to Bottom and then press OK The default setting is Top to Top You can change the default orientation under Original Orientation in Duplex Mode and Copy Orientation in Duplex Mode in User Tools For details see General Features p 201 General Features Duplex Copying 65 2 ...

Page 68: ...ine selects the reproduction ratio automatically This reproduction ratio depends on copy paper sizes and the number of originals The machine selects reproduction ratios of between 25 and 400 If the calculated ratio is under the minimum ratio it is automatically adjusted to within available range However with some ratios parts of the image might not be copied If the orientation of originals is diff...

Page 69: ...30 1 Sided 4 Pages Combine 1 Side Copies four 1 sided originals to one side of a sheet BZH069 1 Sided 8 Pages Combine 1 Side Copies eight 1 sided originals to one side of a sheet BZH070 2 Sided 1 Page Combine 1 Side Copies one 2 sided original to one side of a sheet Combined Copying 67 2 ...

Page 70: ...es two 2 sided originals to one side of a sheet BZH071 2 Sided 4 Pages Combine 1 Side Copies four 2 sided originals to one side of a sheet BZH072 Orientation of the original and image position of combine Portrait originals 2 Basic Copying 68 2 ...

Page 71: ...cape originals BZH074 Placing originals originals placed in the ADF Originals read from left to right BZH075 Originals read from top to bottom BZH076 1 Press Dup Combine Series 2 Press Combine Combined Copying 69 2 ...

Page 72: ...g or 1 sided Comb 4 orig directly by pressing the copy function key In that case proceed to step 6 Two Sided Combine Combines various pages of originals onto two sides of one sheet There are six types of Two Sided Combine 1 Sided 4 Pages Combine 2 Sides Copies four 1 sided originals to one sheet with two pages per side BZH032 1 Sided 8 Pages Combine 2 Sides Copies eight 1 sided originals to one sh...

Page 73: ...ages Combine 2 Sides Copies 16 1 sided originals to one sheet with eight pages per side BZH078 1 Front 2 Back 2 Sided 2 Pages Combine 2 Sides Copies two 2 sided originals to one sheet with two pages per side BZH033 Combined Copying 71 2 ...

Page 74: ...sided originals to one sheet with four pages per side BZH079 1 Front 2 Back 2 Sided 8 Pages Combine 2 Sides Copies eight 2 sided originals to one sheet with eight pages per side BZH080 1 Front 2 Back 1 Press Dup Combine Series 2 Basic Copying 72 2 ...

Page 75: ...Sides for Copy 4 Press Orientation 5 Select orientation Top to Top Top to Bottom and then press OK 6 Select the number of originals to combine 7 Press OK 8 Select the paper size 9 Place the originals and then press the Start key You cannot use custom size paper Combined Copying 73 2 ...

Page 76: ... paper trays loaded with paper of the same size and type but in different orientation are required See System Settings Network and System Settings Reference You cannot use the bypass tray with Rotate Sort Sort Shift Sort Copies are assembled as sets in sequential order To use Shift Sort a finisher or the internal shift tray is required Each time the copies of one set or a job are delivered the nex...

Page 77: ...1 Press Finishing 2 Select Sort or Rotate Sort When the finisher is not attached When the internal finisher is attached When the 500 sheet finisher is attached Finishing 75 2 ...

Page 78: ...o confirm the type of finishing press the Sample Copy key 6 Press the Start key If you are copying from the exposure glass a single copy of each original is made first If the first copy set is acceptable you can make the remaining copy sets by pressing the key The time required for copy sets to be delivered varies depending on the print settings 2 Basic Copying 76 2 ...

Page 79: ...81 4 13 8 13 8 101 2 8 10 71 4 101 2 51 2 81 2 41 8 91 2 37 8 71 2 C5 Env C6 Env DL Env 8K 16K Custom size Horizontal size 148 0 600 0 mm 5 83 23 62 inches Vertical size 90 0 305 0 mm 3 55 12 00 inches Finisher shift tray for the internal finisher Standard size A3 A4 B4 JIS B5 JIS 11 17 81 2 14 81 2 13 81 2 11 81 4 13 71 4 101 2 8K 16K Finisher shift tray for the 500 sheet finisher Standard size A...

Page 80: ...lace the originals 2 Enter the number of copy sets with the number keys 3 Press the Sample Copy key CHF010 One copy set is delivered as a sample 4 If the sample is acceptable press Continue The number of copies made is the number specified minus one for the proof copy If you press Suspend after checking the results return to step 1 to adjust the copy settings as necessary You can change the settin...

Page 81: ...g starts again The number of sets you can enter in step 3 differs depending on when the Clear Stop key is pressed Stack Groups together copies of each page in a multi page original BZH083 If the internal shift tray or a finisher is attached each time the copies of one page are delivered the next copy is shifted when delivered so you can separate each job by page Finishing 79 2 ...

Page 82: ...1 Press Finishing 2 Press Stack When the internal finisher is attached When the 500 sheet finisher is attached When the 1000 sheet finisher is attached 2 Basic Copying 80 2 ...

Page 83: ...irst page to be copied When placing originals in the ADF set so that the first page is on the top When placing originals on the exposure glass or in the ADF using the Batch mode press the key after all the originals have been scanned For details about paper sizes and orientations that can be shifted when delivered to the shift tray see Sort p 74 Sort Staple Each copy set can be stapled together Fi...

Page 84: ...in which they can be read normally When placing the original on the exposure glass keep the same orientation but set the original facing downwards The relationship between the orientation in which you place the original and the staple positions is as follows Internal finisher or 1000 sheet finisher CHF011 1 2 3 2 3 500 sheet finisher 2 Basic Copying 82 2 ...

Page 85: ...CHF012 1 2 2 3 3 Booklet finisher Finishing 83 2 ...

Page 86: ...on of delivery 2 You cannot staple at this position when copying onto B4 JIS 8 13 or larger 3 If you want to staple at this position select unreadable orientation in Original Orientation and then select Top 2 1 Press Finishing 2 Select one of the stapling positions When the internal finisher is attached 2 Basic Copying 84 2 ...

Page 87: ...When the 500 sheet finisher is attached When the 1000 sheet finisher is attached When the booklet finisher is attached Finishing 85 2 ...

Page 88: ...le Centre you must specify the Magazine function For details about Magazine see Booklet Magazine You can change the staple positions shown on the initial display under Input Output in User Tools For details about staple positions see Input Output The following type of paper cannot be stapled Postcards Translucent paper OHP transparencies Label paper adhesive labels Envelopes Thin paper Thick paper...

Page 89: ...s of paper and staple them together if the widths of the paper are the same such as A3 and A4 For details about the sizes and orientations of paper that can be stapled see Appendix About This Machine When stapling B4 JIS 81 2 14 or larger paper sizes be sure to extend the paper support plate of the finisher shift tray You cannot change stapling positions during copying When the original image is r...

Page 90: ...y function For details about the number of sheets that can be stapled together the sizes weights and orientations of paper that can be stapled and the number of stapled copies that can be stacked on each tray see Appendix About This Machine p 159 Booklet Magazine p 219 Input Output Punch You can make punch holes in copies CHF032 You cannot use the bypass tray with this function The available numbe...

Page 91: ...The above table shows punch hole positioning Punched sheets might not be delivered in the orientation shown in this table 2 If you want to punch holes in this position select unreadable orientation in Original Orientation and then select the punch hole position 3 You cannot punch holes in this position when copying onto B4 JIS 8 13 or larger or 51 2 81 2 1 Press Finishing 2 Select one of the punch...

Page 92: ... Output Paper can be punched only if it meets the machine s size and orientation requirements For details about which sizes and weights of paper that can be punched see Appendix About This Machine When using the Punch and Combine Double Copies or Auto Reduce Enlarge the message Orig and paper orientation mismatched for Punch mode Cancel Punch mode or change paper orientation in tray may appear bec...

Page 93: ... for any damage that might result from the loss of data 1 Press Store File 2 Enter a file name user name or password if necessary 3 Press OK 4 Place the originals 5 Make the scanning settings for the original 6 Press the Start key Stores scanned originals in memory and makes one set of copies To stop scanning press the Clear Stop key To resume a paused scanning job press Continue in the confirmati...

Page 94: ...e ADF cannot detect the size of an original automatically the scan will be made at the closest available size If you want to store another document do so after copying is complete For details about the Document Server see Using the Document Server For details about printing stored documents see Printing Stored Documents For details about setting user name file name and password see Using the Docum...

Page 95: ...nction and facsimile function are not displayed in the job list Job List Screen This section explains displays and icons that appear in the Job List screen The Job List screen varies depending on whether Job Order is selected with Print Priority for the System Settings For details about the setting procedure see System Settings Network and System Settings Reference When Job Order is not selected T...

Page 96: ...t jobs Job printed using copy function Job printed using printer function Job printed using Document Server function Job printed using Web Image Monitor Checking Jobs in the Job List You can check the contents of jobs in the job list 1 Press Job List 2 Select the job whose contents you want to check 3 Press Details and then check the contents 4 Press Exit twice 2 Basic Copying 94 2 ...

Page 97: ...Job List 2 Select the job whose order you want to change 3 Press Change Order 4 Change the order using Top Previous or Next 5 Press OK 6 Press Exit Holding Jobs You can hold jobs that are queued or currently printing 1 Press Job List 2 Select the job you want to hold Managing Jobs 95 2 ...

Page 98: ...d 4 Press Exit To resume the suspended jobs press Resume Printing This function is available only if Job Order is specified Deleting Jobs You can delete a job that is queued or currently printing 1 Press Job List 2 Select the job you want to delete To delete two or more print jobs select them 3 Press Delete Reservation 4 Press OK 5 Press Exit 2 Basic Copying 96 2 ...

Page 99: ...ory and contents of completed print jobs 1 Press Job List 2 Press Job History A list of completed print jobs appears 3 Select the job whose contents you want to check 4 Press Details and then check the contents 5 Press Exit twice Managing Jobs 97 2 ...

Page 100: ...red or reset and after the operation switch is turned on See Changing the Default Functions of the Copy s Initial Display Paper settings are stored based on paper size So if you place more than one paper tray of the same size the paper tray prioritized under System Settings in User Tools will be selected first For details see System Settings Network and System Settings Reference Programs are not d...

Page 101: ...er followed by the program name The screen returns to the initial copy display after a short time Program numbers with against them already have settings made for them For details about how to enter text see Entering Text About This Machine Changing a Stored Program Changes program settings 1 Check the program settings 2 Specify the contents of a program 3 Press the Program key 4 Press Program Reg...

Page 102: ...er a short time To check the contents of a program recall the program When it is overwritten the previous program is deleted Recalling a Stored Program Recalls a stored program to make copies using the stored settings 1 Press the Program key 2 Press the program number you want to recall The stored settings are displayed Only programs with against them contain a program Deleting a Stored Program Er...

Page 103: ...2 Press Delete 3 Press the program number you want to delete 4 Press Yes The program is deleted and the display returns to the initial copy display Registering Frequently Used Functions 101 2 ...

Page 104: ...requently is 1 sided copying you can change the default selection to 1 sided copying instead The settings you can register as defaults are Original Type Density Special Original Original Orientation Cover Slip Sheet Edit Stamp Dup Combine Series Reduce Enlarge Finishing Store File paper tray and number of copies 1 Specify scan settings and any other settings you require on the initial display 2 Pr...

Page 105: ...lts The screen returns to the initial display To restore the factory default settings on the initial display press Restore Factory Defaults The default settings can be programmed separately for the normal screen and simplified display screens Changing the Default Functions of the Copy s Initial Display 103 2 ...

Page 106: ...2 Basic Copying 104 2 ...

Page 107: ...ual image density You can adjust the density of the overall original in nine steps Combined auto and manual image density Adjusts the density of an image only for dark texture originals Auto Image Density The machine automatically adjusts the image density by scanning the densities of originals Dark texture originals such as newspaper or recycled paper will be copied so that background will not be...

Page 108: ...he density indicator moves Combined Auto and Manual Image Density Adjusts the density of an image only for dark texture originals 1 Make sure Auto Density is selected If Auto Density is not selected press Auto Density 2 Press or to adjust the density The density indicator moves 3 Advanced Copying 106 3 ...

Page 109: ...Adjusts the shades of an image Background Density Adjusts the background density of an image 1 Press Edit Stamp 2 Press Copy Quality 3 Press Copy Quality 4 Adjust the settings 5 Press OK twice Sharp Soft Contrast and Background Density can each be adjusted however their adjustments can affect the level of other adjustment functions Image Adjustment 107 3 ...

Page 110: ...en pressed or when the power has been turned off Sharp Soft Adjusts the outline of an image 1 Adjust the image quality by pressing Soft or Sharp 2 Press OK Contrast Adjusts the shades of an image 1 Adjust the image quality by pressing Low or High 2 Press OK Background Density Adjusts the background density of an image 3 Advanced Copying 108 3 ...

Page 111: ...1 Adjust the image quality by pressing Lighter or Darker 2 Press OK Adjustments should be made lighter when copying dark textured originals such as newspaper or recycled paper Image Adjustment 109 3 ...

Page 112: ... Copied Photo Use when copying copies or originals generated by color copiers Pale For originals that have lighter lines written in pencil or faintly copied slips Generation Copy For originals that are copied The copy image can be reproduced sharply and clearly 1 Select the original type You can change the settings for original types shown on the initial display under General Features in User Tool...

Page 113: ... p 201 General Features Selecting the Original Type 111 3 ...

Page 114: ...nal size and orientation Exposure glass A3 B4 JIS A4 B5 JIS A5 81 2 13 ADF A3 B4 JIS A4 B5 JIS A5 11 17 81 2 11 81 2 13 mainly North America Original location Original size and orientation Exposure glass 11 17 81 2 14 81 2 11 51 2 81 2 ADF 11 17 81 2 14 81 2 11 51 2 81 2 10 14 71 4 101 2 A3 A4 Only the paper trays set to Do not Display or Recycled Paper in Paper Type and also set to Yes in Apply A...

Page 115: ...original is placed is different from that of the paper you are copying onto the machine rotates the original image by 90 degrees to fit it on the paper BZH101 You cannot use Rotate Copy when enlarging onto A3 B4 JIS 11 17 or 81 2 14 size paper In this case place your original in the orientation Original size and orientation Copy paper size and orientation You cannot rotate A4 B5 JIS A5 81 2 11 or ...

Page 116: ...u cannot use the Rotate Copy function if this setting is changed to Without Image Rotation or Off For details about Auto Tray Switching see General Features The Rotate Copy function is not available in combination with certain finishing settings p 60 Auto Reduce Enlarge p 112 Auto Paper Select p 201 General Features Manual Paper Select Select the tray containing the paper you want to copy onto a p...

Page 117: ...ctions see Reducing or Enlarging Originals p 55 Reducing or Enlarging Originals Size Magnification This function calculates a reproduction ratio based on the lengths of the original and copy BZK054 Measure and specify the lengths of the original and copy by comparing A with a 1 Press Reduce Enlarge 2 Press Size Magnification Advanced Reduce Enlarge Copying 115 3 ...

Page 118: ...f the calculated ratio is over the maximum or under the minimum ratio it is automatically adjusted to within available range However with some ratios parts of the image might not be copied or margins will appear on copies The machine selects reproduction ratios of between 25 and 400 Directional Magnification Specify the horizontal and vertical reproduction ratios individually Copies can be reduced...

Page 119: ...ge regardless of original or copy paper size However depending on settings and other conditions part of the image may not be copied or margins will appear on copies Specifying the ratio with and Specify a ratio using and 1 Press Reduce Enlarge 2 Press Direct Mag 3 Press keys 4 Press Horizontal Advanced Reduce Enlarge Copying 117 3 ...

Page 120: ...g down or changes it in increments of 10 6 Press Vertical 7 Adjust the ratio with and 8 Press OK twice To change the value you entered readjust it with and Entering the ratio with the number keys Enter a ratio using the number keys 1 Press Reduce Enlarge 2 Press Direct Mag 3 Advanced Copying 118 3 ...

Page 121: ...ctional Size Magnification mm mainly Europe and Asia Specify the horizontal and vertical lengths of the original and copy image Copies can be reduced or enlarged at different reproduction ratios horizontally and vertically BZK064 1 Horizontal original size A mm 2 Vertical original size B mm 3 Horizontal copy size a mm 4 Vertical copy size b mm Measure and specify the lengths of the original and co...

Page 122: ...gth of an original and copies between 1 and 9999 mm in increments of 1 mm You can enter the vertical length of an original and copies between 1 and 999 mm in increments of 1 mm To change the value you entered press the key you want to change and then enter a new value The machine selects reproduction ratios of between 25 and 400 When entering a size in mm if the calculated ratio is over the maximu...

Page 123: ...t different reproduction ratios horizontally and vertically BZK064 1 Horizontal original size A inch 2 Vertical original size B inch 3 Horizontal copy size a inch 4 Vertical copy size b inch Measure and specify the lengths of the original and copy by comparing A with a and B with b 1 Press Reduce Enlarge 2 Press Dir Size Mag inch Advanced Reduce Enlarge Copying 121 3 ...

Page 124: ...e key you want to change and then enter a new value The machine selects reproduction ratios of between 25 and 400 When entering a size in inch if the calculated ratio is over the maximum or under the minimum ratio it is automatically adjusted to within available range However with some ratios parts of the image might not be copied or margins will appear on copies Create Margin Reduces the image to...

Page 125: ...ou can change the ratio for Create Margin under Reproduction Ratio in User Tools For details about Reproduction Ratio see Reproduction Ratio p 205 Reproduction Ratio Advanced Reduce Enlarge Copying 123 3 ...

Page 126: ...ve numbers printed on the background of copies If this function is used in conjunction with Sort the same numbers are printed on each set of copies helping you keep track of confidential documents BZK031 1 Press Edit Stamp 2 Press Stamp 3 Press Background Numbering 3 Advanced Copying 124 3 ...

Page 127: ...999 You can change the settings for Background Numbering under Stamp in User Tools For details about Stamp see Stamp The numbers appear to overlap the copied image in some cases p 212 Stamp Preset Stamp Messages are stamped on copies BZH108 You cannot use the bypass tray with this function Only one message can be stamped at a time The following eight messages are available for Preset Stamp Stamps ...

Page 128: ... Internal Use Only CONFIDENTIAL DRAFT Stamp position and original orientation The stamp positions differ according to the orientation in which you place the originals BZK032 1 Press Edit Stamp 2 Press Stamp 3 Press Preset Stamp 3 Advanced Copying 126 3 ...

Page 129: ...Preset Stamp under Stamp in User Tools Depending on the setting density may change For details about Stamp see Stamp Depending on paper size if you change the stamp size parts of the stamp might not be printed p 212 Stamp Changing the stamp position size and density Changes the stamp position size and density 1 Press Change under Position Size Density 2 Select the stamp position size and density a...

Page 130: ...er stamp before using this function For details see Registering a user stamp You cannot use the bypass tray with this function Only one message can be stamped each time Stamp position and original orientation The user stamp positions differ according to the orientation in which you place the originals BZK033 3 Advanced Copying 128 3 ...

Page 131: ... Press All Pages or 1st Page Only to select the print page 6 After making all settings press OK 7 Press OK You can change the settings for User Stamp under Stamp in User Tools For details about Stamp see Stamp p 130 Registering a user stamp p 212 Stamp Changing the stamp position Changes the stamp position Stamps 129 3 ...

Page 132: ...97 mm 0 4 11 7 inches high and 10 432 mm 0 4 17 0 inches wide However if the stamp s size exceeds the maximum value of the area 5 000 mm2 7 75 inch2 it will be automatically corrected to a size that is within the range of the area Up to four frequently used images can be stored in memory BZH112 1 Base point 2 Exposure glass 1 Press the User Tools Counter key CHB029 3 Advanced Copying 130 3 ...

Page 133: ... original will be scanned and the stamp will be registered 11 Press Exit 12 Press Exit The display returns to the User Tools Counter Enquiry screen 13 Press Exit Exits settings and gets ready to copy Stamp numbers with already have settings in them Stamp numbers that are not registered yet are marked with Not Programmed If the stamp number is already being used the machine will ask you if you want...

Page 134: ...r Stamp 5 Press Program Delete Stamp 6 Press Delete and then press the stamp number you want to delete 7 Select Yes and then press Exit 8 Press Exit The display returns to the User Tools Counter Enquiry screen 9 Press Exit Exits settings and gets ready to copy Date Stamp Use this function to print dates on your copies 3 Advanced Copying 132 3 ...

Page 135: ...t from the following styles MM DD YYYY MM DD YYYY DD MM YYYY DD MM YYYY YYYY MM DD Stamp position and original orientation The date stamp positions differ according to the orientation in which you place the originals BZK034 10 10 2010 10 10 2010 10 10 2010 10 10 2010 Stamps 133 3 ...

Page 136: ...he print page 6 After making all settings press OK 7 Press OK You can change the settings for Date Stamp under Stamp in User Tools For details about Stamp see Stamp When Date Stamp is used with the Combine Magazine or Booklet function the date stamp is printed as follows With the Combine function BZH204 4 5 2010 With the Magazine or Booklet function 3 Advanced Copying 134 3 ...

Page 137: ...te Changes the format of date 1 Press Change Format under Current Date 2 Select the date format and then press OK Changing the stamp position Changes the stamp position 1 Press Change under Stamp Position 2 Select the stamp position and then press OK Stamps 135 3 ...

Page 138: ...bypass tray with this function Page number formats There are six formats available for page numbering P1 P2 1 5 2 5 1 2 P 1 P 2 1 2 1 1 1 2 Stamp position and original orientation The page stamp positions differ according to the orientation in which you place the originals 3 Advanced Copying 136 3 ...

Page 139: ...BZK024 1 Press Edit Stamp 2 Press Stamp 3 Press Page Numbering 4 Select the page numbering format Stamps 137 3 ...

Page 140: ... in User Tools For details about these settings see Stamp When Page Numbering is used with Combine Magazine or Booklet function page numbers are printed as follows Per Original is selected in Page Numbering in Combine With 1 Sided 2 Sided using the Combine function BZH170 With the Magazine or Booklet function BZH171 Per Copy is selected in Page Numbering in Combine With 1 Sided 2 Sided using the C...

Page 141: ...hange under Stamp Position 2 Select the stamp position and then press OK Specifying the first printing page and start number P1 P2 1 2 P 1 P 2 1 2 Specify the first printing page and start number The example below shows when the first printing page is 2 and the start number is 3 BZH117 Stamps 139 3 ...

Page 142: ...hen press If you want to number all pages to the end press to the End To change the number entered press Clear and then enter a new number 5 After making all settings press OK The last number is the last page number to print For example if Total Pages is ten when you want to print up to seven pages and do not want to print from page 8 on enter 7 for Last Number Normally you do not need to enter th...

Page 143: ...pages with the number keys and then press To change the number entered press Clear and then enter a new number 6 After making all settings press OK The last number is the last page number to print For example if Total Pages is ten when you want to print up to seven pages and do not want to print from page 8 on enter 7 for Last Number Normally you do not need to enter the number You can set a value...

Page 144: ...th the number keys and then press 4 Press First Printing Number enter the page number from which to start printing with the number keys and then press 5 After making all settings press OK You can set a value from 1 to 9999 for First Printing Page First Chapter No and First Printing Number To change the value you entered press Clear and then enter the new value 3 Advanced Copying 142 3 ...

Page 145: ...bes the machine s advanced copy functions Margin Adjustment Copies originals leaving a binding margin BZH122 1 Press Edit Stamp 2 Make sure that Margin Adj is selected If Margin Adj is not selected press Margin Adj Advanced Copier Functions 143 3 ...

Page 146: ...hes increments Margin on the back side of the page is valid when Duplex or Combine 2 Sides is selected You can change the settings for Margin Adjustment under Edit in User Tools For details about Edit see Edit If you set a binding margin that is too wide part of the image may not be copied When making copies in Combine mode the binding margin is added to the copies after the combination is finishe...

Page 147: ...margin of the original image BZH124 Erase Centre Border Erases both the center and edge margins of the original image BZH125 The relationship between the original orientation and the erased part is as follows Advanced Copier Functions 145 3 ...

Page 148: ...s setting under Edit in User Tools For details about Edit see Edit The width of the erased margin varies depending on the reproduction ratio p 207 Edit Erase Border same width Erases the edge margin of the original image 1 Press Edit Stamp 2 Press Erase 3 Press Erase Centre Border 4 Press Erase Border 5 Press Same Width 3 Advanced Copying 146 3 ...

Page 149: ...changes the width in increments of 10 mm 1 inch 7 Press OK twice To change the value you entered press and and then specify a new value Erase Border different width Erases the edge margins of the original image 1 Press Edit Stamp 2 Press Erase 3 Press Erase Centre Border 4 Press Erase Border 5 Press Different Width Advanced Copier Functions 147 3 ...

Page 150: ...he relevant key changes the width in increments of 10 mm 1 inch To specify another erase width repeat step 6 7 Press OK twice To change the value you entered press and and then specify a new value Erase Centre Erases the center margin of the original image 1 Press Edit Stamp 2 Press Erase 3 Press Erase Centre Border 4 Press Erase Centre 3 Advanced Copying 148 3 ...

Page 151: ...idth in increments of 10 mm 1 inch 6 Press OK twice To change the value you entered press and and then specify a new value Erase Centre Border same width Erases both the center and edge margins of the original image 1 Press Edit Stamp 2 Press Erase 3 Press Erase Centre Border 4 Press Erase Centre Border 5 Press Same Width Advanced Copier Functions 149 3 ...

Page 152: ...of 10 mm 1 inch 7 Press Border and then specify the erase width with and 8 Press OK twice To change the value you entered press and and then specify a new value Erase Centre Border different width Erases both the center and edge margins of the original image 1 Press Edit Stamp 2 Press Erase 3 Press Erase Centre Border 4 Press Erase Centre Border 5 Press Different Width 3 Advanced Copying 150 3 ...

Page 153: ... width in increments of 10 mm 1 inch To specify another erase width repeat step 6 7 Press OK twice To change the value you entered press and and then specify a new value Image Repeat The original image is copied repeatedly BZH131 The number of repeated images depends on the original size paper size and reproduction ratio For example see the following table Advanced Copier Functions 151 3 ...

Page 154: ... 2 11 or Original 51 2 81 2 Copy paper 81 2 11 2 repeats 100 8 repeats 50 32 repeats 25 BAT086S BAT087S BAT088S 1 Select the size of copy paper and the reproduction ratio 2 Press Edit Stamp 3 Press Edit Image 4 Press Image Repeat 5 Press OK You can change the settings for Image Repeat under Edit in User Tools For details about Edit see Edit Depending on the paper size ratio and orientation parts o...

Page 155: ...ace the original on the exposure glass to copy CFG014 1 2 3 1 Base point 2 Horizontal length 3 Vertical length p 207 Edit Double Copies One original image is copied twice on one sheet BZH133 You cannot use the bypass tray with this function The following original sizes cannot be detected properly on the exposure glass mainly Europe and Asia A5 11 17 81 2 11 mainly North America Advanced Copier Fun...

Page 156: ... and copy paper sizes when using a 100 ratio CHF027 orientation orientation 1 Press Edit Stamp 2 Press Edit Image 3 Press Double Copies 4 Press OK 5 Select the paper size You can change the settings for Double Copies under Edit in User Tools For details about Edit see Edit p 207 Edit Centring You can make copies with the image moved to the center of the copy paper 3 Advanced Copying 154 3 ...

Page 157: ...nal location Original size and orientation Exposure glass A3 B4 JIS A4 B5 JIS A5 81 2 13 ADF A3 B4 JIS A4 B5 JIS A5 11 17 81 2 11 81 2 13 mainly North America Original location Original size and orientation Exposure glass 11 17 81 2 14 81 2 11 51 2 81 2 ADF 11 17 81 2 14 81 2 11 51 2 81 2 10 14 71 4 101 2 A3 A4 1 Select the paper size Advanced Copier Functions 155 3 ...

Page 158: ... Press Centring 5 Press OK Though the original is set to a different orientation from the paper loaded the machine will not rotate the image by 90 degrees Rotate Copy Positive Negative Copies an image inverted BZH137 3 Advanced Copying 156 3 ...

Page 159: ...facing pages of a bound original onto two sheets You cannot use the Book 1 Sided function from the ADF The following table shows the paper sizes for Book 1 Sided when the reproduction ratio is 100 CHF028 There are two types of Series Copies Book 1 Sided You can make 1 sided copies from two facing pages of a bound original book Advanced Copier Functions 157 3 ...

Page 160: ...BZH039 2 Sided 1 Sided You can make 1 sided copies from 2 sided originals BZH040 1 Press Dup Combine Series 2 Press Series 3 Advanced Copying 158 3 ...

Page 161: ...de press the key after all originals have been scanned p 65 Originals and Copy Orientation Booklet Magazine Copies two or more originals in page order You cannot use the bypass tray with this function The following table shows the paper sizes for Book 2 Sided when the reproduction ratio is 100 CHF029 There are six types of Booklet Magazine 1 Sided Booklet Make copies in page order for a folded boo...

Page 162: ...sided originals to copies in page order for a folded booklet as shown BZH036 1 Open to left 2 Open to right 1 Sided Magazine Copies two or more originals to make copies in page order when they are folded and stacked BZH037 1 Open to left 3 Advanced Copying 160 3 ...

Page 163: ...ge order when they are folded and stacked BZH038 1 Open to left 2 Open to right Book 2 Sided Copies a two page spread original onto one sheet with one page per side BZH041 Front Back 2 Sided Copies each two page spread original as it is onto both sides of a sheet Advanced Copier Functions 161 3 ...

Page 164: ...booklet Fold a copy along the centerline and open BZH144 1 Open to left 2 Open to right How to fold and unfold copies to make a magazine Fold and stack copies to make a magazine and open BZH145 1 Open to left 2 Open to right 3 Advanced Copying 162 3 ...

Page 165: ...F using Batch mode press the key after all the originals have been scanned The default setting for the orientation of Booklet and Magazine is Open to Left You can change the default under Orientation Booklet Magazine in User Tools For details see Edit In the Booklet or Magazine mode the machine sets the reproduction ratio automatically to meet the paper size and copies the originals together onto ...

Page 166: ...inals and Copy Orientation p 207 Edit Covers You can use this function to create cover sheets by adding additional pages of different paper or copying existing pages onto different paper Before using this function select the trays for covers under Cover Sheet Tray in Tray Paper Settings For details see System Settings Network and System Settings Reference You cannot specify the bypass tray as the ...

Page 167: ...the first and last pages of an original onto paper that has been specified for covers or places a cover sheet before the first copy page and after the last copy page Copy BZK036 Blank BZK037 1 Press Cover Slip Sheet Advanced Copier Functions 165 3 ...

Page 168: ...e Edit If Blank mode is selected the cover will not be counted as a copy The settings made under Cover Sheet Tray in User Tools determine whether or not the front and back covers are duplex printed At Mode Selected Settings made in Cover Sheet Tray will take priority Full Time Settings made in Paper Type will take priority For details see System Settings Network and System Settings Reference p 207...

Page 169: ...ing this function select the tray for designation sheets under Slip Sheet Tray in User Tools For details see System Settings Network and System Settings Reference 1 Press Cover Slip Sheet 2 Press Designate Chapter 3 Select Designate Copy or Designate Blank Advanced Copier Functions 167 3 ...

Page 170: ...making all settings press OK twice To change the value you entered press the key you want to change and then enter a new value The designation sheets should be the same size and orientation as the main sheets If you select Designate Blank the specified pages will be excluded from the copy count When Duplex 1 Sided 2 Sided has been selected specified pages will always be copied on the front of copi...

Page 171: ...chapter number To select chapters 11 to 20 press 11 20 5 Enter the page location of the first page of the chapter with the number keys and then press the key Up to 20 locations can be specified 6 To specify another page location repeat steps 4 to 5 7 Select the main sheet tray that contains the paper to copy the originals 8 After making all settings press OK twice To change the value you entered p...

Page 172: ...nted surfaces This function is useful in copying onto OHP transparencies BZH156 If 1 Sided 2 Sided is set cancel the setting Before using this function select the tray for slip sheets under Slip Sheet Tray in Tray Paper Settings For details see System Settings Network and System Settings Reference When copying onto OHP transparencies Copy BZK038 Blank BZK039 3 Advanced Copying 170 3 ...

Page 173: ...s tray press the key and select OHP Transparency in Paper Type For details see Copying onto Special Paper from Tray 1 or Copying onto Special Paper from the Bypass Tray The slip sheets should be the same size and orientation as the copy paper or the OHP transparency If you do not copy onto slip sheets they are excluded from the number of copies counted p 39 Copying onto Special Paper from Tray 1 p...

Page 174: ...3 Advanced Copying 172 3 ...

Page 175: ...y Available Printing Available Transmission Unavailable Facsimile functions Storing method Fax List display Available Printing Available Transmission Available The data can be transferred by the facsimile feature For details see Sending Stored Documents Facsimile Reference Scanner functions Storing method Scanner List display Unavailable When documents are stored with the scanner feature you can c...

Page 176: ...ies made 4 Displays keys for the operation 5 Displays an icon that indicates the function used to store the document 6 Displays keys for switching the display between list and thumbnails The following icons appear in the list of the Document Server to indicate the function used to store a document Function Copier Facsimile Printer Icons Thumbnail screen In thumbnail view miniature images of the st...

Page 177: ...ection explains how to switch to the simplified display When you press the Simplified Display key the screen changes from the initial display to the simplified display Letters and keys are displayed at a larger size making operations easier CHB027 Simplified Document Server Screen CHF020 Document Server Display 175 4 ...

Page 178: ...stored documents select the documents you want to preview on the Document Server initial display and then press Preview The preview display denotes the screen that allows confirming contents of the scanned documents Preview Display CHF021 1 2 3 4 5 6 7 1 Exit Closes the preview display 2 Display File Displays the file name If you have selected two or more files for preview press Switch to switch b...

Page 179: ...n indicated by the arrow 7 Zoom Out Zoom In Scales the displayed page down or up When the preview is already selected from another function the preview screen function may become unusable The preview display is also not available when the paper size is larger than A3 If the image file is corrupt store it again Document Server Display 177 4 ...

Page 180: ...e accessed by other users After the operation be sure to press the Clear Modes key to cancel the document selection The user name registered to a stored document in the Document Server is to identify the document creator and type It is not to protect confidential documents from others When turning on the fax transmission or scanning by the scanner make sure that all other operations are ended File...

Page 181: ...ess the Clear Stop key To restart a paused scanning job press Continue in the confirmation display To delete saved images and cancel the job press Stop The original placed in the ADF will be ejected If a password is set the key icon appears on the left side of the file name After scanning a list of stored documents will be displayed If the list does not appear press Finish Scanning Data stored in ...

Page 182: ...ll be made at the closest available size Depending on the security setting Access Privileges may appear instead of User Name For details about specifying Access Privileges consult the administrator For details about how to enter text see Entering Text About This Machine Specifying a user name You can specify a user name for the stored file 1 Press Scan Original 2 Press User Name A list of user nam...

Page 183: ...ment name and then press OK You can enter up to 20 characters for a document name In the list however up to 16 characters are displayed as the document name If above limits are exceeded the list will display up to 15 characters for the document name Specifying a password You can specify a password for the stored document 1 Press Scan Original 2 Press Password Using the Document Server 181 4 ...

Page 184: ...4 For double check enter the password again and then press OK Changing the User Name of a Stored Document You can change the user name for a stored document 1 Select the document whose user name you want to change If a password is set enter it and then press OK 2 Press File Management 4 Document Server 182 4 ...

Page 185: ...ing Access Privileges consult the administrator For details about how to enter text see Entering Text About This Machine Changing the File Name of a Stored Document You can change the file name of a stored document 1 Select the document whose name you want to change If a password is set enter it and then press OK 2 Press File Management 3 Press Change File Name 4 Enter a new file name and then pre...

Page 186: ...nt to change If a password is set enter it and then press OK 2 Press File Management 3 Press Change Password 4 Enter a new password and then press OK 5 For double check enter the password again and then press OK 6 Press OK To cancel the selection press the selected highlighted key Depending on the security setting Access Privileges may appear instead of User Name For details about specifying Acces...

Page 187: ...ancel the selection press the selected highlighted key Pressing Exit restores the document selection screen Searching for Stored Documents Searches for stored documents by user name or file name You can rearrange the currently chronologically ordered documents in any desired order Searching by file name Searches for stored documents by file name Searching by user name Searches for stored documents...

Page 188: ...out This Machine Searching by file name Searches for stored documents by file name 1 Press File Name 2 Enter the document name to be searched and then press OK Document names that match completely from the starting character will be searched and displayed on the screen Pressing Display All displays all stored documents Searching by user name Searches for stored documents by user name 4 Document Se...

Page 189: ...haracter will be searched and displayed on the screen Pressing Display All displays all stored documents Printing Stored Documents Prints stored documents Web Image Monitor allows you to print documents stored in the Document Server from your computer 1 Select a document to be printed If a password is set enter it and then press OK 2 When printing two or more documents at a time repeat step 1 Up t...

Page 190: ...he left side of the screen For details about searching the target document see Searching for Stored Documents You can sort the documents by user name file name or creation date Press the item to be used for the sorting on the top of the list To cancel the selection press the selected highlighted key Some of the selected documents may not be printed due to the difference in the size or resolution W...

Page 191: ...ion see Sample print When printing two or more documents at a time you can print them as a single continuous document by specifying the order of their printing When printing two or more documents at a time the printing conditions set for the first document are applied to all the remaining documents When two or more documents are selected press to confirm the user name document name and printing or...

Page 192: ...s in progress You can change the number of sets during printing This function can be used only when the Sort function is selected in the printing conditions 1 Press the Clear Stop key 2 Press Change Quantity 3 Enter the number of sets anew with the number keys 4 Press the key 5 Press Continue Printing will be resumed 4 Document Server 190 4 ...

Page 193: ...is set enter it and then press OK 2 Press To Printing Screen 3 Enter the number of print copies with the number keys 4 Select Sort or Rotate Sort 5 Press the Sample Copy key Only one set will be printed 6 Press Continue Printing will be resumed To cancel the printing press Suspend The print screen will appear enabling to set another item Printing the first page In order to confirm the print result...

Page 194: ...d page alone of the document selected on the Select File screen 1 Select the document to be printed If a password is set enter it and then press OK 2 Press Print Specified Page 3 Press Specified Page 4 Specify the page to be printed with the number keys and then press 5 Press the Start key To change the value you entered press the key you want to change and then enter a new value 4 Document Server...

Page 195: ...rinting end page with the number keys and then press 6 Press the Start key To change the value you entered press the key you want to change and then enter a new value Deleting a Stored Document Deletes a stored document The Document Server can store up to 3000 documents As the number of stored documents reaches the limit storing of a new document becomes unavailable Thus you should delete unnecess...

Page 196: ... the target document from the document name print the first page alone of the document in order to confirm the print results To cancel the selection press the selected highlighted key Web Image Monitor allows you to delete a document stored in the Document Server from your computer For details about how to start Web Image Monitor see Displaying Stored Documents with Web Image Monitor p 194 Display...

Page 197: ... Web Image Monitor The file format converter is required if you want to download documents saved under the copy or printer function 1 Start a Web browser 2 Enter http IPv4 address IPv6 address or host name of this machine in the address bar When entering an IPv4 address do not begin segments with zeros For example If the address is 192 168 001 010 you must enter it as 192 168 1 10 to connect to th...

Page 198: ...t Stamp Margin Adj Stamp For details about how to store these settings see Registering Frequently Used Functions p 98 Registering Frequently Used Functions Changing the Default Functions of the Document Server s Initial Display You can configure the settings of the initial document print screen or the initial scan original screen The initial document print screen appears when To Printing Screen on...

Page 199: ...e the default functions displayed on the initial scan original screen press the Program key and then press Program p 102 Changing the Default Functions of the Copy s Initial Display Using the Document Server 197 4 ...

Page 200: ...4 Document Server 198 4 ...

Page 201: ...ting User Tools Any changes you make with User Tools remain in effect even if the main power switch or operation switch is turned off or the Energy Saver or Clear Modes key is pressed p 200 Quitting User Tools Changing Default Settings This section describes how to change the settings of User Tools If the Administrator Authentications Management is specified contact your administrator 1 Press the ...

Page 202: ...tial display press the User Tools Counter key Quitting User Tools This section describes how to quit the settings of User Tools 1 Press the User Tools Counter key CHB029 You can also quit User Tools by pressing Exit 5 Copier and Document Server Features 200 5 ...

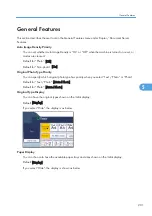
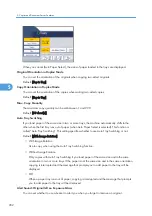
Page 203: ...al Photo Type Priority You can specify which original photo type has priority when you select Text Photo or Photo Default for Text Photo Printed Photo Default for Photo Printed Photo Original Type Display You can have the original types shown on the initial display Default Display If you select Hide the display is as below Paper Display You can choose to have the available paper trays and sizes sh...

Page 204: ...This function is called Auto Tray Switching This setting specifies whether to use Auto Tray Switching or not Default With Image Rotation With Image Rotation Use to copy when using the Auto Tray Switching function Without Image Rotation Only copies with Auto Tray Switching if you load paper of the same size and in the same orientation in two or more trays If the paper is not the same size and in th...

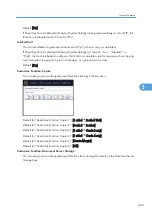
Page 205: ...ut of paper or a paper jam occurred Default On Customize Function Copier You can assign up to six frequently used functions to Copy Function keys Default for Customize Function Copier 1 1 sided 2 sided TtoT Default for Customize Function Copier 2 2 sided 2 sided Default for Customize Function Copier 3 1 sided Comb 2 orig Default for Customize Function Copier 4 1 sided Comb 4 orig Default for Custo...

Page 206: ...ed Comb 2 orig Default for Customize Function Document Server Storage 3 1 sided Comb 4 orig Default for Customize Function Document Server Storage 4 1 sided Comb 8 orig Default for Customize Function Document Server Storage 5 Create Margin Default for Customize Function Document Server Storage 6 Off 5 Copier and Document Server Features 204 5 ...

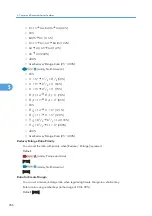
Page 207: ...istered reduce enlarge ratios When you select User Reduce Enlarge Ratio the ratio can be set from 25 to 400 using the number keys mainly Europe and Asia Default for F1 71 Default for F2 141 Default for F3 93 mainly North America Default for F1 73 Default for F2 155 Default for F3 93 Reproduction Ratio You can specify the enlargement and reduction ratios that appear if Reduce Enlarge is pressed on ...

Page 208: ...11 11 17 129 51 2 81 2 81 2 14 155 51 2 81 2 11 17 200 400 User Reduce Enlarge Ratio 25 400 Reduce Enlarge Ratio Priority You can set the ratio with priority when Reduce Enlarge is pressed Default mainly Europe and Asia 71 mainly North America 65 Ratio for Create Margin You can set a reduce enlarge ratio when registering Create Margin in a shortcut key Enter a ratio using number keys in the range ...

Page 209: ...nches An image of approximately 1 5 mm 0 06 inches will not be displayed as the width of the separation line when specifying solid or broken lines Front Margin Left Right Specify left and right margins on the front side of copies in Margin Adjustment mode Default mainly Europe and Asia Left 5 mm mainly North America Left 0 2 inch Back Margin Left Right Specify left and right margins on the back si...

Page 210: ...he margin is set to the same value of Back Margin Left Right Default mainly Europe and Asia Right 5 mm mainly North America Right 0 2 inch 1 Sided 2 Sided Auto Margin TtoB In 1 sided 2 sided Duplex mode you can specify the margins on the back side The value set for Back Margin Top Bottom is used Default mainly Europe and Asia T B 0 mm mainly North America T B 0 0 inch Erase Border Width Specify th...

Page 211: ...ia 10 mm mainly North America 0 4 inch Front Cover Copy in Combine You can make a combined copy on the front cover sheet when you select Front Cover mode BZK040 Do not Combine Combine Default Combine Copy Order in Combine You can set the copy order in Combine mode to From Left to Right or From Top to Bottom BZK041 Default From Left to Right Orientation Booklet Magazine Select the opening orientati...

Page 212: ...r Crop Marks CBA052 1 2 3 4 5 1 None 2 Solid 3 Broken A 4 Broken B 5 Crop Marks Default None Selecting solid or broken lines might produce a blank area of approximately 1 5 mm 0 06 inches in width along the separation line Double Copies Separation Line You can select a separation line using the Double Copies function from None Solid Broken A Broken B or Crop Marks CBA053 1 2 3 4 5 1 None 2 Solid 3...

Page 213: ...ation Line in Combine You can select a separation line using the Combine function from None Solid Broken A Broken B or Crop Marks CBA052 1 2 3 4 5 1 None 2 Solid 3 Broken A 4 Broken B 5 Crop Marks Default None Selecting solid or broken lines might produce a blank area of approximately 1 5 mm 0 06 inches in width along the separation line Edit 211 5 ...

Page 214: ...language of the message printed in Stamp mode English German French Italian Spanish Dutch Portuguese Polish Czech Swedish Finnish Hungarian Norwegian Danish Russian Japanese Simplified Chinese Traditional Chinese Hangul Catalan Turkish Default English Stamp Priority You can select the stamp type given priority when Preset Stamp is pressed Default COPY Stamp Format Specify how each of stamps is pri...

Page 215: ...nter Left T B 2 8 2 8 inches L R 0 1 5 7 inches Center T B 2 8 2 8 inches L R 2 8 2 8 inches Center Right T B 2 8 2 8 inches L R 0 1 5 7 inches Bottom Left T B 0 1 5 7 inches L R 0 1 5 7 inches Bottom Center T B 0 1 5 7 inches L R 2 8 2 8 inches Bottom Right T B 0 1 5 7 inches L R 0 1 5 7 inches Size You can set the size of the stamp Default 1 X Density You can set the pattern used to print the st...

Page 216: ...ainly Europe and Asia Top Left T B 4 144 mm L R 4 144 mm Top Centre T B 4 144 mm L R 72 72 mm Top Right T B 4 144 mm L R 4 144 mm Centre Left T B 72 72 mm L R 4 144 mm Centre T B 72 72 mm L R 72 72 mm Centre Right T B 72 72 mm L R 4 144 mm Bottom Left T B 4 144 mm L R 4 144 mm Bottom Centre T B 4 144 mm L R 72 72 mm Bottom Right T B 4 144 mm L R 4 144 mm mainly North America Top Left T B 0 1 5 7 i...

Page 217: ...p Format You can select the date format for Date Stamp mode Default mainly Europe and Asia DD MM YYYY mainly North America MM DD YYYY Font You can select the date stamp font Default Font 1 Size You can set the date stamp size Default Auto Superimpose You can have the date stamp printed in white when it overlaps black parts of the image Default Off Stamp Setting Specify how the date stamp is printe...

Page 218: ...nches Bottom Center T B 0 1 5 7 inches L R 2 8 2 8 inches Bottom Right T B 0 1 5 7 inches L R 0 1 5 7 inches Page to Stamp Sets whether to print the stamp on all pages or only the first page Default All Pages Page Numbering This section describes the user tools in the Page Numbering menu under Stamp Stamp Format You can select the page number format given priority when Page Numbering is pressed De...

Page 219: ... Stamp Position You can adjust the position of the stamp within the available ranges shown below mainly Europe and Asia Top Left T B 4 144 mm L R 4 144 mm Top Centre T B 4 144 mm L R 72 72 mm Top Right T B 4 144 mm L R 4 144 mm Bottom Left T B 4 144 mm L R 4 144 mm Bottom Centre T B 4 144 mm L R 72 72 mm Bottom Right T B 4 144 mm L R 4 144 mm mainly North America Top Left T B 0 1 5 7 inches L R 0 ...

Page 220: ...Page Numbering Initial Letter You can select the page numbering initial letter between P1 P2 P 1 P 2 and S1 S2 S 1 S 2 Default P1 P2 P 1 P 2 5 Copier and Document Server Features 218 5 ...

Page 221: ...sing copy paper of a different orientation The copy job will finish even if you have left the machine Off When paper of the required orientation runs out the machine stops copying and prompts you to supply copy paper After you have loaded paper the machine will continue copying Memory Full Auto Scan Restart When memory becomes full while scanning originals the machine can make copies of scanned or...

Page 222: ...Default for Staple Position 4 Staple Top 2 When the 1000 sheet finisher is installed Default for Staple Position 1 Staple Top 1 Default for Staple Position 2 Staple Bottom 1 Default for Staple Position 3 Staple Left 2 Default for Staple Position 4 Staple Top 2 When the booklet finisher is installed Default for Staple Position 1 Staple Top 1 Default for Staple Position 2 Staple Centre Default for S...

Page 223: ...with higher priority for Finishing Types on the Simplified Screen Default for Simplified Screen Finishing Types 1 Do not Display Default for Simplified Screen Finishing Types 2 Do not Display Default for Simplified Screen Finishing Types 3 Do not Display Input Output 221 5 ...

Page 224: ...ser Tools in the Administrator Tools menu under Copier Document Server Features Menu Protect You can prevent unauthenticated users from changing the user tools settings For details consult the administrator 5 Copier and Document Server Features 222 5 ...

Page 225: ...ok 1 Sided Duplex Combine Front Back 2 Sided Booklet Magazine Double Copies Image Repeat Margin Adjustment Positive Negative Centring Erase Centre Erase Border Stamps 1 Covers Designate Slip Sheet Sort Rotate Sort Stack Staple Punch Document Server Mixed Sizes Standard Size Originals Custom Size Originals Original Orientation Readable Original Orientation Unreadable Auto Image Density Manual Image...

Page 226: ...ground Numbering with Slip Sheet 6 Top 1 Slant Bottom Slant Bottom 1 Left2 Top 2 of Staple with Magazine 7 Top 2 of Staple with Left 2 Left 3 Left 4 of Punch Staple Centre with Punch or Bottom 1 Left 2 of Staple with Top 2 Top 3 Top 4 of Punch 6 Appendix 224 6 ...

Page 227: ...cript and Reader are either registered trademarks or trademarks of Adobe Systems Incorporated in the United States and or other countries UNIX is a registered trademark in the United States and other countries licensed exclusively through X Open Company Limited Other product names used herein are for identification purposes only and might be trademarks of their respective companies We disclaim any...

Page 228: ...6 Appendix 226 6 ...

Page 229: ... Changing the password 184 Chapters 168 Checking the contents of jobs 94 Checking the details of a stored document 184 Checking the job history 97 Combine 66 Combined auto and manual image density 106 Contrast 107 108 Copier functions 143 173 Copy on Designating Page in Combine 210 Copy Order in Combine 209 Copy Orientation in Duplex Mode 202 Copying 33 Copying from the bypass tray 44 Copying from...

Page 230: ...rgin Top Bottom 207 Function compatibility 223 G General Features 201 Generation Copy 110 H Holding jobs 95 How to read this manual 9 I Image density 105 Image position of Combine 66 Image Repeat 151 Image Repeat Separation Line 210 Important 8 Initial display 14 102 174 196 Input Output 219 Interrupt Copy 34 Interrupting a print job 190 Invert 156 Item 9 J Job End Call 203 Job List screen 93 Job ...

Page 231: ... 187 Printing the first page 191 Program 98 102 Program Delete Stamp 214 Punch 13 74 88 Punch hole positions 88 Punch Type 220 Q Quitting User Tools 200 R Ratio for Create Margin 206 Readable orientation 22 Recalling a stored program 100 Recalling the registered custom size 49 Recommended originals 17 Reduce Enlarge 115 Reduce Enlarge Ratio Priority 206 Reducing originals 55 Registering a custom s...

Page 232: ... Stamp on Designating Slip Sheet 217 Stamp position 125 127 128 129 132 135 136 139 Stamp Position 217 Stamp Priority 212 Stamp Setting 215 Stamp size 127 Staple 13 74 81 Staple Center 13 Staple Position 220 Stapling position 81 Storing data 178 Storing data in the Document Server 13 91 Superimpose 215 217 Switch to Batch 219 Symbols 9 T Text 110 Text Photo 110 Thick paper 39 50 Thin paper 39 50 T...

Page 233: ...MEMO 231 ...

Page 234: ...MEMO 232 EN US D120 7512 ...

Page 235: ......

Page 236: ...EN US D120 7512 2011 ...

Reviews: