background image

125

Chapter 2 / Section 1  Downloading Images to a Computer (For Windows)

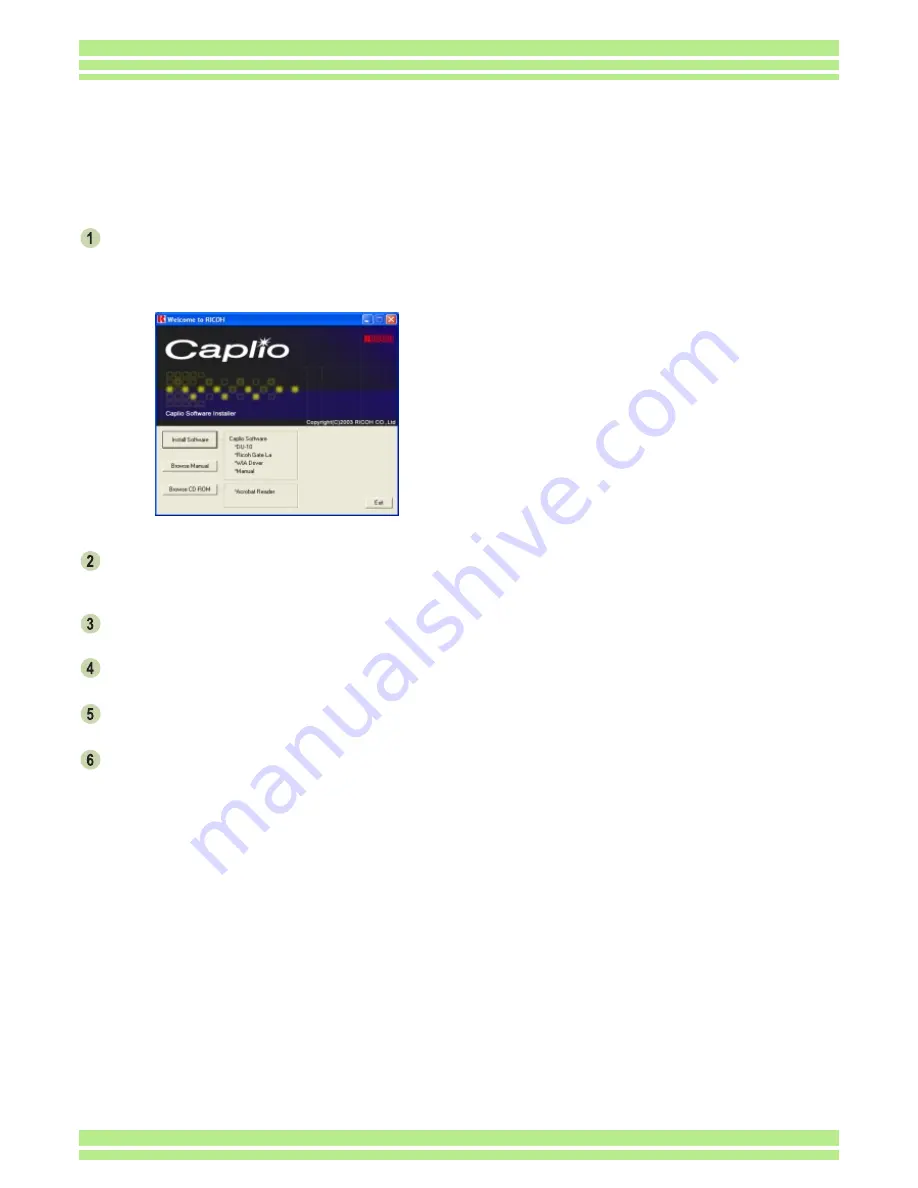
Power on the computer, and insert the 
included Caplio CD-ROM into the CD-ROM 
drive.

The following screen appears automatically.

Click [Browse CD-ROM].

The files on the CD-ROM are listed.

Double-click the [Acrobat] folder.

Double-click the [English] folder.

Double-click [ar500enu] (ar500enu.exe).

Install Acrobat Reader by following the 
messages displayed.

Installing Acrobat Reader

Acrobat Reader is software used to browse the contents of a manual in a PDF file.
If you are using Windows, you can install Acrobat Reader in your computer.

In Windows XP or 2000, only a user with administrative privileges can install the software.

Summary of Contents for Aficio 120

Page 1: ...r sold separately The explanations provied here assume that the AC Adaptor is begin used Please do not connect your camera to the computer before installing the software for downloading If you happened to connect your camera to computer resulting in the Add New Hardware Wizard screen appearing simply click Cancel and after disconnecting your camera install the software on your computer Chapter 2 P...

Page 2: ...DirectX folder under the CD ROM drive using Internet Explorer 2 If using Windows98 98SE Me or Windows2000 double click DX81xxx exe or Win2000 respectively Software and OS Applicability Table The software that can be used differs according to the OS in use as indicated in the table below Application Name Used For RICOH Gate La for Windows Downloading images WIA driver Downloading images For Windows...

Page 3: ...eater 800 X 600 or greater recommended Display colors 256 colors or greater 65000 or greater recommended CD ROM drive A CD ROM drive compatible with the above mentioned computer body USB port A USB port compatible with the above mentioned computer body System Requirements The following environments are necessary for using the provided software Please check your computer or the computer s user manu...

Page 4: ...to the CD ROM drive of your computer and the screen shown on the right appears Å The screen shown here is from Windows XP For all versions of except for Windows XP p 121 Windows XP p 123 Install the software Install Acrobat Reader if necessary Connect the camera to your computer p 126 p 127 Download images to the computer To uninstall the software see p 122 or p 124 for Windows XP You can browse t...

Page 5: ...ard screen appears Click Next After a few moments the Choose Destination Location screen appears Confirm where you want to install and then click Next After a few moments the Select Program Folder screen appears Confirm the program folder and then click the Next button Installation begins and after a while the following screen appears Click the Finish button Installation is complete Installation I...

Page 6: ...rol Panel The control panel screen appears Double click the Add Remove Programs icon Select Caplio Software and then click Change Remove Select the language to use and then click the OK button A message appears to confirm whether you want to remove the program click Yes The uninstallation process begins and a message appears when it is finished click OK A message may appear prompting you to restar...

Page 7: ...creen appears Confirm where you want to install and then click Next After a few moments the Select Components screen appears Confirm the software you want to install and then click Next Thereafter if you continue the operation by following the messages the Finish screen of the InstallShield Wizard will appear If a message appears asking you whether you want to restart your computer select Yes rest...

Page 8: ...ck the Add Remove Programs icon Select Caplio Software and then click Change Remove Select the language to use and then click the OK button A message appears to confirm whether you want to remove the program click OK The uninstallation process begins and a message appears when it is finished Click Finish If a message appears asking you whether you want to restart your computer select Yes restart m...

Page 9: ... are listed Double click the Acrobat folder Double click the English folder Double click ar500enu ar500enu exe Install Acrobat Reader by following the messages displayed Installing Acrobat Reader Acrobat Reader is software used to browse the contents of a manual in a PDF file If you are using Windows you can install Acrobat Reader in your computer In Windows XP or 2000 only a user with administrat...

Page 10: ...vanced Select Next Select Search for the best driver in these locations Include this location in the search and then press the Browse button Select the folder where the Caplio Software is installed that has the WIA driver For example C Program Files Caplio Software WIA driver and then select Next The WIA Driver is installed Connecting the Camera to a Computer After installing the software on your ...

Page 11: ...tically Images are downloaded to your computer from the following memory sources When no memory card is loaded Downloads from internal memory Downloads from SD Memory Card When an SD Memory Card is loaded For how to change files names when recording see p 111 Before closing RICOH Gate La if you turn ther camera power off or unplug the USB cable the RICOH Gate La window is minimized and displayed a...

Page 12: ...nd after saving See p 129 Background illustration settings Changes the background design in the RICOH Gate La window see p 130 About Displays the version of RICOH Gate La Exit Closes RICOH Gate La 2 Save Button Click this and the images are downloaded from your camera 3 Application Button The application registered in Optional Settings is launched DU 10 is registered initially 4 Minimize Button Mi...

Page 13: ...ates a new folder assigning the date it was shot as the folder name and saves images shot on the same day in the same folder For each time saved Creates a new folder for each time images are saved and saves the images shot at the same time in the same folder If you save several times in one day they are saved in separate folders each time Each day shot The same image will not be saved You can spec...

Page 14: ...e types of patterns If you select Background illustration setting from the menu displayed by the MENU button in the RICOH Gate La window the Background illustration settings dialog box appears 1 Background illustration pattern Select the pattern you wish to use from the three available 2 Preview The pattern selected in Background illustration pattern appears and you can configure it ...

Page 15: ...at connects to a computer and can read the contents of cards like the SD Memory Card In addition to the PC Card type there are Card Readers compatible with various types of cards such as SD Memory Cards into which you can directly insert an SD Memory Card Downloading images via USB connection between computer and camera was explained previously but it is possible to download images from SD Memory ...

Page 16: ...ogether as images When downloading images from your camera it is recommended you safeguard the power supply by using the AC Adaptor sold separately The steps here are explained on the premise that the AC Adaptor is used Please do not connect your camera to the computer before installing the software for downloading Section 2 Downloading Images to a Computer For Macintosh ...

Page 17: ... you are using Mac OS X 10 2 to 10 2 1 a photo can be transferred directly by using the Read button of iPhoto The Caplio cannot be mounted directly by using the Read button You cannot display movie files in iPhoto Please use QuickTime instead Software and OS Applicability Table The software that can be used differs according to the OS in use as indicated in the table below Application Name Used Fo...

Page 18: ...r greater 800 X 600 or greater recommended Display Colors 256 colors or greater 32 000 or greater recommended CD ROM Drive A CD ROM drive compatible with the above mentioned Macintosh machine USB Port A USB Port compatible with the above mentioned Macintosh machine When dealing with movies and other large files a larger memory environment is recommended For Mac OS 8 6 to 9 2 2 use a larger memory ...

Page 19: ...e Caplio CD ROM included with the camera Mac OS 8 6 to 9 2 2 Mac OS X 10 1 2 to 10 2 1 Install the software Connect the camera to your computer Download images to the computer p 139 p 140 Mac OS 8 6 to 9 2 2 p 136 Mac OS X 10 1 2 to 10 2 1 p 137 Insert the included CD ROM into the CD ROM drive of your computer and the window or icon shown on the left appears To uninstall the software see p 138 ...

Page 20: ...r Turn on your Macintosh Insert the attached CD ROM in the CD ROM drive The CD ROM icon is displayed on the desktop Double click the CD ROM icon and open the MacOS9 folder The Caplio Installer icon appears Double click the Installer Caplio Installer icon The Installer starts up and the Start screen appears Click Caplio Software Click the OK button The Installation screen appears Click Install Clic...

Page 21: ...pears prompting you for the administrator s password Click the key icon A verification window appears Enter the administrator s name and password and then click OK Click Continue The Select a Destination screen appears Click the destination volume you want then click Continue Click Install After the installation has finishes a message appears to confirm whether it is necessary to restart your Maci...

Page 22: ...unter Prefs System Folder Preferences Caplio USB Driver System Folder Extensions Uninstalling the Software For Mac OS X 10 1 2 to 10 2 1 When you want to remove the software follow the steps below Start Caplio Mounter in Application folder Select Uninstall in File menu The software is uninstalled Or drag and drop the installation files into the Trash Please remove the following files from their re...

Page 23: ...nd then connect the USB cable to its USB terminal Your camera turns on Connecting the Camera to a Computer After installing the software on your computer connect your camera to it Disconnecting your camera from computer 1 Turn your camera off by pressing the power button 2 Unplug the USB cable When you are downloading images from your camera the AC Adaptor sold separately is recommended ...

Page 24: ...COH Gate La see p 141 For Mac OS X 10 1 2 to 10 2 1 Download using the Mounter see p 142 Downloading Pictures to Your Computer After you have connected your camera to the computer images downloaded automatically Images are downloaded to your computer from the following memory sources When no memory card is loaded Downloads from internal memory Downloads from SD Memory Card When an SD Memory Card i...

Page 25: ...computer using the USB cable Your camera turns on When an SD Memory Card is not loaded the Caplio icon is displayed and you can view the image files stored in internal memory When an SD Memory Card is loaded the Caplio SD icon is displayed and you can view the image files stored on the SD Memory Card loaded Double click the displayed icon It can be handled in the same way as a normal drive If you ...

Page 26: ...d in internal memory When an SD Memory Card is loaded the Caplio SD icon is displayed and you can view the image files stored on the SD Memory Card loaded Double click the displayed icon It can be handled in the same way as a normal drive If you double click the icon a folder called DCIM is displayed and a folder called 100RICOH within that folder is displayed The image files you shot are inside t...

Page 27: ...g See p 144 Background illustration If you select this a sub menu will appear allowing you to change the background design of the RICOH Gate La window Sub menu Figure 4 Save Button Click this and the images download from your camera 5 Application Button The application registered in Optional Settings is launched 6 Indicator The indicator lights if the camera is connected via USB cable How to Use R...

Page 28: ...how to create a folder Do not Create Your downloaded images will all be saved in the folder specified in item 2 For each date photographs Creates a new folder assigning the date it was shot as the folder name and saves images shot on the same day in the same folder For example if shot on May 1 2002 20020501 folder Date Transferred Number Transferred Creates a new folder for each time images are sa...

Page 29: ...isplaying Thumbnail Images How to Use DU 10 DU 10 enables you to view downloaded images at a glance as well as edit rotate and resave images This section explains how to use DU 10 DU 10 can only be used in Windows ...

Page 30: ... or click the Close button in the upper right corner of the screen Starting and Exiting DU 10 There are two methods of starting DU 10 Auto Start from RICOH Gate La In the RICOH Gate La option settings if the Application Software is set to DU 10 and if After saving launch Application software is checked DU 10 will start automatically after image files have downloaded from your camera with RICOH Gat...

Page 31: ... used are displayed so you can use those functions with just one simple click 3 The Thumbnail Display Area The reduced images are displayed at one glance 4 Folder Display Area The folders inside My Computer are displayed in a hierarchy The images inside folders selected here appear in the Thumbnail Display Area 5 Thumbnail Image 6 File Name 7 Sound Setting Y N Display 8 Memo Setting Y N Display Me...

Page 32: ...oing from small to large the opposite is descending order For the alphabet a b c is ascending order and z y x is descending Select which order to use 1 2 or 3 and choose either ascending or descending order Switching the Ordering of Images Displayed thumbnail images are ordered according to date descending order You can change the ordering method to by file type or by name You can also choose whet...

Page 33: ...ages How to Use DU 10 To change the display size use either the tool bar or Display size from the View menu You can change the display size to one of five sizes available 1 Extra large 2 Large 3 Medium 4 Medium 5 Small Changing the Display Size memo ...

Page 34: ...n slide show from the menu bar Place the pointer of the mouse on one of the images you selected right click and choose slide show from the menu Menu Shortcut menu displayed with right click The slide show dialog box is displayed so make the necessary settings Click the Run button The slide show begins TRunning a slide show Type of slide show Key Action AUTO is selected in step 3 ESC Key Stops the ...

Page 35: ...log box 1 Operating method Select either Auto slide show the slides are played automatically in order or Manual switch frames by clicking the mouse button or pressing the Enter key 2 Display interval Specify how long in seconds to display each image when using Auto slide show 3 Background color Choose a background color for your images Click the Choose Color button and choose a color from the dial...

Page 36: ...n Information Dialog Box To display image information follow one of the steps below Using the File Menu Click the image in the Thumbnail Display Area for which you want to see information Select Properties from the File menu Using the Shortcut Menu Right click on the image in the Thumbnail Display Area The menu appears Select Properties from the menu Viewing Image Information ...

Page 37: ... steps below Double click the image you want to display from the thumbnail selection Click the image you want to display from the thumbnail display area then select Display Playback from the Image menu Saving under a New File Name When you want to create a duplicate or after rotating an image and changing its orientation if you want to make it into a different file you can save it and attach a new...

Reviews: