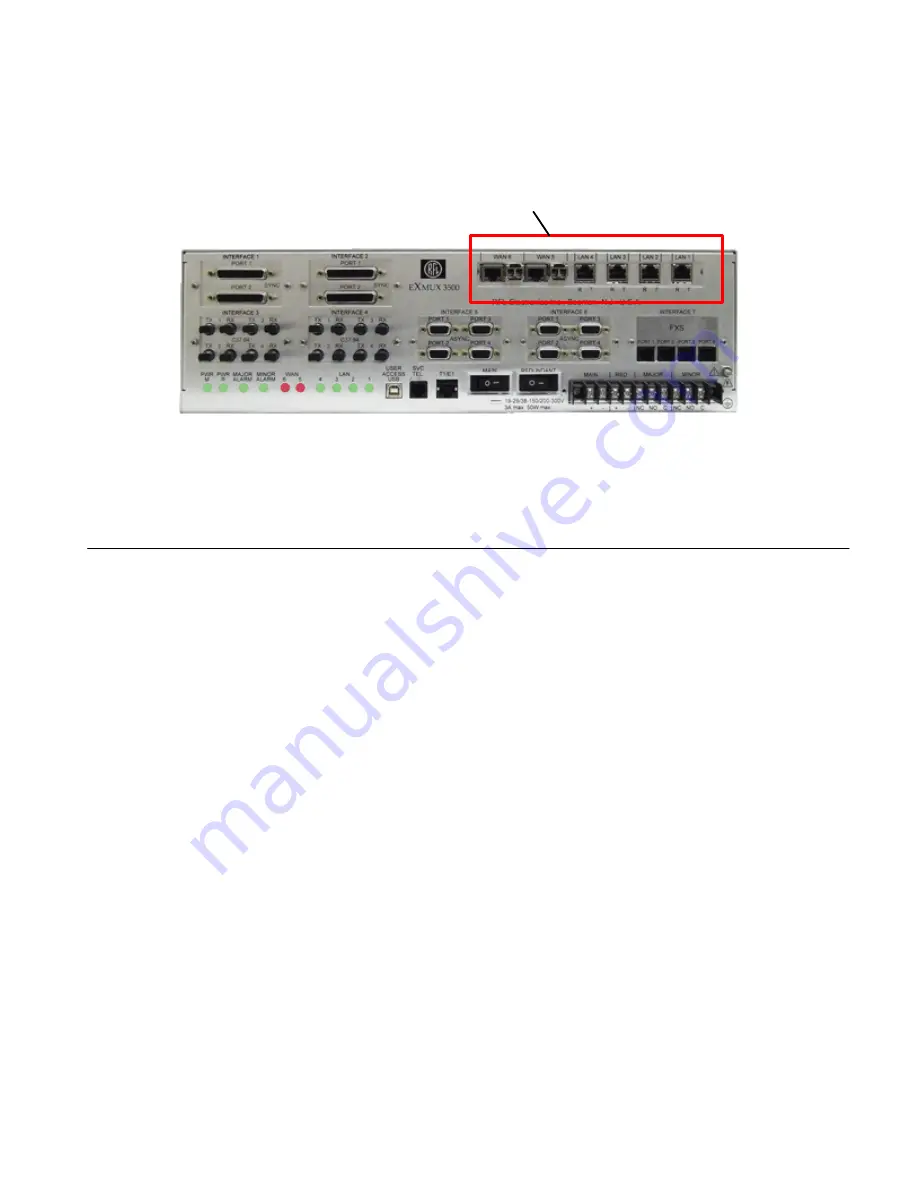
Disconnect the USB cable from the front or rear of the eXmux and connect an Ethernet cable from
your PC/laptop to any of the LAN/WAN ports on the Ethernet Switch. The Ethernet Switch is located
on the rear of the eXmux as shown below.
Location of Ethernet Switch
Rear view of eXmux
The Visual Network Management Software (VNMS) can now be activated on your computer using the
Activation Key Code supplied by RFL.
5. Entering the Activation Key Code and Starting VNMS
The following section describes how to enter the Activation Key Code supplied by RFL at the time of
purchase. The Key Code is required to activate the eXmux 3500 Visual Network Management
Software (VNMS).
Before entering the Key Code note the following:
•
In a situation where both the eXmux and PC are connected to the same network configuring
for “Static IP” is not required as the computer will get IP address information from the
DHCP server. If this is not the case, your computer
MUST
be configured for ‘Static IP.’
Following are the steps required to configure your computer for “Static IP,” these steps are
typical for a Windows XP operating system but may vary slightly depending on your
computers configuration.
1. From the ‘Start’ menu select ‘Control Panel’ > ‘Network Connection.’
2. Right click on the ‘Local Area Network Connection’ and select ‘Properties’ from the
pull-down menu.
E
X
MUX 3500 Quick Start
RFL Electronics Inc.
May 29, 2013
16
973.334.3100
Because RFL™ and Hubbell® have a policy of continuous product improvement,
we reserve the right to change designs and specifications without notice.


