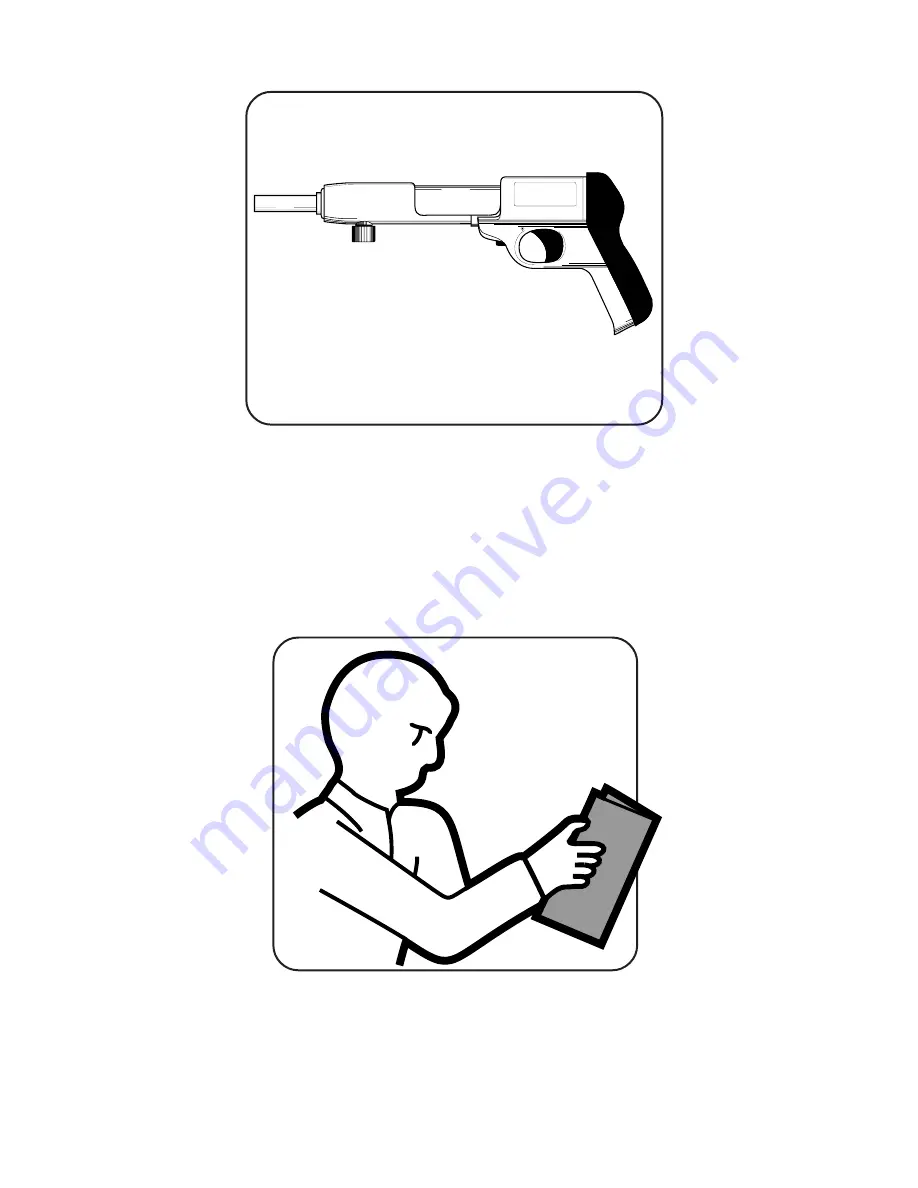
background image

Important :

Read this manual and all labels carefully before operating your powder actuated tool.
This manual should always accompany the tool and be transferred with it upon change
of ownership.

REMINGTON

®

Operating

Instructions

Model 482
Powder Actuated
Fastening Tool

REMINGTON

Summary of Contents for 482

Page 1: ...bels carefully before operating your powder actuated tool This manual should always accompany the tool and be transferred with it upon change of ownership REMINGTON Operating Instructions Model 482 Powder Actuated Fastening Tool REMINGTON ...

Page 2: ...Warranty Back Cover Not provided with tool REMINGTON Power Fastener Barrel Assembly Trigger Maximum 2 1 2 Model 482 Power Load Muzzle Spall Shield Recommended Approved Goggles REMINGTON Model 482 Powder Actuated Fastening Tools The Remington Model 482 Powder Actuated Fastening Tool is designed for use with Remington 22 caliber Type A crimped loads and Remington Power Fasten ers Remington Power Fas...

Page 3: ... require that the operator of this tool on a job site be thoroughly trained and certified for competencepriortooperatingthistool Forcertificationprocedures call1 800 626 2237 U S A or 1 905 826 8010 Canada BEFORE USING DEFECTIVE 3 Operators and bystanders must ALWAYS wear goggles and hearing protection which meet or exceed the accepted standards for adequate protection in your country In the U S r...

Page 4: ...tes 5 ALWAYS make sure the work area is clean from loose material and debris HANDLING THE TOOL 1 NEVER place your hand over the muzzle Accidental discharge can cause serious injury 2 NEVER place your finger on the trigger until the tool s muzzle is against the work surface PISTOLETS DE SCELLEMENT EN USAGE ATTENTION ...

Page 5: ... levels in separate containers 4 NEVER carry or pass a loaded powder actuated tool NEVER point a powder actuated tool at anyone 6 ALWAYS take precaution to maintain your balance while operating a powder actuated tool 5 If the tool is dropped inspect for damage and repair it before continuing to work NEVER use a damaged tool POWDER LOADS POWD LOAD ...

Page 6: ...mer to test drive the particular power fastener to be used into the material If the point penetrates easily the material is too soft If the point becomes blunt the material is too hard If the material fractures cracks or shatters the material is too brittle Test fastenings can be made if the material shows a clear fastener impression and the fastener point is not blunted ALWAYS start with the lowe...

Page 7: ...ete or steel When in doubt such as when base material is concealed conduct a Center Punch Test See page 6 Check continually to avoid fastening into unsuitable material especially in older buildings 482 35 CAST IRON GLASS 2 NEVER attempt to drive power fasteners into very hard or brittle materials including but not limited to cast iron glass tile stone brick or hardened steel Materials of this type...

Page 8: ...ers into steel base material less then 3 16 thick within 2 of a weld within 1 2 of the edge or within 1 of another power fastener 8 When fastening into masonry walls always drive into horizontal mortar joints never into vertical mortar joints BE CAREFUL A poorly laid joint may permit too much penetration and or unsatisfactory holding power OPERATING THE TOOL 1 ALWAYS hold tool perpendicular to wor...

Page 9: ...e Againpressthetoolfirmlyagainsttheworksurface and pull the trigger If the tool still fails to fire hold the tool firmly against the work surface for another 30 seconds before unloading and carefully discarding the misfired power load into water or oil 1 NEVER leave unfired power loads on floors or work surfaces POWER LOADS POWER LOADS AND FASTENERS 482 47 482 48 3 ALWAYS use the spall shield when...

Page 10: ...ease until a proper fastening is made see page 13 Selecting Fasteners and Loads Start 1 GRAY 3 GREEN 4 YELLOW 2 BROWN 482 31 Safety Precautions 3 NEVER use power loads in firearms 4 NEVER carry fasteners or other hard objects in the same pocket or container with power loads 5 A color blind person must take extra precautions to prevent the chance of mixing the power loads of various levels 482 58 Y...

Page 11: ...s fasteners Remington Power Fasteners are manufactured from special steel and heat treated to produce a very hard yet ductile fastener 8 NEVER pry a power load out of the tool Prying can discharge the load causing serious injury see Troubleshooting Guide page 16 1 2 UNLOAD 1 2 LOAD 9 ALWAYS insert the power fastener first then the power load If work is interrupted for any reason ALWAYS remove the ...

Page 12: ...ER have the power fastener point protrude through the concrete NOTE Concrete needs to cure for 28 days before maximum fastening holding power will be achieved WHY A POWER FASTENER HOLDS IN STEEL Holding power in steel depends on the elasticity of the steel The steel pushes back on the shank of the power fastener Drop a marble into water the water parts the marble continues down thewaterclosesback ...

Page 13: ...your tool By avoiding overdrive you can extend the life of your tool considerably and avoid costly repairs NOTE NEVER fire the tool without a power fastener This can damage the tool and or cause possible injury to the operator IMPORTANT DO NOT use power fasteners longer than 2 1 2 without the use of the accessory muzzle cap part number 075961 Piston Extended Out of Muzzle POWER LOADS Always start ...

Page 14: ...l forward rapidly until it stops This sets piston into firing position and opens the chamber 2 Insert power fastener into muzzle of tool head end first Push the fastener until point is even with end of tool ALWAYS load the fastener first then the power load 3 Select the proper Remington Power Load and insert into the chamber until it stops see Application Chart on page 23 4 Push barrel into housin...

Page 15: ...ainst the work surface for 30 seconds Release the trigger and remove pressure on the tool while holding the muzzleagainsttheworksurface Againpressthetoolfirmlyagainsttheworksurface and pull the trigger If the tool still fails to fire hold the tool firmly against the work surface for another 30 seconds before unloading and carefully discarding the misfired power load into water or oil 7 After faste...

Page 16: ...i culties continue take tool to your distributor for repair Replacement of ejector is re quired Replace or take tool to your distributor for repair Barrel must be opened fully to the full extended position to properly position piston Remove piston Replace pis ton ring Replace piston POSSIBLE CAUSE Piston not properly as sembled in relation to tang Broken piston Excessive power Overdriving of power...

Page 17: ...ternational s Parts Department at 1 800 972 7879 for referral information In Canada call 1 905 826 8010 When calling DESA International have ready model and serial numbers of your tool replacement part number Certified For Service Parts Dealers BALTIMORE ELECTRIC 1348 Dixwell Avenue Hamden CT 06514 0322 1 800 397 7553 203 248 7553 Parts Department ALL TOOL FASTENER 7830 N W 72nd Avenue Miami FL 33...

Page 18: ...56209 Spring 1 10 3 075144 Trigger 1 11 054854 Recoil Pad 1 12 054857 Hex Head Screw 1 4 20 x 1 3 8 1 13 054856 Hex Head Screw 1 4 20 x 11 16 1 14 056217 Firing Pin Spring 1 15 075370 Firing Pin 1 16 WLI 4C Internal Tooth Lockwasher 1 17 056218 Sear Spring 1 18 095153 Sear 1 19 054859 Cup Point Set Screw 1 4 20 x 7 16 1 20 055977 Tang 1 21 055448 Compression Spring 1 22 056212 Tang Cap 1 23 102620...

Page 19: ...ap 5 from barrel 6 by unscrewing counterclockwise c Insert a rod or screwdriver into bar rel chamber 6 and push piston 7 and buffer 8 out 3 Replace barrel in receiver align barrel with ejector 16 and push breech 17 to the rear Remove set screw 18 from breech Turn and align firing pin sear 19 with sear access hole Re move sear and sear spring 20 from breech Slide barrel and breech from receiver Too...

Page 20: ...ining Slot 5 6 8 16 Retaining Slot 21 17 Ejector Slot 4 17 22 18 19 20 482 90 6 4 With barrel 6 touching breech insert tang 3 and tang spring 2 into hole in receiver making sure tang drops into slot in barrel Screw on tang cap 1 completely Be sure tang cap is always kept tight to ensure proper operation of tang and align sear recess in breech with sear access hole Insert sear spring 20 and sear 19...

Page 21: ...ed buffer 8 from the piston Inspect the piston and muzzle cap for damage TO REASSEMBLE 1 Push new piston 7 all the way into the barrel 6 2 Place new buffer 8 small end first in new muzzle cap 5 and screw muzzle cap into barrel Barrel Assembly 4 3 2 1 2 Remove muzzle cap 5 from barrel 6 by unscrewing counterclockwise 482 93 5 6 7 6 482 88 3 Insert a rod or screwdriver into barrel chamber 6 and push...

Page 22: ...oncrete Cement block Steel Green Green Yellow 1 1 4 1 1 4 1 Power load listings are recommendations only If you are in doubt try a test fastening using the next lightest power load IMPORTANT This tool is designed to use 22 caliber neck down crimped loads power levels 1 gray through 4 yellow Green Green Yellow 2 1 2 2 1 2 2 Concrete Cement block Steel 3 16 to 3 8 thick Concrete Cement block Steel 3...

Page 23: ...s wear approved goggles and ear protection 482 90 Use power fastener with penetration control disc part number 015549 22 CALIBER Type A Crimp Loads for powder actuated tools Load Color Code Stock Level Load Case Number Number Strength Body Head A22C1 1 light brass Gray A22C2 2 medium brass Brown A22C3 3 heavy brass Green A22C4 4 extra heavy brass Yellow ...

Page 24: ...and limited warranty is the only warranty on this product and to the full extent permitted by law there are no other warranties express or implied including warranties of merchantability and or fitness for a particular purpose which extend beyond the terms of this express and limited warranty To the full extent permitted by law the liability of DESA for personal injury property damage or any other...

Reviews: