Rekam Deja View F105 User Manual Download Page 12

22

23

2. iNSTaLLiNG & RePLaCiNG The BaTTeRy

Place the remote control face down, press down on the ridged area 

of the battery cover and pull towards you to remove the tray. Place 

one CR2025 lithium button‑cell battery on the tray with the positive “+” 

side facing you. Reinsert the tray.


3. GeTTiNG STaRTeD

 3.1  Put the digital photo frame with installing bracket on a flat posi‑

tion stability, then plug one end of the AC adapter into a standard 

100—240V AC electrical outlet and the other end into the DC IN 

slot on the frame.

Note:  

The bracket installing and standing method refer to «Stand In‑

struction».

 3.2  Remove the protective film covering on the LCD.

 3.3 Remove the plastic battery  insulator from the battery compart‑

ment and make sure the remote control has a battery inside. Please 

refer to “Installing & Replacing Battery” if you need a new battery.

 3.4  Press  the

 Power 

button on the Remote Control or the power key 

on the unit 

12. 

OK – 

Press to confirm. Play/pause: In the playing mode, press this 

button, it will pause; repress this button, it will play again.

13. 

ZOOM – 

In the pause state of single picture, press ZOOM to mag‑

nify picture display size.

14.  / 15. 

 VOL +/- –

 Turn up/down the volume.

 16.

  ROTaTe – 

In the pause state of single picture, press this button to 

revolve the picture 90°in clockwise direction each time.

 17. 

 –

 Move back to previous music or video file.

 18. 

 –

 Move forward to next music or video file.
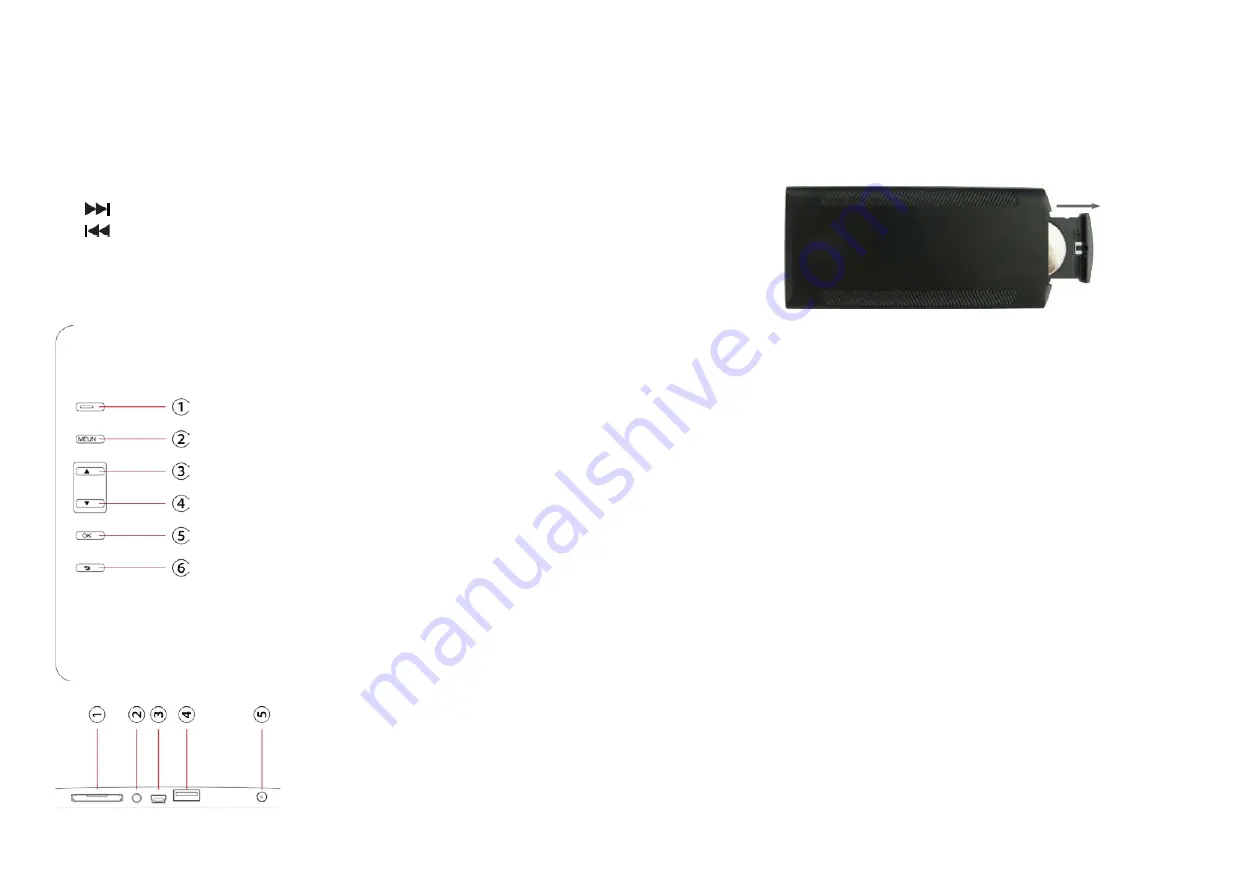
1.2 BaCK OF FRaMe


1. Power on/off

2. Menu

3. Next

4. Previous

5. OK

6. Return


1.SD/MMC/MS/SDHC CARD

2. Earphone jack

3. Mini USB

4. USB 2.0

5. DC IN

Summary of Contents for Deja View F105

Page 1: ...1 Deja View F105...

Page 2: ...2 3 1 JPEG 2 MP3 WMA 3 MPEG1 MPEG2 MPEG4 Xvid AVI M JPEG H 264 4 SD MMC SDHC MS 5 USB USB 2 0 HOST Mini USB 6 7 8 9 10 11 12 2x2 13 10 14 15 1 9 7 2 3 4 5 6 USB USB...

Page 3: ...4 5 1 1 1 1 POWER 2 BGM 3 MUTE 4 MENU 5 6 RETURN 7 8 9 10 SETUP 11 1 5 1 1 5 1 2 6 2 7 3 7 4 8 4 1 USB 8 4 2 9 4 3 10 4 4 11 5 12 6 13 7 14 8 14 9 15 10 16 1 2 3 6 8 11 13 16 5 12 9 15 18 4 7 10 14 17...

Page 4: ...CR2025 3 3 1 110 240 DC IN 8 3 2 3 3 3 4 Power 12 OK 13 ZOOM ZOOM 14 15 VOL 16 ROTATE 90 17 18 1 2 1 2 3 4 5 6 1 Power 2 Menu 3 4 5 OK 6 Return 1 2 3 4 5 1 SD MMC MS SDHC CARD 2 3 Mini USB 4 USB 2 0 5...

Page 5: ...8 9 2 MENU RETURN 3 2 3 4 2 OK Return 4 1 1 3 5 USB RETURN 4 1 USB SD MMC SDHC MS USB c USB 2 0 USB Return USB USB...

Page 6: ...10 11 VOL OK SETUP OK 4 4 5 OK 5 OK VOL OK OK VOL VOL SETUP 4 3 4 4 OK...

Page 7: ...12 13 SETUP 6 7 OK 7 SETUP 5 6 OK 6...

Page 8: ...9 9 9 AC 100 240V 50 60Hz 300mA DC 5V 2A JPEG Mp3 WMA MPEG1 MPEG2 MPEG4 Divx4 0 Divx5 0 XVID AVI M JPEG SD SDHC MS MMC USB USB 2 0 and MINI USB 9 7 1024 768 300 1 4 3 300 2 20 130 140 0 40 10 85 USB 7...

Page 9: ...17 10 USB USB USB USB Mute Deja View F105 USER MANUAL Thank you for your purchase of the Digital Photo Frame Please read this User Manual carefully to learn the correct way to use the Digital Photo Fr...

Page 10: ...sk of electric shock Introduction Thank you for your purchase of the Digital Photo Frame It is designed to allow quick and easy view of photos taken from your digital camera mo bile phone or from a me...

Page 11: ...lection button from left to right cursor 9 Functional selection button from the top to the bottom cursor 10 SETUP Go directly to Setup mode or show the small Opera tion interface 11 Play pause In the...

Page 12: ...astic battery insulator from the battery compart ment and make sure the remote control has a battery inside Please refer to Installing Replacing Battery if you need a new battery 3 4 Press the Power b...

Page 13: ...If the Music is Open in Photo setup Press BGM 4 Operating Instruction After turning on the unit it will display startup logo and then show the Main interface after 3 5 seconds If there are pictures an...

Page 14: ...n continue playback Press to enter the previous or next video playing directly it will play slideshow with background Music and the music must be stored in the same memory device You can use VOL VOL t...

Page 15: ...Sub Menu for Copy Delete Operation If enter the Internal memory It only show Delete Icon If enter the Cards or USB It will show copying to internal memory De lete files Icon and the files can be only...

Page 16: ...gle 130 left right vertical 140 horizontal Working Temperature 0 40 Humidity 10 85 7 Setup Select Setup in the main menu press OK to enter the Setup interface and press to highlight the main item and...

Page 17: ...alf a year in normal conditions Replace with new battery if neces sary Can not read the CARD or USB Please confirm whether there is storage in the card or USB device Empty devices cannot be read Can n...

Reviews: