background image

16

EN

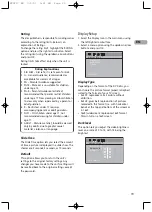
USB Device

An overview

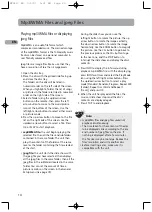
This unit supports MSC devices. You can connect
your own USB storage devices, then you can start
playback.

Connecting/Disconnecting USB device
to the Unit

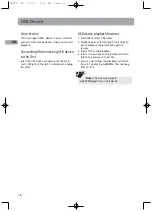
Insert the USB drive's connector into the main
unit’s USB jack of the unit. To disconnect, unplug
the drive.

USB device playback features

1. Press USB to select USB mode.
2. Playback starts automatically. Press PAUSE to 

pause playback and press PLAY again to

resume.

3. Press STOP to end playback.
4. Press CH+/- buttons on the remote control to

skip to the previous or next file.

5. You may also follow the playback instruction

steps 3-7 on playing mp3/WMA files and jpeg
files on  P.14.

Note: 

The unit only support

mp3/WMA/jpeg files on USB device.

RTD217 EN  3/1/07  5:21 PM  Page 22

Summary of Contents for RTD217 - DVD/CD Home Theater System

Page 1: ...RTD217 ...

Page 2: ...t is receiving the interference Move the unit away from the equipment that is receiving interference Plug the unit into a different wall outlet so that the unit and the equipment receiving interference are on different branch circuits If these measures do not eliminate the interference please consult your dealer or an experienced radio television technician for additional suggestions Also the Fede...

Page 3: ...erve the polarities indicated inside the battery compartment Replace only with the type of batteries specified Do not dispose of them in a fire or recharge them If you are not using the remote control for a long period of time remove the batteries Please respect the environment and prevailing regulations Before you dispose of batteries or accumulators ask your dealer whether they are subject to sp...

Page 4: ...tles DVD Camera Angle DVD 12 Play mode Creating a Program list for Play Mode Bookmark Sleep PBC Introscan CD 13 Mp3 WMA Files and jpeg Files 14 Playing mp3 WMA Files or displaying jpeg files Radio 15 Manual Tuning Storing radio stations USB Device 16 Connecting Disconnecting USB devices to the Main Unit USB Device Playback Features CD Ripping 17 An overview Ripping CD to USB device Start Ripping C...

Page 5: ...ou have to use the unit outdoors do not expose it to rain or splashing water The apparatus should not be exposed to dripping or splashing and no objects filled with liquids such as vases should be placed on the apparatus Moving the unit from a cold place to a warm one can cause condensation on some components inside the unit Let the condensation disappear on its own before turning the unit on agai...

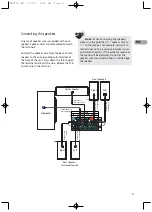
Page 6: ...ting to so the video content goes from the receiver to the screen The audio jacks are IN jacks which need to be connected to OUT jacks on the component you are connecting to so the sound from the component comes into the receiver and out through the speakers Video cables Composite video cable included The basic Video jack color coded yellow is also referred to as composite video Component video ca...

Page 7: ...make sure the polarities speaker wire to on the receiver For example red wire to red terminal on the receiver of speaker wires and terminals match If the cords are reversed the sound will be distorted Do not let the speaker wires touch each other it will damage the speaker SPEAKERS SR SL SUB CEN FR FL 4 4 3 White Grey or Black Striped Red Grey or Black Striped Front Speakers Right Left Green Grey ...

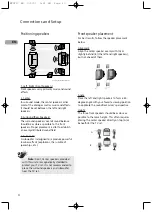
Page 8: ...r placement For best results follow the speaker placement below Alignment Align the center speaker evenly with A or slightly behind B the left and right speakers but not ahead of them Angle Place the left and right speakers to form a 45 degree angle with your favorite viewing position to duplicate the soundtrack mixer s perspective Height The three front speakers should be as close as possible to ...

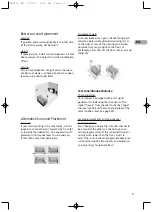
Page 9: ...n stands facing each other to approximate sidewall mounting A or to the sides or rear of the viewing area aimed upwards they can go right on the floor or preferably a few feet off the floor such as on end tables B Test tone Channel balance Channel balance Your receiver is equipped with a test signal generator for balancing the channels As the signal travels from channel to channel adjust the level...

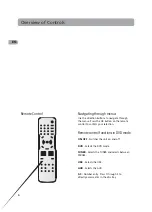
Page 10: ...te control to confirm your selection Remote control functions in DVD mode ON OFF Switches the unit on and off DVD Selects the DVD mode TUNER Selects the TUNER and selects between FM AM USB Selects the USB AUX Selects the AUX 0 9 Number entry Press 1 through 5 to directly access a disc in the disc tray Overview of Controls 6 EN ...

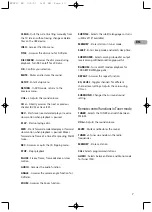
Page 11: ...Stops playback PAUSE Freeze frame frame advance or slow motion AUDIO Accesses the audio function ANGLE Accesses the camera angle function for DVD disc ZOOM Accesses the Zoom function SUBTITLE Selects the subtitle languages or turns subtitle off if available MEMORY Stores station in tuner mode SLEEP Enters sleep mode and selects sleep time SUBWOOFER Selects among subwoofer output levels among soft ...

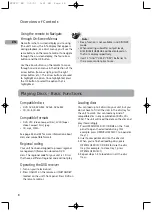
Page 12: ...en the desired disc tray For example press OPEN CLOSE DISC 1 to open disc tray 1 2 Insert a compatible disc into the disc slot 3 When you re finished loading discs press OPEN CLOSE DISC 1 2 3 4 5 to close the disc tray For example to close tray 1 press OPEN CLOSE DISC 1 4 Repeat steps 1 3 to load discs in all the disc trays Using the remote to Navigate through On Screen Menus No matter what on scr...

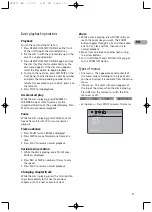
Page 13: ...ress FWD to move forward one frame at a time 3 Press PLAY to resume normal playback Variable slow motion 1 While the disc is playing press PAUSE once PAUSE is displayed 2 Press REV or FWD a number of times to vary the speed 3 Press PLAY to resume normal playback Changing chapter track While the disc is playing press the CH button to go immediately to the next or previous chapter or to the next or ...

Page 14: ... time display PBC PLA sleep timer bookmark play mode track Note INVALID KEY will be displayed if the function you select is not available Note When playing disc in a certain tray for example tray1 pressing an empty tray number on the remote for example 2 will display No disc in tray 2 for few seconds When you press STOP the unit stores the point where playback was interrupted If you press PLAY aga...

Page 15: ...on or press the AUDIO button on the remote control 3 Choose a language or an audio format with the up down arrow buttons This option is only available if the disc offers dialog languages or audio formats When you change the dialog language using the Info menu it only changes the dialog language of the disc being played When you eject the disc or switch off the unit the language will revert to the ...

Page 16: ... disc repeat All disc repeat all CDDA discs repeat 1 track A B repeat IntroScan 4 To stop repeat playback select the Play Mode icon and use the up down arrow buttons to choose the Standard option CreatingaProgramListforProgramPlay Mode AudioCDs DVDandVCDdiscs To use program play mode you must first create a program list 1 To create a program list press the INFO button three times Highlight the Pla...

Page 17: ...left right buttons and press OK A menu is displayed with five bookmarks 2 The first bookmark space is highlighted Press OK to set the bookmark The book mark is saved and is indicated by the number 1 You can set up to five bookmarks on a disc 3 To start playback from a bookmark press the PLAY button on the remote 4 To delete a bookmark highlight it and press CLEAR Sleep 1 Press INFO twice for CD VC...

Page 18: ... jpeg file you have selected then displays all the jpeg files in the same folder then all the jpeg files in the subfolders located in the same folder You can set the amount of time a picture remains on the screen in the General Setup menu see page 19 During the slide show you can use the left right button to rotate the picture the up arrow button to rotate the image vertically the down arrow butto...

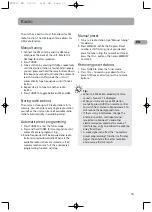
Page 19: ...uencies will be browsed and radio stations stored automatically When all the available radio stations are stored or all 30 memory locations are full the auto preset programming function will stop Manual preset 1 Tune to a radio station see Manual tuning for details 2 Press MEMORY While the Program Preset number is still flashing input your desired preset number using the numeric buttons or press t...

Page 20: ...nplug the drive USB device playback features 1 Press USB to select USB mode 2 Playback starts automatically Press PAUSE to pause playback and press PLAY again to resume 3 Press STOP to end playback 4 Press CH buttons on the remote control to skip to the previous or next file 5 You may also follow the playback instruction steps 3 7 on playing mp3 WMA files and jpeg files on P 14 Note The unit only ...

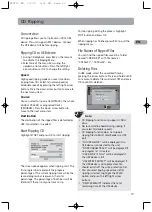
Page 21: ...k to rip To stop ripping during the process highlight STOP button and press OK When ripping has finished press REC to quit the ripping menu File Names of Ripped Files You can find the ripped files saved in a folder named CDRECORD with file name as CDTKxx01 CDTKxx02 etc Deleting Files In USB mode select the unwanted files by pressing the arrow buttons Press and hold CLEAR on remote to delete files ...

Page 22: ...tivate locking according to your preset rating limits highlight the PASSWORD option using the up down arrow buttons and select LOCK and press OK 2 You are asked for a new password Enter four digits using the number buttons and press OK 3 You are asked for confirmation enter the four digits again and press OK Unlocking the Unit 1 To unlock the unit or set a new password highlight the PASSWORD optio...

Page 23: ...4x3 PS reproduces a 4x3 picture without distortion 4x3 LB gives best reproduction of pictures recorded in this format i e with horizontal bands at the top and bottom of the screen or in 16x9 16x9 widescreen reproduces 16x9 format films in full on a 16x9 screen Dark level This option lets you adjust the video brightness level on a scale of 0 to 12 with 12 being the brightest EN 19 Rating Explanatio...

Page 24: ...mpensates for center or surround speakers that are closer to the listening position than the front speakers 1 Highlight a distance option using the up down arrow buttons Front FL FR DISTANCE Center CT DISTANCE Surround SL SR DISTANCE 2 Press the right arrow button to move to the default distance 3 Press the up down arrow buttons to adjust the distance Test Tone This function is used to test the sp...

Page 25: ...io icon Press the up down arrow buttons or AUDIO on the remote control to select audio language Subtitles Select the subtitle language using up down arrow buttons and press OK To change the language of the subtitles during playback press INFO twice for DVD and use the left right arrow buttons to highlight the Subtitle icon Press the up down arrow buttons or the SUBTITLE button on the remote to sel...

Page 26: ...he device switches off spontaneously There is no picture The picture is of poor quality with snow or lines There is no sound or the sound is of poor quality Problem No surround sound I can t find my file in the WMA mp3 jpeg listing The remote control does not work or works only intermittently The subtitles do not appear The disc menu language is not the correct one You have forgotten your password...

Page 27: ...utes or could constitute a violation of copyright law Cleaning Use a soft dry clean cloth Regularly dust the vents at the back or sides Using solvents abrasive or alcohol based products risks damaging the unit If an object or liquid enters inside the unit unplug it immediately and have it checked by an authorized servicer or service center Handling and caring for discs Handle your discs with care ...

Page 28: ...hen playing a CD R disc it is normal for the unit to take up to 20 seconds to recognize the disc before starting to play If the disc is not recognized after a period of 20 seconds remove the disc and insert it again Do not use its full capacity CD Rs should be preferably used instead of CD RWs rewritable CDs as in certain cases CD RW playback may be faulty Use reliable good quality CD write softwa...

Page 29: ...s in WMA Windows Media Audio format Please follow all the recommendations for CD R above Sound Enhancement Systems This receiver is equipped with several built in sound enhancement systems Dolby Digital The Dolby Digital mode lets you enjoy full digital surround from software processed in the Dolby Digital format Dolby Digital provides better sound quality and a more powerful presence than convent...

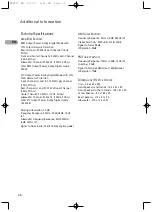
Page 30: ...Ohm Total FTC Output Power Dolby Digital mode 145 Watts Muting Attenuation 70 dB Frequency Response 200Hz 20KHz 3dB 1KHz ref Subwoofer Frequency Response 20Hz 200Hz 3dB 100Hz ref Signal to Noise Ratio 70 dB Dolby digital mode AM Tuner Section Frequency Response 2kHz 3dB 400Hz ref Usable Sensitivity 3000uV m S N 20dB Signal to Noise 38dB IF Rejection 35dB FM Tuner Section Frequency Response 15kHz 3...

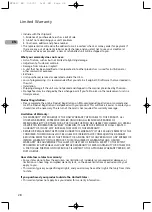
Page 31: ... If your unit is not received within 14 days the suggested retail value of the unit will be charged to your credit card This amount will be credited less a handling fee if the unit is subsequently received 4 Ship your defective unit back to us less accessories using the replacement unit s carton Shipping instructions will be included in the carton along with your SR number which will allow you to ...

Page 32: ...urn of the card is not required for warranty coverage Limitation of Warranty THE WARRANTY STATED ABOVE IS THE ONLY WARRANTY APPLICABLE TO THIS PRODUCT ALL OTHER WARRANTIES EXPRESS OR IMPLIED INCLUDING ALL IMPLIED WARRANTIES OF MERCHANTABILITY OR FITNESS FOR A PARTICULAR PURPOSE ARE HEREBY DISCLAIMED NO VERBAL OR WRITTEN INFORMATION GIVEN BY THOMSON ITS AGENTS OR EMPLOYEES SHALL CREATE A GUARANTY O...

Page 33: ...xico D F Telefono 52 55 11 020360 RFC CTM 980723 KS5 EXPORTER Thomson Inc P O Box 1976 Indianapolis IN 46206 1976 2007 Thomson Inc Trademark s Registered Marque s de commerce enregistrée s Marca s Registrada s www rcaaudiovideo com Printed in China Imprimé en Chine Impreso en China 5634874A EN E RTD217 EN E 16 5 07 2 57 PM Page 2 ...

Reviews: