6
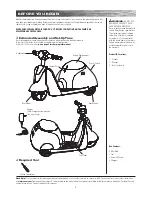
PRE-RIDE CHECKLIST
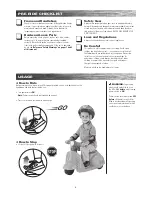
How to Ride
Before turning unit on, make sure child is properly seated on unit, with both hands on the
handlebars and both feet inside the unit.
• Turn power switch
ON
.
Note:
Power switch should be turned on by an adult.
• Press foot down on foot pedal to make unit go.
How to Stop
• Lift foot off foot pedal to stop unit.
Frame and Handlebars
Check for cracks or broken connections. Although broken frames
are rare, it is possible for an aggressive rider to run into a curb
or object and wreck and bend or break. Get in the habit of
inspecting your electric product on a regular basis.
Hardware/Loose Parts
Before every ride, check all parts, such as nuts, bolts, cables,
fasteners, etc., to ensure they are secure and assembled
correctly. There should not be any unusual rattles or sounds
from loose parts or broken components. If the unit is damaged,
do not ride.
Reference “Safety Warnings” on pages 1 and 2
of this manual.
Safety Gear
Always wear proper protective gear, such as an approved safety
helmet. Elbow pads and kneepads are recommended. Always wear
closed toe shoes (lace-up with rubber soles) and keep shoelaces
tied and out of the way of the wheels. NEVER RIDE BAREFOOTED
OR IN SANDALS.
Laws and Regulations
Always check and obey any local laws or regulations.
Be Careful!
This product is not for aggressive or trick riding. Avoid steep
inclines and don’t ride too fast — you can lose control and fall.
Skateboard parks are not designed for young riders. Never ride
in traffi c or on the street and watch your surroundings for
pedestrians, skaters, skate boards, electric products, bikes,
children or animals who may enter your path and respect
the rights and property of others.
Maintain a hold on the handlebars at all times.
USAGE
WARNING:
Supervising
adult should help child to sit on
the Mini Mod
before
adult turning
power switch to
ON
.
Power switch should be turned
OFF
before
child enters or exits Mini
Mod to avoid accidentally pushing
on active accelerator pedal, which
could cause loss of balance.
Summary of Contents for MINI MOD
Page 10: ...9...


