background image

Tiller drive

autopilot

Installation

Instructions

English

Date: 07-2016

Document number: 87279-1-EN 

© 2016 Raymarine UK Limited

Summary of Contents for Q047

Page 1: ...Tiller drive autopilot Installation Instructions English Date 07 2016 Document number 87279 1 EN 2016 Raymarine UK Limited...

Page 2: ...81131_8 book Page 118 Thursday October 7 2004 11 03 AM...

Page 3: ...ical safety Make sure the power supply is switched off before you make any electrical connections WARNING Calibration We supply this product calibrated to default settings that should provide stable p...

Page 4: ...onto the desired track using a navigationaid alwaysmaintainalogandmakeregularpositional plots Navigation signals can produce significant errors under some circumstances and the autopilot will not be a...

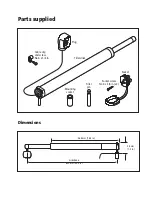
Page 5: ...Mounting socket Tiller pin Socket Plug Socket screw No 4 x 3 4 in x2 Tiller drive Cable clip and screw No 6 x 1 2 in Parts supplied midstroke 620 mm 24 5 in 468 mm 18 4 in 38 mm 1 5 in Dimensions...

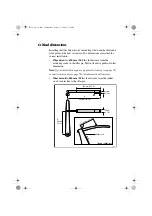
Page 6: ...er pin Pull out the drivepushrod to this dimension Note If your installation requires a pushrod extension seepage 52 or cantilever mount see page 56 this dimension will increase Dimension B 460 mm 18...

Page 7: ...ngles as shown on the diagram 3 Make sure that the drive unit is mounted horizontally Basic installation After establishing the control dimensions A and B you can usually mount the tiller drive direct...

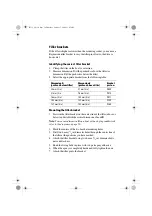
Page 8: ...xy to harden completely before apply a load Installation accessories Ifyouarenotabletoinstallthedriveunitdirectlyontothecockpitseat or tiller as described use one or a combination of the following acc...

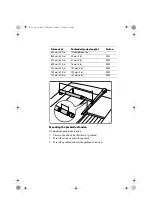
Page 9: ...d end into the pushrod extension Dimension C Pushrod extension length L Part no 620 mm 24 5 in Standard dimension 648 mm 25 5 in 25 mm 1 in D003 673 mm 26 5 in 51 mm 2 in D004 699 mm 27 5 in 76 mm 3 i...

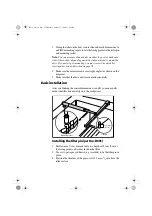
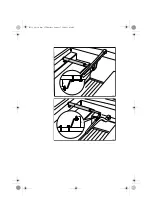
Page 10: ...To measure dimension B on a boat with a sloping rudderstock refer to the diagram on page 56 2 Mark the centers of the two bracket mounting holes 3 Drill two 6 mm 1 4 in diameter holes through the cent...

Page 11: ...D286 2 D E D287 2 81131_8 book Page 55 Thursday October 7 2004 11 03 AM...

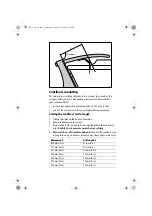
Page 12: ...nter line 2 Measure dimension F actual 3 Refer to the table to establish a cutting length for the cantilever rod double check measurements before cutting 4 Measure therod from threaded end then cut th...

Page 13: ...attach the mounting ring to the backing plate with the backing plate on the other side of the mounting surface as shown above 6 Screw the rod firmly into place 7 Roughen the end of the cantilever rod...

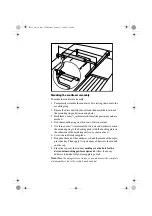
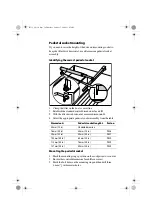
Page 14: ...te pedestal socket assembly from the table Mounting the pedestal socket 1 Mark the mounting ring s position on the cockpit seat or counter 2 Ensure that control dimensions A and B are correct 3 Mark t...

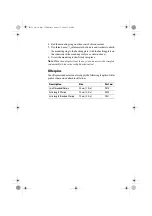
Page 15: ...t firmly into place Note Whenthe autopilot is not in use you canunscrew the complete rod assembly to leave the cockpit unobstructed Tiller pins Your Raymarine dealercan alsosupply the following length...

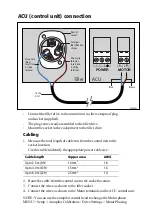
Page 16: ...the tiller drive Cabling 1 Measure the total length of cable run from the control unit to the socket location Use this table to identify the appropriate power cable size 2 Route the cable from the co...

Page 17: ...Remove the template 3 Pass the cable through the bulkhead and attach to the socket making sure you connect each core to the correct pin as described in the ACU control unit connection section 4 Attac...

Page 18: ...3 5 turns lock to lock 4 0 sec lock to lock Operating conditions Wheel drive Tiller drive 10 C to 55 C 14 F to 131 F waterproof to CFR46 0 C to 60 C 32 F to 140 F Overall dimensions Wheel drive Tiller...

Page 19: ...81131_8 book Page 118 Thursday October 7 2004 11 03 AM...

Page 20: ...Drill 2 5 mm 3 32 inch diameter hole 2 positions Drill 18 mm 23 32 inch diameter hole Tiller drive plug template D5411 1 81131_8 book Page 111 Thursday October 7 2004 11 03 AM...

Page 21: ...User notes 81176_4 fm Page 22 Tuesday April 18 2006 9 26 AM...

Page 22: ...User notes 81176_4 fm Page 22 Tuesday April 18 2006 9 26 AM...

Page 23: ...User notes 81176_4 fm Page 22 Tuesday April 18 2006 9 26 AM...

Page 24: ...www raymarine com...

Reviews: