


3.3 Mounting the antenna
To mount the antenna:
1. Select a suitable location for the antenna,
as described in the
GNSS antenna location
requirements
section.
2. Mount your antenna using either the
Surface
mounting
or
Pole mounting
procedure, as
appropriate.
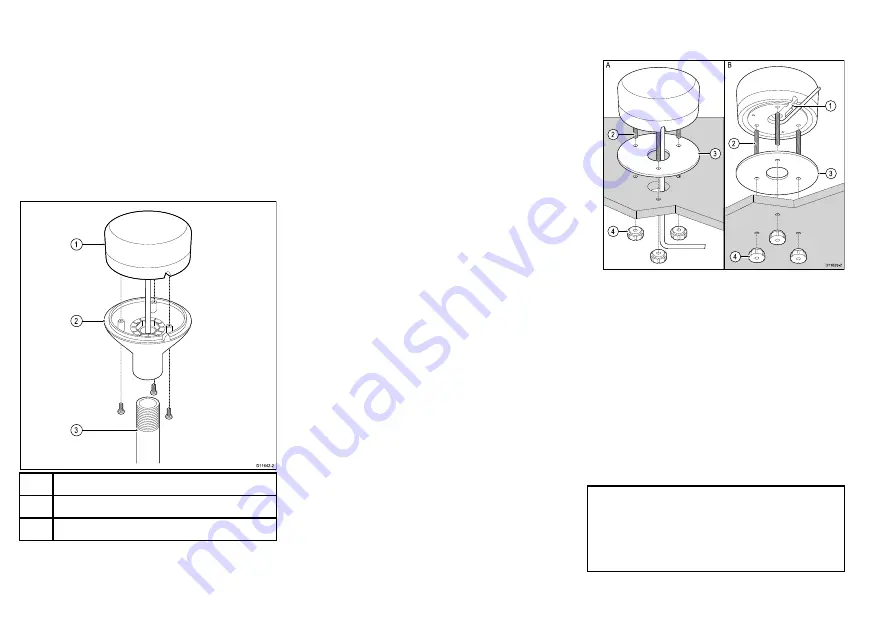
Pole mounting
If you want to pole-mount the antenna, obtain a pole of
suitable length with a 1 inch 14 TPI thread.
1
GNSS antenna
2
Pole mount adaptor
3
Mounting pole (not supplied)
1. Ensuring that the
GNSS antenna location
requirements
are met, securely attach the pole to
a suitable, secure point.
2. Remove and retain the screws securing the antenna
to the pole mount adaptor, then separate these two
items.
3. Screw the pole mount adaptor fully onto the pole
and ensure it is secure.
4. Feed the antenna cable through the center of the
pole mount adaptor and then down through the
center of the mounting pole.
5. Ensuring you do not trap the cable, place the antenna
on the pole mount adaptor so the screw holes are
aligned, then secure the antenna with the 3 screws
removed during step 2.
Surface mounting
When surface mounting the antenna, you can route the
cable either centrally (Option A) or from the side of the
antenna (Option B).
1. Remove the 3 screws securing the antenna to its
pole mount adaptor, then remove the adaptor from
the antenna.
2. Using the supplied mounting template, mark and drill
the mounting holes.
• OPTION A: If the cable is going to pass through the
mounting surface, drill a 19 mm (0.75 in.) center
hole for the cable.
• OPTION B: If the cable is to be routed from the side
of the antenna (i.e. above the mounting surface),
remove the piece of plastic covering the end of
the cable channel and route the cable through
the channel (1). Incorrect cable routing can cause
damage to the cable.
3. Screw the supplied mounting studs (2) into the
underside of the antenna.
4. Stick the supplied gasket (3) to the mounting surface,
ensuring that the holes on the gasket correspond
with the drilled holes.
5. Route the cable as follows:
• For Option A, feed the cable down through the
center hole.
• For Option B, route the cable along the cable
channel.
6. Carefully place the antenna so the mounting studs
pass through the holes in the mounting surface.
7. Secure the antenna to the surface using the supplied
thumb nuts (4).
Note:
• The thumb nuts supplied with your product may
differ slightly from those shown in the illustration.
• Only use the studs and thumb nuts supplied with
the antenna.
16


