Rangemaster Toledo XT Electric Users Manual & Installation Download Page 27

27

WARNING  SERVICING TO BE CARRIED OUT ONLY BY AN AUTHORISED PERSON

Disconnect from electricity before servicing. Check appliance is safe when you have finished.

to the control panel by fi rst lining up the raised key on its 
body with the cut-out in the control panel and pushing it 
in from the front. Assemble the new switch to the bezel 
by lining up the key sections and pushing home. Fit the 
new button by pushing in from the front. 

Replace control panel in reverse order and test for 
correct operation.

6. To 

Remove 

Electronic 

Timer

Disconnect from electricity supply.

Pull off  the timer control buttons and remove the control 
panel (See 4). Remove the timer/mounting bracket 
assembly from the control panel by removing the two 
fi xing screws. Remove the timer from its mounting 
bracket by depressing the plastic lugs on the timer case, 
at the same time pulling the unit forward.

Reassemble in reverse order. When replacing leads refer 
to the wiring diagram. Check operation of timer

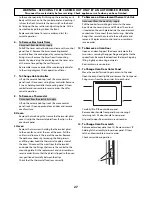
7.  To Change Hob Controller 

Lift up the ceramic hob top (see 2). Remove control 
panel (see 4). Disconnect wiring from controller. Remove 
2 screws holding controller to mounting panel. Fit new 
controller and reassemble in reverse order. Check for 
correct operation.

8. To 

Remove 

Thermostat

Disconnect from the electricity supply.

Lift up the ceramic hob top (see 2). Remove control 
panel (see 4). Open appropriate oven door and remove 
oven furniture.

RH oven

Remove the two fi xings that secure the thermostat phial 
cover. Unclip the thermostat phial from the clips in the 
oven back panel.

LH oven

Remove the two screws holding the thermostat phial 
to the oven fan cover at the rear of the oven. Pull the 
unit forward to access the rear of the cooker. Remove 
the both cover boxes by removing the fi xing screws 
and lifting clear. Feed the thermostat capillary clear of 
the oven. Disconnect the wires from the thermostat 
and undo the two fi xings that secure the control to the 
mounting plate. Fit the replacement and re-assemble in 
reverse order. Ensure that the phial is clipped to the oven 
rear, positioned centrally between the clips. 

Check that the thermostat functions correctly.

To Remove an Oven element Thermal Cut-Out.

Disconnect from the electricity supply.

Pull the cooker for ward to gain access to the cover 
box. Undo the cover screws and lift clear. The cutout 
is located on the earth plate be side the oven element 
con nec tions. Disconnect the cutout wir ing. Undo the 
fi xings that secure the cutout to the earth plate and 
re move. Fit re place ment control and re-as sem ble in 
reverse order.

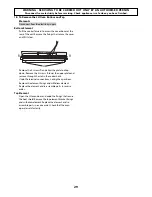
10.  To Remove an Oven Door

Open oven door. Support the door and remove the 
two screws securing the upper hinge and gasket to the 
cooker front. Remove the door from the lower hinge by 
lifting slightly and moving outwards.

Reassemble in reverse order.

11.  To Change Oven Door Outer Panel

Move the cooker forward to gain access to the sides.

Open the oven door slightly and remove the front panel 
fi xing screws from the door sides (two each side). 

Carefully lift off  the outer door panel. 

Remove door handle from panel by unscrewing 2 
retaining nuts. Fit door handle to new panel

Fit panel to door. Reassemble in reverse order.

12.  To Change Oven Door Latch

Remove outer door panel (see 13). Remove screws ‘B’ 
holding latch assembly to inner door panel. Fit new 
catch and reassemble in reverse order.

Check correct door operation.

Summary of Contents for Toledo XT Electric

Page 1: ...110 Ceramic Electric Users Guide Installation Service Instructions U107230 01...

Page 2: ...o be careful with little children If the younger members of your family are allowed into the kitchen we strongly advise that they are kept under supervision at all times If you have not used a ceramic...

Page 3: ...ge 11 Oven shelves Page 12 Oven light Page 12 Storage Page 12 Multi function Oven cooking guide Page 14 Cooking chart Conventional and full Fan oven functions Page 15 Cleaning your cooker Page 16 Clea...

Page 4: ...the same size as or slightly larger than the areas marked on the hob top Using smaller pans wastes heat and any spillage will be burnt on Using a lid will help the contents boil more quickly 5 Always...

Page 5: ...y mean the pan is not suitable perhaps too small or too uneven for a ceramic hob Sugar spillage will permanently damage the hob and therefore must be cleaned o with care immediately Never let sugar sp...

Page 6: ...d element de ector when placing or removing items from the oven For more detail on this oven see the section Multi function oven The fan in the right hand oven circulates hot air continuously which me...

Page 7: ...cook period which is the period of time you want the oven to cook The stop time which is the time of day you want the oven to stop cooking You cannot set a start time directly this is set automaticall...

Page 8: ...s pork or sh should be avoided if a long delay period is planned especially in hot weather Don t place warm food in the oven Don t use an oven already warm Don t use if an adjoining oven is warm Avoid...

Page 9: ...tion oven The left hand oven of your cooker is Multi function It has many varied uses We suggest you keep a careful eye on your cooking until you are familiar with each function Remember not all funct...

Page 10: ...also possible to bake on two shelves at one time although they will need to be swapped over during the cooking time as the heat at the top of the oven is greater than at the base when using this funct...

Page 11: ...will depend upon the size of the food being grilled Pre heat the oven on the fanned grilling function with the oven door closed for 5 10 minutes before use Always decide on the level at which to grill...

Page 12: ...push the shelf back until the ends hit the shelf stop Lift up the front so the shelf ends clear the shelf stops and then lower the front so that the shelf is level and push it fully back Steam When co...

Page 13: ...s and at the same time pull the drawer forward and away from the side runners For safety s sake push the drawer runners back out of the way To refit the draw Rest the drawer back on the side runners a...

Page 14: ...at least one runner space between them Place baking trays individual cake tins or baking dishes centrally on the oven shelf For best results pre heat the oven until the oven indicator light goes out C...

Page 15: ...s per 500g 20 25mins 200 C 2 3 190 C 15 20mins per 500g 15 20mins Turkey 160 C 2 150 C 20 25mins per 500g 20 25mins 200 C 2 190 C 15 20mins per 500g 15 20mins Stu ed Poultry Cook at 200 C or at 200 C...

Page 16: ...REMOVE the spill IMMEDIATELY with a razor scraper while the unit is still hot IMPORTANT Use an oven glove to protect your hand from potential burns Scrape the major spill or melted material from the c...

Page 17: ...Glass Glass Lid Toughened glass Hot soapy water cream cleaner scourer if necessary Ovens Part Finish Recommended Cleaning Method Sides oor roof of oven NOT COOK CLEAN OVEN PANELS see below Enamel Any...

Page 18: ...ect cleaning methods Pots and pans with rough bottoms or coarse particles salt or sand between the pan and the surface of the hob may cause scratches Use the recommended cleaning methods Make sure pan...

Page 19: ...cooker is not level arrange for your supplier to level it for you The left hand Multi function oven not coming on when turned on manually Is the power on Is the clock illuminated If not there may be s...

Page 20: ...ything of interest to children in cabinets above a cooker children climbing on the cooker to reach them could be seriously injured Clean only parts listed in this guide In the interests of hygiene and...

Page 21: ...in temperature Use proper pan size select pans having at bottoms large enough to cover the surface unit s heating area The use of undersized pans will expose a portion of the surface unit to direct co...

Page 22: ...you Installer s Name Installer s Company Installer s Telephone number Installation Regulations This appliance must be installed by a quali ed electrician to comply with the relevant regulations and al...

Page 23: ...65 C above room temperature For safety reasons curtains must not be tted immediately behind the cooker We recommend a gap of 1110mm between units to allow for moving the cooker Do not box the cooker i...

Page 24: ...nd removing the levelling tool 20 times Make sure you lower BOTH REAR ROLLERS There are two adjusting nuts one for each roller at both the front bottom corners of the cooker Unfold the rear edge of pa...

Page 25: ...by removing the electrical terminal cover box on the back panel Connect the mains cable to the correct terminals for your electrical supply type see g Check that the links are correctly tted and that...

Page 26: ...Reassemble in reverse order 2 To Lift up the Ceramic Hob Pull the cooker forward Pull o the push t control panel end caps at each end and remove the end xing screws under the end cap Remove the lower...

Page 27: ...holding the thermostat phial to the oven fan cover at the rear of the oven Pull the unit forward to access the rear of the cooker Remove the both cover boxes by removing the xing screws and lifting c...

Page 28: ...lly tightened For the LH oven unscrew the 2 thermostat phial xing screws Remove the screws that secure the inner back to the oven rear Lift the removable panel away Re assemble in reverse order Ensure...

Page 29: ...cover and lift it clear Remove the 2 screws A and allow the plate to drop down Remove the 2 screws B lower the upper plate and remove through the slot in the cooker back Undo the terminal connections...

Page 30: ...right hand P1 Oven light bulb left hand P2 Oven light bulb right hand Q1Base element 1 0kW Q2Top element 1 2kW Q3Browning element 1 15kW Circuit Diagram Q4Fan oven element 2 5kW R Left hand oven fan...

Page 31: ...mum space above hotplate 650mm Ratings Total Load At 230V 50Hz 13 6kW approximate total including oven lights oven fan etc Hob Ovens Left hand Multifunction Oven Right hand Fan Oven Fan element 2 5kW...

Page 32: ......

Reviews: