Rane SERATO SL 1 Operator'S Manual Download Page 18

RANE SL1 FOR SERATO SCRATCH LIVE • OPERATOR’S MANUAL 2.5.0

18

The A - Slot 

A special loop slot ‘A’ exists for auto-
looping. The act of using the auto-loop 
buttons sets a loop in the ‘A’ slot, 
following the rules above. Turning a 
loop off using the auto-loop buttons 
returns you to the loop slot that you were 
previously in at the time you started auto-
looping. Turning the loop off using the 
‘loop’ button leaves you in the ‘A’ slot. The 
‘A’ slot is not saved to disk automatically, 
pressing ‘save’ saves the loop to the first 
empty slot in 1-9. 
  Auto-looping shortcut keys are alt-1 to 
5 for the left deck, and alt-6 to 0 for the 
right deck. They correspond to the looping 
buttons as laid out on screen. ie. if the 
onscreen buttons display 1 2 4 8 16 bar 
loops, alt-1 triggers 1 bar loop, and alt-5 
triggers a 16 bar loop. 

Loop Roll

Loop roll performs a standard auto-
loop, but when the loop is turned off, 
the playback position is returned to the 
position where it would be if it had not 
entered the loop (much like censor).
  The other difference between loop 
roll and standard autoloop is the ‘roll’ 
button is momentary. The loop is engaged 
when the button is pressed down, and 
disengaged when the button is released. 
Use short loop lengths to create “stutter” 
type effects.
  To activate loop roll, hold c alt 
while clicking on the desired autoloop 
increment, or use the 

keyboard 

shortcuts:

 c alt + 1 through 5 for 

the Left Deck and c alt + 6 through 
0 for the Right Deck. (ie. the same as the 
autoloop controls with the additional ‘alt’ 
key as a modifier).
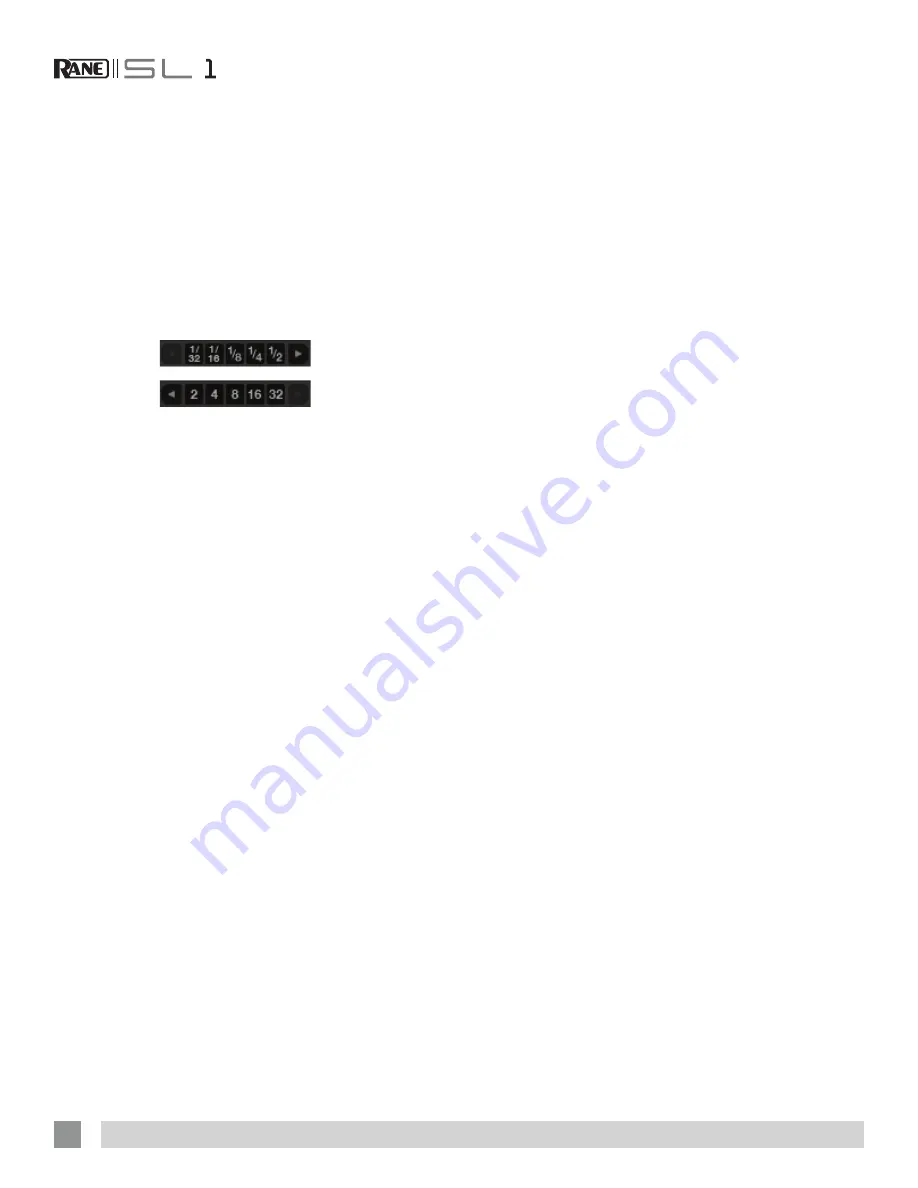
  The range of values available for loop 
roll are 1/32 through to 32 beats. The 
shortcut keys will activate whichever loop 
lengths are visible on screen, i.e., if you 
have lengths of a 1/4 beat through to 4 
beats visible for the Left Deck, c 
alt + 1 will activate a 1/4 beat loop roll, 
c alt + 2 will activate a 1/8 beat 
loop roll and so on.
  Use the 

 and 

 buttons to toggle 

through the range of possible lengths 
visible on screen.

Loop Roll with MIDI

You can assign loop roll to MIDI in several 
ways:
After pressing the 

MIDI

 assign button in 

Scratch Live, press the c alt keys, 
click on an auto-loop value, then click on 
the button/slider you want it mapped to 
on your MIDI controller. Alternatively, you 
can assign the singular loop roll button to 
MIDI, then assign a MIDI knob or slider on 
your controller to the autoloop select knob 
(visible in the MIDI assign panel area when 
in MIDI assign mode) to change the values 
on the fly.

TIP: When you have the “auto-loop 
select” knob assigned to MIDI, you 
have all of the loop roll lengths at your 
disposal. This allows you to roll up and 
down the loop length scale, to create 
interesting stutter and build-up effects.

NOTE: Like auto-loop, loop roll requires 
a BPM value written to the ID3 tag in 
order to work. Build overviews with the 
“Set Auto BPM” box checked and the 
proper range for your music selected 
to ensure an accurate BPM value. See 
“Set Auto-BPM” on page 11.

will be green. Press the 

x

 button to clear 

the loop. If you click on the locked loop 
symbol, a red border will appear. This 
indicates the loop is locked, and you 
will not be able to adjust the end points 
or delete the loop until you unlock it, by 
clicking on the number again.

NOTE: Looping applies to REL and INT 
modes.

Auto Looping

Auto looping 
allows you to 
create loops 
instantly. If 
the track has 
a BPM value simply click the number of 
beats you wish to loop and Scratch Live 
will create the loop for you. The loop is 
snapped to the beats in the song detected 
by Scratch Live so even if you press the 
button slightly out of time Scratch Live will 
still create a perfect loop for you.
  Five auto-loop buttons are available on 
screen at any one time. They range from 
1/32 to 32 beats. The user can select the 
auto loop range with the 

 and 

 buttons. 

  Pressing an auto-loop button will create 
a loop start point from the nearest beat 
to the playhead (within reason), and set 
a loop endpoint in the future. Pressing 
auto-loop 1 while auto-loop 1 is active will 
deactivate the loop. Pressing a different 
auto-loop button while looping is active 
will extend the endpoint of the current 
loop to the appropriate new auto-loop 
length.
  You can also save an auto-loop to the 
next available slot. When using an auto-
loop, a 

 

save button is visible where 

the lock loop button normally is.

NOTE: Auto-looping requires the track 
BPM to be set. See “Set Auto-BPM” on 
page 11.

Summary of Contents for SERATO SL 1

Page 1: ...RANE SL1 FOR SERATO SCRATCH LIVE OPERATOR S MANUAL 2 5 0 Setting the standard for professional djs...

Page 2: ...sidential installation This equipment generates uses and can radiate radio frequency energy and if not installed and used in accordance with the instructions may cause harmful interference to radio co...

Page 3: ...is software is based in part on the work of the Independent JPEG Group and uses libpng code copyright 2000 2002 Glenn Randers Pehrson The Scratch Live Control Tone the audio pressed on Scratch Live Co...

Page 4: ...e 16 More Controls 16 Cue Points 17 Setting Cue Points 17 Enable Hot Cues 17 Triggering Cue Points 17 Editing Cue Points 17 Customizing Cue Points 17 Looping 17 Auto Looping 18 The A Slot 18 Loop Roll...

Page 5: ...Keyboard Shortcuts 29 Additional Setup 30 Hardware 30 USB Buffer Size Latency 30 Audio Input Level 30 Playback 30 Track End Warning 30 Playback Keys Use Shift 30 Lock Playing Deck 30 Sort Cues Chronol...

Page 6: ...ou just downloaded from serato com 3 Follow the on screen instructions Once the installation is complete Scratch Live appears in the Start Menu under All Programs Serato Scratch Live Because the SL1 w...

Page 7: ...oftware sending audio direct from the SL1 inputs to your mixer i e the sound from your records or CDs Connect these to your mixer inputs matching the level of your decks In general turntables are phon...

Page 8: ...software to your situation Calibration is equally important for both vinyl and CD users of Scratch Live There are two parts to the Scratch Live control signal The directional tone and the noise map Li...

Page 9: ...ove For optimal performance the inner ring should be as close to circular as possible Use the scope zoom slider 1x to 16x to zoom in or out as necessary Use the scope L R balance and P A balance contr...

Page 10: ...e possible Whitelabel audio files play as high quality 320 kbps stereo audio in Scratch Live when Rane Scratch Live hardware is connected Without Scratch Live hardware connected or when playing these...

Page 11: ...cally This feature is available to CD users Go to track 2 on the control CD to access Vinyl Scroll Find the track you want to load and go back to track 1 The track you selected will be loaded and read...

Page 12: ...w provides a close up of the track including color coding to show the frequency of the sound red representing low frequency bass sounds green representing mid frequency sounds and blue representing hi...

Page 13: ...ight Virtual Deck Tap the space bar along with the beat After you ve tapped the first beat you can switch to double time tapping half time start of each bar etc The range is set by the first two taps...

Page 14: ...formation text to the right Album Art Grid 2 Displays the album art as a grid with the track information text below NOTE Your files must have album art added for it to be displayed See Adding Album Ar...

Page 15: ...you run out of record You can switch from Emergency Internal mode to ABS mode by lifting the needle and placing it in the lead in of the control record Emergency Internal mode will activate after 1 se...

Page 16: ...Alt F Ctrl I set a temporary cue point Ctrl K Click on the waveform to scrub or make fine adjustments to your position within the track This may be useful if you wish to set cue points in your tracks...

Page 17: ...trl 1 through 0 Customizing Cue Points To change the color of a cue point click on the colored square and choose a new color from the drop down menu To name your cue point double click on the time fie...

Page 18: ...the control alt keys click on an auto loop value then click on the button slider you want it mapped to on your MIDI controller Alternatively you can assign the singular loop roll button to MIDI then...

Page 19: ...p screen Playing Samples Pressing the play button on each slot will play the loaded audio TIP Use the shortcut keys z slot 1 x slot 2 c slot 3 v slot 4 b slot 5 n slot 6 to trigger each sample respect...

Page 20: ...for easy recall at a later stage Sample Bank A will load as the default SP 6 Mute Buttons Use the mute buttons to mute the audio output for each of the SP 6 s sample slots Click on the mute button to...

Page 21: ...Deck Assign You can select which Deck the FX unit applies to by clicking the Deck buttons Each Deck can only pass through one FX unit at a time Show Parameters Press the Show Parameters button to expo...

Page 22: ...r loops and cue points MIDI Controller Setup The process of setting up a MIDI controller for use with Scratch Live will vary depending on the hardware Many devices can connect to a computer using MIDI...

Page 23: ...iles into the following crates where any one track would be filed in more than one crate Hip Hop UK Hip Hop French Hip Hop Inst Hip Hop Old Hip Hop Hip Hop LPs To make a new crate click the Add New Cr...

Page 24: ...list by Genre BPM Artist and Album To turn the song browser on or off click the Browse button Searching Scratch Live includes a search function to help you find files quickly and easily Enter text int...

Page 25: ...cks box The session will then also list these tracks in grey along with actual played tracks Alternatively you can mark or unmark tracks as played manually Select a track or a group of tracks and clic...

Page 26: ...in the MP3 file If possible re encode the MP3 The track has been imported from the iTunes library The track has been imported from the iTunes library and Scratch Live has detected some corruption in t...

Page 27: ...ew location The original files will still be kept in their current location but will no longer referenced in your Scratch Live library Copy Move Crates You can also copy or move your Crates and Subcra...

Page 28: ...ate more sensitive The amount of time available to record is determined by your audio cache setting The track overview display shows the amount of usable audio you have to play with from the recording...

Page 29: ...and from library ctrl shift del and ctrl shift backspace Delete the file from your library and send to the recycle bin Note to iTunes users files in your iTunes library cannot be deleted this way ctr...

Page 30: ...s checked you can only load a track if the target deck is stopped Sort Cues Chronologically The five cue points can be placed in any order and can be dragged up and down if you wish to reorder them If...

Page 31: ...ection of side A of the control record This setting allows you to adjust the sensitivity of Vinyl Scroll so that you can control the amount of record movement required to move between tracks Drop To A...

Page 32: ...ze Crate Views Check this option to set custom column views for each crate and playlist When the option is off default all crates will share the same column configuration as the All crate Center on Se...

Page 33: ...check boxes to enable and disable the Serato Playlists plugin disabled by default Enable Live Playlists With this box is checked and an active internet connection the Start Live Playlist button in th...

Page 34: ...te See Calibrating Scratch Live on page 8 Try increasing the USB audio buffer size if your computer is close to the minimum spec Clean your needles This is the most common cause of audio drop out Beca...

Page 35: ...ar as Scratch Live is concerned Please make sure this really is an audio file Unsupported file This MP3 contains mul tiple layers While scanning this file Scratch Live found frames belonging to multip...

Page 36: ...receiving any control signal check your connections BAD TURNTABLE VIBRATION Bass is reaching the stylus Try to isolate the turntable from the speakers CD PLAYER INTO PHONO INPUT In the Hardware tab o...

Page 37: ...ions BAD RECORD BURN Your record is badly worn and Scratch Live is unable to track Swap sides or get new vinyl ASAP LEFT CHANNEL IS NOISE Left signal has been lost with a noisy loose connection RIGHT...

Page 38: ...llowed under this directive The user of this equipment shall accept full responsibility for compliance with the LV directive and EMC directive in the event that the equipment is modified without writt...

Page 39: ...HIP THE SPECIFIC PERIOD OF THIS LIMITED WARRANTY SHALL BE THAT WHICH IS DESCRIBED TO THE ORIGINAL RETAIL PURCHASER BY THE AUTHORIZED RANE DEALER OR DISTRIBUTOR AT THE TIME OF PURCHASE Rane Corporation...

Page 40: ...THE COUNTRY WHERE THE UNIT WAS PURCHASED OR if product was purchased in the U S AT THE RANE FACTORY IN THE U S If the product is being sent to Rane for repair please call the factory for a Return Auth...

Reviews: