


Waveform analysis
R&S
®
RTO6
246
User Manual 1801.6687.02 ─ 05
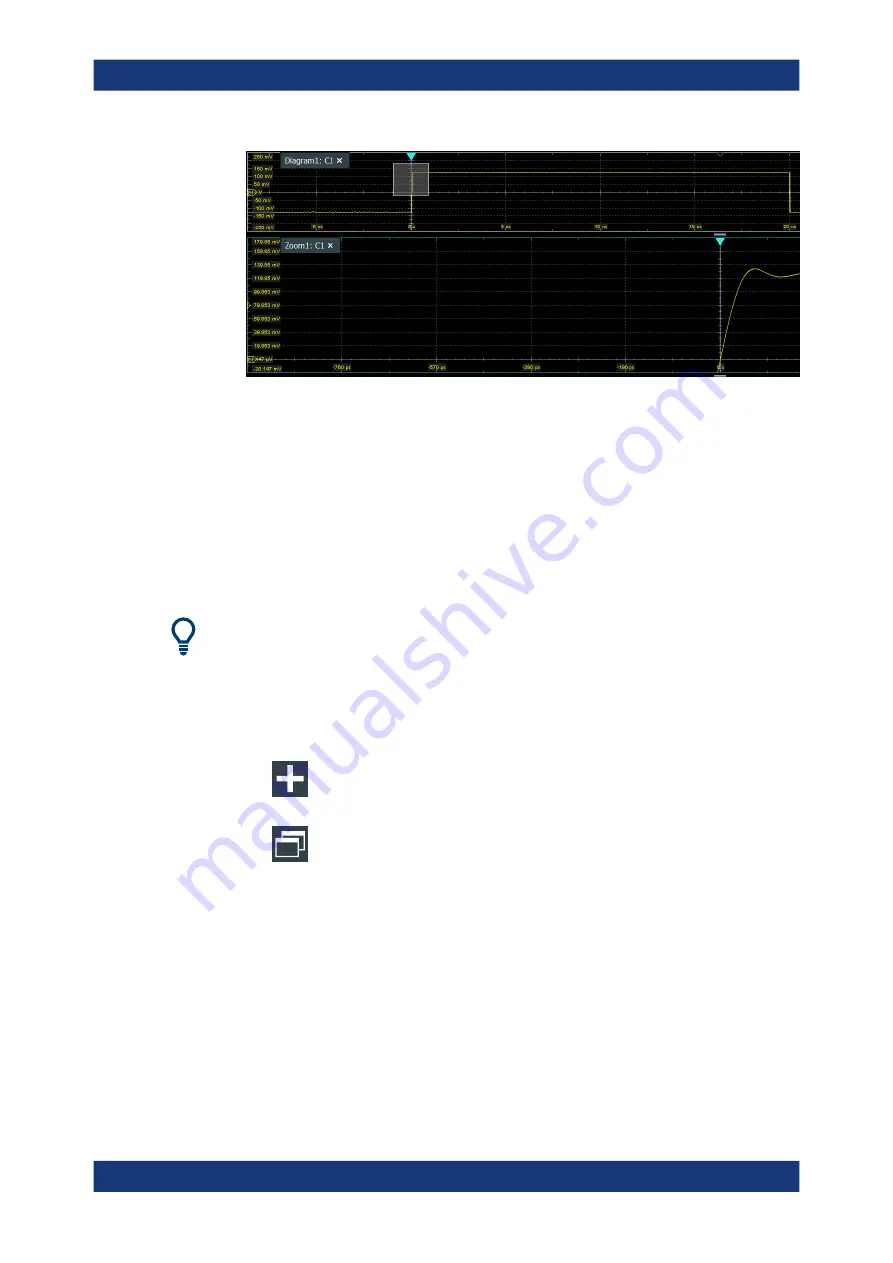
Figure 7-3: Zoom diagram and overview diagram
3. If the position of the zoom area is not correct, drag the rectangle in the overview to
the correct position.
4. If the size of the zoom area is not yet ideal, tap the rectangle in the overview dia-
gram.
Now, 4 red lines indicate the edges of the zoom area. A dashed red line indicates
the selected edge, which you can adjust.
5. Touch the edge that you want to move, and drag it to the required position.
To optimize the zoom definition of an active zoom diagram, double-tap the zoom dia-
gram. The "Zoom" dialog box for numeric definition is opened.
To create a new zoom using the Zoom dialog box
1. There are two ways to create a new zoom:
● If you want to create a new, unconfigured zoom, tap the "Add" icon.
● If you want to create zoom based on an existing one, tap the "Copy" icon.
2. Enter a name for the zoom using the on-screen keyboard.
To define the zoom area numerically using start/stop values
1. On the "Menu" menu, tap "Horizontal".
2. In the "Zoom" tab, select "Start/Stop".
3. Select "X mode" to define "Absolute" or "Relative" x-axis values. Relative values
cause the zoom area to adapt to the input values dynamically.
4. Define the "X start" and "X stop" values that define the lower and upper borders of
the zoom area on the x-axis (see
Zoom


