Documentation Center
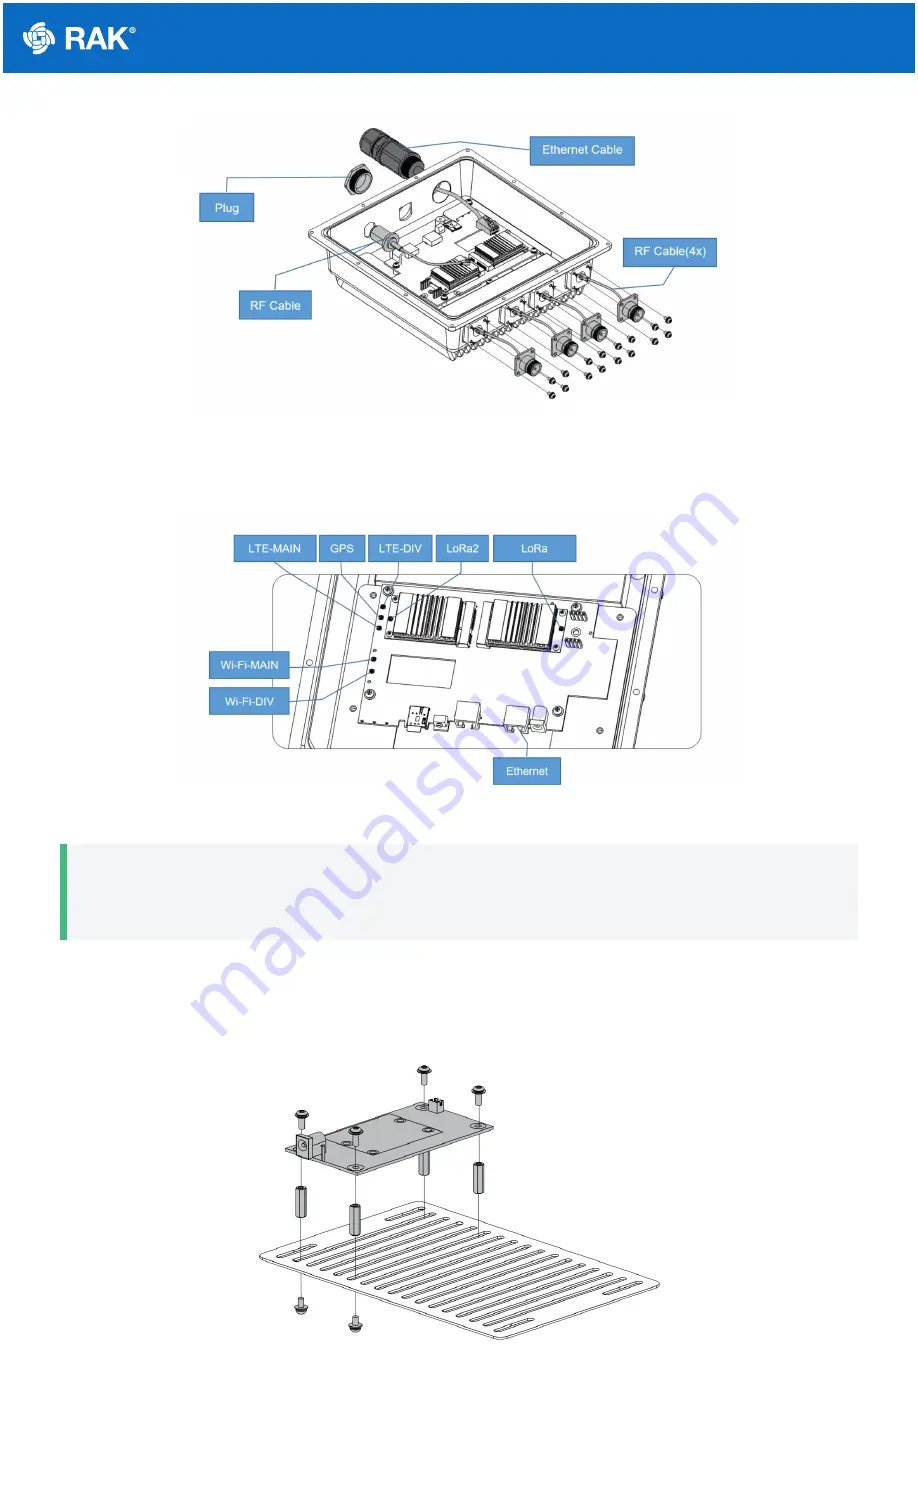
Figure 5: Installing the cables and plugs
6. Connect the cables to the motherboard. The connectors on the motherboard are shown in Figure 6.
Figure 6: Connecting the cables to the motherboard
📝
NOTE
You must use the Wi-Fi MAIN connector to connect the Wi-Fi antenna.
7. If you have a Backup Battery Kit, connect with the backup battery to the motherboard.
8. Fix the M3 hexagon spacers on the plate with four screws, and then fix the battery charging PCB board on top
of them.
Figure 7: Fixing the battery charging PCB board
9. Fix the battery with cable ties beside the charging PCB board. If the cable tie is not long enough, two ties can
be connected.


