background image

51

EN

Automatic mode on (symbol on the standard display)


All set automatic functions are active


Manual operation is also possible in automatic mode

AUTO

Automatic mode off (symbol on the standard display)


All automatic functions are deactivated


All automatic symbols are deactivated on the standard display


Inputs E1 and E2 will not be taken into consideration - unless the 
automatic wind function is activated.

Switching automatic mode on/off in menu 1

1. 

  Open menu 

1

.

2. 

  Set and confirm the desired setting.

OFF = automatic mode off
On = automatic mode on

17.  Menu 1 - Switching automatic mode on/off

Toggling directly on the standard display

OK

  1 sec. 

Press the OK button for one second on the  


standard display.

Summary of Contents for Troll Comfort DuoFern

Page 1: ...VBD 580 5 1 01 19 Item no 3650 05 72 ultra white 3650 05 82 aluminium EN Troll Comfort DuoFern Instruction manual for the electrical connection and for commissioning Type 5665...

Page 2: ...ank you for the trust you have placed in us RADEMACHER products have been developed with the greatest possible convenience in mind Having applied uncompromising quality standards and thorough testing...

Page 3: ...uct description 18 5 1 Description of the safety functions 20 5 2 Overview of functions 21 6 Technical specifications 23 6 1 Factory settings 25 6 2 Conduct in the event of a power failure 27 7 Safety...

Page 4: ...ng times 56 19 Connecting a local light sensor 60 19 1 Light sensor connection when using the supplied frame 61 19 2 Light sensor connection when using a frame supplied by other manufacturers 62 19 3...

Page 5: ...nu 9 8 3 Setting the permanent display lighting 96 27 4 Menu 9 8 3 Setting the timer mode 97 27 5 Menu 9 8 5 Switching the button lock on off 98 27 6 Menu 9 8 6 Configuring the inputs E1 E2 99 27 7 Me...

Page 6: ...oftware reset 124 30 Performing a hardware reset 125 31 Error messages 126 32 Dismantling 127 33 Time zone table 128 34 Simplified EU declaration of conformity 130 35 Accessories 130 36 Warranty terms...

Page 7: ...instruction manuals for the accessories if avail able as well as the manuals for the respective connected electrical appliances This manual is part of the product Please store it in an easily accessi...

Page 8: ...erous situation 2 1 Levels of danger and signal words DANGER This hazard will lead to serious injury or death if not avoided WARNING This hazard may result in serious injury or death if not avoided CA...

Page 9: ...useful information Please read the respective manual 1 Procedures 2 Itemisation 1 or a Lists Activated menu symbols and setting parameters flash on the display Information about opening the menus and...

Page 10: ...Cover panels for installation devices for building into device boxes 2014 53 EU European Radio Equipment Directive ELV Extra low voltage DuoFern RADEMACHER radio system used to control compatible pro...

Page 11: ...b 1 x Frame c 1 x Installation housing d 1 x Spacer frame see page 38 e 1 x Instruction manual not illustrated After unpacking please check and compare the contents of the package with those specifie...

Page 12: ...n the main menu Back to the previous menu or standard display 4 Setting buttons Select a menu in the main menu Set the parameters more less Short press or press and hold gradual or quick setting Switc...

Page 13: ...g 6 Operating buttons Up Down Manual operation 7 8 SET Stop button Manual stop of the roller shutter travel Set adjust various functions Call up the weather data 9 Bridging contact for a hardware rese...

Page 14: ...14 EN 4 1 General view of the installation housing 11 12 Pos Symbol Description 11 Installation housing 12 Claw fasteners and screws 13 Connecting terminals 14 Type plate i 14 13...

Page 15: ...g Venetian blind switches or Venetian blind buttons external sensors etc see page 36 37 Both inputs are independently configured see page 99 16 L N Power supply 230V 50 Hz Connect the supply voltage...

Page 16: ...g parameters DuoFern status Weather information Switching time programme Rain display OFFSET Offset for astro time SET Setting AUTO Automatic mode PLZ Postcode IST Actual value Direction of travel up...

Page 17: ...rain function System settings SOLL Set value Automatic slat adjustment T Jog mode L Light function NORMAL Switching modes NORMAL ASTRO SENSOR Blockage detection Position in percent C Temperature unit...

Page 18: ...nected to the DuoFern network You can find a detailed description of the various functions configu ration options and possible combinations for the DuoFern system at http www rademacher de duofern Cen...

Page 19: ...used as a central controller for other Troll devices as an alternative to connecting a tubular motor You can obtain additional connection and circuit examples from our website at www rademacher de Ex...

Page 20: ...l Comfort DuoFern 9485 can be integrated into standard switch ranges 50 x 50 mm i Itmaybenecessarytouseanintermediateframe 50x50 accor ding to DIN 49075 depending on the switch range used Not included...

Page 21: ...witching time pair for MO SO MON SUN Weekday and weekend switching times One switching time pair for MO FR MON FRI One switching time pair for SA SO SAT SUN Individual day switching times One switchin...

Page 22: ...ion direction on off Automatic summer winter changeover Permanent storage of the settings External control via the two configurable inputs E1 E2 Delete or reset all data Description and configuration...

Page 23: ...on environmental sensor etc Input voltage 230 V 50 Hz Ri 200 kW Maximum cable length 15 metres Rotation direction s t Switching voltage 230 V 50 Hz Maximum switching capacity M 8 4 A Type 1B Improper...

Page 24: ...D Operating unit 1 50 x 50 x 12 mm according to DIN 49075 Available colours ultra white UW glossy Aluminium Installation depth 32 mm Permissible ambient temperature range 0 C to 40 C Protection class...

Page 25: ...olar function OFF Motor running time 2 255 sec 150 seconds Ventilation position 1 99 OFF 80 Postcode 34 DuoFern mode 3 local operation DuoFern solar mode 1 local light sensor Switching time programme...

Page 26: ...utomatic tilt after moving to a target position On Motor dead time 0 ms 160 ms 480 ms OFF 0 ms Automatic summer winter change over On Display contrast 8 Display backlighting 0 Timer mode 1 50 Hz Butto...

Page 27: ...date after a power failure The power reserve is approx 8 hours If this time is exceeded the time and date are lost and need to be reset see page 81 i The internal timer works with tolerances in power...

Page 28: ...or damaged devices Check the Troll Comfort DuoFern for damage Please contact our Customer Service if you find any damage see page 132 Improper use leads to an increased risk of injury Train all perso...

Page 29: ...The tubular motor must be fitted with a mechanical or electronic end position switch Only operate the Troll Comfort DuoFern in dry rooms A 230 V 50 Hz power supply together with a site provided disco...

Page 30: ...s or where there is an accident risk Applications of this kind require additional safety equipment Observe the respective statutory regulations for the installation of such systems There is a risk to...

Page 31: ...cal connection DANGER There is a risk of fatal electric shock when touching electrical com ponents All connection and installation work must only be carried out in a de energised state Disconnect all...

Page 32: ...tion housings of other RADEMACHER products such as other Troll controllers are not compatible WARNING Connection of a second phase to E1 or E2 will cause the Troll Com fort DuoFern to be damaged When...

Page 33: ...ubular motors can be connected in parallel to the Troll Comfort DuoFern e g RADEMACHER electronic tubular motors In order to do so follow the information in the instruction manual of the tubular motor...

Page 34: ...connecting external signal transducers to E1 or E2 must be 15 metres Installation materials The Troll Comfort DuoFern is designed for flush mounted installation We recommend installation in a deep 58...

Page 35: ...curely lay all connecting cables right into the flush mounted box 3 Remove the insulation on all leads down to 6 mm in length and connect them according to the connection diagram on the following page...

Page 36: ...36 EN 8 3 Connecting a tubular motor PE N L L E2 E1 N MOTOR 1 N PE Troll Comfort DuoFern i 230 V 50 Hz Inputs E1 E2 230 V 50 Hz only if required...

Page 37: ...30 V 50 Hz only if required If required you can connect a garden light or other electrical appli ances to the controller instead of a tubular motor and use the light function to control it see page103...

Page 38: ...installation housing into the flush mounted box and fasten it with the screws of the claw fasteners 2 Place the frame onto the installation housing 3 Then carefully insert the operating unit into the...

Page 39: ...om the standard display Main menu Enables display and selection of the individual functions and menus Manual operation is not possible from the main menu No automatic switching commands will be execut...

Page 40: ...Open the main menu i Pressing the menu button on the standard display opens the main menu 2 Select the desired menu or menu number The selected menu is indicated by a flashing symbol 3 OK Confirm and...

Page 41: ...g must be confirmed with the OK button Confirming the entry takes you to the next setting or back to the menu 6 M Back to the standard display i Pressing the menu button briefly takes you back one men...

Page 42: ...lation wizard to be cancelled prematurely Readiness for operation The Troll Comfort DuoFern is ready for operation after completing the settings i 1 The installation wizard is shown after switching on...

Page 43: ...STRO The roller shutter opens at the daily recalculated dawn time The previously configured opening time is interpreted as earliest at xx xx hours If ASTRO is selected then the opening time calculated...

Page 44: ...ily at dusk as measured by the light sensor The previously configured closing time is interpreted as latest at xx xx hours If ASTRO is selected then the closing time calculated for the current day app...

Page 45: ...he roller shutter The roller shutter moves to the configured ventilation position or to the lower end point Manual operation is possible from the standard display at any time and has priority over the...

Page 46: ...this function it is necessary to previously determine and configure the running time for the connect ed tubular motor see page 82 The ventilation position is ignored when moving to the target positio...

Page 47: ...nvironmental Sensor onto the Troll Comfort DuoFern i Environmental sensors update the weather data approx every 5 minutes and therefore it can take a few minutes until the weather data is displayed If...

Page 48: ...3 You can call up all the available weather data using the set buttons see examples Temperature and rain 15 Calling up and displaying weather data 1 As soon as an environmental sensor is detected the...

Page 49: ...9 5 Automatic dawn function 73 6 Random function 75 7 Automatic wind function 76 8 Automatic rain function 78 9 System settings 80 SET 9 1 Time and date 81 9 2 Motor running time 82 9 3 Ventilation po...

Page 50: ...on direction 101 L 9 8 8 Light function 103 9 8 9 End points 106 9 8 0 Software version 108 9 9 DuoFern settings 109 9 9 1 Logging on and off 110 9 9 2 Setting the DuoFern mode 114 9 9 3 Setting the s...

Page 51: ...tomatic symbols are deactivated on the standard display Inputs E1 and E2 will not be taken into consideration unless the automatic wind function is activated Switching automatic mode on off in menu 1...

Page 52: ...N FRI and SA SON SAT SUN 3 Individual day switching times The switching times can be set for every day of the week MO DI MI DO FR SA SO MON TUES WED THURS FRI SAT SUN Doubling the switching times by a...

Page 53: ...rder to do so the second switching time block must be select ed and the respective second opening and closing time must be set accordingly The first closing time has been set to 20 00 hours The roller...

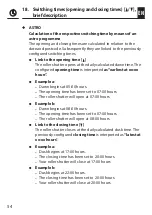
Page 54: ...le a Dawn begins at 05 00 hours The opening time has been set to 07 00 hours The roller shutter will open at 07 00 hours Example b Dawn begins at 08 00 hours The opening time has been set to 07 00 hou...

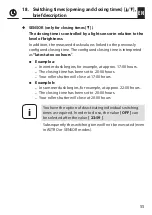
Page 55: ...Example a In winter dusk begins for example at approx 17 00 hours The closing time has been set to 20 00 hours Your roller shutter will close at 17 00 hours Example b In summer dusk begins for example...

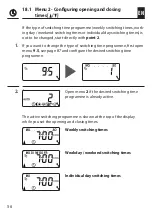
Page 56: ...active switching programme is shown at the top of the display while you set the opening and closing times 18 1 Menu 2 Configuring opening and closing times Weekly switching times Individual day switc...

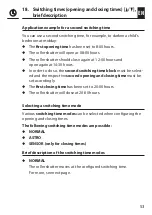
Page 57: ...ORMAL The roller shutter opens at the configured opening time ASTRO The roller shutter opens at the daily recalculated dawn time The previously configured opening time is interpreted as earliest at xx...

Page 58: ...shutter closes at the daily recalculated dusk time SENSOR The roller shutter closes daily at dusk as measured by the light sensor The previously configured closing time is interpreted as latest at xx...

Page 59: ...culated dusk time can be individually customised by means of an offset between 60 and 60 minutes Dusk can be configured in menu 3 see page 65 Dawn can be configured in menu 5 see page 73 Information a...

Page 60: ...brightness levels then you must connect the optionally available RADEMACHER light sensor to the Troll Comfort DuoFern If the Troll Comfort DuoFern is intended to react to control signals from a centr...

Page 61: ...ing unit 3 Feed the sensor cable into the cable bushing in the frame and guide it out 4 Carefully replace the operating unit with the frame back onto the instal lation housing Accessories see page 130...

Page 62: ...sor connector into the socket on the rear of the operating unit 3 Lay the sensor cable in the cable bushing of the operating unit The sensor cable can be pressed into the engagement hooks with the hel...

Page 63: ...ing unit is covered by the frame then it will be necessary to fit the additionally provided spacer frame onto the rear of the operating unit It may be necessary to use an intermediate frame 50 x 50 de...

Page 64: ...ion housing 2 If the sensor cable has been fixed in place by means of the operating unit s engagement hooks then it must first be released for example with the help of a 50 cent coin 3 Pull the light...

Page 65: ...ith light sensor switching time mode SENSOR Automatic dusk function with astro pro gramme The dusk time is recalculated every day based on the geographical location and the current date defined by the...

Page 66: ...ion after approx 10 seconds The roller shutter will open again once the configured opening time is reached or in the event of a manual command The required dusk limit value is configurable 20 Automati...

Page 67: ...or SENSOR NORMAL No customisation is possible in this switching time mode OK Return to main menu ASTRO OK Set the offset The offset function can be used to modify the calculated astro time by 60 minu...

Page 68: ...alue in switching time mode SENSOR If the limit value is not met due to the onset of dusk the roller shutter will close ACTUAL value Currently measured brightness e g 12 too bright SET value Configura...

Page 69: ...omatic movement of the roller shutter once a set limit is exceeded The roller shutter end position can be freely selected by changing the position of the local light sensor on the window Please note t...

Page 70: ...hutter will return to the upper end point i The above mentioned delay times can be exceeded in the event of changing weather conditions The automatic solar function will be terminated and must be reac...

Page 71: ...ion On automatic solar function on Off automatic solar function off 3 Adjust the local sun limit value Configure the local sun limit value ACTUAL value Currently measured brightness e g 31 too dark SE...

Page 72: ...position The locally mounted light sensor may not be covered by the roller shutter when it is moving downwards Set the sunshine position in a way that the roller shutter remainsabovethelightsensor Ot...

Page 73: ...ing time mode This means that it is not necessary to continuous ly readjust the opening time throughout the year Link to the opening time The previously configured opening time is interpreted as earli...

Page 74: ...customisation is possible in this switching time mode OK Return to main menu ASTRO OK Set the offset The offset function can be used to modify the calculated astro time by 60 minutes Example With a n...

Page 75: ...ic opening and closing times Please note the state of the cube symbol on the standard display The cube symbol flashes on the standard display when the random function is activated during the period in...

Page 76: ...ured The wind can be used to retract the Venetian blinds or close them as a draught stop If the automatic wind function is active The wind symbol flashes Manual operation is no longer possible Automat...

Page 77: ...s still in order to prevent damage to the awnings Venetian blinds 1 Open menu 7 2 Select and confirm the desired setting On automatic wind function on Off automatic wind function off 3 Configure and c...

Page 78: ...the event of rain can be configured The awning can be retracted up or used as a rain cover down in the event of rain Once the automatic rain function is active The rain symbol flashes Manual operatio...

Page 79: ...her in order to prevent damage to the awnings Venetian blinds 1 Open menu 8 2 Select and confirm the desired setting On automatic rain function on Off automatic rain function off 3 Configure and confi...

Page 80: ...he DuoFern settings in menu 9 9 are introduced and described sepa rately from page 109 onwards Menu 9 System settings Symbol Menu Page SET 9 1 Time and date 81 9 2 Motor running time 82 9 3 Ventilatio...

Page 81: ...81 EN 26 1 Menu 9 1 Setting the time and date SET 1 Open menu 9 1 Configure and confirm the desired settings Setting order 2 Time 3 Date Day Month 4 Year 2000 to 2099...

Page 82: ...ing time can be detected directly with the Troll Comfort DuoFern or you may for example measure and configure it with the help of a timer Measurement information and run time setting Tubular motor run...

Page 83: ...ss the button until the roller shutter stops at the upper end point and then release it again The running time has been measured and stored during the up cycle 4 OK Back to system menu Measuring the r...

Page 84: ...stop at the ventilation position however it can subsequently be closed completely via manual operation i The running time must be configured prior to setting the ventilation position see page 82 1 Op...

Page 85: ...r shutter to the desired position or Enter the desired ventilation position manually Value roller shutter position 0 fully open 100 fully closed i If the position is set to 0 or 100 then the ventilati...

Page 86: ...sired international time zone Time zone table see page 128 34 factory setting i If the Troll Comfort DuoFern is not being used in Germany it may be necessary to switch off the automatic summer winter...

Page 87: ...weekend switching times Separate switching times for MO FR MON FRI and SA SON SAT SUN 3 Individual day switching times The switching times can be set for every day of the week MO DI MI DO FR SA SO MON...

Page 88: ...Configure and confirm the number of switching time blocks n1 one switching time block is active n2 two switching time blocks are active Recommended setting 26 5 Menu 9 5 Configuring the switching tim...

Page 89: ...amage i Blockage detection can only be used in combination with a tubular motor with mechanical end point setting 1 Open menu 9 6 2 Activate deactivate the blockage detection and confirm On blockage d...

Page 90: ...6 Menu 9 6 Configuring the blockage detection 4 Set and confirm the sensitivity Sensitivity 1 low 6 high i Test runs should be made to ascertain the highest possible sensitivity in order to protect th...

Page 91: ...motor will be switched off by the blockage detection system when moving out of the end points when using mechanical motors with high switching hysteresis Blockage detec tion must be deactivated for t...

Page 92: ...f jog mode Tapping the operating buttons briefly enables Venetian blind slats to be conveniently configured In order to conveniently move the Venetian blinds to the end points ac tuate the control but...

Page 93: ...vate the automatic slat adjustment function and confirm On automatic slat adjustment function on Off automaticslatadjustmentfunctionoff Continue with point 4 After deactivation and confirmation the di...

Page 94: ...9 8 1 Automatic summer winter changeover 95 9 8 2 Display contrast 96 9 8 3 Display lighting 96 9 8 4 Timer mode 97 9 8 5 Button lock 98 9 8 6 Inputs E1 E2 99 9 8 7 Reversal of rotation direction 101...

Page 95: ...00 hours Winter time The timer is changed to winter time standard time on the last Sunday in October The timer is set back one hour at 03 00 hours Recommendation for operating the device outside Germa...

Page 96: ...menus You can set the desired brightness level if the background lighting should remain permanently lit up in an idle state without pressing a button 1 Open menu 9 8 3 2 Set and confirm the desired b...

Page 97: ...and confirm the desired timer mode 1 50 Hz operation factory setting e g in Europe 2 60 Hz operation e g in the USA 3 Quartz timer for other mains frequencies This menu enables you to configure the t...

Page 98: ...period of two minutes the button lock is switched on automatically The button lock is deactivated manually on the standard display 4 sec Press and hold for 4 seconds The button lock is activated manua...

Page 99: ...ossible 0 Off 1 UP roller shutter mode 2 DOWN roller shutter mode 3 UP Venetian blind mode 4 DOWN Venetian blind mode 5 UP Stop Down 6 Automatic mode on off closer NO 7 Automatic mode on off opener NC...

Page 100: ...iguring the inputs E1 E2 1 Open menu 9 8 6 2 Set and confirm the function for input 1 E1 3 Set and confirm the function for input 2 E2 i You can obtain application examples for inputs E1 E2 from our w...

Page 101: ...ction Changing the rotation direction of the logged on DuoFern devices You can also reverse the rotation direction of the logged on DuoFern devices 1 Open menu 9 8 7 2 Select the device on which the r...

Page 102: ...f the selected device 5 OK Change and confirm the rotation direction or switching sequence as required Aftersuccessfullyreversingtherotationdirection SEt flashes on the display Error display if a sele...

Page 103: ...ontrol the light with the buttons Up Down and SET Stop The underlying functions of the Troll Comfort DuoFern change when the light function is activated When a lamp or other electrical appliance is co...

Page 104: ...t function on Command signal Tubular motor mode Light mode Reversal of rotation direction off Device mode Reversal of rotation direction on Up Off On Stop Off Off Down On Off Dusk Down On Off Dawn Up...

Page 105: ...the light function is activated a selection can be made between the light mode and device mode in menu 9 8 7 Reversal of rota tion direction see page 101 i If the light function is changed all of the...

Page 106: ...rom 2000 onwards The end point setting cannot be adjusted for tubular motors con nected in parallel The end point function is not available when the light function is activated see page 103 The end po...

Page 107: ...he motor type has been detected continue with the end point settings 3 Setting the upper end point Press and hold the button The roller shutter travels upwards 3 1 Release the button as soon as the de...

Page 108: ...version to be displayed 1 Open menu 9 8 0 2 The current software version is subsequently displayed 3 Display the device version Cd Troll Comfort DuoFern 4 Perform a display test 5 OK Return to menu 9...

Page 109: ...InorderforyourTrollComfortDuoFerntobeabletoreceivecontrolsignals from the DuoFern network or send control commands to the DuoFern network it is necessary to log each desired DuoFern device e g DuoFer...

Page 110: ...ed For example one device is logged on here 3 Logging on DuoFern devices 3 1 Switch the respective DuoFern device to log on mode 3 2 Start the log on process The display flashes On 3 3 The new number...

Page 111: ...oFern devices 4 1 Switch the respective DuoFern device to log off mode 4 2 Start the log off process The display flashes OFF 4 3 The new number of logged on devices appears after successfully logging...

Page 112: ...OFF 2 All connections are subsequently deleted 28 1 Menu 9 9 1 Logging DuoFern devices on off i Deleting the connections can lead to problems for the par ticipants whereby the Troll Comfort DuoFern i...

Page 113: ...attery operated DuoFern transmitters e g the DuoFern Manual Central Operating Unit cannot be logged off using this function 1 Open menu 9 9 1 The number of logged on DuoFern devices is displayed 2 4 s...

Page 114: ...2 DuoFern transmitter The Troll Comfort DuoFern is integrated into a DuoFern network as a central controller and is intended to control other DuoFern devices with set automatic functions switching tim...

Page 115: ...rn mode 1 DuoFern receiver 2 DuoFern transmitter 3 Local operation i All manual and automatic control signals received via radio are executed on site regardless of the set mode Exception Control comma...

Page 116: ...function 3 Receiver external sun sensor Mode 1 Local light sensor Select mode 1 if the Troll Comfort DuoFern is to be controlled by a light sensor connected to this device Function and settings of mod...

Page 117: ...r Requirement The automatic solar function must be activated On and a sunshine position must be set in menu 4 Solar mode 2 If the solar mode 2 is selected you have the option to set the sunshine posit...

Page 118: ...sunshine position is measured correctly open the roller shutter completely before moving to the sunshine position 3 min Press the Up button Leave the direction switched on for approx 3 minutes 4 Move...

Page 119: ...directly on the standard display see page 47 Maximum number of environmental sensors A maximum of 4 environmental sensors are detected Only one sensor can ever be selected as the source Observing dela...

Page 120: ...ast four digits of the DuoFern address radio code of the current environmental sensor are displayed Display if no environmental sensor has been received or is in radio range so far 4 OK Select and con...

Page 121: ...DuoFern actuators Individual actuators cannot be controlled via the Troll Comfort DuoFern If you deactivate the function Off you can only control the motor connected to the Troll Comfort DuoFern with...

Page 122: ...nables you to transfer the automatic states of the Troll Comfort DuoFern automatic timer automatic dawn and dusk function etc to logged on DuoFern devices 1 Open menu 9 9 6 2 Switch the transfer of au...

Page 123: ...de throughwhichitcommu nicates in the DuoFern network If necessary you can display the DuoFern address of the Troll Comfort DuoFern 1 Open menu 9 9 7 2 Two digits of the six digit DuoFern address are...

Page 124: ...r 5 seconds until all the symbols are shown on the display 2 Then the device type Cd Comfort DuoFern and software version are displayed for five seconds All settings are deleted and reset to the facto...

Page 125: ...g 2 The centre section on the rear of the operating unit contains an opening with two contacts that must be carefully bridged for a few seconds for example with the help of a flat head screwdriver 3 T...

Page 126: ...ve Please then contact RADEMACHER Service see page 132 Error 3 display E3 There is a communication problem Check that all logged on actuators and the HomePilot if necessary are connected properly and...

Page 127: ...the DuoFern network 2 Switch off the mains power secure it against restarting and check that the system is de energised 3 Carefully pull the operating unit out of the installation housing 4 Remove th...

Page 128: ...136 Nantes 137 Nice 138 Paris 139 Reims 140 Strasbourg 141 Toulon Italy 142 Bologna 143 Bolzano 144 Florence 145 Genoa 146 Miland 147 Naples 148 Palermo 149 Rome 150 Turin 151 Venice Ireland 152 Cork...

Page 129: ...15 Alicante 216 Barcelona 217 Bilbao 218 Badajoz 219 Burgos 220 C ceres 221 Castell n 222 Granada 223 Guadalajara 224 La Coru a 225 L rida 226 Le n 227 Madrid 228 Murcia 229 Oviedo 230 Palma 231 Pampl...

Page 130: ...fort DuoFern complies with the Directive 2014 53 EU Radio Equipment Directive The full text of the declaration of conformity is available at the following website www rademacher de ce i 35 Accessories...

Page 131: ...airs and modifications by third parties unauthorised persons Use of unsuitable accessories Damage caused by unacceptable excess voltages e g lightning Operational malfunctions caused by radio frequenc...

Page 132: ...ervice Hotline 01807 933 171 Telefax 49 2872 933 253 service rademacher de 30 seconds free of charge subsequently 14 cents minute from German fixed line networks and max 42 cents minute from German mo...

Reviews: