Getting started
RipEX is a widely configurable compact radio modem, more precisely a radio IP router. All you have
to do to put it into operation is to connect it to an antenna and a power supply and configure it using a
PC (tablet, smart phone) and a web browser.
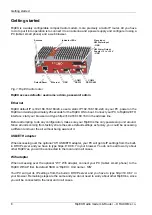
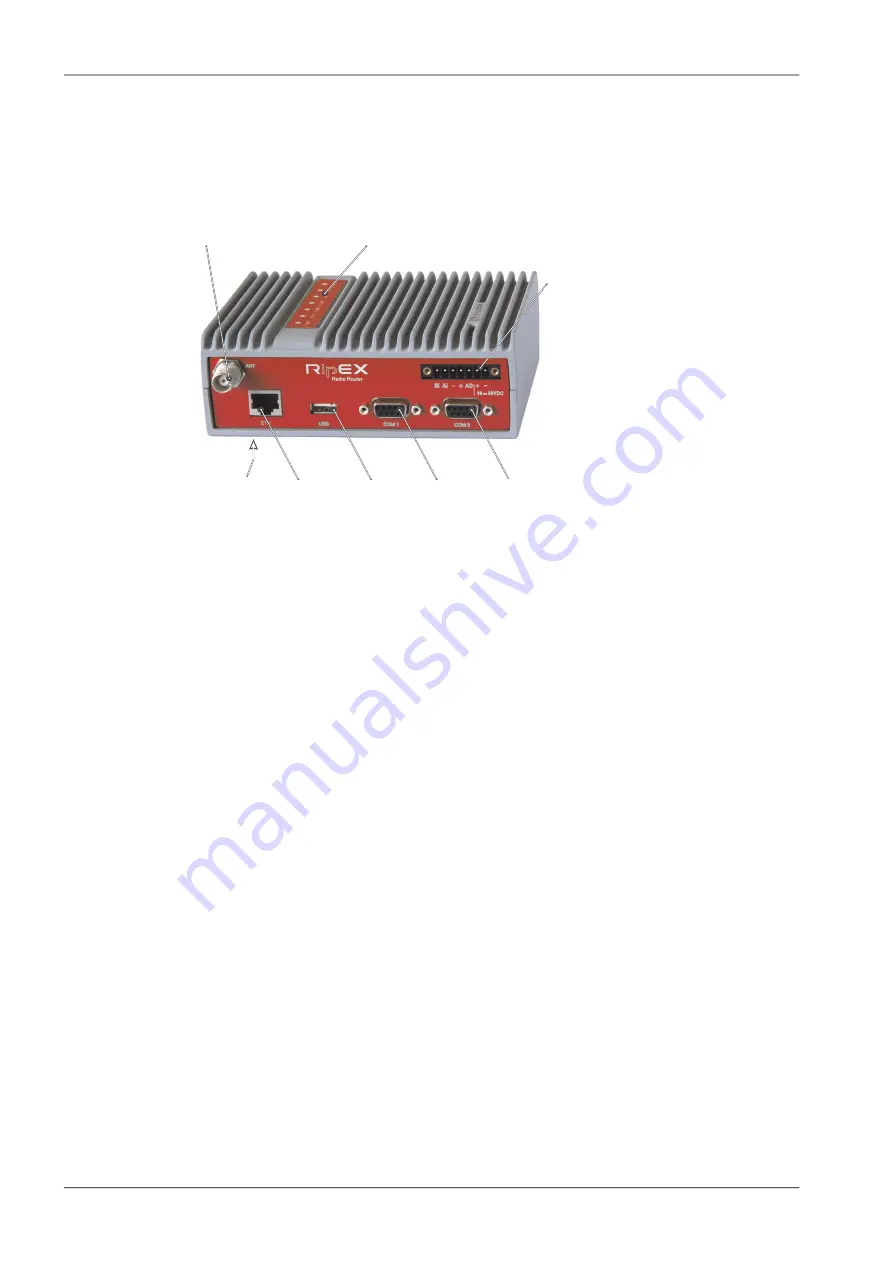
Antenna
Indicator LEDs'
Sleep Input
HW Alarm Input
- GND
+
HW Alarm Output
10 to +30 V
- GND
Ethernet
USB
COM1
RS232
COM2
RS232/485
Default/Reset
-
-
+
+
SI AI
AO
10 – 30VDC
ETH
USB
ANT
COM 1
COM 2
Fig. 1: RipEX radio router
RipEX access defaults: username: admin, password: admin
Ethernet
RipEX default IP is 192.168.169.169/24, so set a static IP 192.168.169.x/24 on your PC, power on the
RipEX and wait approximately 25 seconds for the RipEX OS to boot. Connect your PC to RipEXs' ETH
interface, start your browser and type https://192.168.169.169 in the address line.
Before attempting to do any configuration, make sure your RipEX is the only powered-up unit around.
Since all units coming from factory share the same default settings ex factory, you could be accessing
a different unit over the air without being aware of it.
USB/ETH adapter
When accessing over the optional “X5” USB/ETH adapter, your PC will get its IP settings from the built-
in DHCP server and you have to type https://10.9.8.7 in your browser. You do not need to worry about
other RipEX'es, you will be connected to the local unit in all cases.
Wifi adapter
When accessing over the optional “W1” Wifi adapter, connect your PC (tablet, smart phone) to the
RipEX Wifi AP first. Its default SSID is “RipEX + Unit name + S/N”
Your PC will get its IP settings from the built-in DHCP server and you have to type http://10.9.8.7 in
your browser. Remaining steps are the same and you do not need to worry about other RipEX'es, since
you will be connected to the local unit in all cases.
RipEX Radio modem & Router – © RACOM s.r.o.
8
Getting started
Summary of Contents for RipEX 1.6.0
Page 2: ......


