QUIEDAN COMPANY
22'x96' - 1000 Series Installation Manual
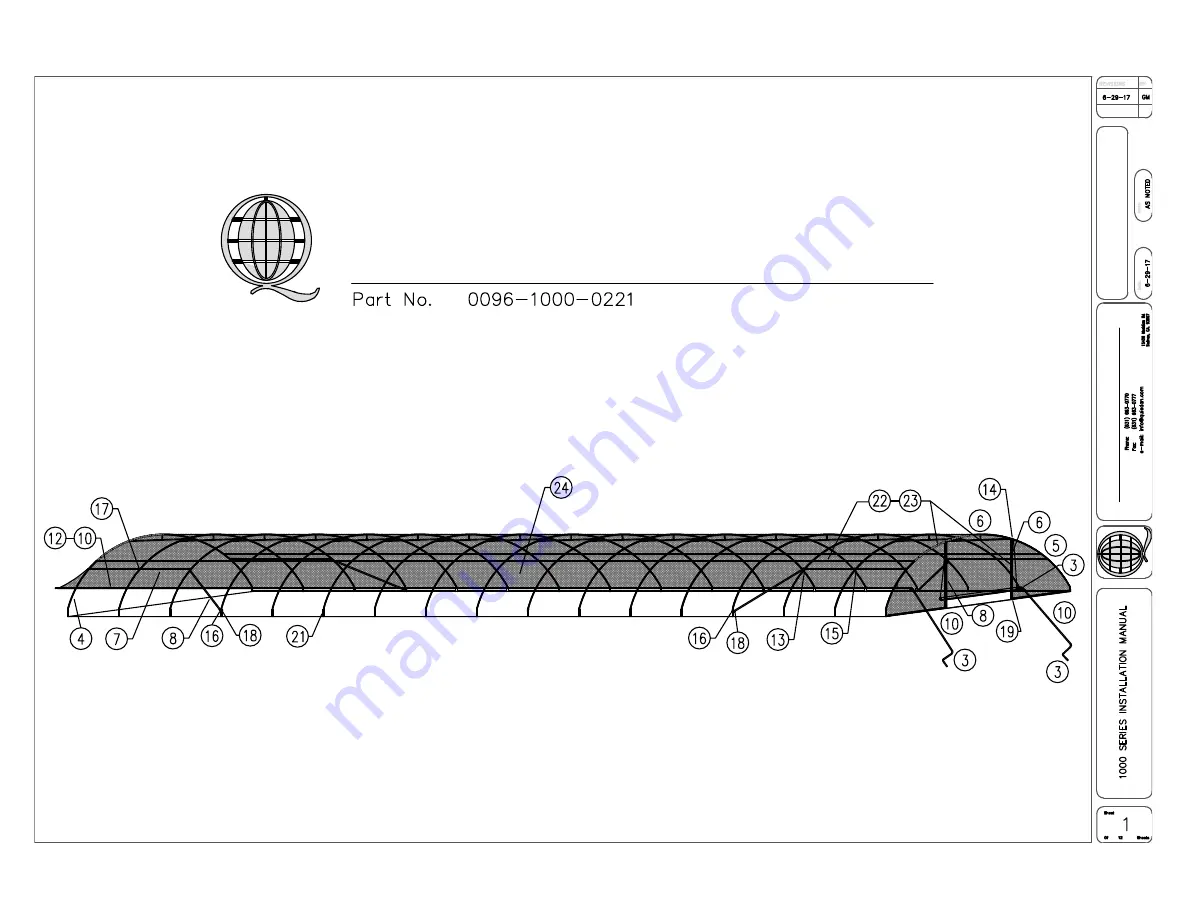
Page 1: ...QUIEDAN COMPANY 22 x96 1000 Series Installation Manual ...
Page 2: ...22 x96 1000 Series Components List QUIEDAN COMPANY ...
Page 3: ... one 17 33 33mm hinged double clamp onto each 5 10 leg 2 in from the swaged end see drawing 2 Connect 5 legs to reinforced 6 8 center piece to create arc drill in two 1 screws at the unions to hold tubes together 1 SDS screws 5 10 leg section pairs 17 6 8 reinforced center 17 17 33 33mm hinged double clamp 34 ...
Page 4: ... continuity throughout the heights of all platform posts Instructions 1 Using the width of the assembled arcs as an accurate measurement map out your platform insertion points as shown 2 Once insertion points are located dig 6 diameter holes and insert 20 36 anchor props 3 Use appropriate tooling according to the condition of the soil where the structure will stand 36 anchor prop 20 36 anchor prop...
Page 5: ... one person on each side insert one end at a time and continue until all arcs are set onto 20 anchor props Overview Installation of arcs to begin over head structure assembly 5 10 leg section pairs 6 8 reinforced center 20 36 anchor prop ...
Page 6: ...rcs to appropriate platform posts as shown below 3 When complete with first corner continue with remaining three corners as instructed Overview Attachment of the stretchers will provide additional support to both ends of the cold frame since this is where the most tension is placed 7 6 tube 8 8 8 tube 4 13 33 33mm straight clamp 8 15 33 33 33mm 3 way connector 4 16 33mm one bolt strap clamp 8 18 p...
Page 7: ...wn 3 Gather four 7 6 tubes and drill on 23 aluminum channel to the tubes beginning at 12 in from both ends 4 Using 13 straight clamp 33 33mm connect prepped 7 6 tubes to the first and last pairs of leg sections 5 Drive 19 prop stops into ground and insert 8 8 tubes at the appropriate distance so that they can be connected by the prepped 6 tubes using 13 straight clamp 33 33mm 6 Cut both 8 tubes ap...
Page 8: ...ect all appropriate pieces for 3 crank handle including 33mm swaged insert connectors if necessary Once film is ready to be attached to side roll up tube clamp on one 14 4 abs cuff at every foot as shown 2 See page 13 for details of large crank handle assembly 3 large crank handle 2 8 8 Tubing 1 10 10 swaged tube 10 11 swaged insert connector 33mm 2 12 4 abs cuff 75 ...
Page 9: ... prevent flapping which can cause potential tearing 4 Attach film simultaneously on both sides so film is tight and evenly distributed 5 Wrap up the bottom excess film to the roll up arm assembled 6 Trim excess film that hangs over the front and back of cold frame allow 6 of excess flap Overview Attaching film Be sure to tape all corners and possible sharp edges before attaching film to prevent pu...
Page 10: ...m is 32 wide by x 2 long i e if the cold frame height is 13 your sheet should be 32 x15 3 Center the sheet and lock film into 23 aluminum channels with 12 of film going upwards past the top and 12 downwards past bottom 23 aluminum channel along the ground 4 Do for front and back ends of cold frame Overview Attaching film to cover the front and back sides 23 aluminum channel 24 super premium film ...
Page 11: ...QUIEDAN COMPANY Instructions 1 Cut out an opening 4 in from the 9 12 tubes and header Overview Cutting out your front and back doors 8 8 tube ...
Page 12: ...ank handle assembly see page 13 4 Screw on 21 42mm end J SDS clamp to the outside of each 5 arc a few inches above ground with 4 poly web strip between the 21 J SDS clamp and the 5 arc see illustration below step 1 5 Using the same strip of 4 poly web screw the other end of the strip into 23 aluminum channel see illustration below step 2 Step 1 of poly web attachment Step 2 of poly web attachment ...
Page 13: ...ged insert connectors are in place drill in SDS screws through both sides to secure them in place 4 For Side Roll Up Assembly insert the swaged connector end into the 8 8 tube roll up assembly tube Drill SDS screws to connect 5 For the Front Back roll up door assembly insert swaged connector end into the 9 12 roll up door assembly 4 Large Crank Handle 2 8 8 Tubing 2 9 12 Tube 11 Swaged connector 4...