Configuration and Operation
53
9.3.4.1.2
Alarm Type
Select an alarm type (
Normal close
or
Normal open
) that corresponds to the alarm application.
Normal open
is the default setting. Click
SAVE
after configuring the settings.
9.3.4.1.3
Alarm Output
Define the normal alarm output signal as
Output high
or
Output low
, according to the current alarm
application.
Output high
is the default setting. Click
SAVE
after configuring the settings.
9.3.4.1.4
Trigger Action
The Administrator can specify various alarm actions to take when an alarm is triggered. The
following options are available:
Enable alarm output
– Select this checkbox to enable alarm relay output (default setting).
Send message by FTP
– Select the checkbox send an alarm message by FTP when an alarm is
triggered.
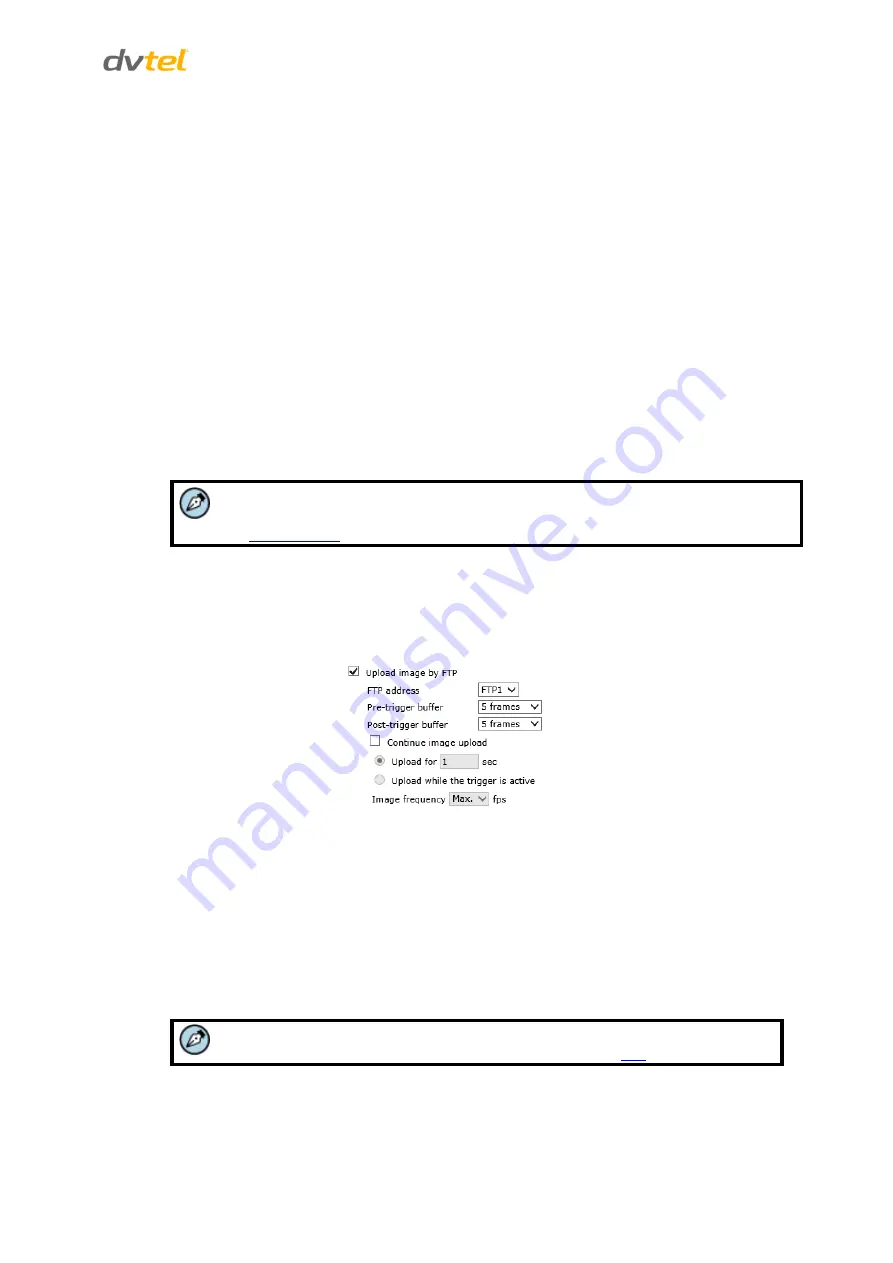
Upload image by FTP –
Select this box to assign an FTP site and configure the parameters
shown. When an alarm is triggered, event images are uploaded to the designated FTP site.
Note:
Images can be sent by FTP only when MJPEG is selected as the video stream from
the
Follow these steps:
From the
FTP address
drop-down list, select one of the two FTP addresses to use.
From the
Pre-trigger buffer
and
Post-trigger buffer
drop-down lists, select the number
of frames for the buffer from 1-20 frames.
Figure 53: Upload Image by FTP
Select the
Continue image upload
checkbox to upload an image by FTP for a defined
period of time or while the trigger is active. Select one of the following options:
To specify the length of time for the upload, select
Upload for
and enter the
number of seconds in the text box.
To upload while the trigger is active, select
Upload while the trigger is active
.
In the
Image Frequency
text box, from the drop-down list select the number of frames
per seconds from 1-15 for the upload.
Note:
Make sure that FTP configuration has been completed. See
Send HTTP notification
– Select this checkbox to send a notification by HTTP. Select the
destination HTTP address from the drop-down menu and specify the parameters for event


