14
Chapter 1
Getting Started
882 operational modes
The 882 has two operational modes: 1) Basic mode and 2) Browse mode. The 882 boots
up in the Basic mode which is the main operating mode you will be using. Both modes are
described below along with instructions for booting up the 882.
Booting up the 882
When the 882 is powered up it presents a screen enabling you to select the boot device.
The 882 loads its operating system and firmware from a from the selected boot device or
specified medium (storage location). If you do not press a key within 5 seconds the
currently specified boot location is used and boot up proceeds. This feature enables you
to control where the 882 boots from in instances where the default location is either
inaccessible or known to have a suspect application file. Follow the procedure below to
boot the 882:
To boot the 882:
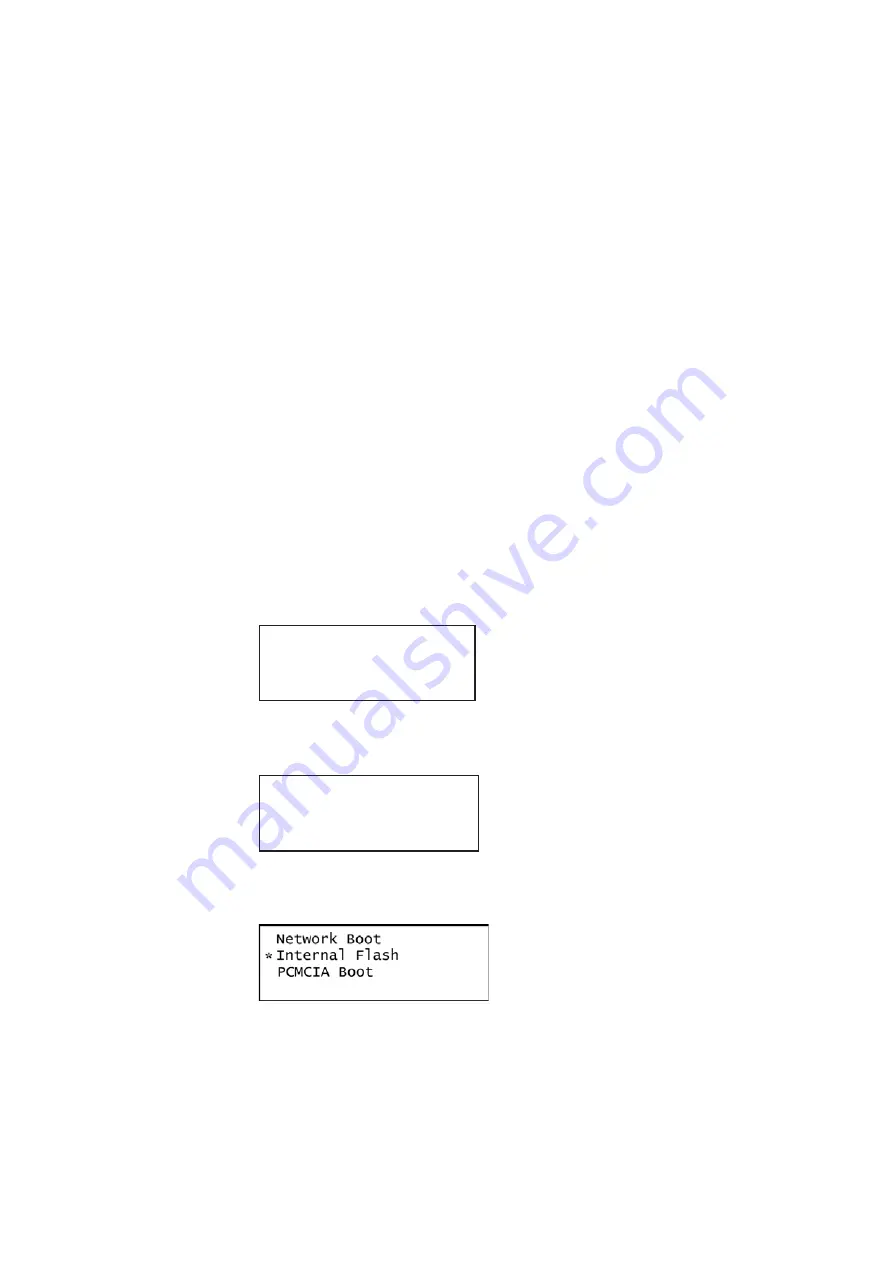
1. Apply power to the 882. The following display appears.
If you are sure you want to boot from the current storage location you can let the system
boot automatically.
a.
To boot from an alternative device, press any key within five seconds. The following
screen appears on the 882’s display:
2. Choose the
!BootDev
item by pressing the adjacent soft key. The following menu
appears:
3. Do one of the following:
•
To boot from the file server, press the soft key adjacent to
Network Boot
.
•
To boot from the 882’s flash memory, press the soft key adjacent to
Internal Flash
.
Quantum Data
Windriver
vxWorks System Boot
Press any key for setup
!BootDev !Passwd
!HostName !Flags
!FileName !Other
!InetAddr !TrgtName
Summary of Contents for 881
Page 1: ...881 882 Video Test Instrument User Guide 882E for HDMI ...
Page 12: ...10 Contents ...
Page 50: ...38 Chapter 1 Getting Started ...
Page 84: ...72 Chapter 2 Testing Video Displays ...
Page 99: ...882 Video Test Instrument User Guide Rev A 35 87 ...
Page 102: ...90 Chapter 3 Administrative Tasks ...
Page 107: ...882 Video Test Instrument User Guide Rev A 35 95 ...
Page 216: ...204 Chapter 5 Working with Formats ...
Page 248: ...236 Chapter 7 Working with Images ...
Page 264: ...252 Chapter 8 Working with Test Sequences ...
Page 382: ...40 Chapter 11 Testing EDID for HDMI 2 Expand the EDID Block in the navigation view ...
Page 446: ...104 Chapter 12 CEC Interactive Troubleshooting Environment ITE ...
Page 493: ...882 Video Test Instrument User Guide Rev A 35 151 ...
Page 591: ...882 Video Test Instrument User Guide Rev A 35 213 Commands by name ...
Page 687: ...882 Video Test Instrument User Guide Rev A 35 309 Example DVIC 23 FMTU ...
Page 1018: ...580 Appendix B Image Reference The EMITest5 image is shown below ...
Page 1094: ...656 Appendix B Image Reference ...
Page 1124: ...686 Appendix C Error Messages ...
Page 1140: ...702 Appendix D Format Reference ...


