October 12, 2017
7080-162B
25
MT VERNON E2-C
Shock hazard.
• Do NOT remove grounding prong from plug.
• Plug directly into properly grounded 3 prong
receptacle.
• Route cord away from appliance.
• Do NOT route cord under or in front of appliance.
CAUTION
G. Power Cord
1. Prior to installing the power cord, turn the dial
control “OFF”.
2. Make sure the wall receptacle has 120vac
output. NOTE: Using a circuit protector can
protect the appliance circuits from power
surges.
3. The appliance receptacle is located on its
lower, back right hand corner. Install the cord
to wall and appliance reception.
4. Refer to owner’s manual for appliance opera-
tion.
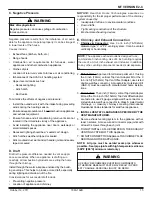
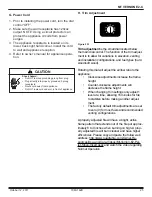
Figure 25.1
Trim adjustment
is the small dial located below
the main dial control. The function of the trim adjust
-
ment is to allow for variations in elevation, venting
and installation configurations, and fuel types (hard
wood/soft wood).
Rotating this dial will adjust the air/fuel ratio to the
appliance:
•
Clockwise adjustments increase the flame
height.
•
Counter-clockwise adjustments will
decrease the flame height.
•
When changing trim settings only adjust 1
level at a time, allowing 15 minutes for fire
to stabilize before making another adjust
-
ment.
•
The factory default trim adjustments are set
to zero (0) for most fuels and recommended
venting configurations.
A properly adjusted fire will have a bright, active
flame pattern that extends out of the fire pot approx
-
imately 6 to 9 inches when burning on high. A prop-
erly adjusted fire will burn cleaner and have higher
efficiencies. Please copy and paste the follow web
address:
http://www.quadrafire.com/Owner-Re
-
sources/Use-and-Care-Videos/Mt-Vernon-E2-Pel-
let-Stove-Insert.aspx and watch the video regarding
Normal Operation.
H. Trim Adjustment

