background image

1.

As supervisor (see

How to Log in as Supervisor

on page 180):

From the main menu, select the path:

Default User Settings Timeout

Settings Sleep Timeout

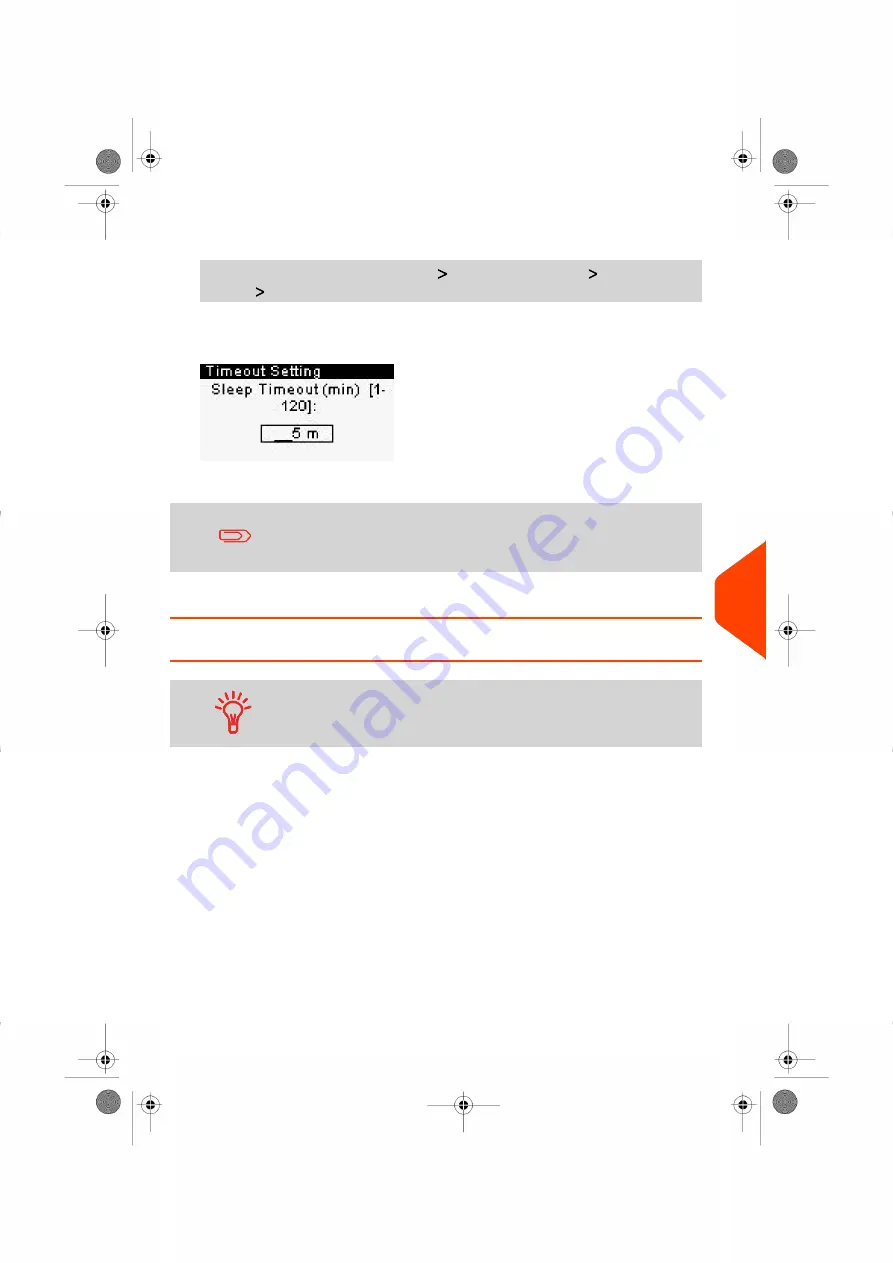
The Sleep Timeout screen is displayed.

2.

Enter the value of the 'Sleep timeout'.

Use the key

[C]

to clear the old setting and then enter a new

value.

3.

Press

[OK]

to validate.

How to Change the 'Soft Off Timeout'

Soft Off Timeout:

Period of inactivity after which the system

automatically turns to 'Soft off' mode (see

Power Management

on page 20).

To change the 'Soft Off Timeout':

10

Configuring

your

Mailing

System

187

| Page 187 | Jan-27-2023 01:28 |

Summary of Contents for iX-1 Series

Page 1: ...User Guide iX 1 Series Mailing Systems...

Page 2: ...25 3 2 Choosing Stamp Type 29 3 3 Processing Examples 32 3 4 Mail Corrections 57 3 5 Settings 63 Imprints 81 4 4 1 Imprint Configuration 83 4 2 Imprint Memories 205 Money Operations 93 5 5 1 Managing...

Page 3: ...9 Configuring your Mailing System 177 10 10 1 Settings Overview 179 10 2 Logging in out as the Supervisor 180 10 3 Display Settings 182 10 4 System Time outs and Settings 186 10 5 Setting Warnings 190...

Page 4: ...e Issues 253 13 2 Diagnostics 256 13 3 System Data 258 Specifications 263 14 14 1 Mail Specifications 265 14 2 Package Specifications 266 14 3 General Specifications 268 14 4 Operating Conditions 269...

Page 5: ...Page 4 TOC Jan 27 2023 01 28...

Page 6: ...Safety Information 1 1 1 Safety Requirements 3 How to Disconnect your Mailing System 6 1 2 Symbols 7 1 3 Glossary 8 1 Page 1 Safety Information Jan 27 2023 01 28...

Page 7: ......

Page 8: ...of liquid spillage disconnect the power cord from the outlet and proceed with cleaning Use an outlet located near the system that is easily accessible As the power supply cord is the system disconnect...

Page 9: ...ark that indicates conformity with health safety and environmental protection standards for products sold within the European Economic Area EEA The CE marking is also found on products sold outside th...

Page 10: ...s cigars etc on the mailing system When removing jammed material avoid using too much force to prevent personal injury and damaging components When lifting covers wait for all parts to stop moving bef...

Page 11: ...isconnect your Mailing System Unplug the power supply cord only when the mailing machine is in Sleep or Soft Off mode This avoids keeping the ink cartridge in a unprotected position where the ink may...

Page 12: ...man safety hazard ATTENTION brings to your attention a risk for equipment or mail that could result from an action you may perform NOTE remark that explains different scenarios or situations TIP advic...

Page 13: ...nding Postage amount available Descending IDentification ID Local Area Network link between computers LAN Personal Computer PC Personal Identification Number PIN Postal Security Device Meter PSD Unite...

Page 14: ...your Mailing System in this section 2 1 System Layout 11 2 2 Accessories 13 2 3 Control Panel Features 15 2 4 Connections 18 2 5 Power Management 20 How to Switch to Sleep or Wake Mode 20 9 Page 9 Mee...

Page 15: ......

Page 16: ...of envelopes for printing Mail Path Measures weight of mail pieces Weighing Platform Controls the mailing system Control Panel Allows you to access the ink cartridge Cover Inside Machine Front view 1...

Page 17: ...ide corner to open the cover Cover Prints the postal imprint on envelopes See also Changing the Ink Cartridge on page 237 Ink cartridge Postage meter Postal security device PSD 12 Page 12 Jan 27 2023...

Page 18: ...be directly connected to the mailing system for printing mailing related reports For more information about compatible printers that can connect to your mailing system please contact technical suppor...

Page 19: ...Barcode Scanner Optional This scanner is used to identify accounts through barcodes to scan e services tracking numbers on mail items 14 Page 14 Jan 27 2023 01 28 2 Meet Your Mailing System...

Page 20: ...te and services selected 1 Rate and Services Displays the date that will be printed 2 Date Indicates the amount to be printed on the envelope 3 Postage Current weight used to calculate postage amount...

Page 21: ...22 Text Keys and Shortcuts NAVIGATION KEYS Used to cancel skip or go back 19 Return Returns the system to the Home screen 18 Home Screen Accesses the menu settings 10 Menu Validates a selection 9 OK N...

Page 22: ...t 16 Clear Reset Rate SLEEP WAKE KEYS Wakes the Mailing System up or turns it to Sleep mode The light indicates the system state green awake amber continuous asleep 5 Sleep Wake Keypad Use For differe...

Page 23: ...l Serial Bus USB ports that allow you to connect a printer or memory devices To Weighing Platform WP Port To LAN LAN Port To peripherals see detail in next table USB ports To AC mains adaptor Power co...

Page 24: ...lug To memory device To printer optional The Mailing System will detect the connection method on startup Therefore please connect the LAN cable before applying power to the system 2 Meet Your Mailing...

Page 25: ...into a low power sleep mode after a period of inactivity A very low power sleep mode called soft off mode is also available This mode should only be used for long periods of non use of the machine In...

Page 26: ...e light located next to the key indicates Green The mailing system is in awake mode and ready for use Amber continuous The mailing system is in sleep mode low power mode Amber blinking The mailing sys...

Page 27: ......

Page 28: ...w to Print Meter Tapes 43 How to Process Certified Mail 45 How to Process E Certified Mail 46 How to Process a Large Flat Envelope 48 How to Process International Mail 49 How to Process a Postcard 51...

Page 29: ...How to Enter the Weight Manually 71 How to Change the Date 83 How to Add or Cancel a Text on the Stamp 221 How to Add or Cancel a Slogan on the Stamp 227 24 Page 24 Processing MailJan 27 2023 01 28...

Page 30: ...ccording to the characteristics and in the order that follows 1 Mail Type See table Type of Process and Type of Stamp on page 29 Outgoing mail with different postage types Standard postage Date to cor...

Page 31: ...ttings The access to the system may be open You may have to enter a PIN code You may have to select an account Your work session ends when the system returns to a Sleep mode You should not put anythin...

Page 32: ...r step is required to navigate through the system Login Screen If the login screen is displayed enter your PIN code Account Screen If the account screen is displayed select your account as follows Use...

Page 33: ...ike a cell phone Example To have N press twice the key 6 Accounting information To change allocating accounts when a session is already opened see Changing the Current Account on page 63 To choose sec...

Page 34: ...Slogan optional Standard Printing Standard Mail on page 32 Applying postage to outgoing mail No weight postage amount 0 Date Redate Printing Redate Mode on page 60 Re dating a mail piece Amount Date o...

Page 35: ...nu Each type of stamp is associated to A specific home screen that displays current stamp configuration weight postage etc A specific imprint configuration menu that allows you to set stamp parameters...

Page 36: ...displayed 3 Select the type of stamp in the list and press OK The Customize Stamp screen is updated and displays the menu items that allow you to modify the stamp options 4 Press to return to the home...

Page 37: ...in with selecting the Type of stamp to gain access to the additional options and be able to run your mail standard is default To set the stamp quickly consider using imprint memories The memories stor...

Page 38: ...e type of stamp is indicated on line 2 of the screen To change the type of stamp select the Type line press OK and then select Standard in the Type of stamp screen and press OK To select an option in...

Page 39: ...ate or Date Format Select Date and then select a date option in the Date advance screen Select Today s date for printing today s date For more details see How to Change the Date on page 83 Press to re...

Page 40: ...e is displayed in the Weight area of the home screen and the postage amount is updated 4 Insert the mail piece into the system with the side to be printed facing upwards Because of legibility issue th...

Page 41: ...the WP and insert it into the system with the side to be printed facing upwards The Mailing System applies the imprint on the mail piece When you put a mail piece on the Weighing Platform the weight...

Page 42: ...ed on the item s declared value There are limitations for insuring some products and certain items Some types of mail classes may include insurance in the price of service 1 Place the item on the weig...

Page 43: ...ng Dimensional weight involves factoring the box size into pricing If the dimensional weight exceeds the actual weight the shipping rate is based on the dimensional weight instead Essentially the bigg...

Page 44: ...tination ZIP Code Using the numeric keys enter the zip code 2 The display will prompt you to select the basic shape of the item Select Parcel for a rectangular shaped parcel and Non rectangular for al...

Page 45: ...e numeric keys to enter the dimensions The prompts may vary depending upon what shape was selected 4 The display will display the entered dimensions Select Next 5 The display will display the rate sel...

Page 46: ...s higher it would need to be entered manually into the mailing system the manual weight would then be used to calculate the rate Step 1 Calculate the Dimensional Weight You must calculate the Dimensio...

Page 47: ...ur desired class and enter the zip code Step 2 Decide to use the Calculated Weight or the Actual Weight After you have calculated the Dimensional Weight compare the calculated weight to the actual wei...

Page 48: ...ter Tapes The mailing system allows you to print adhesive meter tapes for mail pieces that are a too big to fit through the machine This mailing system requires double meter tapes Single meter tapes w...

Page 49: ...nsert your double meter tape into the system with the side to be printed facing upwards 3 Peel the meter tape of its backing and apply it to your mail piece 44 Page 44 Jan 27 2023 01 28 3 Processing M...

Page 50: ...uniquely identify each one with a label Not all mail classes may offer Certified Be sure to use the correct label for the service you want 1 Place your item on the weighing platform and press 2 Select...

Page 51: ...ou with special eConfirmation labels once you sign up for the eConfirmation contract The three types of eConfirmation labels correspond to the three types of eConfirmation Services supported by the US...

Page 52: ...4 Select e Cert 7 5 Enter the destination ZIP Code 6 Enter an e Confirmation Sender ID Optional 7 Select 5 for Return Receipt Optional 3 Processing Mail 47 Page 47 Jan 27 2023 01 28...

Page 53: ...ample The envelope is 10 inches by 13 inches and is less than a 1 2 inch thick The envelope weighs between 0 and 13 ounces These are the basic steps 1 Place the item on the weighing platform and press...

Page 54: ...For this example we will be processing an International First Class Letter to Great Britain One common mistake is to look for England or United Kingdom instead of Great Britain when selecting the cou...

Page 55: ...try start keying in the name in the Country box 5 Select Letter 1 and press the button to select Service 6 Press the button to display Summary 7 Press the OK button to save and exit to the home screen...

Page 56: ...opriate mail class when processing 1 Place the postcard on the weighing platform and press 2 Select Wizard 8 3 Select First Class 1 4 Select Domestic 1 5 Select Postcard 2 and press the OK button sele...

Page 57: ...Entry Manual Weighing allows you to enter the weight manually You may have to enter the weight manually if a mail piece exceeds the weighing capacity of your Scale To enter the weight manually from th...

Page 58: ...d 3 Enter the weight first lb then oz and press OK to validate If the weight exceeds a threshold the rate will be chained to another rate For more information refer Rate Chaining on page 138 The home...

Page 59: ...on incoming mail You must begin with selecting the Type of stamp to gain access to the corresponding parameters and be able to run mail Required settings 1 Make sure you are on the home screen of the...

Page 60: ...an Activate or deactivate printing the date Add text or slogan to print using text slogan element Activate or deactivate printing Received Activate or deactivate Counter Select the option to change an...

Page 61: ...nvelope into the mail path against the rear guide wall with the side to be printed facing upwards The Mailing System applies the imprint and the mail piece is ejected 56 Page 56 Jan 27 2023 01 28 3 Pr...

Page 62: ...lope with the additional postage amount The total postage will be the front and back stamps Only one postage correction indicia stamp is permitted On letter size mail place the postage correction indi...

Page 63: ...re details see How to Change the Current Type of Stamp on page 57 3 Select Amount and enter the desired amount Press OK to validate Press to return to the home screen 4 Amount correction type of stamp...

Page 64: ...piece into the mail path against the rear guide wall side to be printed facing upwards The Mailing System applies the imprint and the mail piece is sent to the catch tray 3 Processing Mail 59 Page 59...

Page 65: ...post office The post office may return mail if the correct date is not on the indicia Only one date correction indicia stamp is permitted On letter size mail place the date correction indicia stamp o...

Page 66: ...in the Type of stamp screen and press OK To change the date or date format from the Customize stamp screen as follows Select Date and then select a date option in the Date Advance Screen Select Today...

Page 67: ...piece into the mail path against the rear guide wall side to be printed facing upwards The Mailing System applies the imprint and the mail piece is sent to the catch tray 62 Page 62 Jan 27 2023 01 28...

Page 68: ...ount as follows How to Change Account You can change the account to charge to any account created In this example we will change from Marketing account 01 to Sales account 02 To change accounts 1 As a...

Page 69: ...tup and configured by a Quadient service technician The barcode sheet of accounts that you create should be Free 3 of 9 A barcode scanner can be used for One Click entry of accounts into your Mailing...

Page 70: ...dy done connect the barccode scanner to the mailing system via a USB port The list of accounts barcodes that are available is typically placed near the mailing system 3 Processing Mail 65 Page 65 Jan...

Page 71: ...vice or for big parcels entered manually see How to Enter the Weight Manually on page 71 The system provides you several ways to select a rate Using a shortcut list in the rate selection screen Using...

Page 72: ...ou can Type a rate number 1 to 7 to select a rate or display rate options Press 8 to select the Rate wizard 3 Follow the instructions on screen and once you have chosen the rate and services press OK...

Page 73: ...ire additional rate data such as a Zip Code The following example explains the rate chaining functionality 1 From the home screen a rate has been selected Enter a weight manually The weight entered ex...

Page 74: ...l prompt you to enter the dimensions of the item Use the numeric keys to enter the dimensions The prompts may vary depending upon what shape was selected 5 The entered dimensions are displayed Select...

Page 75: ...r the weight manually if you know it see How to Enter the Weight Manually on page 71 How to Use Standard Weighing Standard Weighing In this mode each mail piece is manually placed on the Weighing Plat...

Page 76: ...y shows Printing in progress How to Enter the Weight Manually Manual Weight Entry Manual Weighing allows you to enter the weight manually You may have to enter the weight manually if a mail piece exce...

Page 77: ...d 3 Enter the weight first lb then oz and press OK to validate If the weight exceeds a threshold the rate will be chained to another rate For more information refer Rate Chaining on page 138 The home...

Page 78: ...the Date You can set the Date to change the date at a fixed time This is useful if you process mail after the last mail pickup for the day This ensures that the proper date of mailing is printed for...

Page 79: ...ncel the day in the date select No day To choose another day select the corresponding item in the list The icon indicates the current selection The date can be advanced up to 30 days from today s date...

Page 80: ...p as illustrated below Imprint with a text Imprint with a slogan See also Managing Custom Text Messages on page 221 Managing Slogans on page 227 How to Add or Cancel a Text on the Stamp To add a text...

Page 81: ...e list or select None for printing no text The Text list screen is displayed The icon indicates the current selection 4 Press OK to validate your selection The Customize stamp screen is displayed with...

Page 82: ...ize Stamp 2 Select Ad slogan The Slogan list screen is displayed 3 Select the slogan in the list or select None for printing no slogan 4 Press OK to validate your selection The Customize Stamp screen...

Page 83: ...printer adjustment This function is only for the standard stamp To use imprint test 1 From the home screen Press and select Customize Stamp The Customize Stamp screen is displayed 2 Select Standard i...

Page 84: ...and date mode for the Type of stamp you would like to use In account activated configurations Imprint Memories allow you assign postage costs to pre selected accounts If your mail requires different s...

Page 85: ...or The imprint memories list is displayed 2 Select an imprint memory in the list 3 Press OK to validate your selection The imprint memory zone Mem of the home screen displays the current imprint memo...

Page 86: ...Cancel a Text on the Stamp 221 How to Add or Cancel a Slogan on the Stamp 227 4 2 Imprint Memories 205 How to Create an Imprint Memory 205 How to Edit Modify an Imprint Memory 206 How to Use an Impri...

Page 87: ......

Page 88: ...ed for the next days mail pickup The Date setting allows you to Change the date printed on the mail pieces for future sending you are processing the mail on Friday but not delivering the mail to the p...

Page 89: ...o cancel the day in the date select No day To choose another day select the corresponding item in the list The icon indicates the current selection The date can be advanced up to 30 days from today s...

Page 90: ...een is displayed 3 Select the desired text in the list or select None for printing no text The Text list screen is displayed The icon indicates the current selection 4 Press OK to validate your select...

Page 91: ...tomize Stamp 2 Select Ad slogan The Slogan list screen is displayed 3 Select the slogan in the list or select None for printing no slogan 4 Press OK to validate your selection The Customize Stamp scre...

Page 92: ...home screen the number of the current Imprint Memory How to Create an Imprint Memory Standard Imprint Memory Text Slogan Weight option Date Mode Rate Account Number if any To create an imprint memory...

Page 93: ...t Modify an Imprint Memory on page 206 How to Edit Modify an Imprint Memory To edit or modify an imprint memory 1 As supervisor see How to Log in as Supervisor on page 180 From the main menu select th...

Page 94: ...s are the solution all your settings are stored in a single memory Just press the imprint memory key instead of multiple keystrokes to select all the required elements To prepare imprint memories as s...

Page 95: ...ine printer adjustment This function is only for the standard stamp To use imprint test 1 From the home screen Press and select Customize Stamp The Customize Stamp screen is displayed 2 Select Standar...

Page 96: ...rint Test as below 5 A message is displayed Check your imprint If your setting are not correct press OK to do again Else if your imprint quality is bad press Cleaning to clean the cartridge 4 Imprints...

Page 97: ......

Page 98: ...PSD Meter Funds 95 How to Add Funds to the PSD Meter 96 5 2 Unlocking the PSD Postal Inspection 98 How to Unlock the PSD 98 5 3 Setting Warnings 190 How to Set the High Value Warning Amount 190 How to...

Page 99: ......

Page 100: ...see Connections on page 18 and that the connection is properly configured see Connection Settings on page 209 Checking Funds You can check the total postage used and the remaining funds in the PSD at...

Page 101: ...n add funds to your Mailing System at any time by complete the steps listed below The Mailing System then connects to the Postal Services and validates the operation How to Add Funds to the PSD Meter...

Page 102: ...failure message and the amount that you may actually add depending on your postal account balance In the case of a communication error the amount previously entered cannot be changed Check connection...

Page 103: ...ed to the network permanently The IX mailing system will automatically connect to the postal server at night If the IX mailing system does not connect in 72 hours it will be deactivated If your system...

Page 104: ...o confirm audit transaction request is displayed 4 Press OK to validate If the audit is successful the system displays a successful message If the audit fails the system displays a failure message exp...

Page 105: ...cidentally printing high postage amounts Example 4 80 instead of 0 48 To set a high value warning amount 1 As supervisor see How to Log in as Supervisor on page 180 From the main menu select the path...

Page 106: ...e set to any dollar amount To set a low funds threshold 1 As supervisor see How to Log in as Supervisor on page 180 From the main menu select the path Default User Settings Funds Settings 2 Select Low...

Page 107: ...mailing system The mailing machine will prompt for a PIN code depending on user settings To set a funding PIN code 1 As supervisor see How to Log in as Supervisor on page 180 From the main menu select...

Page 108: ...ll operations performed on the machine in a selected period Die Number on printed report only Download date time Default period previous 6 months Funding amount New descending Output Options Screen US...

Page 109: ...nds usage since the installation of the system The content is limited to the history available in the PSD Die Number Current Date and Time on printed report only Output Options On label Screen USB pri...

Page 110: ...ow to Display and Change to Account with pin code Mode 114 How to Display and Change the Account Mode 119 6 4 Creating Accounts 116 How to Create an Account 119 6 5 Managing Accounts 119 How to Displa...

Page 111: ......

Page 112: ...n account when processing mail No PIN number is required to access functions or process mail Account with pin code Postage usage is tracked by account User must select an account when processing mail...

Page 113: ...to Display and Change to Account with pin code Mode Account with pin code Postage usage is tracked by account User must select an account when processing mail A PIN number is required to access functi...

Page 114: ...cessing mail A PIN number is required to access functions and process mail In this mode there is a shared System PIN Code To display and change the Account mode to No account with access control 1 As...

Page 115: ...do not want to use accounts use the No Account with Access Control mode This provides a single PIN code for all authorized users 1 As supervisor see How to Log in as Supervisor on page 180 From the ma...

Page 116: ...Accounts Function is activated users of the Mailing System must select an account when starting their work session Afterwards users can change accounts to allocate postal expenditures as needed How to...

Page 117: ...g mail A PIN number is required to access functions and process mail In this mode there is a shared System PIN Code To display and change the Account mode to No account with access control 1 As superv...

Page 118: ...ail processing If only one account is available the Mailing System automatically selects it at start up Implementing the Account Mode 1 Follow the steps outlined in How to Display and Change the Accou...

Page 119: ...equired to access functions and process mail To use this mode the system must have at least one account created If only one account is available the Mailing System automatically selects it at start up...

Page 120: ...As supervisor see How to Log in as Supervisor on page 180 From the main menu select the path Account Management Account Mode Selection The Account Mode Selection screen is displayed with the current...

Page 121: ...Account Item Number of the account Two accounts cannot have the same number An account number cannot be modified after the account is created However the account can be deleted 30 Alphanumeric Charact...

Page 122: ...t screen select Manage Account The Manage Account screen is displayed 2 Select Account List 3 Select Add Account 4 Enter Number of account and press OK 5 Enter Name of account and press OK 6 Choose th...

Page 123: ...8 Press OK to validate The Account creation summary screen displayed 9 Press OK to confirm the creation of the account 118 Page 118 Jan 27 2023 01 28 6 Accounts and Access Control...

Page 124: ...s displayed with the current Account Mode shown 2 Select the desired Account mode 3 Press OK to confirm 4 If required enter the PIN code and press OK How to Create an Account To create an account you...

Page 125: ...hoose the Status for the account and press OK 7 If you are in Account with pin code mode set a PIN Code for the account 8 Press OK to validate The Account creation summary screen displayed 9 Press OK...

Page 126: ...is displayed 2 Select the account or type the account number and press OK 3 Select Edit Modify The Edit Modify screen appears 4 Change account name using the keypad use key C to clear characters Press...

Page 127: ...efore your account structure is complete To activate or deactivate an account 1 As supervisor see How to Log in as Supervisor on page 180 From the main menu select the path Account management Manage a...

Page 128: ...isible to the operator How to Delete an Account To delete an Account 1 As supervisor see How to Log in as Supervisor on page 180 From the main menu select the path Account management Manage account Ac...

Page 129: ...of account deletion is displayed 4 Press OK to delete the account An account number cannot be modified If you want to modify the account number first delete the account and then create a new account...

Page 130: ...nt or Account with pin code Report output is printer or USB memory key To generate the Account Report 1 Make sure the current account mode is Account or Account with pin code 2 As supervisor from the...

Page 131: ...rrent account mode has to be Account or Account with pin code Die Number on printed report only You have to specify the Begin date and an the End date of the report Use the selection of month and year...

Page 132: ...t with pin code You have to select an account in the list of accounts then the Begin date and the End date of the report You have to specify the Begin date and an the End date of the report Use the se...

Page 133: ...128 Page 128 Jan 27 2023 01 28 6 Accounts and Access Control...

Page 134: ...this example we will change from Marketing account 01 to Sales account 02 To change accounts 1 As a user Press and select the path Change Account The list of accounts that are available is displayed...

Page 135: ...service technician The barcode sheet of accounts that you create should be Free 3 of 9 A barcode scanner can be used for One Click entry of accounts into your Mailing System You can change the accoun...

Page 136: ...connect the barccode scanner to the mailing system via a USB port The list of accounts barcodes that are available is typically placed near the mailing system 6 Accounts and Access Control 131 Page 1...

Page 137: ...2 Select the account you want to use and scan 3 The current account number is displayed 132 Page 132 Jan 27 2023 01 28 6 Accounts and Access Control...

Page 138: ...electing a Rate 135 How to Select a Rate 135 7 2 Managing Postal Rates 233 How to Check your Rate Updates 233 How to Download New Postal Rates 234 How to Use Rate Chaining 138 133 Page 133 Rates Jan 2...

Page 139: ......

Page 140: ...n this screen you can Type a rate number 1 to 7 to select a rate or display rate options Press 8 to select the Rate wizard 3 Follow the instructions on screen and once you have chosen the rate and ser...

Page 141: ...vailable rate tables that are currently installed in your mailing system and indicates with a check mark the active rate table Rate tables will automatically become active on their effective date For...

Page 142: ...s The mailing system connects to the Online Services server and downloads available rates Rate Protection Rate Protection ensures that the latest postal rates are installed on your Mailing System When...

Page 143: ...require additional rate data such as a Zip Code The following example explains the rate chaining functionality 1 From the home screen a rate has been selected Enter a weight manually The weight entere...

Page 144: ...will prompt you to enter the dimensions of the item Use the numeric keys to enter the dimensions The prompts may vary depending upon what shape was selected 5 The entered dimensions are displayed Sel...

Page 145: ...6 The Rate Selection screen is displayed Select OK 7 The Machine displays the rate chaining on the homepage process as normal 140 Page 140 Jan 27 2023 01 28 7 Rates...

Page 146: ...ains how you can access and print reports for your Mailing System 8 1 Generating a Report 143 How to Generate a Report 143 8 2 Available Reports 145 How to Generate the Account Report 145 141 Page 141...

Page 147: ......

Page 148: ...ord the report On screen On an external printer if any On a label On a USB memory key How to Generate a Report To generate a Report as a User 1 As a user Press and select the path Reports A list of av...

Page 149: ...e the C key to clear displayed parameter data from right to left and then enter the new parameter data you want 4 Select an available output device The system will send the report details to the selec...

Page 150: ...to be Account or Account with pin code Report output is printer or USB memory key To generate the Account Report 1 Make sure the current account mode is Account or Account with pin code 2 As superviso...

Page 151: ...t postage refill operations performed on the machine in a selected period Die Number on printed report only Download date time Default period previous 6 months Funding amount New descending Output Opt...

Page 152: ...ber of items purchased Total postage value for this day Output Options Screen USB printer USB memory key Content Funds Summary Report This report displays the information on funds usage since the inst...

Page 153: ...he IP Configuration Report displays IP address information To generate this report the mailing system must be connected to the network with a LAN The report prints to a label Output Options The IP Con...

Page 154: ...Content Machine Configuration Report This report displays all machine settings Output Options USB printer if installed USB memory key 8 Reports 149 Page 149 Jan 27 2023 01 28...

Page 155: ...Content 150 Page 150 Jan 27 2023 01 28 8 Reports...

Page 156: ...stage used You have to specify the Begin date and an the End date of the report Use the selection of month and year Default period is previous 12 months ending current month Die Number on printed repo...

Page 157: ...mode has to be Account or Account with pin code Die Number on printed report only You have to specify the Begin date and an the End date of the report Use the selection of month and year Default peri...

Page 158: ...e period You can select any account from the list The current account mode has to be Account or Account with pin code You have to select an account in the list of accounts then the Begin date and the...

Page 159: ...en Content Base Events Report This report displays the list of errors encountered on the mailing system and related to the base Output Options Screen USB Printer USB Key Content 154 Page 154 Jan 27 20...

Page 160: ...stem and related to the meter Output Options Screen USB Printer USB Key Content Server Connection History Report Provides a list of the Server Connection History where failed and successful connection...

Page 161: ...Status Management Report This report displays the information of the current status of the Host Output Options Screen Content 156 Page 156 Jan 27 2023 01 28 8 Reports...

Page 162: ...How to Upload Report Data to the Online Services Server 162 Synchronize Call 163 How to Save Customer Data 164 9 3 OLS Connection Tests 165 Ping Server Diagnostic Test 165 Test Server Diagnostic Test...

Page 163: ......

Page 164: ...f all of your tracked mail from your web account Ink alerts never run out of ink again The online server monitors your mailing machine ink supply and e mails an alert notification when it is time to r...

Page 165: ...Ink Management service the Mailing System automatically connects when it s time to re order ink supplies It is strongly recommended that you leave the Mailing System turned on in sleep mode and connec...

Page 166: ...ng the Mailbox on page 216 To trigger a generic call as Supervisor 1 As supervisor see How to Log in as Supervisor on page 180 From the main menu select the path Online Services Generic Call The Maili...

Page 167: ...ces Server To upload report data 1 As a user Press and select the path Online Services Upload Statistics 2 As supervisor see How to Log in as Supervisor on page 180 From the main menu select the path...

Page 168: ...n Press and select the path Online Services Machine Synchronization The Mailing System connects to the server and updates 2 Call is complete To trigger a Synchronize call as Supervisor 1 As supervisor...

Page 169: ...a request from by Customer Service To save customer data 1 As supervisor see How to Log in as Supervisor on page 180 From the main menu select the path Online Services Save Customer Data 2 Press OK t...

Page 170: ...en Press and select the path Online Services 2 Select Ping Server from the list displayed on the screen 3 After a successful connection the display shows Press OK To ping the server as a Supervisor 1...

Page 171: ...st Sends a message to a server to test the line To test the server as a User 1 From the home screen Press and select the path Online Services 2 Select Test Server from the list displayed on the screen...

Page 172: ...Supervisor on page 180 From the main menu select the path Online Services 2 Select Test Server from the list displayed on the screen 3 After a successful connection the display shows Press OK 9 Online...

Page 173: ...ction ensures that the latest postal rates are installed on your Mailing System When the Postal Service announce changes in their rate and fee schedule the Online Services server downloads the new rat...

Page 174: ...electronically to the Postal Server The special rate is identified as eConfirmation on your Mailing System and in these instructions To be eligible for Postal Service discounts on Delivery Confirmati...

Page 175: ...s you must have a Weighing Platform connected to your Mailing System e Confirmation Service Customer Profile If you have purchased the E Confirmation Edition with USPS tracking on the Online Services...

Page 176: ...the USPS e Confirmation does not require additional special paper work as do retail mail confirmations 5 Upload your daily mailing information to the Online Services Server This function is performed...

Page 177: ...atform see How to Zero the Weighing Platform on page 194 3 Select the rate corresponding to the package to send see How to Select a Rate on page 135 If the rate requires a zip code to be entered a spe...

Page 178: ...hen eConfirmation records are uploaded the eConfirmation record list is empty You can display and check information regarding an eConfirmation record Record status PIC Valid or PIC Deleted Type of eCo...

Page 179: ...valid mail with eConfirmation Service to track through USPS PIC Deleted corresponds to a mail you don t want to track anymore You will not receive any tracking information on records with status PIC D...

Page 180: ...4 Press OK 9 Online Services 175 Page 175 Jan 27 2023 01 28...

Page 181: ......

Page 182: ...How to Set the High Value Warning Amount 190 How to Set the Low Funds Threshold 191 10 6 Weighing Settings 192 How to Change the Default Weighing Type 192 How to Activate De active the Automatic Weig...

Page 183: ...ection Settings 209 How to Set the Postal Online Services Connection 209 How to Set LAN Parameters 210 10 10 Date and Time 211 How to Check the Machine Time and Date 211 How to Set the Automatic Date...

Page 184: ...long as the user who applies them is logged in Supervisor settings sets the default or permanent settings of your Mailing System Other user settings are described in the corresponding sections Process...

Page 185: ...sor to configure the Mailing System and perform functions such as managing accounts and access rights generating certain reports etc When you are logged in as supervisor only the supervisor menu is av...

Page 186: ...or a PIN code at start up How to Exit the Supervisor Mode Follow the step below to exit the supervisor mode You must exit the supervisor Mode before you can begin to print postage To exit the supervis...

Page 187: ...t the display contrast 1 As a user Press and select the path User Preferences Contrast 2 Use the or to increase or decrease the contrast The screen updates immediately 3 Press OK to exit This is a use...

Page 188: ...references Contrast 2 Use the or button to increase or decrease the contrast The screen updates to the new setting 3 Press OK to validate Do not press OK if the screen contrast is completely light or...

Page 189: ...3 Press OK to validate This user setting lasts as long as you are logged in The standby mode will delete this setting To change the user language by default 1 As supervisor see How to Log in as Super...

Page 190: ...2 Select the default language 3 Press OK to validate This setting will not be affected by the standby mode 10 Configuring your Mailing System 185 Page 185 Jan 27 2023 01 28...

Page 191: ...e see Power Management on page 20 To change the Sleep timeout 1 As a user Press and select the path Job Settings Timeout Settings Sleep Timeout The Sleep Timeout screen is displayed 2 Enter the value...

Page 192: ...Enter the value of the Sleep timeout Use the key C to clear the old setting and then enter a new value 3 Press OK to validate How to Change the Soft Off Timeout Soft Off Timeout Period of inactivity a...

Page 193: ...e 3 Press OK to validate To change the Soft Off Timeout by default 1 As supervisor see How to Log in as Supervisor on page 180 From the main menu select the path Default User Settings Timeout Settings...

Page 194: ...3 Press OK to validate 10 Configuring your Mailing System 189 Page 189 Jan 27 2023 01 28...

Page 195: ...lly printing high postage amounts Example 4 80 instead of 0 48 To set a high value warning amount 1 As supervisor see How to Log in as Supervisor on page 180 From the main menu select the path Default...

Page 196: ...any dollar amount To set a low funds threshold 1 As supervisor see How to Log in as Supervisor on page 180 From the main menu select the path Default User Settings Funds Settings 2 Select Low funds t...

Page 197: ...hange the Default Weighing Type This setting defines both the weighing device and the weighing type that are selected by default when a user starts the mailing process see Choosing a Weighing Type on...

Page 198: ...val from the WP do not trigger the Weighing Platform Automatic Selection A warning message can be displayed to the operator to confirm that the WP will be automatically selected To activate the automa...

Page 199: ...t Detection to de activate the function 3 Press OK to validate How to Zero the Weighing Platform The mailing system should display 0 00 weight when there is nothing on the weighing platform scale If t...

Page 200: ...Zero Weighing Platform To zero the Weighing Platform quickly press and hold the button for approximately two seconds 2 The display prompts 3 Remove all items from the Weighing Platform 4 Press OK 10 C...

Page 201: ...Online Services or manually How to Change the GEO Code To change the GEO code manually follow the steps below Changing the GEO code modifies the weight values the Mailing System calculates Make sure y...

Page 202: ...able on the next pages to get the 5 digit GEO code from your location altitude and latitude and enter the 5 digit using the keypad 3 Press OK to validate 10 Configuring your Mailing System 197 Page 19...

Page 203: ...Geodesic map 198 Page 198 Jan 27 2023 01 28 10 Configuring your Mailing System...

Page 204: ...Geodesic codes 10 Configuring your Mailing System 199 Page 199 Jan 27 2023 01 28...

Page 205: ...e Mode To activate de activate ePostage Mode 1 As supervisor see How to Log in as Supervisor on page 180 From the main menu select the path Default User Settings System Settings ePostage Mode The ePos...

Page 206: ...as Supervisor on page 180 From the main menu select the path Maintenance Network Advanced Settings ePostage Link The ePostage Advanced Settings screen is displayed 2 Enter PC IP address 3 Enter PC Po...

Page 207: ...ttings You can set default parameters for the stamp elements that follow Rate Text Slogan You can create up to nine custom text messages On list screens a mark indicates the default parameter How to C...

Page 208: ...ervisor see How to Log in as Supervisor on page 180 From the main menu select the path Default User Settings Default Imprint Parameters Set Default Text 2 Select the Default text from the list 3 Press...

Page 209: ...lect the path Default User Settings Default Imprint Parameters Default Slogan Selection 2 Select the default slogan from the list or None for no slogan 3 Press OK to validate See also Managing Slogan...

Page 210: ...the number of the current Imprint Memory How to Create an Imprint Memory Standard Imprint Memory Text Slogan Weight option Date Mode Rate Account Number if any To create an imprint memory 1 As supervi...

Page 211: ...mprint Memory on page 206 How to Edit Modify an Imprint Memory To edit or modify an imprint memory 1 As supervisor see How to Log in as Supervisor on page 180 From the main menu select the path Predef...

Page 212: ...isor on page 180 From the main menu select the path Predefined Imprint Management 2 Select an imprint memory from the list of saved imprint memories 3 Press OK to validate 4 Select the menu path Delet...

Page 213: ...l your settings are stored in a single memory Just press the imprint memory key instead of multiple keystrokes to select all the required elements To prepare imprint memories as supervisor see Imprint...

Page 214: ...to the LAN at power up To set the postal Online Services connection 1 As supervisor see How to Log in as Supervisor on page 180 From the main menu select the path Communication Settings Type of conne...

Page 215: ...To set the parameters of the LAN 1 As supervisor see How to Log in as Supervisor on page 180 From the main menu select the path Communication Settings Internet LAN Settings The DHCP configuration is d...

Page 216: ...er you can perform a postal inspection on page 98 How to Set the Automatic Date Advance Time The Automatic Date Advance function automatically changes the date printed on mail pieces at a preset time...

Page 217: ...screen is displayed 2 Press OK 3 Select ON and press OK to enable the Auto Date Advance function 4 Select Set Hours enter the Automatic Date Advance time 00 00 hours is not allowed and press OK 5 Sele...

Page 218: ...oad New Options 220 11 4 Managing Text Messages 221 How to Add or Cancel a Text on the Stamp 221 How to Display the List of Text Messages 223 How to Add a New Text Message 223 How to Modify a Text Mes...

Page 219: ......

Page 220: ...tes Creating additional Texts for the stamp Downloading custom Slogans To update your Mailing System s operating system see Online Services on page 157 How to Access the Options and Updates Menu 1 As...

Page 221: ...ead messages and allows you to delete read messages How to Read Messages The mailbox allows you to receive messages from the mailing system or from customer service via the server To read Messages as...

Page 222: ...e message to erase the message after you have read it How to Delete Messages The mailbox allows you to receive messages from the mailing system or from customer service via the server To read Messages...

Page 223: ...pervisor see How to Log in as Supervisor on page 180 From the main menu select the path Mailbox The Mailbox screen is displayed 2 Select the message to be deleted and press OK 3 Select Delete message...

Page 224: ...or more information about the options you can add to your Mailing System please contact customer service To display the option list 1 As supervisor see How to Log in as Supervisor on page 180 From the...

Page 225: ...es server To activate an option that is ready for downloading on the Online Services server 1 Check that your Mailing System is connected to a network see Connections on page 18 and that the connectio...

Page 226: ...Managing Text Messages 11 4 How to Add or Cancel a Text on the Stamp To add a text to the stamp or to cancel the text 221 Page 221 Jan 27 2023 01 28 11 Options and Updates...

Page 227: ...st or select None for printing no text The Text list screen is displayed The icon indicates the current selection 4 Press OK to validate your selection The Customize stamp screen is displayed with upd...

Page 228: ...default text if any To display the list of text 1 As supervisor see How to Log in as Supervisor on page 180 From the main menu select the path Options and Updates Text Settings The list of available...

Page 229: ...een 2 Select Create new text 3 Enter your text max 4 lines 18 characters per line For more information on how you can type different characters see Control Panel Features on page 15 The lower case let...

Page 230: ...f text is displayed in the Text management screen 2 Select a message and press OK The Text Settings screen is displayed 3 Select Modify text 4 You can change the text message and press OK to display t...

Page 231: ...select the path Options and Updates Text Settings The list of text is displayed in the Text management screen 2 Select a message and press OK The Text Settings screen is displayed 3 Select Delete tex...

Page 232: ...slogans Rename or delete slogans from the list Download new slogans The available slogans are automatically downloaded into your Mailing System by connecting the Mailing System to the Online Services...

Page 233: ...n is displayed 3 Select the slogan in the list or select None for printing no slogan 4 Press OK to validate your selection The Customize Stamp screen is displayed with updated parameters home screen p...

Page 234: ...ark the active slogan To display the list of slogans 1 As supervisor see How to Log in as Supervisor on page 180 From the main menu select the path Option and Updates Update Ad Slogans The list of Slo...

Page 235: ...Option and Updates Update Ad Slogans The list of Slogans is displayed in the Slogan management screen 2 Select the slogan and press OK 3 Select Edit 4 Change the slogan name using the keypad and pres...

Page 236: ...select the path Option and Updates Update Ad Slogans The list of Slogans is displayed in the Slogan management screen 2 Select the slogan and press OK 3 Select Delete The system asks for a confirmatio...

Page 237: ...ct the path Option and Updates Update Ad Slogans The list of Slogans is displayed in the Slogan management screen 2 Select Check for updates and press OK The Mailing System connects to the Online Serv...

Page 238: ...e rate tables that are currently installed in your mailing system and indicates with a check mark the active rate table Rate tables will automatically become active on their effective date For each ra...

Page 239: ...the path Options and Updates Rate management The list of rate tables is displayed in the Rate management screen The tables are identified by the effective date of the rate 2 Select Check for updates T...

Page 240: ...e Data 240 How to Clean the Print Heads Automatically 253 How to Clean the Printing Head Manually 243 How to Align the Print Heads 244 12 2 Service Processes 246 How to Run the Registration Update 246...

Page 241: ......

Page 242: ...lity The system performs cleaning automatically or on your request You can also clean the heads manually if the automatic cleaning is not sufficient The ink cartridge also contains two print heads tha...

Page 243: ...pervisor see How to Log in as Supervisor on page 180 From the main menu select the path Maintenance Ink Cartridge Cartridge replacement The cartridge moves to the replacement position and the followin...

Page 244: ...ge towards you to disengage it 5 Remove the protective strips from the new ink cartridge 6 Insert the new ink cartridge and then push it forward until it stops 7 Put the blue lever back into place 8 C...

Page 245: ...as consumption and date installed To display the ink cartridge data as a User 1 As a user Press and select the path Ink Cartridge Ink Cartridge information The Ink information screen is displayed To d...

Page 246: ...yed How to Clean the Print Heads Automatically Each ink cartridge contains two print heads If after cleaning the print heads you still observe poor print quality streaked too light blurred etc or the...

Page 247: ...s automatically To clean the print heads automatically as Supervisor 1 As supervisor see How to Log in as Supervisor on page 180 From the main menu select the path Maintenance Ink Cartridge Cleaning P...

Page 248: ...the printing head manually To clean the printing head manually 1 Open the cover 2 Remove the ink cartridge See How to Change the Ink Cartridge on page 237 3 Clean the head with a soft damp cloth 4 Pu...

Page 249: ...uld verify that the ink cartridge print heads are aligned To align the print heads 1 As supervisor see How to Log in as Supervisor on page 180 From the main menu select the path Maintenance Ink Cartri...

Page 250: ...ine 4 Press OK to validate 5 Repeat the previous step until lines F are aligned 6 Press to exit Ink Management Service The Ink Management service sends an electronic message to the Online Services ser...

Page 251: ...ss Contact your Customer Service to change your information then you will be instructed to perform the update registration procedure To run the registration update 1 As supervisor see How to Log in as...

Page 252: ...tion The message Transaction successful is displayed 6 Press OK A message for entering the geodesic code Please refer to User Guide for allowed values 7 Press OK 8 Enter the Geocode 9 Press OK The upd...

Page 253: ...ase for removal by saving data on USB key To remove the meter 1 As supervisor see How to Log in as Supervisor on page 180 From the main menu select the path Maintenance Processes Disable Base The Remo...

Page 254: ...ices to perform To withdraw the meter 1 As supervisor see How to Log in as Supervisor on page 180 From the main menu select the path Maintenance Processes Withdraw The Withdraw meter screen is display...

Page 255: ...f the base then the cover of the meter Pull the meter towards the front of the base to disengage it from the base connector 6 Remove the meter from the Mailing System base 250 Page 250 Jan 27 2023 01...

Page 256: ...ssues 253 How to Clean the Print Heads Automatically 253 13 2 Diagnostics 256 How to Access Diagnostic Data 257 13 3 System Data 258 How to Display Software Data 258 How to Display Hardware Data 259 H...

Page 257: ......

Page 258: ...reaked too light blurred etc or the system indicates the ink cartridge is out of ink It is time to replace the ink cartridge To clean the print heads automatically as a User 1 As a user Press and sele...

Page 259: ...ing area Clear the weighing zone and re zero the Weighing Platform see Weighing Settings on page 192 Something is touching or laying on the Weighing Platform See the weighing platform zeroing procedur...

Page 260: ...t description 72 hour time limit for server communication reached Long description Re connect your mailing system to your network and perform a postal inspection to clear the PSD Locked message Recove...

Page 261: ...data listed below Comments Diagnostic No Sends a message to a server if connected to check the line Ping Server 1 Reports the status 0 or 1 of the sensors below Mail Inserted Sensors Status 2 The scr...

Page 262: ...g in as Supervisor on page 180 From the main menu select the path Maintenance Diagnostics 2 The system requires you press OK to start the diagnostic tests then displays the list of the tests 3 Select...

Page 263: ...er OS PACK XNDF DATA DELTA language variant To display Software Data 1 As supervisor see How to Log in as Supervisor on page 180 From the main menu select the path Maintenance System Info Software Inf...

Page 264: ...ct the path Maintenance System Info Hardware Information 2 The system hardware data appears on the screen How to Display the Machine Counters The display will show the data of the machine counters To...

Page 265: ...e list of the events occurred in the machine Base errors PSD events and Server connection history To display the event lists 1 As supervisor see How to Log in as Supervisor on page 180 From the main m...

Page 266: ...2 Select the Base events list or the PSD events list or Server connection history or Status Management 3 Press OK to validate 13 Troubleshooting 261 Page 261 Jan 27 2023 01 28...

Page 267: ...list in a table with for each error The Code of the event The Date where appends the event The Cycles count when the event occurred 5 Note the Code and refer to your customer service 262 Page 262 Jan...

Page 268: ...ications of your Mailing System 14 1 Mail Specifications 265 14 2 Package Specifications 266 14 3 General Specifications 268 14 4 Operating Conditions 269 14 5 System Specifications 270 14 6 System Ch...

Page 269: ......

Page 270: ...flap sizes as illustrated below note the illustration is not to scale Envelopes Minimum Weight 0 1 oz Maximum Weight 1 lb 10 4 oz Minimum Envelope Thickness 0 008 inches Maximum Envelope Thickness 0 6...

Page 271: ...age The measurements shall be provided in inches with an accuracy of 3 decimal places ie NN NNN A package must meet the following dimensional criteria Minimum and maximum size MAX MIN Label Dimensions...

Page 272: ...not measure more than 130 inches in length and girth combined USPS Retail Ground All Parcels except USPS Retail Ground 130 108 max Length Girth inch For parcels the length is the distance of the longe...

Page 273: ...gth x Height Base 8 85 x 12 75 x 7 85 Weight Base 8 lb 5 8 oz Power Frequency 60 Hz Max current rating full configuration 2 5 A Power supply 120 V 6 10 3 wire grounded circuit Up to standard NFC15 100...

Page 274: ...rated in the following conditions Ambient temperature 50 F 104 F Temperature range 80 max without condensation Relative humidity Weighing accuracy To obtain the best weighing results use a solid and s...

Page 275: ...Accounts The number of accounts is set to 10 by default Weighing accuracy To obtain the best weighing results use a solid and steady table Away from any doors Away from any fan 270 Page 270 Jan 27 20...

Page 276: ...on page 57 The Amount and Date Correction functions allow the postage and date is set by the user Correction mode Using Imprint Test on page 90 This layout is dedicated to give an overview of the indi...

Page 277: ...151 152 153 168 169 170 173 202 211 Date Advance 202 211 Date Correction 60 271 Daylight Savings Time 211 Diagnostics 159 256 E eCertified 46 eConfirmation 46 159 160 169 170 172 173 174 e Confirmatio...

Page 278: ...36 233 Rate Updates 159 Rate Wizard 66 Received 29 54 170 reports 111 160 256 Re zero 254 S Scale 52 71 254 265 Sensors 256 session 25 26 Sleep 6 16 28 160 186 Slogan 15 29 73 159 160 202 204 229 Stam...

Page 279: ...A0146499 A 30 01 2023...

Page 280: ...A0146499 A 30 01 2023...

Reviews: