background image

12

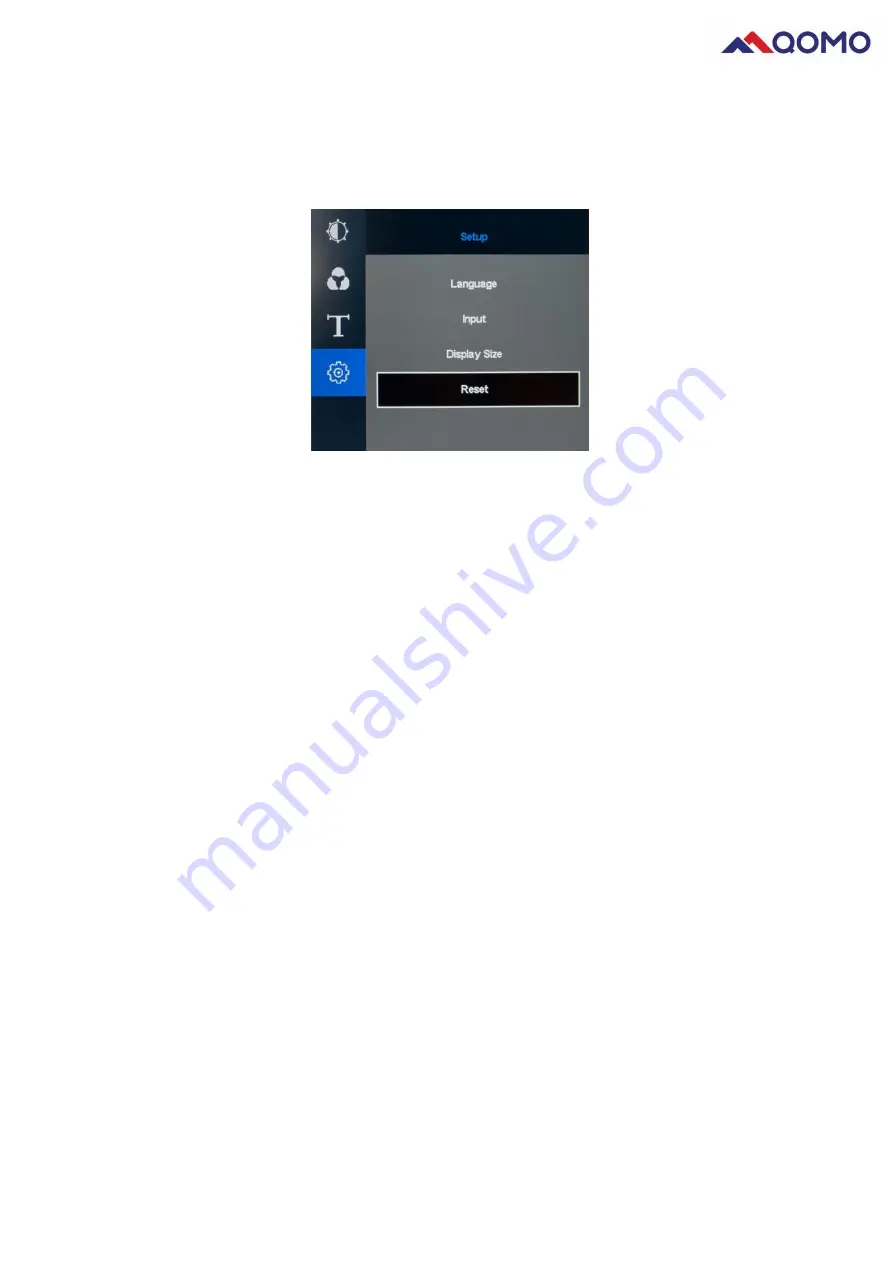
5. Reset setting

Press “MENU” button to enter the menu, press “+” button to move the cursor to the setting

interface, and press “MENU” button to enter the setting interface. Press “+” button to move to reset,
press “MENU” button to confirm, and press “TOUCH” button to exit the menu.

Chapter 3: Passive Handwriting Pen

This chapter guide you how to operate your computer and software by using a

handwriting pen. You can input information to the computer through the passive pen, to
realize the writing function and operate the computer.

Summary of Contents for QIT600F3

Page 1: ...1 QIT600F3 User Manual ...

Page 2: ...ck or fire 7 Do not install this product in a poorly ventilated place such as a bookcase or a wall cabinet because the high temperature may cause a fire 8 Do not use a non standard display holder to avoid injury 9 Do not spray liquid such as detergent directly onto the display to avoid damage electric shock or fire 10 Unplug the power cord before cleaning the product 11 Do not open the back cover ...

Page 3: ...3 Passive Handwriting Pen 12 3 1 Introduction of Passive Pen 13 3 2 Driver Installation For MAC 13 3 3 Personalized Setting of Driver 14 3 4 Introduction to Driver Interface 15 3 5 Pen Button Setting 15 3 6 Pressure Sensitivity setting 16 3 7 Calibration 16 3 8 Driver Uninstallation 16 Chapter 4 References 17 4 1 Use of USB Extension Port Universal Serial Bus 17 Product Specifications 18 ...

Page 4: ... way and thus improve working efficiency The products are widely used in medical treatment business meetings multimedia teaching and other related fields Product Features 1 21 5 Inch IPS LCD screen 2 1920 1080 FHD display 3 Handwriting or passive pen writing 4 8192 level handwriting pressure sensitivity 5 Support HDMI input or output 6 USB 3 0 ports extension 7 Compatible system Win 7 8 10 chrome ...

Page 5: ...f key Press and hold to turn on off the tablet Touch on off Turn capacitive touch on off Indicator light Green Working mode Red Standby mode Speaker Stereo Audio USB 2 USB 3 0 extension port working current 1A Touch Touch input HDMI in HDMI input HDMI out 2 HDMI outputs for sharing on multiple screen Power input Power input Pen holder For handwriting pen Stand Adjustable stand ...

Page 6: ...er Indicator 1 3 Product Installation 1 3 1 Connection process 1 Connect the computer to the HDMI IN port on the tablet using an HDMI cable 2 Next enable touch control by connecting the computer to the touch port using a USB A B cable The USB Type B square port connects to the tablet 2 3 4 5 1 6 ...

Page 7: ...thumb drives Chapter 2 Use of tablet 2 1 Start Shutdown 1 Press and hold the Power button for 1 second to start the tablet the LED light will be green 2 Press and hold the Power button for 1 second to shut off the tablet the LED indicator will be also turned off 3 Menu To enter Menu setting When it is in the Menu interface this is a confirm button 5 Volume setting Press to set volume value 6 Touch...

Page 8: ...o times to enter picture setting page Press and buttons to set gamma value press MENU to confirm and press TOUCH button to exit the menu Color setting 1 Color temperature setting Press MENU button to enter menu page press button to move the cursor to the color interface press MENU button twice to enter color adjustment interface Press and buttons to select the corresponding color temperature param...

Page 9: ...t the parameters press MENU button to confirm and press TOUCH button to exit the menu Menu Setting 1 Horizontal setting Press MENU button to enter menu press button to move the cursor to the menu interface and press MENU button twice to enter horizontal position adjustment interface Press and buttons to adjust the horizontal position of OSD menu press MENU button to confirm and press TOUCH button ...

Page 10: ... cursor to transparency and press MENU button to enter transparency adjustment interface Press and buttons to adjust the display transparency parameters of OSD menu press MENU button to confirm and press TOUCH button to exit the menu 4 Time setting Press MENU button to enter menu press button to move the cursor to the menu interface and press MENU button to enter menu adjustment interface Press bu...

Page 11: ... enter the setting interface Press button to move to input signal and press MENU button to enter input signal interface Press and buttons to move the cursor to select the input signal Type C HDMI press MENU button to confirm and press TOUCH button to exit the menu 4 Display size setting Press MENU button to enter menu press button to move the cursor to the setting interface and press MENU button t...

Page 12: ...interface Press button to move to reset press MENU button to confirm and press TOUCH button to exit the menu Chapter 3 Passive Handwriting Pen This chapter guide you how to operate your computer and software by using a handwriting pen You can input information to the computer through the passive pen to realize the writing function and operate the computer ...

Page 13: ... assemble the electromagnetic pen in any way Replacement of Refill 1 Use a pen extractor to remove the refill from the pen tip Insert the refill into the pen and press it tightly 3 2 Driver Installation For MAC 1 Precautions before installation Second button Right mouse button First button Eraser pen switch Pen tip Left mouse button ...

Page 14: ...ile PenTablet to Application the installation will be done After doing it you will see the PenTabletSetting shows on your Application list 3 3 Personalized Setting of Driver 1 After the driver has been installed the normal function will fulfill most requirement you need If you need further personalized setting you can set in the driver panel 2 Run the driver go to setting page to set the pen butto...

Page 15: ...To set the basic functions of handwriting pen and the custom functions of pen buttons 2 Monitor Monitor mapping 3 Calibration Click this menu to enter the screen calibration interface 4 About Shows software version 3 5 Pen Button Setting Set the button function of pen It can completely replace the mouse when it is working ...

Page 16: ...click Uninstall to confirm uninstallation Follow the guide until the program has been uninstalled and restart the computer Chapter IV Troubleshooting Fault Solution Handwriting Problems Unable to control cursor 1 Check if the tablet displays the images normally 2 Restart the tablet To verify the driver was installed successfully After the driver has been installed the driver icon will list in the ...

Page 17: ...and cannot be removed by pressing Try to display a whole white or black image on the screen Other Problems No sound Check if USB Type B is properly connected to the computer Check if the computer volume is set to 0 Check the settings of computer and the software used to play audio files The unit that connects by USB does not work Check whether the USB cable is properly connected Connect it to othe...

Page 18: ...work when the main power is disconnected Connection Method 1 Connect it with the power cord of computer and tablet respectively to ensure power supplying 2 Connect the computer with the tablet by USB cable and the system will automatically set the functions of USB hub 3 Connect a peripheral compatible with USB to the USB downstream port of tablet Product Specifications Display Specification Produc...

Page 19: ...UT x2 USB3 0 TYPE B x 1 USB3 0 TYPE A x2 Host Handwriting Specification Handwriting Technology Electro magnetic Active Area 476 64mm x 268 11mm Stylus Passive Pen PA2 Pressure Sensitivity 8192 Level Reading Resolution 5080LPI Accuracy 0 25mm Reading Height 15mm Max Report Rate 220RPS Capacitive Touch Specification Active Area 476 64mm x 268 11mm Surface hardness 7H Structures G G Cover Glass 1 8mm...

Reviews: