Method
Steps
Use the toolbar
a.
Click
.
b.
Select
Always Keep in Reserved Cache
.
A confirmation message appears.
c.
Click
OK
.
Use the context menu
a.
Right-click the selected item.
b.
Select
Always Keep in Reserved Cache
.
A confirmation message appears.
c.
Click
OK
.
File Station keeps the selected folder or file in the reserved cache.
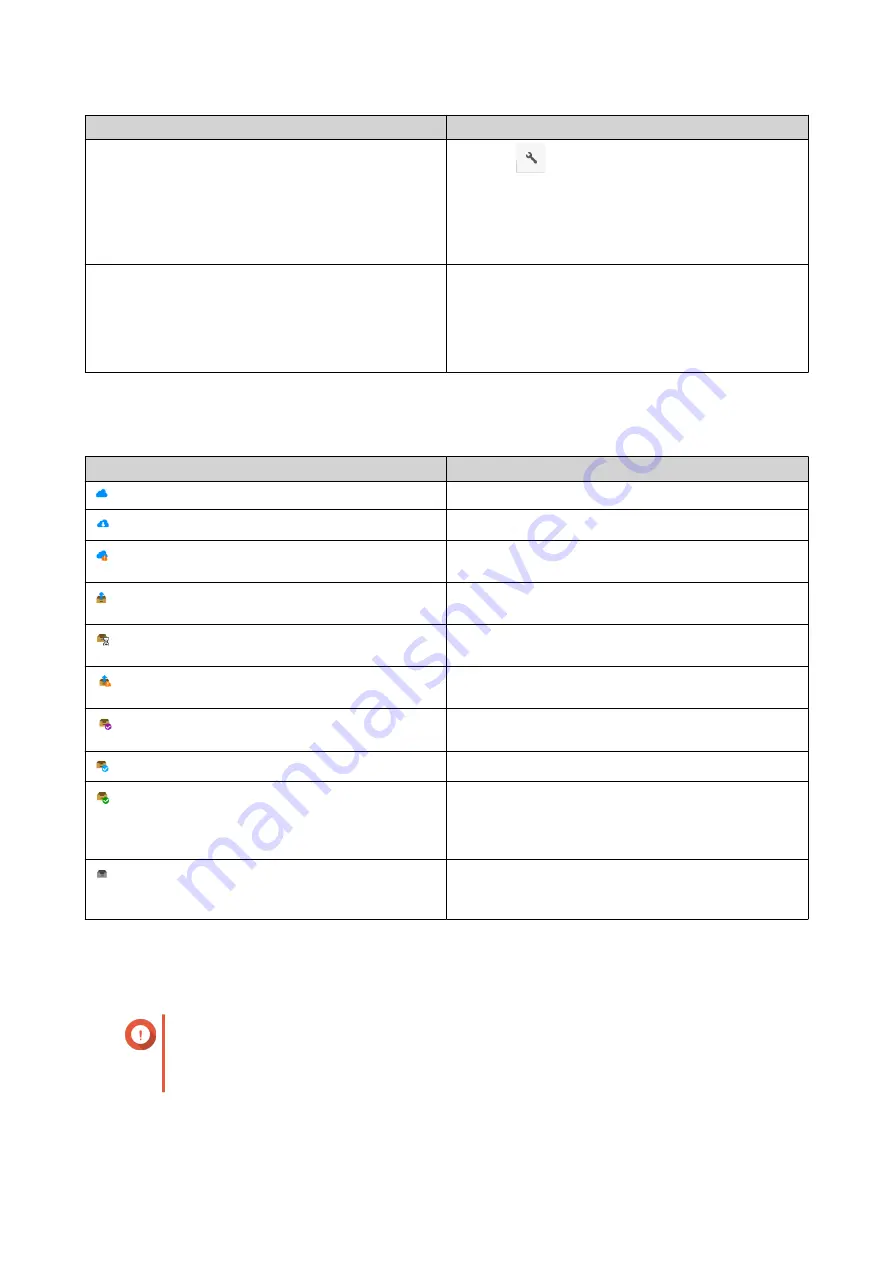
Folders or files in the reserved cache can have one of the following statuses.
Status Icon
Description
This file or folder is only stored in the cloud
File Station is downloading this file or folder.
File Station has encountered an error when
downloading this file or folder.
File Station has cached and is uploading this file or
folder.
File Station has cached and placed this file or folder
in the upload queue.
File Station has encountered an error when
uploading this file or folder.
This file or folder has been cached and synced and
will always be kept in the reserved cache.
This file or folder has been cached and synced.
This file or folder has been cached and synced but
marked as low priority. When the cache space is
insufficient, File Station will remove files or folders
that are the least recently accessed.
This file or folder is ignored and not uploaded to the
cloud. File Station ignores and skips temporary
system files during the sync process.
Removing a Folder from Reserved Cache
You can remove folders from the reserved cache.
Important
You can only perform this operation for folders in the shared folders mounted via
HybridMount. For details on how to use HybridMount and how to mount cloud services,
see HybridMount Help.
1.
Open File Station.
QTS 4.5.x User Guide
File Station
167


