0DNLQJ&RSLHV
4063ULQW6\VWHP2SWLRQV
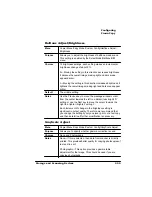
12 Access the CrownCopy menu on the printer to configure the
copier.
13 CrownCopy is ready to use.
»
Note:
For information on adjusting copy settings, see
“Configuring CrownCopy” on page 5-28 for copying instructions.
0DNLQJ&RSLHV
0DNLQJ&RSLHV0DQXDOO\
1
If necessary, turn on the scanner, wait 5 seconds, and then
turn on the printer.
The power switch is located on the right side of the scanner.
2
When the scanner’s Power and Ready LEDs are on, open the
scanner cover and put a document face down, with the top to
the left, on the scanner glass.
If necessary, flatten out any curls or folds in the document.
The left side and top edge of the document should be aligned
with the reference frame in the rear-left corner of the scanner
glass.
3
Close the document cover carefully, making sure that the
paper does not move and is flat against the glass.
»
Note:
If you’re copying a page from a book rather than a single
sheet, you will not be able to close the document cover
completely. The rear side of the document cover will lift up to
accommodate books. However, you should hold the book firmly
against the scanner glass. The part of the book in close contact
with the glass will copy clearly, but any part not in close contact
with the glass will be distorted or unclear.
Summary of Contents for 2060
Page 1: ...406 3ULQW 6 VWHP 2SWLRQV...
Page 9: ...QWURGXFWLRQ Q 7KLV KDSWHU About This Manual on page 1 2 Typographic Conventions on page 1 3...
Page 126: ......
Page 127: ...6HFXULW H DQG DUQLQJ X HU Q 7KLV KDSWHU Security Key on page 6 2 BuzzBox Lite on page 6 6...
Page 146: ......
Page 154: ......
Page 160: ......


