7–Installing Management Applications
Detailed Procedures
67
83840-546-00 D
In Linux, the certificate should have the extension “.pem”. The extension
“.crt” and “.pem” are the same, so there is no need to use the
openssl
command to convert from .crt to .pem. You can simply copy the file as-is.
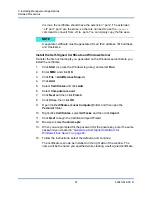
Install the Self-Signed Certificate on Windows Server
Transfer the file
hostname
.pfx you generated on the Windows server before you
install the certificate:
1.
Click
Start
(or press the Windows logo key) and select
Run
.
2.
Enter
MMC
and click
OK
.
3.
Click
File
>
Add/Remove Snap-in
.
4.
Click
Add
.
5.
Select
Certificates
and click
Add
.
6.
Select
Computer account
.
7.
Click
Next
and then click
Finish
.
8.
Click
Close
, then click
OK
.
9.
Open the
Certificates (Local Computer)
folder and then open the
Personal
folder.
10.
Right-click
Certificates
, select
All Tasks
and then click
Import
.
11.
Click
Next
to begin the Certificate Import Wizard.
12.
Browse to select
hostname.pfx
.
13.
When you are prompted for the password for the private key, enter the same
password you created in
“Generate a Self-Signed Certificate for
Windows/Linux Server” on page 64
14.
Follow the instructions, select the defaults, and continue.
The certificate is shown as installed on the right side of the window. The
name will be the name you specified while creating a self-signed certificate.
NOTE
A separate certificate must be generated for an IPv4 address, IPv6 address,
and Hostname.
Summary of Contents for 8400 Series
Page 390: ......

