


Wait for the GPS to retrieve the satellites (the letters GPS on a black background like in the photo); place yourself in the spot where you wish to store the
coordinates, press the "S1" button if you wish to save split time 1 , press "Finish" if you want to save the finish line. When you press the button you have
chosen, the icon you selected will turn into a confirmation icon CONFIRM , if you press "Finish", the procedure will be complete and the track will be
saved in the TRACKS folder of the memory with the name choosen; if you press "S1", the next screen will appear where you can set the second split time
or simply the finish line, and so on up to three split times.
10 – Session analysis
To view the stored sessions, press the LAPS button (button 2) from the main screen
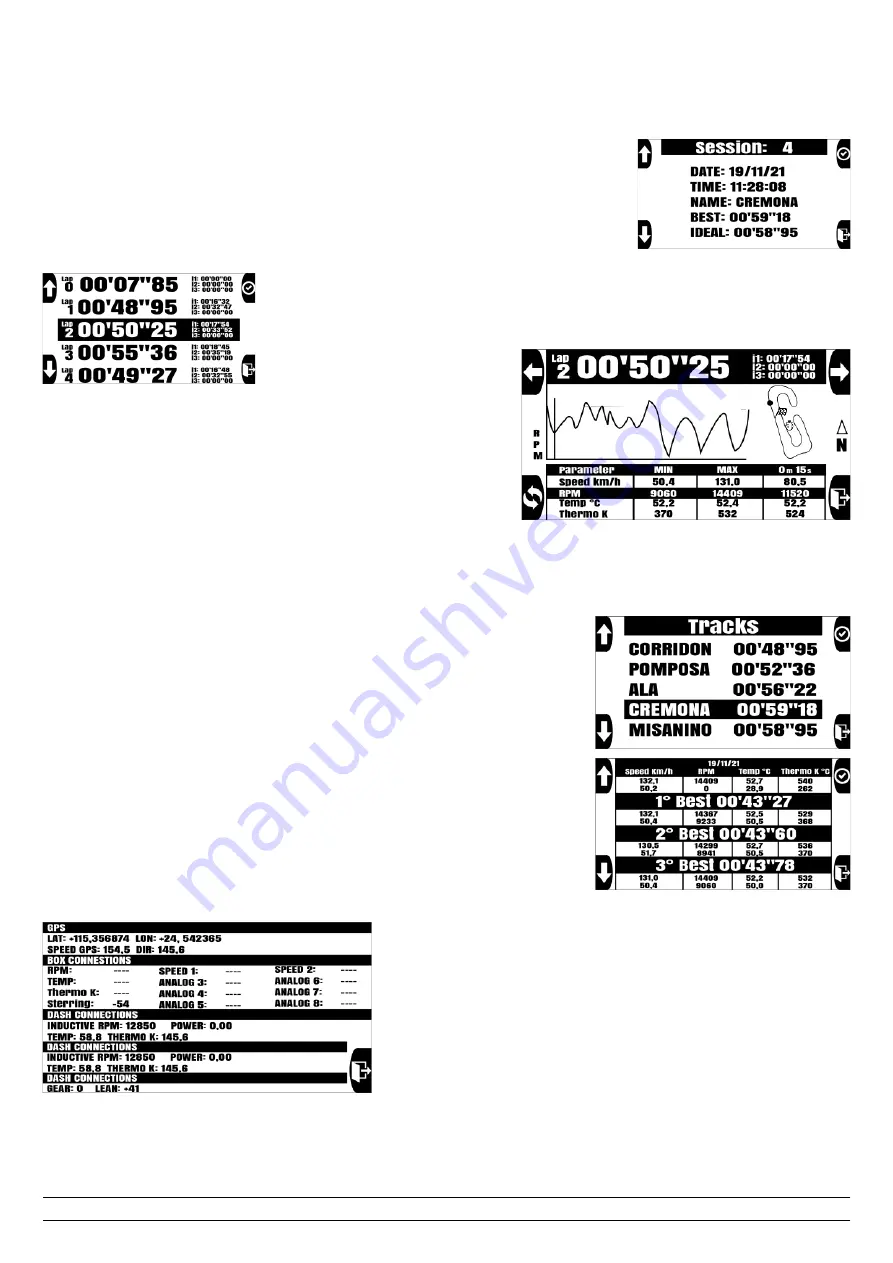
10.1 – Viewing all sessions
Select the ALL icon within the LAPS menu to view all stored sessions.
The sessions will be displayed in chronological order from the most recent, displaying the main data of the
session. Press the CONFIRM button to view all times recorded in the session
For each lap will be displayed: the number, the total time and the various split times.
Press the arrow buttons to move the cursor and select the desired lap with the CONFIRM button
By selecting the single lap it will be possible to view in detail all the main parameters
memorized from the dashboard (GPS speed, RPM, TEMP, Thermo K), their maximum
and minimum values together with a special display function of the value in real time. It
is possible to select the parameter to be displayed by pressing the REPLACE key (button
3), the cursor will select the indicated parameter, then through the side arrows it will be
possible to scroll the time by displaying the cursor on the graph, a point on the map and
the corresponding values in time real.
10.2 – Deleting a session
In the session selection screen, display the session to be deleted, then hold down the CONFIRM button until the message “Delete parameter: Are you
sure?” appears. If you want to delete it, press the CONFIRM button.
10.3 – Session display by track
Select the TRACK icon in the LAPS menu.
A list of all the circuits in which the sessions have been stored will appear and the relative "Best Lap" on
the side. Scroll the cursor using the arrows, select the desired track and press the CONFIRM button.
All available sessions will be shown filtered for the selected track.
10.3 – Session display by date
Select the DATE icon in the LAPS menu.
The summary of the first date will appear in chronological order, the best 3 times of the day will be
displayed with relative minimum and maximum parameters. Scroll the dates using the arrows, select
the date desire and press the CONFIRM button.
All available sessions will be shown filtered for the selected date.
11 – Viewing values in real time
The real time values screen allows you to see all the measurements retrieved by the GPS,
all the analogue and digital measurements retrieved by the Box Expander.
To access this screen, access the menu, select the INFO icon and then select VALUE, a
screen will open with all the values displayed in real time.
With regard to the analogues (ANALOG X) and SPEED 1 and SPEED 2, these will appear
with their default name if they have not been changed; if they have been changed, the
name associated to the analogue access will appear.
To change the name, you need to open the configuration file CONFIG.CFG in the
RacePro software and refer to the software manual.
PZRacing Via de Gasperi 5 – 61032 Fano (PU) Italy - Tel: +39 0721 820434 – Email: [email protected]


