Building your MINI+
Original Prusa MINI+ semi-assembled
11
STEP 11
Connecting the LCD cable
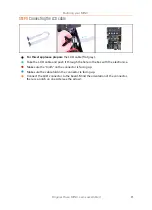
For this step please prepare
the LCD cable (flat grey).
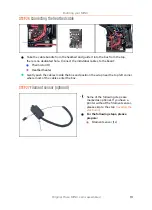
Take the LCD cable and push it through the hole in the box with the electronics.
Make sure the "tooth" on the connector is facing up.
Make sure the cable fold in the connector is facing up.
Connect the LCD connector to the board. Mind the orientation of the connector,
there is a notch on one side (see the arrow).
Summary of Contents for MINI+
Page 2: ...2 ...
Page 3: ...Original Prusa MINI semi assembled 3 Manual changelog MINI semi assembly ...
Page 5: ...Original Prusa MINI semi assembled 5 Building your MINI ...
Page 27: ...27 Notes ...
Page 28: ...28 ...
Page 29: ...29 Notes ...
Page 30: ...30 ...
Page 31: ...31 Notes ...
Page 32: ...32 ...


