background image

1

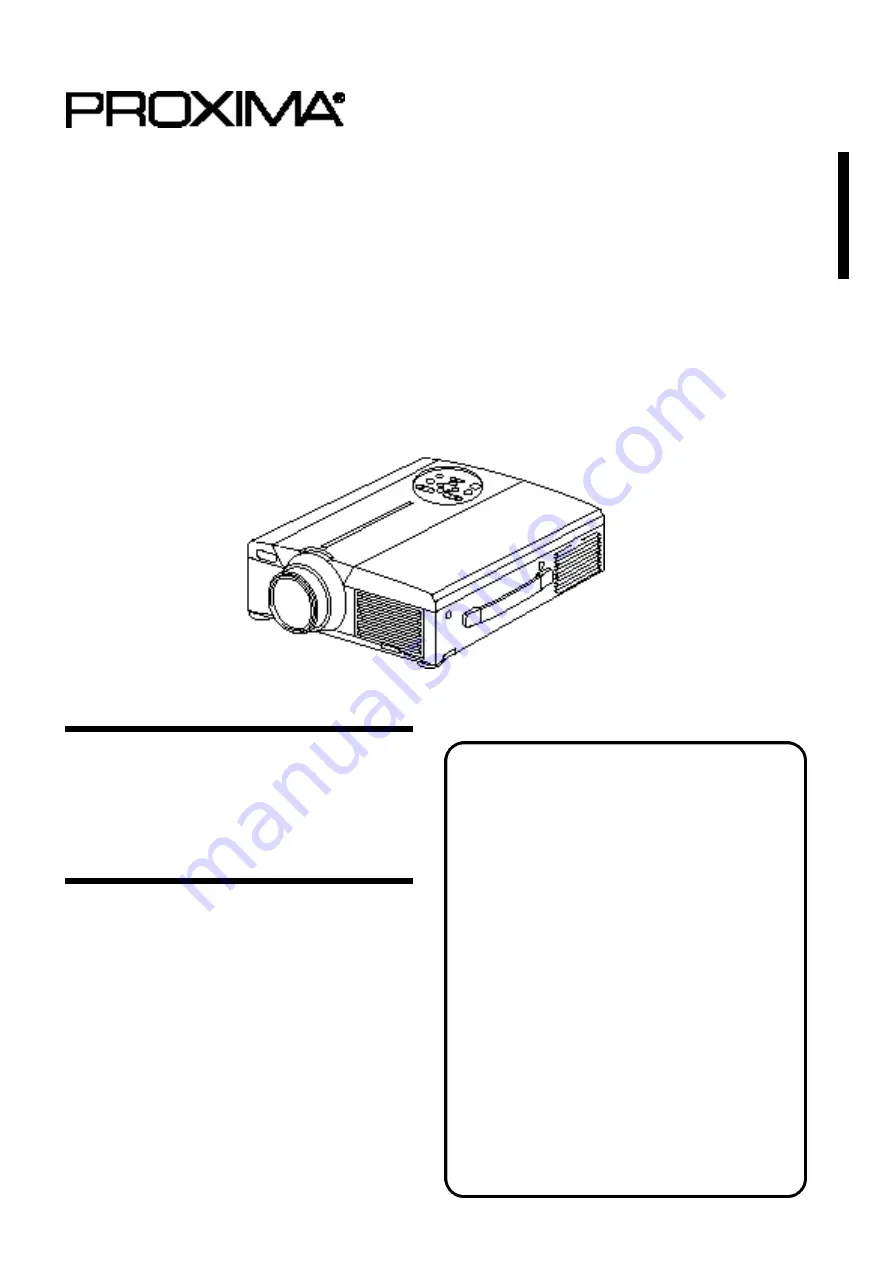
Desktop Projector

Model

DP6850

USER’S GUIDE

Thank you for purchasing the PROXIMA Desktop projector. Please read this user’s manual
thoroughly to ensure correct usage through understanding. After reading, store this instruction
manual in a safe place for future reference.

Outline

The DP6850 is bright enough to fill a room
and versatile enough to fulfill your demanding
needs. Its superb image quality and advanced
video capabilities make it a dependable tool
for classrooms and meeting rooms.

Features

(1) Digital keystone correction makes it easy to

p roject  a  square  image  and  increases
placement  possibilities.

(2) Bright images make it ideal for conf e r e n c e

rooms and classrooms

(3) True XGA (1024 x 768) resolution and Fit-to-

V i ew® display of VGA (640 x 480) thr o u g h
SXGA (1280 x 1024) supports full screen
images from PCs and Macintosh computers

(4) Flexible connectivity with ports for up to two

computers and USB mouse

(5) High-quality video performance with picture-

in-picture and support for most video formats

(6) Motorized zoom and focus offers flexibility in

projector placement, while digital zoom offers
close-up views of selected items

Before Use

…………………………………

3

Checking the package Contents

…………

8

Names and functions of each part

………

8

Installation

…………………………………

12

Basic operations

…………………………

13

Adjustments and functions

………………

17

Connection to the video signal

terminals

………………………

22

Connection to the RGB signal 

terminal

………………………

22

Connecting to the USB cable

……………

25

Connection to the CONTROL signal 

terminal

………………………

26

Example of system setup

………………

31

Cleaning the air filter

……………………

31

Lamp

…………………………………

32

Message table

……………………………

32

Troubleshooting

……………………………

33

Specifications

……………………………

34

About the warranty and 

after-service

…………………

35

Contents

Page

Summary of Contents for DP6850

Page 1: ...ution and Fit to View display of VGA 640 x 480 thr ough SXGA 1280 x 1024 supports full screen images from PCs and Macintosh computers 4 Flexible connectivity with ports for up to two computers and USB mouse 5 High quality video performance with picture in picture and support for most video formats 6 Motorized zoom and focus offers flexibility in projector placement while digital zoom offers close ...

Page 2: ...ou dispose of it immediately having first removed the fuse to avoid a possible shock hazard by inadvertent connection to the mains supply WARNING THIS EQUIPMENT MUST BE EARTHED IMPORTANT The wires in the mains lead are coloured in accordance with the following code Green and Yellow Earth Blue Neutral Brown Live Green Yellow to Earth Blue to Neutral Brown to Live Fuse Cord Clamp As these colours ma...

Page 3: ...he power plug should be disconnected from the power outlet Before Use WARNING This equipment has been tested and found to comply with the limits for a Class A digital device pursuant to Part 15 of the FCC Rules These limits are designed to provide reasonable protection against harmful interference when the equipment is operated in a commercial environment This equipment generates uses and can radi...

Page 4: ...fire or electrical shock Do not insert foreign objects Do not insert metal objects through the ventilation openings etc of this projector or drop such objects inside because this could result in fire or electrical shock If a foreign object should enter this projector immediately turn off the power switch disconnect the power plug from the power outlet and contact your dealer Continued use could re...

Page 5: ...heavy objects on the concealed power cord If the power cord is damaged exposed or broken core wires etc contact your dealer for replacement otherwise fire or electrical shock could result Make sure there is no dust etc on the power plug and insert a knife blade to make sure that there is no looseness Do not allow the laser beam to enter the eyes This remote control is equipped with a laser pointer...

Page 6: ...Incorrect loading could result in personal injury or contamination of the surroundings due to battery cracking or leakage Clean the projector interior once every two years Request your dealer to clean the interior of the projector approximately every two years Accumulations of dust inside the projector can result in fire or malfunction if not cleaned for an extended period This cleaning is more ef...

Page 7: ... excessively soiled dilute a neutral detergent in water wet and wring out the cloth and afterward wipe with a dry cloth Do not apply undiluted detergent directly to the projector Extended usage When using this projector for an extended period stop periodically to rest the eyes to prevent eye fatigue Caution When the projector is not to be used for an extended period For safety purposes when the pr...

Page 8: ...hen the fan malfunctions Refer to page 33 for details Remote control I R receiver Lens Lens cap Speaker Cooling fan intake side Cooling fan exhaust side Carring handle Projector unit Remote control Remote control Batteries User s Guide this document Speaker RESET button Used to reset the initial settings Refer to page 10 17 25 26 for details LAMP indicator Lights or flashes when the temperature in...

Page 9: ...nk 1 2 CONTROL jack D sub 15 pin shrink AUDIO OUT jack RGB VIDEO Stereo mini jack AUDIO IN jack RGB Stereo mini jack Connecting to the AC IN jack Make sure the accesory power cord is plugged into the AC IN jack as far as it will go Incomplete connection can result in fire or electrical shock Remote control I R receiver RGB OUT jack D sub 15 pin shrink USB jack The mouse cursor can be controlled by...

Page 10: ...u screen display on and off Refer to page 17 21 MUTE button Applies Mute Press the Play button again to cancel VOLUME button Adjusts the volume of the sound Press to increase the volume and to decrease the volume When there is no video signal input operation is not possible when the input video signal is outside the sync range LASER button Turns the laser beam on and off Refer to page 11 concernin...

Page 11: ...ction When not to be used for an extended period remove the batteries from the remote control Replace the batteries when remote control operation becomes difficult Do not place the remote control close to the cooling fan of the projector Do not disassemble the remote control in case of malfunction please bring it to the service station Auto adjust can take up to 30 seconds Auto adjust may not oper...

Page 12: ... locks unless the projector is being held otherwise the projector could overturn or the fingers could get caught and cause personal injury Do not force the adjusters to rotate This could damage the adjusters or cause the lock to fail Lock the adjusters firmly If the lock is difficult to operate change the angle slightly and try again Use the adjusters on the bottom to adjust the projection angle 1...

Page 13: ...utton is pressed 2 Use the FOCUS button to adjust the focus until the image is sharp 3 The message Focus will disappear if any other button is pressed When there is no input signal the Focus characters are not displayed when the input signal is outside the sync range 6 Turn on the power to the connected equipment Refer to page 31 concerning the connection of other equipment 7 Press either the INPU...

Page 14: ...orten the service life of the lamp This projector is VESA DDC 1 and DDC 2B compatible Plug play is possible by connecting to a computer that is VESA DDC Display Data Channel compatible to RGB 1 Plug play is a system configured with peripheral equipment including a computer and display and an operating system 1 1 3 2 Use the RGB cable included with this projector when using plug play With other cab...

Page 15: ... to page 10 Cancelling the FREEZE function When there is no input signal the Freeze function is not effective when the input signal is outside the sync range Pressing the FREEZE button alternately turns the freeze function on and off The FREEZE function will be cancelled when the input select button is pressed or the display mode of the PC being used for display is changed When a still image signa...

Page 16: ... accordance with the button pressed 6 Press the MAGNIFY OFF button Magnify function Changing the magnification ratio Moving the display area Returning to normal display 1 2 3 5 4 6 Part of an image can be displayed magnified refer to page 10 Basic operations continued When there is no video signal input Magnify is not effective when the video signal input is outside the sync range The magnify func...

Page 17: ...ons of the projector or the DISK PAD button of the remote control to select the menu item to be adjusted The selected menu item will be displayed in orange 3 Adjust the selected menu item with the MENU buttons of the projector or the DISK PAD button of the remote control The selected menu item will be displayed in orange Select the adjustment item to be returned to the initial settings Press the R...

Page 18: ...ay positions can be adjusted from the SETUP menu Adjustment item VOLUME BRIGHT BRIGHTNESS CONTRAST SHARPNESS COLOR TINT V POSIT V POSITION H POSIT H POSITION H PHASE H SIZE COLOR BAL R COLOR BALANCE Red COLOR BAL B COLOR BALANCE Blue Adjustment description Volume decreases Volume increases Darker Brighter Lower contrast Stronger contrast Softer image Sharper image Less More Redder Greener Moves th...

Page 19: ...requency of the monitor and the VIDEO signal Adjustment item RGB VIDEO Adjustment description Displays the following RGB inputs fH horizontal sync frequency fV vertical sync frequency Sets the video signal system When the screen is unstable no color or rolls select the mode that matches the input signal ...

Page 20: ...ion only V vertical inversion only H V both horizontal and vertical inversion Sets the color to be used for blanking with BLANK ON or when there is no signal Blanking is turned on when there is no signal for approximately 5 min Opens and closes the initial settings screen during signal input at start up When canceled the background color will change to blue Selects the P in P sub screen display po...

Page 21: ...Sets the bit configuration for the communication data 7N1 7 data bits No parity 1 stop bit 8N1 8 data bits No parity 1 stop bit Sets the timer display time 0 99 min Selects the menu screen language English French German Spanish Italian Norwegian Dutch Japanese Sets the time after which the power will be turned off standby status when there is no input signal The settings are 1 99 min 0 and None Se...

Page 22: ... Horizontal sync signal TTL level positive negative polarity Vertical sync signal TTL level positive negative polarity Compound sync signal TTL level Audio signal Input 200mV rms 20k Ω or less max 3 0V p p Output 0 200mVrms 1k Ω Pin Pin 1 Video input red 9 N C 2 Video input green 10 Ground 3 Video input blue 11 N C 4 N C 12 DDC jack Display Data Channel 5 N C 13 Horizontal sync signal compound syn...

Page 23: ...ESA VGA 3 72Hz Zoom in 640 480 37 5 75 0 VESA VGA 3 75Hz Zoom in 640 480 43 3 85 0 VESA VGA 3 85Hz Zoom in 800 600 35 2 56 3 VESA SVGA 56Hz Zoom in 800 600 37 9 60 3 VESA SVGA 60Hz Zoom in 800 600 48 1 72 2 VESA SVGA 72Hz Zoom in 800 600 46 9 75 0 VESA SVGA 75Hz Zoom in 800 600 53 7 85 1 VESA SVGA 85Hz Zoom in 832 624 49 7 74 5 Mac16 mode Zoom in 1024 768 48 4 60 0 VESA XGA 60Hz 1024 768 56 5 70 1...

Page 24: ... 1 3 9 14 5 0 6 XGA 60Hz 2 1 2 5 15 8 0 4 XGA 70Hz 1 8 1 9 13 7 0 3 XGA 75Hz 1 2 2 2 13 0 0 2 SXGA 1152 X 864 75Hz 1 2 2 4 10 7 0 6 SXGA 1280 X 960 60Hz 1 0 2 9 11 9 0 9 SXGA 1280 X 1024 60Hz 1 0 2 9 11 9 0 9 SXGA 1280 X 1024 75Hz 1 1 1 8 9 5 0 1 Computer Signal Vertical signal timimg lines a b c d VGA 1 85Hz 3 60 350 32 VGA 2 85Hz 3 41 400 1 PC 9800 8 25 400 7 TEXT 3 42 480 1 VGA 3 2 33 480 10 Ma...

Page 25: ...only when the mouse is used Do not use with any device other than a personal computer When using with Windows 95 it is necessary to set so that USB can be used with version OSR 2 1 or higher Depending on the kind or the virsion of the host controller operation may not be possible in some cases With some notebook computers that use a built in pointing device such as a track ball the built in pointi...

Page 26: ...ce and change the BIOS setting system setup so that an external mouse can be selected After changing the BIOS setting perform the operations described in 1 3 above Refer to the computer hardware manual concerning the BIOS setting Also some computers may not have a utility program to operate a mouse Refer to the computer hardware manual 1 Mouse functions 1 Turn off the main power switches of the pr...

Page 27: ...puter Computer Mouse jack Mini DIN 4 pin Mouse cable ADB option Serial mouse Projector Computer Computer Mouse jack D sub 9 pin Mouse cable serial option Pin no RS 232C Mouse PS 2 ADB Serial 1 YB 2 CLK 3 DATA DATA 4 5 6 SELO SELO SELO 7 RTS RTS RTS RTS 8 9 5V 5V 10 GND GND GND GND 11 12 13 RD 14 TD TD 15 ...

Page 28: ... 11h 11h 1 20h 11h 31h 11h 1 ZOOM 11h 12h 1 31h 12h 1 FOCUS 11h 13h 1 31h 13h 1 MIRROR 11h 14h 1 20h 14h 31h 14h 1 40h 14h INPUT 11h 21h 1 20h 21h 31h 21h 1 40h 21h VIDEO SYSTEM 12h 22h 2 20h 22h 32h 22h 2 40h 22h VOLUME 11h 23h 1 20h 23h 31h 23h 1 40h 23h MUTE 11h 24h 1 20h 24h 31h 24h 1 40h 24h BRIGHT 13h 31h 3 20h 31h 33h 31h 3 40h 31h CONTRAST 13h 32h 3 20h 32h 33h 32h 3 40h 32h COLOR 13h 33h ...

Page 29: ... 03h H V Invert INPUT 11h VIDEO 21h RGB1 22h RGB2 SYSTEM VIDEO 00h 00h Auto 00h 01h NTSC 00h 04h NTSC4 43 00h 02h PAL 00h 03h SECAM 00h 05h M PAL 00h 06h N PAL VOLUME 00h low volume 24h high volume MUTE 00h mute off 01h mute on BRIGHT 00h 00h 00h dark 00h 00h 24h bright CONTRAST 00h 00h 00h low 00h 00h 24h strong COLOR 00h 00h 00h pale 00h 00h 24h dense TINT 00h 00h 00h reddish 00h 00h 24h greenis...

Page 30: ... 4xH or 4xH yyH data to the projector 2 When the command sent by the projector cannot be understood the the error code 0xH yyH data is returned When the data length is greater than indicated by the data length code the projector will ignore the excess data code Conversely when the data length is shorter than indicated by the data length code an error code will be returned to the projector When a f...

Page 31: ... of each device before connecting AC input Video tape recorder with S jack Video tape recorder Speaker with built in amp Display monitor Computer desktop type Computer notebook type Clean the air filter about every 100 hours 1 Turn off the MAIN POWER switch of the projector and pull out the power cord 2 Remove the front air filter ...

Page 32: ...new one The following indicator or a message which appears when the power is turned on will indicate when the lamp should be replaced At such time it is necessary to replace the lamp with a new one For lamp replacement please contact your dealer or service company The following messages are displayed on the screen 1 This display will disappear after 3min but will reappear when the power is turned ...

Page 33: ...itch allow the set to cool for approx 20 min and then turn the power on again Troubleshooting Before requesting repair check in accordance with the following chart If the situation cannot be corrected then contact your dealer Symptom The power is not turned on No video or audio Video is present but no audio Audio is present but no video Colors are pale and color matching is poor Images are dark Vi...

Page 34: ...3 7A AC220 240V 1 5A Power consumption 320W Operating temperature range 0 35 C Size 289mm W 124mm H 345mm D 11 W 5 H 14 D Weight mass 6kg 13 lbs S VIDEO mini DIN 4 pin jack VIDEO signal input jacks VIDEO RCA jack AUDIO RCA jack RGB signal input output jacks RGB signals D sub 15 pin shrink jack Audio stereo mini jack CONTROL signal jack D sub 15 pin shrink jack USB jack B type Resolution Horizontal...

Page 35: ...e in a safe place About after service When a problem occurs please check first using the Troubleshooting Chart provided in this instruction manual If the problem still persists contact your dealer or service company About repairs during the warranty period Repairs will be made as described in the warranty For details please read the warranty Specifications continued ...

Page 36: ...r or replacement shall be the End User s exclusive remedy for any defect in the Product WARRANTY LIMITATION AND EXCLUSION This Limited warranty does not extend to any Product that has been damaged due to accident unauthorized modifications tampering abuse misuse alterations unusual physical or electrical stress or to any Product that has been serviced by other than Proxima Corporation or its autho...

Page 37: ...Echte XGA 1024 x 768 Auflösung und Fit to View Anzeige von VGA 640 x 480 durch SXGA 1280 x 1024 unterstützt volle Bildschirmbilder von PCs und Macintosh Computers 4 Flexible Anschlußmöglichkeiten mit Buchsen für bis zu zwei Computern und USB Maus 5 Qualitativ hochwertige Videoleistung mit Bild in Bild und Unterstützung für die meisten Videoformate 6 Motorzoom und fokussierung bieten Flexibilität b...

Page 38: ......

Page 39: ...können VORSICHT Dieses Symbol weist auf Vorsichtsmaßregeln hin deren Mißachtung bei falscher Bedienung zu Personenverletzungen oder Sachschäden führen können Typische Symbole Dieses Symbol weist auf eine zusätzliche Warnung einschließlich Vorsichtsmaßregeln hin wobei eine Abbildung den Textinhalt verdeutlicht Das linksstehende Symbol deutet auf Gefahr durch elektrische Schläge hin Dieses Symbol we...

Page 40: ...Ihren Fachhändler Nicht modifizieren Der Projektor darf nicht baulich verändert werden da hierbei die Gefahr elektrischer Schläge besteht Niemals im Badezimmer verwenden Verwenden Sie den Projektor niemals im Badezimmer da hierbei die Gefahr elektrischer Schläge besteht Keine Fremdkörper ins Gehäuse stecken Stecken Sie keine Metallobjekte in die Belüftungsöffnungen usw des Projektors und achten Si...

Page 41: ...dem Projektor verlegen Hierdurch können Brände oder elektrischen Schläge verursacht werden Ebenso sollte das Kabel nicht durch einen Teppich oder dergleichen verdeckt werden da versehentlich schwere Gegenstände auf das verdeckte Kabel gestellt werden könnten Wenden Sie sich an Ihren Fachhändler falls das Netzkabel beschädigt ist freiliegende oder gebrochene Kabeladern usw da eine Weiterverwendung ...

Page 42: ...r Batterien auf die korrekte Ausrichtung der Plus und Minuspole achten Falsches Einlegen der Batterien kann zu Verletzungen oder zur Verschmutzung der Umgebung durch giftige Batteriesäure führen Den Projektor alle zwei Jahre innen säubern lassen Lassen Sie den Projektor etwa alle zwei Jahre von einem Fachhändler innen säubern Im Projektor angesammelter Staub kann zu Bränden oder Betriebsstörungen ...

Page 43: ...m Sauberwischen mit einem trockenen Tuch nachwischen Niemals unverdünnte Reinigungslösung direkt auf das Gehäuse auftragen Längerer Betrieb Bei längerem Betrieb sollten zwischendurch Pausen eingelegt werden um einer Ermüdung der Augen vorzubeugen Vorsicht Den Netzstecker niemals durch Ziehen am Kabel von der Steckdose trennen Brände oder elektrische Schläge ausgelöst werden Den Netzstecker deshalb...

Page 44: ...wenn der Ventilator versagt Einzelheiten hierzu auf Seite 33 Infrarotempfänger für Fernbedienung Objektiv Objektivdeckel Lautsprecher Gebläse Einlaßseite Gebläse Auslaßseite Tragegriff Projektor Fernbedienungsteil Batterien für Fernbedienungsteil Bedienungsanleitung diese Anleitung Lautsprecher Rückstelltaste RESET Diese Taste dient zum Rückstellen auf die werksseitig voreingestellten Werte Einzel...

Page 45: ...hse AUDIO OUT RGB VIDEO Stereo Minibuchse Audioeingangsbuchse AUDIO IN RGB Stereo Minibuchse RGB Ausgangsbuchse RGB OUT 15polige D sub Halbformatbuchse USB buchse Der Mauscursor kann über Fernbedienung durch Anschluß eines PCs gesteuert werden Anschluß an die Netzeingangsbuchse AC IN Darauf achten den Stecker des Zusatznetzkabels so weit wie möglich in die Buchse AC IN einzuschieben Ein lockerer A...

Page 46: ...öht und ein Drücken der Minustaste senkt die Lautstärke Wenn kein Videosignaleingang vorhanden ist ist Betrieb nicht möglich wenn das Eingangsvideosignal außerhalb des Synchronisationsbereiches ist LASER Taste LASER Diese Taste dient zum Ein und Ausschalten des Laserstrahls Siehe Seite 11 über Verwendung und Vorsichtsmaßregeln Mausrückstell Rechtstaste MOUSE RESET RIGHT 1 Funktioniert bei angezeig...

Page 47: ... Bei längerer Nichtbenutzung die Batterien aus dem Fernbedienungsteil herausnehmen Die Batterien austauschen wenn die Fernsteuerung zunehmend schwerer wird Das Fernbedienungsteil nicht in der Nähe des Projektor Kühlgebläses ablegen Das Fernbedienungsteil bei Funktionsstörungen nicht zerlegen sondern von einer Kundendienstwerkstatt reparieren lassen Die automatische Einstellung kann bis zu 30 Sekun...

Page 48: ...eigeben der Fußversteller festhalten andernfalls kann der Projektor umkippen oder auf die Hand fallen und die Finger abklemmen Die Fußversteller nicht gewaltsam drehen Die Versteller können hierdurch beschädigt werden oder die Sperre löst sich wieder Die Fußversteller fest sperren Falls sich die Versteller schwer sperren lassen den Projektionswinkel leicht ändern und noch einmal versuchen Den Proj...

Page 49: ...te erscheint die rechts dargestellte Anzeige im Display 2 Das Bild durch wiederholtes Drücken der FOCUS Taste scharfstellen 3 Bei Drücken einer anderen Taste erscheint die Meldung Focus Wenn kein Eingangssignal vorhanden ist so wird FOKUS nicht angezeigt wenn das Videoeingangssignal außerhalb des Synchronisationsbereiches ist 6 Das angeschlossene Gerät einschalten Siehe Seite 31 zum Anschluß exter...

Page 50: ...die Betriebslebendauer der Birne hierdurch verkürzt wird Für Plug Play das mit dem Projektor gelieferte RGB Kabel verwenden Bei anderen Kabeln sind die Stifte 12 bis 15 mitunter nicht angeschlossen gilt nur für RGB1 Dieses Gerät wird als Plug and Play Monitor erkannt Verwenden Sie die Standard Monitortreiber aus Windows 95 98 Diese Funktion kann abhängig vom verwendeten Personalcomputer nicht ausf...

Page 51: ...Funktion Wenn kein Eingangssignal vorhanden ist so ist die FREEZE Funktion nicht wirksam wenn das Videoeingangssignal außerhalb des Synchronisationsbereiches ist Durch Drücken der FREEZE Taste wird die FREEZE Funktion abwechselnd ein und ausgeschaltet Die FREEZE Funktion wird aufgehoben wenn die Eingangswahltaste gedrückt wird oder wenn der zur Anzeige verwendete Displaymodus ds PC geändert wird W...

Page 52: ... drücken Vergrößerungsfunktion Ändern des Vergrößerungsverhältnisses Verschieben des Anzeigebereichs Zurückstellen auf normale Anzeige 1 2 3 5 4 6 Ein Teil eines Bildes kann vergrößert gezeigt werden siehe Seite 10 Grundlegende Bedienung Fortsetzung Wenn kein Videosignaleingang vorhanden ist so ist die Vergrößerungsfunktion nicht wirksam wenn das Videoeingangssignal außerhalb des Synchronisationsb...

Page 53: ... die MENU Tasten am Projektor oder die Taste DISK PAD am Fernbedienungsteil drücken Der gewählte Menügegenstand wird in orange angezeigt 3 Richten Sie den gewählten Menügegenstand mit den MENU Tasten des Projektors oder der DISK PAD Steuerfläche der Fernbedienung aus Der gewählte Menügegenstand wird in orange angezeigt Die Einstellung wählen die auf den werksseitig voreingestellten Wert zurückgest...

Page 54: ...uf dem SETUP Menü eingestellt werden RGB Signaleingang Videosignaleingang Einstellgegenstand LAUTST HELLE HELLIGKEIT KONTRAST SCHÄRFE FARBE F TON V POSIT V POSITION H POSIT H POSITION H PHASE H GR FARB BAL R FARBBALANCE Rot FARB BAL B FARBBALANCE Blau Beschreibung der Einstellung Lautstärkeerhöhung Lautstärkesenkung Heller Dunkle Höherer Kontrast Niedriger Kontrast Weicheres Bild Schärferes Bild W...

Page 55: ...gabe Menü INPUT dient zum Wählen der RGB Signal Sync Frequenzen von Monitor und VIDEO Signal Einstellgegenstand RGB VIDEO Beschreibung der Einstellung Zeigt die folgenden RGB Eingänge fH horizontale Sync Frequenz fV vertikale Sync Frequenz Wählt VIDEO Eingang ...

Page 56: ... Austastung mit BLANK ON verwendet werden soll oder wenn kein Signal vorhanden ist Die Austastung wird eingestellt wenn länger als etwa 5 min kein Signal vorhanden ist Öffnet und schließt den Anfangs Einstellbildschirm wenn ein Signal außerhalb des Sync Bereichs in eingeschaltetem Zustand und ohne Signal angelegt wird Wenn der Anfangs Einstellbildschirm geschlossen wird wird Rückzug in der obigen ...

Page 57: ...lt die Bit Konfiguration für die Datenübertragung ein 7N1 7 Datenbits Keine Parität 1 Stoppbit 8N1 8 Datenbits Keine Parität 1 Stoppbit Stellt die angezeigte Timer Zeit ein 0 bis 99 Wählt die Menübildsprachee Englisch Französich Deutsch Spanisch Italienisch Norwegisch Holländisch Stellt ein nach wieviel Minuten die Netzversorgung ausgeschaltet wird Bereitschaftmodus wenn kein Signaleingang vorhand...

Page 58: ...r Farbsignal 0 286 Vs s Burstsignal 75 Ohm Abschlußstecker 1 0 Vs s 75 Ohm Abschlußstecker 200 mVeff 20 kOhm oder weniger max 3 0 Vs s 0 bis 200 mVeff 1 kOhm Video signal Analog 0 7 Vs s 75 Ohm Abschlußstecker Horizontales S Signal TTL Pegel positive negative Polarität Vertikales S Signal TTL Pegel positive negative Polarität Zusammengesetztes Sync Signal TTL Pegel Audio signal Eingang 200 mVeff 2...

Page 59: ...Heranzoomen 640 480 37 5 75 0 VESA VGA 3 75Hz Heranzoomen 640 480 43 3 85 0 VESA VGA 3 85Hz Heranzoomen 800 600 35 2 56 3 VESA SVGA 56Hz Heranzoomen 800 600 37 9 60 3 VESA SVGA 60Hz Heranzoomen 800 600 48 1 72 2 VESA SVGA 72Hz Heranzoomen 800 600 46 9 75 0 VESA SVGA 75Hz Heranzoomen 800 600 53 7 85 1 VESA SVGA 85Hz Heranzoomen 832 624 49 7 74 5 Mac16 mode Heranzoomen 1024 768 48 4 60 0 VESA XGA 60...

Page 60: ... 2 2 20 0 1 0 Computer Signal Horizontale Signalsteuerung µs a b c d SVGA 72Hz 2 4 1 3 16 0 1 1 SVGA 75Hz 1 6 3 2 16 2 0 3 SVGA 85Hz 1 1 2 7 14 2 0 6 Mac 16 mode 1 1 3 9 14 5 0 6 XGA 60Hz 2 1 2 5 15 8 0 4 XGA 70Hz 1 8 1 9 13 7 0 3 XGA 75Hz 1 2 2 2 13 0 0 2 SXGA 1152 X 864 75Hz 1 2 2 4 10 7 0 6 SXGA 1280 X 960 60Hz 1 0 2 9 11 9 0 9 SXGA 1280 X 1024 60Hz 1 0 2 9 11 9 0 9 SXGA 1280 X 1024 75Hz 1 1 1 ...

Page 61: ...men damit die USB Schnittstelle mit Version OSR 2 1 oder höher verwendet werden kann Abhängig von der Art oder Version des Host Controllers könnte der Betrieb in einigen Fällen nicht möglich sein Bei manchen Notebook Computers die eingebaute Zeigevorrichtungen haben wie etwa einen Trackball hat die eingebaute Zeigevorrichtung Priorität auch wenn eine Maus angeschlossen ist und die Maus wird nicht ...

Page 62: ...IOS Einstellung die obigen Schritte 1 bis 3 ausführen Hinsichtlich der BIOS Einstellung bitte in der Betriebsanleitung des Computers nachschlagen Darüber hinaus wird die Maus bei einigen Computern über ein Utility Programm gesteuert Einzelheiten hierzu enthält die Betriebsanleitung des Computers 1 Mausfunktionen 1 Computer und Projektor mit dem jeweiligen Netzschalter ausschalten und die beiden Ge...

Page 63: ...ter Computer Vierpolige Maus Minibuchse DIN Mauskabel ADB Option Serienmaus Projektor Computer 9polige Mausbuchse D sub Mauskabel Serienkabel Option Stift Nr RS 232C Maus PS 2 ADB Serial 1 2 CLK 3 DATA DATA 4 5 6 SELO SELO SELO 7 RTS RTS RTS RTS 8 9 5V 5V 10 GND GND GND GND 11 12 13 RD 14 TD TD 15 Computer ...

Page 64: ...11h 1 20h 11h 31h 11h 1 ZOOM 11h 12h 1 31h 12h 1 FOCUS 11h 13h 1 31h 13h 1 SPIEGEL 11h 14h 1 20h 14h 31h 14h 1 40h 14h EINGB 11h 21h 1 20h 21h 31h 21h 1 40h 21h FORMAT 12h 22h 2 20h 22h 32h 22h 2 40h 22h LAUTST 11h 23h 1 20h 23h 31h 23h 1 40h 23h MUTE 11h 24h 1 20h 24h 31h 24h 1 40h 24h HELLE 13h 31h 3 20h 31h 33h 31h 3 40h 31h KONTRAST 13h 32h 3 20h 32h 33h 32h 3 40h 32h FARBE 13h 33h 3 20h 33h 3...

Page 65: ...ritt H GR 00h 00h 00h 01h Groß Bewegung um zwei Schritte 00h 00h 00h 7Fh Klein Bewegung um zwei Schritte V POSIT 00h 00h 00h 01h Aufwärts Bewegung um einen Schritt 00h 00h 00h 7Fh Abwärts Bewegung um einen Schritt FARBBAL R 00h 00h 00h Hellrot bis 00h 00h 24h Dunkelrot FARBBAL B 00h 00h 00h Hellblau bis 00h 00h 24h Dunkelblau AUTO EINSTELLUNG 00h Autom Einstellung Wiedergabe BLANK 0Xh Austastung A...

Page 66: ...den Fehlercode 00H yyH Daten an den Projektor zurück Wenn die Datenlänge den vom Datenlängencode angezeigten Wert überschreitet ignoriert der Projektor den zu langen Datencode Unterschreitet die Datenlänge jedoch den vom Datenlängencode angezeigten Wert schickt der Computer einen Fehlercode zurück Wenn in Datenübertragungsblockfehler auftritt Wiederholt 10 Mal pro Sekunde bis eine Reaktion auf den...

Page 67: ...iligen Geräts durchlesen Netzeingang Videorecorder mit S Buchse Videorecorder Lautsprecher mit eingebautem Verstärker Bildschirmgerät Computer Desktop Computer Notebook Den Luftfilter etwa alle 100 Betriebsstunden säubern 1 Den Projektor mit dem Hauptnetzschalter MAIN POWER ausschalten und den Netzstecker abziehen 2 Den vorderen Luftfilter entfernen ...

Page 68: ...ldung die beim Einschalten des Geräts erscheint zeigt an wann die Birne ausgetauscht werden sollte Hiernach muß die Birne gegen eine neue ausgetauscht werden Der Austausch der Birne erfolgt nach einer bestimmten Methode bei der verschiedene Punkte zu beachten sind Wenden Sie sich hierzu bitte an Ihren Fachhändler oder an eine Kundendienststelle Die folgenden Meldungen erscheinen auf dem Bildschirm...

Page 69: ...e Bitte überprüfen Sie zuerst die Punkte in der folgenden Fehlersuchtabelle bevor Sie das Gerät zur Reparatur einreichen Falls sich das Problem hierdurch nicht beheben läßt wenden Sie sich bitte an Ihren Fachhändler Symptom Das Gerät ist nicht eingeschaltet Kein Video oder Audioempfang Videoempfang vorhanden aber kein Audioempfang Audioempfang vorhanden aber kein Videoempfang Die Farben sind blaß ...

Page 70: ... 120V 3 7A AC220 240V 1 5A Leistungsaufnahme 320W Betriebstemperaturbereich 0 C bis 35 C Abmessungen 289 B 124 H 345 T Gewicht 6 kg S VIDEO Vierpolige DIN Minibuchse VIDEO Signaleingangsbuchsen VIDEO RCA Buchse AUDIO RCA Buchse RGB Signaleingang RGB Signale 15polige Halbformatbuchse D sub Ausgangbuchsen Audio Stereo Minibuchse CONTROL Signalbuchse 15polige Halbformatbuchse D sub USB Buchse B Typ A...

Page 71: ...t Bitte überprüfen Sie Störungsursachen zuerst mit Hilfe der Fehlersuchtabelle in dieser Anleitung bevor Sie das Gerät zur Reparatur einreichen Falls sich das Problem hierdurch nicht beheben läßt wenden Sie sich bitte an Ihren Fachhändler Reparaturen während der Garantiezeit Reparaturen werden entsprechend der Garantieerklärung ausgeführt Über Einzelheiten hierzu informiert die Garantiekarte Techn...

Page 72: ...n Endbenutzer im Fall eines defekten Produktes GEWÄHRLEISTUNGSEINSCHRÄNKUNG UND AUSSCHLUSS Diese eingeschränkte Gewährleistung gilt nicht für Produkte die durch Unfall nicht genehmigte Änderungen Mißbrauch unsachgemäße Verwendung oder ungewöhnliche physische oder elektrische Belastung beschädigt wurden oder für Produkte die nicht durch Proxima oder einen von Proxima autorisierten Service Techniker...

Page 73: ...n affichage Fit to View aux formats VGA 640 x 480 à SXGA 1280 x 1024 supportent les images plein écran des ordinateurs PC et Macintosh 4 Possibilités de raccordement aux ports de deux ordinateurs maximum et d une souris USB 5 Performances vidéo de haute qualité avec fonction d image dans image P in P et support de la plupart des formats vidéo 6 Le zoom et la mise au point électriques offrent une g...

Page 74: ......

Page 75: ...Risques de blessure corporelle ou de dommage matériel en cas de mauvaise manipulation consécutive à un manquement aux recommandations indiquées sous ce symbole Symboles types Ce symbole indique un avertissement supplémentaire y compris des précautions Il est accompagné d une illustration qui précise la nature du danger l illustration de gauche indique un danger d électrocution Ce symbole indique u...

Page 76: ...er à des risques d incendie ou d électrocution Ne mettez pas de corps étrangers dans le projecteur N insérez pas d objets métalliques dans les sorties de ventilation par exemple et ne laissez rien tomber dans le projecteur afin de ne pas vous exposer à des risques d incendie ou d électrocution Si un objet quelconque est entré dans le projecteur coupez immédiatement l alimentation principale et déb...

Page 77: ...être endommagé et exposé au risque de prendre feu ou de devenir une source d électrocution Ne recouvrez pas le cordon avec un couvercle par exemple pour ne pas être tenté de poser des objets lourds sur le cordon ainsi masqué Demandez à votre distributeur de remplacer le cordon électrique dès que celui ci est endommagé fils mis à nu ou cassés un cordon 5 Sortie du faisceau laser ATTENTION endommagé...

Page 78: ...r ou de fuir et de provoquer des blessures corporelles ou de contaminer l environnement Nettoyez l intérieur du projecteur tous les deux ans Demandez à votre distributeur de nettoyer l intérieur du projecteur à peu près une fois tous les deux ans S il n est pas nettoyé pendant longtemps la poussière s accumule à l intérieur du projecteur et risque de provoquer un incendie ou un mauvais fonctionnem...

Page 79: ...ns de l eau additionnée d un produit de nettoyage neutre et bien essoré puis essuyez avec un chiffon sec Ne pas verser directement le détergent pur sur le projecteur Utilisation prolongée Quand vous utilisez le projecteur pendant une longue durée arrêtez le de temps en temps pour vous reposer les yeux et éviter de vous fatiguer la vue d électrocution Toujours débrancher le fil en tirant sur la pri...

Page 80: ...tilateur Détails complémentaires page 33 Photorécepteur infrarouge de télécommande Objectif Capuchon d objectif Haut parleur Ventilateur côté arrivée d air Ventilateur côté sortie d air Poignée de transport Projecteur Télécommande Piles de télécommande Manuel d utilisation document présent Haut parleur Touche RESET S utilise pour rétablir les réglages de départ Détails complémentaires page 10 17 2...

Page 81: ...e COMMANDE N sub 15 broches rétractable Prise de sortie AUDIO RGB VIDEO Mini jack stéréo Prise entrée AUDIO RGB Mini jack stéréo Raccordement à la prise AC IN Branchez bien le cordon d alimentation accessoire à fond dans la prise AC IN Un raccordement incomplet risque de provoquer un feu ou un choc électrique Photorécepteur infrarouge de télécommande Prise sortie RGB N sub 15 broches rétractable P...

Page 82: ... VOLUME Pour régler le volume sonore Pour augmenter le son appuyez sur pour le diminuer appuyez sur Lorsqu il n y a pas d entrée de signal vidéo ou que le signal vidéo d entrée se trouve en dehors des limites de synchronisation l opération n est pas possible Touche LASER Pour activer ou désactiver le faisceau laser Son utilisation et les précautions d emploi sont indiquées à la page 11 Touche RESE...

Page 83: ... que vous vous n utilisez pas la télécommande pendant une période prolongée Remplacez les piles dès que la télécommande fonctionne mal Ne posez pas la télécommande près du ventilateur de refroidissement du projecteur Si la télécommande ne fonctionne pas correctement ne la démontez pas apportez la au centre de dépannage Les réglages automatiques peuvent prendre jusqu à 30 secondes Le réglage automa...

Page 84: ... relâchez les taquets tenez bien le projecteur afin qu il ne se renverse pas et pour ne pas risquer de vous pincer les doigts ou de vous blesser Ne forcez pas sur les ajusteurs quand vous les faites tourner pour ne pas les endommager ou endommager les taquets de blocage Bloquez fermement les ajusteurs Si le taquet est difficile à dégager modifiez l angle de prise Réglez l angle de projection avec ...

Page 85: ...tre apparaît à l écran 2 Réglez la mise au point à partir de la touche FOCUS jusqu à ce que l image soit nette 3 Le message Mise au point s affiche si vous appuyez sur une autre touche Lorsqu il n y a pas d entrée de signal ou que le signal d entrée se trouve en dehors des limites de synchronisation les caractères de mise au point ne sont pas affichés 6 Mettez les périphériques connectés sous tens...

Page 86: ...fonction de prêt à jouer branchez le câble RGB fourni avec le projecteur Avec les autres câbles les broches 12 15 ne correspondent pas toujours valable uniquement pour le signal RGB1 L appareil est reconnu comme moniteur plug and play Utilisez les pilotes d écran standard de Windows95 98 Selon l ordinateur personnel utilisé cette fonction peut ne pas être possible Si la fonction DDC n est pas poss...

Page 87: ...ée voir page 10 Annulation de l arrêt sur image Lorsqu il n y a pas d entrée de signal ou que le signal d entrée se trouve en dehors des limites de synchronisation l arrêt sur image n est pas valable La fonction d arrêt sur image est activée ou désactivée à partir de la touche FREEZE L arrêt sur image est annulé lorsque la touche de sélection d entrée est sollicitée ou lorsque le mode d affichage ...

Page 88: ...randissement Comment modifier le taux d agrandissement Comment déplacer la zone d affichage Comment revenir sur l affichage normal 1 2 3 5 4 6 Il est possible d agrandir une partie de l image et de l afficher voir page 10 Fonctionnement de base suite Lorsqu il n y a pas d entrée de signal vidéo ou que le signal vidéo d entrée se trouve en dehors des limites de synchronisation l agrandissement n es...

Page 89: ...sur les touches MENU du projecteur ou sur l orienteur à disque de la télécommande pour sélectionner le menu des paramètres à régler L élément de menu choisi est affiché en orange 3 Ajustez l élément de menu choisi avec les touches MENU sur le projecteur ou la touche DISK PAD de la télécommande L élément de menu choisi est affiché en orange Sélectionnez les paramètres à rétablir Appuyez sur la touc...

Page 90: ... CONFIGURATION est utilisé pour modifier les réglages des paramètres d image et de position Paramètres VOLUME LUMINOSITE CLARTE CONTRASTE NETTETE COULEUR TEINTE POSITION V POSITION H PHASE H TAILLE H EQUIL CHROM R équilibrage des rouges EQUIL CHROM B équilibrage des bleus Description du réglage Fort Faible Sombre Clair Faible Accentué Enveloppée Franche Moins de couleur Plus de couleur Rouge Vert ...

Page 91: ...B du projecteur et le signal VIDEO Paramètre RGB VIDEO Description du réglage Affichage des entrées RGB fH fréquence de synchronisation horizontale fV Fréquence de synchronisation verticale Configuration du système de signal vidéo Sélectionnes le mode qui convient au signal d entrée si l image est anormale absence de couleur ou défile ...

Page 92: ...rsion horizontale et verticale Pour configurer la couleur de suppression lorsque le mode BLANK ON est activé ou lorsque aucun signal ne passe La suppression est automatiquement activée si aucun signal ne passe pendant environ 5 minutes Pour ouvrir ou fermer l écran initial lors de l entrée du signal au démarrage Après l annulation la couleur du fond devient bleue Pour sélectionner la position d af...

Page 93: ... des données de transmission 7N1 données à 7 bits sans parité 1 bit d arrêt 8N1 données à 8 bits sans parité 1 bit d arrêt Pour régler la minuterie de 0 à 99 minutes Pour sélectionner la langue d affichage du menu anglais français allemand espagnol italien norvégien hollandais japonais Pour régler le délai de coupure de l alimentation attente de fonctionnement après le dernier signal d entrée Régl...

Page 94: ...positive négative Signal de synchronisation verticale Niveau TTL polarité positive négative Signal de synchronisation composé Niveau TTL Signal audio Entrée 200 mV rms 20 Ω maximum max 3 0V crête à crête Sortie 0 200mV rms 1 Ω Broche Broche 1 Entrée vidéo rouge 9 N C 2 Entrée vidéo verte 10 Terre 3 Entrée vidéo bleue 11 N C 4 N C 12 Prise de canal de visualisation 5 N C 13 Signal de sync horizonta...

Page 95: ...Hz Zoom avant 640 480 37 5 75 0 VESA VGA 3 75Hz Zoom avant 640 480 43 3 85 0 VESA VGA 3 85Hz Zoom avant 800 600 35 2 56 3 VESA SVGA 56Hz Zoom avant 800 600 37 9 60 3 VESA SVGA 60Hz Zoom avant 800 600 48 1 72 2 VESA SVGA 72Hz Zoom avant 800 600 46 9 75 0 VESA SVGA 75Hz Zoom avant 800 600 53 7 85 1 VESA SVGA 85Hz Zoom avant 832 624 49 7 74 5 Mac16 mode Zoom avant 1024 768 48 4 60 0 VESA XGA 60Hz 102...

Page 96: ...6 mode 1 1 3 9 14 5 0 6 XGA 60Hz 2 1 2 5 15 8 0 4 XGA 70Hz 1 8 1 9 13 7 0 3 XGA 75Hz 1 2 2 2 13 0 0 2 SXGA 1152 X 864 75Hz 1 2 2 4 10 7 0 6 SXGA 1280 X 960 60Hz 1 0 2 9 11 9 0 9 SXGA 1280 X 1024 60Hz 1 0 2 9 11 9 0 9 SXGA 1280 X 1024 75Hz 1 1 1 8 9 5 0 1 Ordinateur signal Rythme de signal vertical lignes a b c d VGA 1 85Hz 3 60 350 32 VGA 2 85Hz 3 41 400 1 PC 9800 8 25 400 7 TEXT 3 42 480 1 VGA 3 ...

Page 97: ... n est possible qu avec la souris Utilisez exclusivement avec un ordinateur individuel Lors de l utilisation de l appareil avec Windows 95 il faut le régler de façon que USB puisse être utilisé avec OSR version 2 1 ou supérieure En fonction de la version du contrôleur d hôte il est possible que les opérations ne soient pas possibles Sur les ordinateurs portables munis d un pointeur incorporé du ty...

Page 98: ...ages BIOS configuration du système de manière à pouvoir reconnaître une souris externe Une fois les réglages BIOS modifiés procédez comme indiqué de 1 à 3 ci dessus Les réglages BIOS sont indiqués dans le manuel qui accompagne l ordinateur Certains ordinateurs n ont pas de programme utilitaire pour la souris Consultez le manuel de l ordinateur 1 Fonctionnement de la souris 1 Coupez l alimentation ...

Page 99: ...rise de souris MINI DIN 4 broches Câble de souris ADB en option Souris en série Projecteur Ordinateur Ordinateur Prise de souris N sub 9 broches Câble de souris série en option N de broche RS 232C Souris PS 2 ADB Serial 1 2 CLK 3 DATA DATA 4 5 6 SELO SELO SELO 7 RTS RTS RTS RTS 8 9 5V 5V 10 GND GND GND GND 11 12 13 RD 14 TD TD 15 ...

Page 100: ...LIMENTATION 11h 11h 1 20h 11h 31h 11h 1 ZOOM 11h 12h 1 31h 12h 1 MISE AU POINT 11h 13h 1 31h 13h 1 MIROIR 11h 14h 1 20h 14h 31h 14h 1 40h 14h ENTREE 11h 21h 1 20h 21h 31h 21h 1 40h 21h SYSTEME VIDEO 12h 22h 2 20h 22h 32h 22h 2 40h 22h VOLUME 11h 23h 1 20h 23h 31h 23h 1 40h 23h SILENCIEUX 11h 24h 1 20h 24h 31h 24h 1 40h 24h LUMINOSITE 13h 31h 3 20h 31h 33h 31h 3 40h 31h CONTRASTE 13h 32h 3 20h 32h ...

Page 101: ...GB1 22h RGB2 SYSTEME VIDEO 00h 00h Auto 00h 01h NTSC 00h 04h NTSC4 43 00h 02h PAL 00h 03h SECAM 00h 05h M PAL 00h 06h N PAL VOLUME 00h volume faible 24h volume fort SILENCIEUX 00h activé 01h désactivé LUMINOSITE 00h 00h 00h Sombre 00h 00h 24h clair CONTRASTE 00h 00h 00h Faible 00h 00h 24h dense COULEUR 00h 00h 00h Atténuée 00h 00h 24h Dense TEINTE 00h 00h 00h vers le rouge 00h 00h 24h vers le vert...

Page 102: ...s le projecteur 2 S il n est pas possible d interpréter la commande envoyée par le projecteur le code d erreur 0xH yyH données est renvoyé Le projecteur ignore les codes de données qui dépassent la longueur définie dans le code de longueur des données Inversement un code d erreur est envoyé au projecteur lorsque les données sont plus courtes que la valeur indiquée dans le code de longueur des donn...

Page 103: ...e manuel d entretien de chaque dispositif Entrée courant alternatif Magnétoscope avec prise S Magnétoscope Haut parleurs avec ampli incorporé Ecran d affichage Ordinateur de bureau Ordinateur portable Nettoyez le filtre à air toutes les 100 heures d utilisation 1 Coupez l alimentation principale du projecteur et débranchez la prise murale 2 Déposez le filtre à air avant ...

Page 104: ...oin s allume ou un message apparaît au moment où le projecteur s éteint pour indiquer que la lampe doit être remplacée Il faut alors remplacer la lampe par une neuve Contactez votre distributeur ou la société d entretien pour cette opération Les messages suivants s affichent sur l écran 1 Cet affichage disparaît au bout de 3 min Il réapparaîtra chaque fois que l appareil sera mis sous tension Ecra...

Page 105: ...l alimentation principale de l appareil et attendez qu il refroidisse environ 20 min avant de le remettre sous tension Dépannage Consultez le tableau ci après avant d appeler le service de dépannage Si le problème persiste contactez votre distributeur Symptôme L appareil n est pas sous tension Pas d image ou de son L image est présente mais pas le son Le son est présent mais pas l image Les couleu...

Page 106: ... Consommation électrique 320W Gamme de température de fonctionnement 0 35 C Taille 289 W x 124 H x 345 D Poids masse 6 kg S VIDEO prise MINI DIN 4 broches Prises d entrée du signal vidéo VIDEO prise RCA AUDIO prise RCA Prise d entrée sortie du signal RGB Signaux RGB prise rétractable 15 broches N sub Audio mini jack stéréo Prise de signal de COMMANDE Prise rétractable 15 broches N sub Prise USB Ty...

Page 107: ...ès vente En cas de panne consultez d abord le tableau de dépistage contenu dans ce manuel Si le problème persiste contactez votre distributeur ou la société d entretien Réparations pendant la période de garantie Les réparations seront effectuées conformément aux clauses de la garantie Pour plus de détails lisez le formulaire de garantie Caractéristiques techniques suite ...

Page 108: ...oit le défaut du produit LIMITATION ET EXCLUSION La présente garantie limitée ne couvre pas les dommages occasionnés par un accident des modifications non autorisées des manoeuvres ou une utilisation erronées ou abusives une altération des contraintes physiques ou électriques inhabituelles elle ne couvre pas les produits réparés par un technicien non agréé ou n appartenant pas à Proxima Corporatio...

Page 109: ...che 3 La risoluzione XGA 1024 x 768 eff ettiva e la capacità di visualizzazione fit to view dalla risoluzione VGA 640 x 480 a quella SXGA 1280 x 1024 supporta immagini a tutto schermo provenienti da PC e da computer Macintosh 4 Flessibilità di collegamento con porte per un numero massimo di due computer e un mouse USB 5 Prestazioni video di elevata qualità con possibilità di innesto delle immagini...

Page 110: ......

Page 111: ...tipo di informazione da non ignorare per evitare eventuali rischi di lesioni personali o danni fisici per maneggiamento errato dell apparecchio Simboli tipici Questo simbolo indica un avvertenza aggiuntiva note di attenzione incluse Viene riportata un illustrazione atta a chiarirne il contenuto l illustrazione riportata sulla sinistra indica pericolo di scossa elettrica Questo simbolo indica un di...

Page 112: ...di strani odori potrebbe essere causa di incendi o scosse elettriche In questi casi disattivare immediatamente il pulsante di alimentazione elettrica quindi scollegare la spina dalla presa di corrente Una volta certi che non vi sia più presenza di fumo o strani odori contattare il vostro rivenditore richiedendo di riparare l apparecchio Non tentare mai di provvedere voi stessi alla riparazione poi...

Page 113: ...usa di incendi o scossa elettrica Maneggiare accuratamente il cavo di alimentazione Non danneggiare tagliare maneggiare o torcere fortemente il cavo di alimentazione Appoggiare oggetti pesanti sul cavo di alimentazione riscaldarlo o tirarlo eccessivamente può essere causa di guasti incendi o scossa elettrica Tirare il cavo di alimentazione Appoggiare oggetti pesanti sul cavo di alimentazione Danne...

Page 114: ...potrebbe essere causa di lesioni personali o contaminazione dell ambiente circostante dovuto a criccature o perdite dalle batterie Pulire la parte interna del proiettore almeno una volta ogni due anni Richiedete al vostro rivenditore di pulire la parte interna del proiettore ogni due anni circa Accumuli di polvere all interno del proiettore dovuti a mancata pulizia per un lungo periodo possono ess...

Page 115: ...iano eccessivamente unti diluire un detergente neutro in acqua inumidire e strizzare il panno quindi asciugare con un panno asciutto Non applicare detergenti non diluiti direttamente sul proiettore Utilizzo prolungato Nel caso in cui il proiettore venga utilizzato per un periodo prolungato fermarsi periodicamente in modo tale da far riposare gli occhi ed evitare un affaticamento oculare Attenzione...

Page 116: ...i in merito far riferimento alla pagina 33 Ricevitore a infrarossi del telecomando Obiettivo Coperchio obiettivo Altoparlante Ventola di raffreddamento lato immissione aria Ventola di raffreddamen lato uscita aria Maniglia per il trasporto Unità del proiettore Telecomando Batterie del telecomando Guida per l utente il presente documento Altoparlante Tasto RESET Inizializzazione Utilizzato per ripr...

Page 117: ...a 15 pin Presa jack USCITA AUDIO Mini presa jack per STEREO Presa jack AUDIO RGB Mini presa jack per STEREO Collegamento alla presa AC IN ingresso in c a Accertarsi che la spina del cavo di alimentazione fornito in dotazione sia inserita a fondo nella presa a jack d ingresso in c a AC IN Se la spina non è inserita completamente si corre il rischio di incendio o scassa elettrica Ricevitore a infrar...

Page 118: ...stamento e clic del tasto sinistro del mouse del personal computer sono attive 3 Una volta premuto il tasto POSITION POSIZIONE ATTIVAZIONE la schermata potrà essere spostata verso l alto verso il basso a sinistra ed a destra Tasto MENU Utilizzato per attivare e disattivare la visualizzazione della schermata MENU Far riferimento alle pagine 17 21 Tasto MUTE Esclusione audio Attiva la funzione di si...

Page 119: ...non appena il funzionamento del telecomando risulti difficoltoso Non porre il telecomando in prossimità della ventola di raffreddamento del proiettore In caso di malfunzionamento non smontare il telecomando bensì portarlo presso un centro assistenza La regolazione automatica può richiedere fino a 30 secondi La funzione di autoregolazione potrebbe in alcuni casi non funzionare correttamente a secon...

Page 120: ...finché il proiettore è bloccato in caso contrario il proiettore potrebbe rovesciarsi o le dita rimanere intrappolate con conseguenti lesioni personali Non forzare la rotazione dei dispositivi di regolazione Questo potrebbe danneggiarli o provocare il malfunzionamento del blocco Bloccare fermamente i dispositivi di regolazione Nel caso in cui sia difficile maneggiare il blocco variare leggermente l...

Page 121: ... riportata sulla destra 2 Utilizzare il tasto FOCUS messa a fuoco per regolare la messa a fuoco fino ad ottenimento di un immagine nitida 3 Premendo qualsiasi altro tasto il messaggio Focus messa a fuoco sparirà Quando non c è segnale di ingresso i caratteri di Focus non vengono visualizzati quando il segnale di ingresso cade fuori dalla gamma di sincronizzazione 6 Attivare l alimentazione alle ap...

Page 122: ...bbe la durata della lampada Utilizzando la funzione plug play far uso del cavo RGB incluso nel proiettore Utilizzando cavi diversi i pin 12 15 risultano spesso non collegati valido solamente per RGB1 Questa periferica viene riconosciuta come monitor plug and play Utilizzare i driver di Windows 95 98 per gli schermi standard Questa funzione potrebbe essere inattiva a seconda del personal computer u...

Page 123: ...non c è segnale di ingresso la funzione Freeze Fermo immagine non è operativa quando il segnale di ingresso cade fuori dalla gamma di sincronizzazione Premendo in sequenza il tasto FREEZE FERMO IMMAGINE tale funzione sarà attivata e disattivata La funzione di FERMO IMMAGINE FREEZE sarà annullata premendo il tasto di selezione ingresso o nel caso in cui la modalità di visualizzazione del PC sia var...

Page 124: ...IMENTO DISATTIVATO Funzione MAGNIFY Ingrandimento Variazione del rapporto di ingrandimento Spostamento dell area di visualizzazione Ripristino della visualizzazione a dimensioni normali 1 2 3 5 4 6 L immagine può essere visualizzata con alcune parti ingrandite far riferimento alla pagina 10 Operazioni di base segue Quando non c è ingresso di segnale video la funzione di ingrandimento non è operati...

Page 125: ...SK P AD CUSCINETTO DISCO sul telecomando per selezionare la voce di menu da regolare La voce del menu selezionata viene visualizzata in arancione 3 Regolare la voce selezionata del menu mediante i tasti MENU del proiettore o mediante il tasto DISK PAD CUSCINETTO DISCO del telecomando La voce del menu selezionata viene visualizzata in arancione Selezionare la voce soggetta a regolazione da ripristi...

Page 126: ...sere regolate dal Menu SETUP IMPOSTAZIONE Voce soggetta a regolazione VOLUME LUMINOSO LUMINOSITA CONTRASTO NITIDEZZA COLORE TONALITA TINT POSIZIONE VERT V POSIT POSIZIONE ORIZZ FASE ORIZZ H PHASE DIMENSIONE ORIZZ H SIZE BILANCIAMENTO COLORE R BILANCIAMENTO COLORE Rosso BILANCIAMENTO COLORE B BILANCIAMENTO COLORE Blu Descrizione della regolazione Riduzioni di volume Incrementi di volume Più scura P...

Page 127: ...or ed il segnale VIDEO Voce soggetta a regolazione RGB VIDEO Descrizione della regolazione Visualizza i seguenti ingressi RGB fH frequenza di sincr orizzontale fV frequenza di sincr verticale Imposta il sistema di segnali video Nel caso in cui la schermata sia instabile nessun colore o ruoti selezionare la modalità adatta al segnale di ingresso Imposta la ...

Page 128: ... sia inversione orizzontale che verticale Imposta il colore da utilizzare durante la soppressione immagine a SOPPRESSIONE IMMAGINE ATTIVATA BLANK ON o nel caso in cui non vi sia alcun segnale La funzione di soppressione immagine viene attivata nel caso in cui non vi sia presenza di alcun segnale per circa 5 min Apre e chiude la schermata delle impostazioni iniziali durante l ingresso di segnale al...

Page 129: ...zione dei dati di comunicazione 7N1 7 bit dati Nessuna parità 1 stop bit bit di stop 8N1 8 bit dati Nessuna parità 1 stop bit bit di stop Imposta l ora di visualizzazione del timer 0 99 min Seleziona la lingua della schermata del menu Inglese Francese Tedesco Spagnolo Italiano Norvegese Olandese Giapponese Imposta il tempo a seguito del quale l alimentazione sarà disattivata stato di attesa nel ca...

Page 130: ...a Segnale di sincronizzazione verticale Livello TTL polarità positiva negativa Segnale di sincronizzazione composta Livello TTL Segnale audio Ingresso 200MV rms valore quadratico medio 20k W o inferiore max 3 0V p p Uscita 0 200mVrms 1k W Pin Pin 1 Ingresso video rosso 9 N C 2 Ingresso video verde 10 Messa a terra 3 Ingresso video blu 11 N C 4 N C 12 Presa jack DDC Display data channel Canale dati...

Page 131: ...37 9 72 8 VESA VGA 3 72Hz Zoom abilitato 640 480 37 5 75 0 VESA VGA 3 75Hz Zoom abilitato 640 480 43 3 85 0 VESA VGA 3 85Hz Zoom abilitato 800 600 35 2 56 3 VESA SVGA 56Hz Zoom abilitato 800 600 37 9 60 3 VESA SVGA 60Hz Zoom abilitato 800 600 48 1 72 2 VESA SVGA 72Hz Zoom abilitato 800 600 46 9 75 0 VESA SVGA 75Hz Zoom abilitato 800 600 53 7 85 1 VESA SVGA 85Hz Zoom abilitato 832 624 49 7 74 5 Mac...

Page 132: ... 6 XGA 60Hz 2 1 2 5 15 8 0 4 XGA 70Hz 1 8 1 9 13 7 0 3 XGA 75Hz 1 2 2 2 13 0 0 2 SXGA 1152 X 864 75Hz 1 2 2 4 10 7 0 6 SXGA 1280 X 960 60Hz 1 0 2 9 11 9 0 9 SXGA 1280 X 1024 60Hz 1 0 2 9 11 9 0 9 SXGA 1280 X 1024 75Hz 1 1 1 8 9 5 0 1 Computer Segnale Determinazione dei tempi del segnale verticale linee a b c d VGA 1 85Hz 3 60 350 32 VGA 2 85Hz 3 41 400 1 PC 9800 8 25 400 7 TEXT 3 42 480 1 VGA 3 2 ...

Page 133: ... personal computer Quando si utilizza Windows 95 occorre effettuare le impostazioni in modo che l USB possa essere utilizzato con la versione OSR 2 1 o superiore In determinati casi il funzionamento può risultare impossibile a seconda del tipo o della versione del controller centrale In caso di computer Notebook che utilizzino un dispositivo di puntamento incorporato tipo track ball sfera di contr...

Page 134: ...use esterno Dopo aver variato le impostazioni BIOS eseguire le operazioni descritte ai punti 1 3 sopra riportati Per quanto riguarda le impostazioni BIOS far riferimento al manuale dell hardware del computer Inoltre alcuni computer potrebbero non disporre di un programma di utilità atto all azionamento del mouse Far riferimento al manuale dell hardware del computer 1 Funzioni del mouse 1 Attivare ...

Page 135: ...ter Presa jack del mouse Mini DIN a 4 pin Cavo del mouse ADB opzionale Mouse seriale Proiettore Computer Computer Presa jack del mouse Sub D a 9 pin Cavo del mouse seriale opzionale Nr di pin RS 232C Mouse PS 2 ADB Serial 1 2 CLK 3 DATA DATA 4 5 6 SELO SELO SELO 7 RTS RTS RTS RTS 8 9 5V 5V 10 GND GND GND GND 11 12 13 RD 14 TD TD 15 ...

Page 136: ... SPECCHIO MIRROR 11h 14h 1 20h 14h 31h 14h 1 40h 14h INGRESSO INPUT 11h 21h 1 20h 21h 31h 21h 1 40h 21h SISTEMA VIDEO 12h 22h 2 20h 22h 32h 22h 2 40h 22h VOLUME 11h 23h 1 20h 23h 31h 23h 1 40h 23h ESCLUSIONE AUDIO MUTE 11h 24h 1 20h 24h 31h 24h 1 40h 24h LUMINOSITA BRIGHT 13h 31h 3 20h 31h 33h 31h 3 40h 31h CONTRASTO CONTRAST 13h 32h 3 20h 32h 33h 32h 3 40h 32h COLORE COLOR 13h 33h 3 20h 33h 33h 3...

Page 137: ...SC4 43 00h 02h PAL 00h 03h SECAM 00h 05h M PAL 00h 06h N PAL VOLUME 00h basso volume 24h volume alto ESCLUSIONE AUDIO MUTE 00h esclusione audio disattivata 01h esclusione audio attivata LUMINOSITA BRIGHT 00h 00h 00h scura 00h 00h 24h luminosa CONTRASTO 00h 00h 00h basso 00h 00h 24h forte COLORE 00h 00h 00h debole 00h 00h 24h intenso TONALITA TINT 00h 00h 00h delicata 00h 00h 24h verdastra NITIDEZZ...

Page 138: ...ati Nel caso in cui la lunghezza dei dati sia superiore a quanto indicato nel codice di lunghezza dati il proiettore ignorerà il codice dei dati in eccesso Al contrario nel caso in cui la lunghezza dei dati sia inferiore a quanto indicato nel codice di lunghezza dati il proiettore riceverà una risposta includente il codice di errore Nel caso in cui si verifichi un errore di fotogramma 10 ripetizio...

Page 139: ...i dispositivo Ingresso a CA Videoregistratore con presa jack S Videoregistratore Altoparlanti con amplif incorporato Schermo di visualizzazione Computer di tipo desktop Computer di tipo Notebook Pulire il filtro dell aria ogni 100 ore 1 Disattivare l interruttore dell alimentazione elettrica al proiettore ed estrarre il cavo di alimentazione 2 Rimuovere il filtro dell aria anteriore ...

Page 140: ...ell alimentazione elettrica fornirà indicazioni circa il momento in cui sia necessario sostituire la lampada In tal caso procedere alla sostituzione della lampada Per quanto riguarda la sostituzione della lampada Vi preghiamo contattare il vostro rivenditore o la società di assistenza I seguenti messaggi vengono visualizzati a video 1 La visualizzazione sparirà dopo 3 minuti per riapparire nel mom...

Page 141: ...vare l alimentazione Guida alla soluzione dei pr oblemi di funzionamento Prima di richiedere assistenza ai fini della riparazione verificare attenendovi alla tabella seguente la possibilità di ovviare al problema quindi contattare il vostro rivenditore Sintomo L alimentazione elettrica non è stata attivata Assenza di video o audio Il video è funzionante ma vi è assenza di audio L audio è funzionan...

Page 142: ...sercizio 0 35 C Dimensione 289 W 124 H 345 D Peso massa 6 kg Prese jack dell ingresso S VIDEO Presa jack mini DIN a 4 pin del segnale VIDEO VIDEO presa jack RCA AUDIO presa jack RCA Prese jack ingresso uscita segnale RGB Segnali RGB Presa jack adattamento Sub D a 15 pin Audio Minipresa jack stereo Presa jack del segnale di COMANDO CONTROL Presa jack adattamento Sub D a 15 pin Spinotto a jack USB T...

Page 143: ...nnanzitutto a dei controlli attenendosi alla Tabella di localizzazione guasti fornita nel presente manuale di istruzioni Nel caso in cui il problema persista contattare il vostro rivenditore o la società addetta al servizio di assistenza Riparazioni durante il periodo di garanzia Le riparazioni saranno eseguite in conformità a quanto descritto nella garanzia Per maggiori dettagli al riguardo far r...

Page 144: ...ne e la riparazione o la sostituzione del prodotto sarà l unico rimedio esclusivo a favore dell utente finale per qualsiasi difetto del Prodotto LIMITAZIONI ED ESCLUSIONI DELLA GARANZIA Questa garanzia limitata non si estende ad un Prodotto qualsiasi che sia stato danneggiato a seguito di incidente modifiche non autorizzate manomissione abuso uso non corretto cambiamenti stress fisico o elettrico ...

Reviews: