background image

Summary of Contents for PLTV-3750

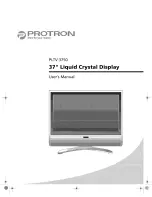
Page 1: ...More for your money PLTV 3750 37 Liquid Crystal Display User s Manual Q I_ I I II ...

Page 2: ... to operation All statements technical information and recommendations in this manual and in any guides or related documents are believed reliable but the accuracy and completeness thereof are not guaranteed or warranted and they are not intended to be nor should they be understood to be representations or warranties concerning the products described Specifications are subject to change without no...

Page 3: ...particularly at plugs convenience receptacles and the point where they exit from the apparatus Only use attachments accessories specified by the manufacturer Use only with the cart stand tripod bracket or table specified by the manufacturer or sold with the apparatus When a cart is used use caution when moving the cart apparatus combination to avoid injury from tip over Unplug this apparatus durin...

Page 4: ...fied service personnel Do not touch the display or antenna during thunderstorms Unplug the display during thunderstorms or if it will not be used for extended periods Failure to do so may result in electric shock or fire Before cleaning the display unplug it from the walt Use a damp cloth for cleaning Never use liquid or aerosol cleaners To prevent overheating and ensure reliable operation place t...

Page 5: ...an outlet on a circuit different from that to which the receiver is connected Consult the dealer or an experienced radio TV technician for help Caution To comply with the limits for an FCC Class B computing device the user should use the shielded signal cable and power cord supplied with the unit The FCCwarns that changes or modifications of the unit not expressly approved by the party responsible...

Page 6: ...rating the Display 9 Turning the Display On and Off 9 Selecting the Video and Audio Source 9 Adjusting the Volume 9 Selecting the Television Channel 9 Accessing the On Screen Display 10 Using Your Display for the First Time 11 Setting up Digital Television Channels 11 Setting up Analog Television Channels 11 Using the Remote Control 13 Replacing the Remote Batteries 15 Configuring the Display 16 V...

Page 7: ...ent video inputs on your display give you the highest quality video available allowing you to enjoy crystal clear DVDs and other media Features 37 viewable display area 1366 x 768 resolution Built in HDTV tuner with coaxial input Analog TV tuner with coaxial input HDMI audio video input 2 progressive scan component video inputs 3 composite video inputs S Video input with optical audio input 6 audi...

Page 8: ...tended display location 2 Open the top of the box 3 Remove the accessories box from behind the display and set it aside 4 Lift the display out of the box 5 Remove the pads and set the display aside The accessories box should contain the items indicated below If any items are missing or damaged contact the seller immediately i h Remote Control 1 _ 4 _ 0 _20 A lu_ o c q o h I 2 x AAA Battery Power C...

Page 9: ...he display prepare such a space To set up the display 1 Remove the power cord from the accessories box insert the appropriate end into the power AC IN connector on the bottom of the display and then insert the other end into a free power outlet 2 Turn on the power switch on the bottom of the display O e X Connecting a Digital TV HDTV Signal Source To connect an HDTV signal source to the display co...

Page 10: ...to the ANT jack on the display with another cable Connecting Composite Video Devices Many video devices such as VCRs DVD players video game systems and camcorders have composite video outputs Composite video uses one RCA cable to transmit video information and generally provides lower quality than S Video component video and HDMI see below To connect a composite video source to the display 1 Using...

Page 11: ...play 2 Using two RCA cables connect the right red and left white audio outputs on the source to the corresponding jacks in the S Video block on the display l I g l i I I_1 iiiiiiiiiiiiiiiiiiiiiiiiiii1 L_ tkJ_ k_ mm Zm T ll Im S VIDEO OUT Connecting Component Video Devices High quality video devices such as HDTV receivers and high end DVD players have component video outputs Component video uses th...

Page 12: ...is a subwoofer output that can be connected to a powered amplified subwoofer to fill out the bass To connect the display to an audio system 1 Using two RCA cables connect the right red and left white audio outputs in the output block on the display AV OUT to the corresponding inputs on your audio system 2 OPTIONAL If you have a powered amplified subwoofer connect a third RCA cable from the SUBWOOF...

Page 13: ...a PC Your display can be used as a computer monitor for any computer with a VGA video output In addition the computer s audio output can be connected to the display and played through the display s speakers To connect a PC to the display 1 Set the video resolution on the computer to 1280 x 1024 or less before connecting to the display see Supported VGA Modes on page 29 for a full list of supported...

Page 14: ... _r_u_ DI _ D spta Color R_sot_tlOrl_ oO J _ bOO 5 2 _ b2 Uk 4 _ 7b8 115 _ bZ f izSJ _ lOz _ Ib_O _ ligO 179L _ 1344 Cofo s Mdhons T I Refresh Rate b0 L Her z T_ i Sho dlspla x r_ ment_ baF Nufrbe _ Of gt_ceqt r _odes Connect a VGA cable between the VGA output on the computer and the VGA input on the display OPTIONAL Using a 1 8 stereo audio cable connect the computer s audio output LINE OUT to th...

Page 15: ...ay and disconnect the power Selecting the Video and Audio Source The signal source may come from any of the input blocks on the sides or bottom of the display The SOURCE button cycles through these To change the audio video source press the SOURCE button until the correct source is selected The SOURCE button cycles through the following sources TV AVl AV2 AV3 S Video YPbPrl YPbPr2 HDMI DTV VGA Adj...

Page 16: ...tion of the display You can change video and audio settings activate and configure closed captioning select television channels control access to mature programming and configure other general display behavior See Configuring the Display on page 16 for more information To access the OSD press the MENU button 10 ...

Page 17: ...s V until Time Zone is highlighted and then press 1_until the correct time zone is selected 6 Press v until Auto Scan is highlighted and then press ENTER to begin scanning for available television channels Select _tcJ Exit I Er_ AudTo Language Enghsh T_ n_ Zor e Pde fl T1rn_ SPDhTcpe PCM Auto Scan Scan Ma _ual Scdn P_ess _Ent_ Channel S_0 Press _En _ Selecti_ Exl_ Setting up Analog Television Chan...

Page 18: ..._ iii Auto Search Tuner Mode Air Channel Skl_ Channel Name Select Air if you are using an antenna se_ t _ Ex_t_ Select one of the Cable options if you are connecting directly to a cable TV wall outlet Contact your cable service provider to find out which system is in use in your area Cable or Cable IRC will work with most systems Press 11 to return to the TV menu Press A until Auto Search is highl...

Page 19: ...CC3CC These buttons activate and configure Picture in Picture PIP as follows PIP Selects the PIP mode Off Standard PIP or PBP Picture by Picture 1 D PIP S SOURCE Selects the signal source used for the secondary window See Picture in Picture Combinations on page 29 for a list of possible signal source combinations for the main and secondary windows S POS When PIP is set to Standard PIP mode adjusts...

Page 20: ...the previous channel When viewing HDTV used to jump to a television channel once it has been entered on the keypad Selects the aspect ratio used by the display 4 3 or Full 16 9 i i 43 FULL flUTE Mutes the audio 0 EP s When viewing HDTV brings up the HDTV program guide which displays k _ program schedules and information for each channel s L 0 Turns surround sound simulation on and off cH Selects t...

Page 21: ...splay program the remote to control any NEC television Replacing the Remote Batteries The remote requires two AAA batteries which are held in a small enclosure on the rear of the remote To replace the batteries 1 Release the tab and pull the enclosure out of the remote 2 Remove the old batteries and replace them with the new batteries Ensure the batteries are oriented as indicated in the enclosure...

Page 22: ...tton to select the desired item 6 If no text is displayed next to the item name a sub menu will appear upon pressing ENTER Repeat steps 4 and 5 to navigate the sub menu If the selected item is an adjustable parameter one of two things will happen A pop up box will appear in which case use 41and I_ to adjust the parameter and then press ENTER to accept the value The parameter will edit in place in ...

Page 23: ...y Adjusts the phase of the video synchronization Flesh Tone Turns on and off image filtering to improve flesh tones in the image Color Temperature Sets the color temperature used by the display Cool Normal Warm or a user defined setting To set the user defined color temperature select the User option and adjust the levels of red green and blue to be used to produce white Use A and V to select a co...

Page 24: ...ers display format closed captioning Picture in Picture and parental controls It contains the following menu items Language Selects the language used for the OSD English French or Spanish Language Enghsh TIITI_T Sleep Time OFF OSD Tlmeotlt 30 Sec Format Full C osed Caption OFF V Chlp ParentaJ All Reset Select _ Exit I_I Timer A sub menu that allows you to schedule the display to turn on or off at ...

Page 25: ...io when PIP is active FULL 4 3 Closed Caption Turns closed captioning on and off and selects the closed captioning channel used Closed captioning displays the dialog of the current program or other information on the screen so it may be read The available channels are C1 4 and T1 4 C1 is the most used closed captioning channel usually used for English dialog C2 is usually used for foreign language...

Page 26: ...ociation of America rating level the V Chip wilt block without a password Blocking a particular rating will automatically block all ratings above that level Similarly unblocking a rating will automatically unblock all ratings below that level Select a rating using the arrow controls on the remote then press ENTER to block unblock it Press MENU to exit this sub menu The ratings are as follows x x X...

Page 27: ... then press ENTER to block unblock it Press MENU to exit this sub menu The ratings are as follows Rating Level Significance TV Y All children TV Y7 Children 7 years and older TV G General audience TV PG Parental guidance suggested TV 14 Parents strongly cautioned TV MA Mature audience only Content Type Significance FV Fantasy violence V Violence S Sexual content L Foul language D Suggestive dialog...

Page 28: ... cable signal primarily used on the West Coast of the US Channel Skip Allows you to manually adjust which channels are available when flipping through channels A check mark next to a channel number indicates that the channel is available Channel Name A sub menu that allows you to assign a name to the current channel Enter characters by selecting them with the arrow controls on the remote and then ...

Page 29: ...TV menu is a separate menu system for HDTV configuration that allows you to configure the available channels closed captioning parental controls and other HDTV options Note The navigation procedure for the DTV menu differs from that of the main OSD as follows To use the DTV menu 1 Use the _1and I_ buttons to navigate the sub menus represented by icons at the top of the menu 2 Press the V button to...

Page 30: ...e Scan Mode to Add on Mode to scan all channels that have not yet been scanned To scan a particular range of channels set the Scan Mode to Range Scan then enter the start and end channels on the remote keypad Once the Scan Mode has been set press ENTER to begin the scan 0 Scan IP _ Exlt_ r _r_A Channel Skip Brings up a dialog box allowing you to disable individual channels To enable disable a chan...

Page 31: ...ground Opacr y Window Colo_ Window Opaclty Cus om Large 51a k Sohd White Sobd White Translucent Select _ E_lt_ ABC Parental Configures parentalcontrolsfor HDTV programming allowing you to blockindividual channels To access the menu select Password and enter the current password which is set in the main parental controls menu see V Chip Parental on page 20 To block unblock channels select Channel B...

Page 32: ... indicator is Contrast or Adjust the contrast and or brightness until picture green brightness too low appears Unclear or Signal cable s not Make sure the signal cable s are firmly connected noisy picture securely connected Poor TV signal Check the TV signal If using an antenna adjust the position for better signal If using cable or satellite TV contact your service provider No sound Audio cable s...

Page 33: ...eries energy A button is stuck Jog any stuck buttons on the remote to unstick them Obstacle between Remove the obstacle remote and display The remote is too Move closer to the display far from the display If none of the resolutions above resolves the problem turn the display off and then on again using the power switch on the bottom of the display then check to see if the problem has resolved Note...

Page 34: ...n colors 1366 x 768 0 60mm H x 0 60mm V Horizontal 30 80kHz 50 75Hz Vertical 1200 1 500 cd m 2 89 H V 8ms lx lx lx 2x 3x lx 6x lx lx lx lx lx lx ATSC TV 75 ohm coaxial F NTSC M TV 75 ohm coaxial F HDMI progressive scan component video RCA composite video RCA S Video stereo audio RCA SVGA 15 pin D Sub stereo audio line in 0 dBV nominal 1 8 TRS composite video RCA optical S PDIF audio TOSLINK TM ste...

Page 35: ...TV AV1 AV2 AV3 S Video YPbPrl YPbPr2 HDMI DTV VGA Primary Source S Video YPbPrl YPbPr2 HDMI Supported VGA Modes Display Resolution Vertical Frequency VESA Rate Standard 640 x 480 800 x 600 1024 x 768 1280 x 720 1280 x 768 1280 x 1024 1366 x 768 Refresh Hz 60 72 75 85 56 60 72 75 85 60 70 75 85 60 60 6O 6O Horizontal Frequency kHz 31 5 37 9 37 5 43 3 35 1 37 9 48 1 46 9 53 7 48 4 56 5 60 0 68 7 47 ...

Page 36: ... an authorized Protron Service Center If in home service is not available in your area you must either take your television to the Service Center location at your own expense pay for the additional cost that the Service Center may charge to transport your television to and from your home or send the unit to our National Return Center for repair Proof of purchase in the form of a bill of sale or re...

Page 37: ...plied If the identifiable markings on the TV such as the serial number are defaced unrecognizable or missing The product is used outside the country in which it was originally sold This warranty is not transferable and only applies to the original purchase Any implied warranties including the warranty of merchantability are limited in duration to the period of this expressed warranty and no warran...

Page 38: ...2 1 MPLT 3 q b 4c Pa e 3 Tluu da_ Febut u_ l 2 J 44 M _ _ _ _ y I Protron Digital Corporation htt p www protronusa com PLTV 3750 OMPLTV3750 I I ...

Reviews: