


Creating and Editing Protocol Steps
55
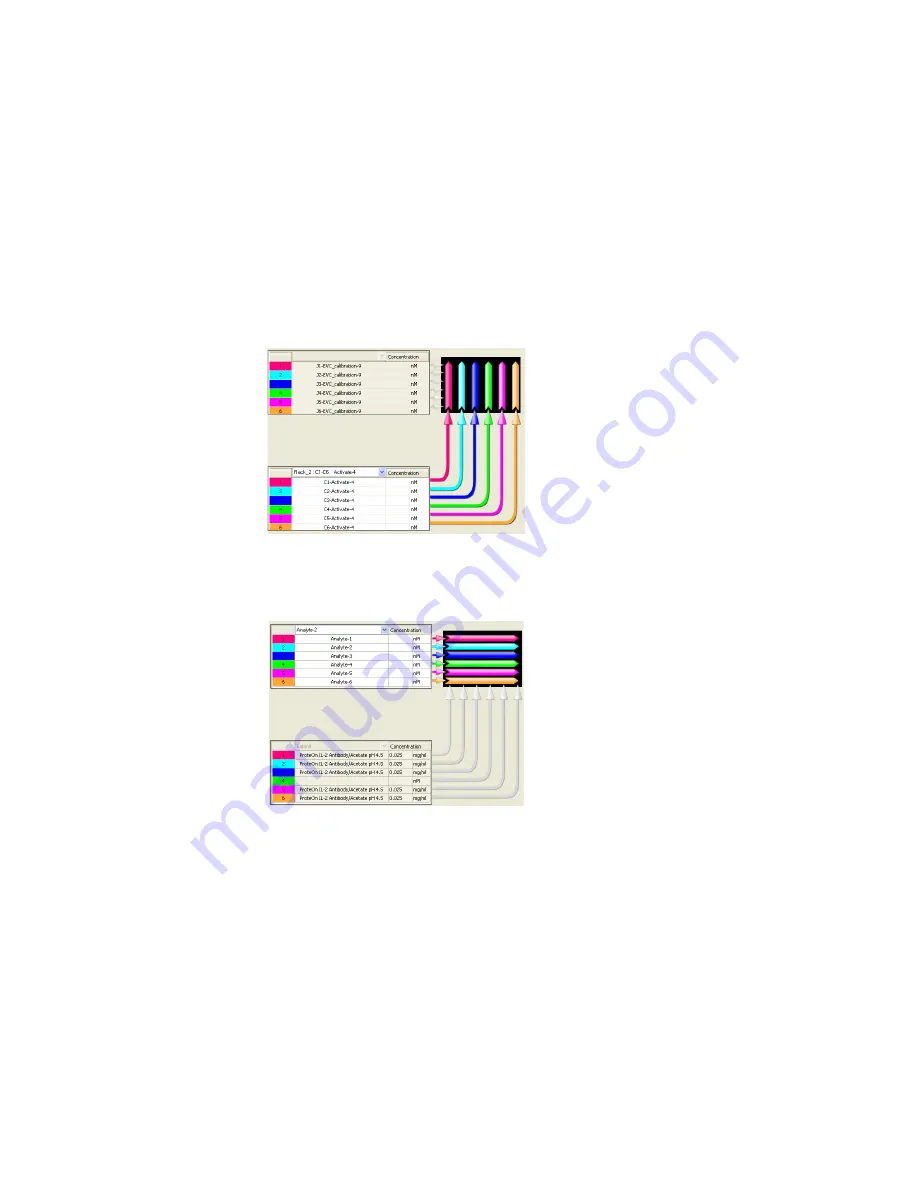
Interaction viewer
— located at the bottom of the Step Details panel,
displays the orientation of the current injection and the flow direction for
sample application, and indicates how the samples are to interact with each
other.
The chip view is vertical for the Activate, Ligand, Deactivate, and CoInject
Ligand steps.
The chip view is
horizontal for the Analyte, Blank, Regenerate, and CoInject
Analyte steps. Ligands appear in the lower panel (read-only) if they have been
immobilized.
Setting the Buffer Step
Use the Set Buffer step in the Step list to specify which of two possible
running buffers (Buffer A and Buffer B) to use for subsequent protocol steps.
This enables the instrument to switch between buffers in an unattended
experiment. This is done most commonly in an experiment using DMSO.
Immobilization is first performed
without
DMSO in the running buffer; then the
interactions are measured
with
DMSO in the running buffer.
Summary of Contents for XPR36
Page 1: ...ProteOn XPR36 Protein Interaction Array System Protein Interaction Analysis User Manual...
Page 2: ......
Page 3: ...ProteOn XPR36 Protein Interaction Array System Version 3 1 User Manual...
Page 4: ......
Page 10: ...ProteOn XPR36 System viii...
Page 166: ...ProteOn XPR36 System Analysis 148...
Page 188: ...ProteOn XPR36 Maintenance 170...
Page 194: ...ProteOn XPR36 System ProteOn System Troubleshooting 176...
Page 226: ...ProteOn XPR36 System A ProteOn XPR36 Instrument and Peripherals 208...
Page 250: ...ProteOn XPR36 System E Ordering Information 232...
Page 264: ...ProteOn XPR36 System F Security Edition Configuration Guide 246...
Page 276: ...ProteOn XPR36 System Glossary 258...
Page 287: ......


