background image

18

CONDITIONING GUIDELINES

The following guidelines will help you to plan your ex-
ercise program. For more detailed exercise informa-
tion, obtain a reputable book or consult your physician. 

EXERCISE INTENSITY

Whether your goal is to burn fat or to strengthen your
cardiovascular system, the key to achieving the 
desired results is to exercise with the proper intensity.
The proper intensity level can be found by using your
heart rate as a guide. The chart below shows recom-
mended heart rates for fat burning and aerobic exercise.

To find the proper heart rate for you, first find your age
near the bottom of the chart (ages are rounded off to
the nearest ten years). Next, find the three numbers
above your age. The three numbers define your “train-
ing zone.” The lower two numbers are recommended
heart rates for fat burning; the higher number is the
recommended heart rate for aerobic exercise.

Fat Burning

To burn fat effectively, you must exercise at a relatively
low intensity level for a sustained period of time.
During the first few minutes of exercise, your body
uses easily accessible 

carbohydrate calories

for en-

ergy. Only after the first few minutes does your body
begin to use stored 

fat calories

for energy. If your goal

is to burn fat, adjust the speed and incline of the tread-
mill until your heart rate is near the lowest number in
your training zone. 

For maximum fat burning, adjust the speed and incline
of the treadmill until your heart rate is near the middle
number in your training zone.

Aerobic Exercise

If your goal is to strengthen your cardiovascular sys-
tem, your exercise must be “aerobic.” Aerobic exercise
is activity that requires large amounts of oxygen for
prolonged periods of time. This increases the demand
on the heart to pump blood to the muscles, and on the
lungs to oxygenate the blood. For aerobic exercise,
adjust the speed and incline of the treadmill until your
heart rate is near the highest number in your training
zone.

WORKOUT GUIDELINES

Each workout should include the following three parts:

A Warm-up

—Start each workout with 5 to 10 minutes

of stretching and light exercise. A proper warm-up in-
creases your body temperature, heart rate and circula-
tion in preparation for exercise. 

Training Zone Exercise

—After warming up, increase

the intensity of your exercise until your pulse is in your
training zone for 20 to 60 minutes. (During the first few
weeks of your exercise program, do not keep your
pulse in your training zone for longer than 20 minutes.)
Breathe regularly and deeply as you exercise—never
hold your breath.

A Cool-down

—Finish each workout with 5 to 10 min-

utes of stretching to cool down. This will increase the
flexibility of your muscles and will help prevent post-
exercise problems.

EXERCISE FREQUENCY

To maintain or improve your condition, complete three
workouts each week, with at least one day of rest be-
tween workouts. After a few months, you may com-
plete up to five workouts each week if desired. The key
to success is to make exercise a regular and enjoyable
part of your everyday life.

WARNING:

Before beginning this

or any exercise program, consult your physi-
cian. This is especially important for individu-
als over the age of 35 or individuals with pre-
existing health problems.

The pulse sensor is not a medical device.
Various factors, including your movement,
may affect the accuracy of heart rate readings.
The sensor is intended only as an exercise aid
in determining heart rate trends in general.

Summary of Contents for 495Pi PFTL33105.0

Page 1: ...S MANUAL QUESTIONS As a manufacturer we are com mitted to providing complete customer satisfaction If you have questions or if parts are damaged or missing PLEASE CONTACT OUR CUSTOMER SERVICE DEPARTME...

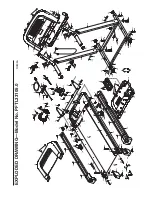
Page 2: ...NT 11 HOW TO FOLD AND MOVE THE TREADMILL 14 TROUBLESHOOTING 16 CONDITIONING GUIDELINES 18 HOW TO ORDER REPLACEMENT PARTS Back Cover LIMITED WARRANTY Back Cover Note An EXPLODED DRAWING and a PART LIST...

Page 3: ...mber 146148 or see your local electronics store 12 Failure to use a properly functioning surge suppressor could result in damage to the con trol system of the treadmill If the control sys tem is damag...

Page 4: ...e only 25 This treadmill is intended for in home use only Do not use this treadmill in a commer cial rental or institutional setting WARNING Before beginning this or any exercise program consult your...

Page 5: ...se note the product model number and serial number before calling The model number of the treadmill is PFTL33105 0 The serial number can be found on a decal attached to the tread mill see the front co...

Page 6: ...lips screwdriver rubber mallet adjustable wrench and wire cutters For help identifying the assembly hardware see the drawings below If a part is not in the parts bag first check to see if it has been...

Page 7: ...ssembly is raised raise the Uprights 31 36 so the Upright Base 48 is flat on the floor Make sure that the end of the Wire Harness 28 does not fall into the Right Upright 36 It may be helpful to bend t...

Page 8: ...t the excess wiring down into the right Handrail Attach the console assembly with four 3 4 Screws 2 and two Console Bolts 22 with two 1 4 Star Washers 21 Make sure that no wires are pinched Start all...

Page 9: ...olts 40 and the two Frame Bolts 32 Be careful not to overtighten the Frame Bolts 31 31 36 32 18 74 36 Top View 8 40 9 Attach the end of the ground wire from the Wire Harness 28 to the indicated small...

Page 10: ...otect the floor or carpet place a mat under the treadmill 10 Attach the Latch Housing 30 to the Left Upright 31 with two 3 4 Screws 2 Make sure that the large hole in the Latch Housing is on the side...

Page 11: ...malfunc tion or break down grounding provides a path of least resistance for electric current to reduce the risk of elec tric shock This product is equipped with a cord having an equipment grounding c...

Page 12: ...he walking belt will begin to move at 1 mph As you exercise change the speed of the walking belt as desired by pressing the Speed in crease and decrease buttons Each time a button is pressed the speed...

Page 13: ...can be plugged in the key can be removed from the console and the indicators in the display will automatically appear in a preset sequence the buttons on the console will not operate If a d ap pears w...

Page 14: ...e hole in the frame is aligned with the latch pin and then slowly release the latch knob Make sure that the latch pin is fully inserted into the frame To protect the floor or carpet from damage place...

Page 15: ...ntil the frame is past the latch pin 2 Hold the metal frame firmly with both hands and lower the treadmill to the floor CAUTION To decrease the possibility of injury do not lower the treadmill by grip...

Page 16: ...tch protrudes as shown the circuit breaker has tripped To reset the circuit breaker wait for five minutes and then press the switch back in PROBLEM The power turns off during use SOLUTION a Check the...

Page 17: ...rd insert the key and run the treadmill for a few minutes Repeat until the walking belt is properly tight ened c If the walking belt still slows when walked on see the front cover of this manual PROBL...

Page 18: ...ctivity that requires large amounts of oxygen for prolonged periods of time This increases the demand on the heart to pump blood to the muscles and on the lungs to oxygenate the blood For aerobic exer...

Page 19: ...les Stretch With one leg in front of the other reach forward and place your hands against a wall Keep your back leg straight and your back foot flat on the floor Bend your front leg lean forward and m...

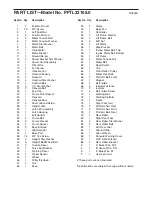
Page 20: ...Caution Decal 42 1 Pulse Bar Bracket 43 1 Warning Decal 44 4 Wheel Spacer 45 2 Wheel 46 1 Pulley Flywheel 47 4 Nut 48 1 Base 49 2 Clamp 50 1 Belly Pan 51 1 Controller 52 2 Lift Frame Washer 53 2 Lift...

Page 21: ...7 38 28 27 37 38 45 40 44 44 47 37 38 47 44 45 44 40 2 49 2 23 29 50 51 2 38 38 38 56 47 54 54 55 60 54 54 11 62 61 54 66 24 64 65 66 72 73 4 4 3 71 68 70 69 4 4 78 78 38 76 83 38 81 82 85 84 11 82 81...

Page 22: ...damages arising out of or in con nection with the use or performance of the product or damages with respect to any economic loss loss of property loss of revenues or profits loss of enjoyment or use c...

Reviews: