background image

11/16

2011/06 - Indice de révision : C - Code : 0030050

Installation instructions


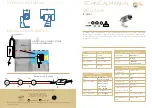
Install the wall fitting


Installs in minutes on pools with a dedicated vacuum point equipped with a tapped 1"1/2 union  .


1.  Separate the wall fitting from the quick disconnect and screw the wall fitting into the vacuum point. 


2.  Insert the quick disconnect into the wall fitting making a1/4 clockwise turn. Pull on the quick disconnect to  


secure it in position.

1

2.40 m

Figure 1


Adjust the length of the feed hose


1.   Take the feed hose out of its packaging and stretch it out beside the pool (in the sun if possible). 


2.  Using a telescopic handle, measure the water depth at the deepest point (figure 1).    


Cut the feed hose (A) so that its length corresponds to this depth (example, the feed hose originally    


measures 3 m, if the max pool depth is 2.40 m, cut off 0.60 m).


3.   Connect the feed hose to the wall fitting with the quick disconnect and pull the free end gently to the    


furthest point in the pool (figure 2), be careful not to pull too hard. Measure the length of the hose that  


extends beyond the pool wall at this point. This is the superfluous length. If the furthest point is at a step,  


measure the length at the point level with the second tread.


Disconnect the swivelling union (D) between the two hose sections (B and C

)

, and 

cut a portion equal  


to half the superfluous length from each section. 

(example

the superfluous length is 50 cm, cut    


25 cm from each of the hose sections (B and C). There should be a float on each hose section, floats  


should be positioned at regular intervals. 

2

Strainer

Quick disconnect
with relief pressure 
valve

Wall fitting

to vacuum point

Summary of Contents for JetVac

Page 1: ...1 16 2011 06 Indice de r vision C Code 0030050 NETTOYEUR AUTOMATIQUE POUR PISCINE MANUEL D INSTALLATION ET D UTILISATION A lire attentivement et conserver Fran ais page 1 English page 9...

Page 2: ...pi ces qui ne r pondraient pas aux sp cifications du JetVac pourraient emp cher son bon fonctionnement voire l endommager Le JetVac doit tre install par un professionnel Les explications concernant s...

Page 3: ...ide de votre manche t lescopique figure 1 Couper la partie du tuyau d alimentation A correspondant cette profondeur exemple le tuyau d alimentation mesurant 3 m l origine si la profondeur maximum de l...

Page 4: ...ce de r vision C Code 0030050 Raccord mural Longueur superflue Figure 2 B A C L Longueur totale superflue L Conserver la longueur de 300 mm entre le robot et le raccord tournant E Raccord tournant D E...

Page 5: ...du JetVac doivent tourner une vitesse comprise aux environs de 40 45 tours minute 2 Faire un rep re sur le cot de la roue l aide d un morceau de ruban adh sif 3 Mettre la pompe en marche immerger le J...

Page 6: ...t r gl e en usine au droit du plan de base de la buse mais selon la piscine d autres positions peuvent tre mieux adapt es R glage du tuyau de balayage Le tuyau de balayage doit se d placer doucement P...

Page 7: ...nts pour tre s r qu ils tournent librement et remplacer les si n cessaire Le JetVac se d place lentement a V rifier et nettoyer le filtre du connecteur rapide b V rifier que le tuyau d alimentation et...

Page 8: ...8 16 2011 06 Indice de r vision C Code 0030050...

Page 9: ...9 16 2011 06 Indice de r vision C Code 0030050 Automatic pool cleaners Installation and operating instructions To be read carefully and kept for future reference...

Page 10: ...JetVac original parts Other parts may not comply with JetVac specifications and could cause the cleaner to malfunction or could even damage it JetVac should be installed by a professional The installa...

Page 11: ...responds to this depth example the feed hose originally measures 3 m if the max pool depth is 2 40 m cut off 0 60 m 3 Connect the feed hose to the wall fitting with the quick disconnect and pull the f...

Page 12: ...06 Indice de r vision C Code 0030050 Superfluous length Figure 2 B A C Figure 2 L Total super fluous length L Keep the 300 mm length between the rotating union E and the robot E Rotating union D Rota...

Page 13: ...heels should turn at between 40 and 45 RPM 2 Mark the side of the wheel with a piece of tape 3 Switch the booster pump on and submerge JetVac Count the wheel revolutions for one minute 4 If the wheel...

Page 14: ...rection is set in the factory but other positions may be better suited to the pool shape Sweep hose regulation The sweep hose should move gently To increase or decrease the movement of the sweep hose...

Page 15: ...the swivel unions are turning freely replace them if necessary JetVac is moving slowly a Inspect and clean out the strainer on the quick disconnect b Check to make sure that the swivel unions are turn...

Page 16: ...16 16 2011 06 Indice de r vision C Code 0030050...

Reviews: