2
Powering Up Your Boat
3
Electronic Speed Control (ESC)
Your new Horizon Hobby boat has been designed and built with a combination of
waterproof and water-resistant components to allow you to operate the product in
calm, fresh water conditions.
While the entire boat is highly water-resistant, it is not completely waterproof and your
boat should NOT be treated like a submarine. The various electronic components used
in the boat, such as the ESC, servo(s) and receiver are waterproof, however, most of
the mechanical components are water-resistant and require additional maintenance
after use.
Metal parts, including the bearings, pins, screws and nuts, propeller, rudder, rudder
mounts, prop struts, as well as the contacts in the electrical cables, will be susceptible
to corrosion if additional maintenance is not performed after running in wet conditions.
To maximize the long-term performance of your boat and to keep the warranty intact,
the procedures described in the “Wet Conditions Maintenance” section must be
performed regularly.
CAUTION: Failure to exercise caution while using this product and complying
with the following precautions could result in product malfunction and/or void
the warranty.
Water-Resistant Boat with Waterproof Electronics
Safety Precautions and Warnings
As the user of this product, you are solely responsible for operating in a manner that
does not endanger yourself and others or result in damage to the product or the
property of others.
• When handling and/or transporting your boat, always pick up the boat from the
front, keeping all moving parts pointed away from you.
• Always keep a safe distance in all directions around your model to avoid
collisions or injury. This model is controlled by a radio signal subject to
interference from many sources outside your control. Interference can cause
momentary loss of control.
• Always operate your model in open spaces away from full-size vehicles, traffic
and people.
• Always carefully follow the directions and warnings for this and any optional
support equipment (chargers, rechargeable battery packs, etc.).
• Always keep all chemicals, small parts and anything electrical out of the reach of
children.
• Always avoid water exposure to all equipment not specifically designed and
protected for this purpose. Moisture causes damage to unprotected electronics.
• Never place any portion of the model in your mouth as it could cause serious
injury or even death.
• Never operate your model with low transmitter batteries.
NOTICE
MEANING OF SPECIAL LANGUAGE
All instructions, warranties and other collateral documents are subject to change
at the sole discretion of Horizon Hobby, LLC. For up-to-date product literature, visit
http://www.horizonhobby.com and click on the support tab for this product.
The following terms are used throughout the product literature to indicate various levels
of potential harm when operating this product:
NOTICE:
Procedures, which if not properly followed, create a possibility of physical
property damage AND little or no possibility of injury.
CAUTION:
Procedures, which if not properly followed, create the probability of
physical property damage AND a possibility of serious injury.
WARNING:
Procedures, which if not properly followed, create the probability
of property damage, collateral damage, and serious injury OR create a high
probability of superficial injury.
This is a sophisticated hobby product and NOT a toy. It must be operated with caution
and common sense and requires some basic mechanical ability. Failure to operate
this Product in a safe and responsible manner could result in injury or damage to the
product or other property. This product is not intended for use by children without direct
adult supervision. Do not use with incompatible components or alter this product in any
way outside of the instructions provided by Horizon Hobby, LLC. This manual contains
instructions for safety, operation and maintenance. It is essential to read and follow
all the instructions and warnings in the manual, prior to assembly, setup or use, in
order to operate correctly and avoid damage or serious injury.
Age Recommendation: Not for children under 14 years.
This is not a toy.
WARNING:
Read the ENTIRE instruction manual to become familiar with
the features of the product before operating. Failure to operate the product
correctly can result in damage to the product, personal property and cause
serious injury.
General Precautions
• Read the WET CONDITIONS MAINTENANCE procedures and make sure that you
have all the tools you will need to properly maintain your boat.
• Not all batteries can be used in wet conditions. Consult the battery manufacturer
before use. Caution should be taken when using Li-Po batteries in wet conditions.
• Most transmitters are not water-resistant. Consult your transmitter’s manual or the
manufacturer before operation.
• Never operate your transmitter or boat when lightning is present.
• Salt water is very conductive and highly corrosive. If you choose to run your boat in
salt water, immediately rinse the boat in fresh water after each use. Operating your
boat in salt water is at the sole discretion of the modeler.
Wet Conditions Maintenance
• Drain any water that has collected in the hull by removing the drain plug or
canopy and tilting the boat in the appropriate direction to drain the water.
CAUTION:
Always keep hands, fingers, tools and any loose or hanging objects
away from rotating parts.
• Remove the battery pack(s) and dry the contacts. If you have an air compressor
or a can of compressed air, blow out any water that may be inside the recessed
connector housings.
• Remove all moving parts. Dry and lubricate parts after every 30 minutes of
operation or if the boat becomes submerged.
NOTICE:
Never use a pressure washer to clean your boat.
• Use an air compressor or a can of compressed air to dry the boat and help
remove any water that may have gotten into small crevices or corners.
• Spray the bearings, fasteners and other metal parts with a water-displacing light
oil or lubricant.
• Let the boat air dry before you store it. Water (and oil) may continue to drip for a
few hours.
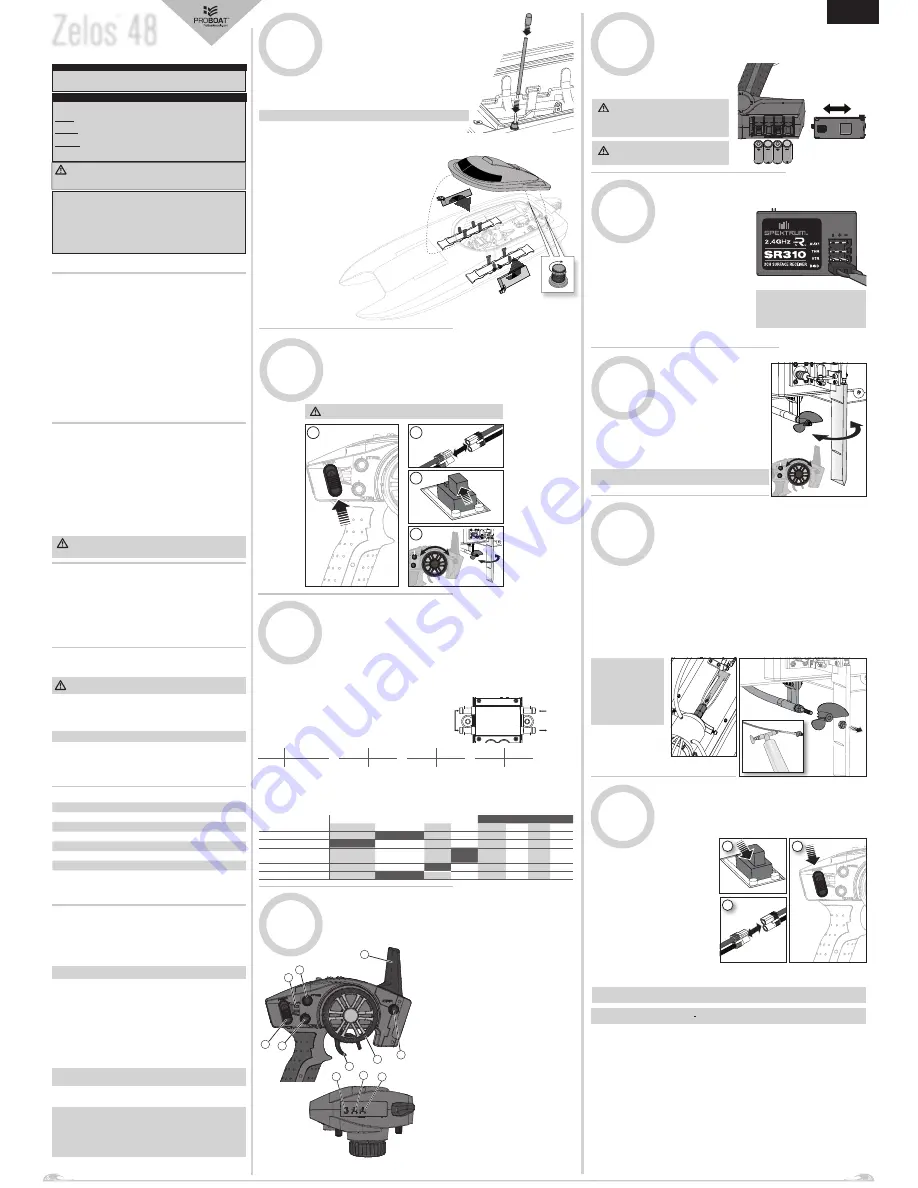
1. Power on the transmitter. Ensure the throttle is not reversed and the throttle trim is neutral.
2. Connect the two batteries to the EC5™ connectors on the ESC.
3. Power on the ESC switch.
4. Test the transmitter’s control of the boat with the boat on the display stand.
CAUTION:
Always keep hands a safe distance from the propeller.
9
1. Power off the ESC.
2. Power off the transmitter.
3. Disconnect and remove the battery from
the boat.
4. Drain water from inside the hull using the
drain plug.
5. Fully dry the inside and outside of the boat,
including the water cooling lines and jacket
around the motor.
6. Remove the canopy before storage or
moisture may allow mold and mildew to grow
in the boat.
7. Repair any damage or wear to the boat.
8. Lubricate the flex shaft using Pro Boat®
Marine Grease (DYNE4200 or DYNE4201).
9. Make note of lessons learned from the
trimming of your boat, including water and
wind conditions.
Tip:
The hook and loop strips in the boat retain water. To dry them, press on them with a dry cloth.
NOTICE:
When you are finished boating, never leave the boat in direct sunlight or in a hot, enclosed area
such as a car. Doing so can damage the boat.
When You Are Finished
8
Drivetrain Lubrication and Maintenance
Lubricate the driveshaft and drive strut after every 20 minutes of operation.
1. In the hull, use a 12mm and a 13mm open-end wrench to loosen the collet nut from the flex shaft.
2. Remove the propeller. Use a paper towel to slide the flex shaft out from the stuffing tube and drive strut
at the rear of the boat.
3. Wipe the old lubricant and material from the flex shaft.
4. Lubricate the full length of the flex shaft assembly up to the drive dog using marine grease (DYNE4200
or DYNE4201). Also apply grease to the collet threads.
5. Carefully reinstall the flex shaft into the drive strut, through the stuffing tube and into the collet. If the
flex shaft is difficult to remove or install in the collet, spin the collet in the direction that the flex shaft is
wound. If you have trouble pushing the flex shaft into the collet, loosen the nut further.
Tip:
Spinning the flex shaft as you insert it in to the stuffing tube will help carry the well greased flex
shaft into the stuffing tube.
Ensure there is a 3mm gap between the drive strut and drive dog to allow for flex shaft shrinkage under load.
NOTICE:
Running the
boat in saltwater could
cause some parts to
corrode. If you run the
boat in saltwater, rinse it
thoroughly in freshwater
after each use and
lubricate the drive
system.
5
Installing Your Transmitter Battery
This transmitter requires 4 AA batteries.
1. Remove the battery cover from the transmitter.
2. Install the batteries as shown.
3. Install the battery cover.
4
Transmitter Controls
EN
Zelos
TM
48
Specifications
Length
48 in (1244.6mm)
Beam (width)
17.3 in (440mm)
Hull Material
Fiberglass
Motor
Dynamite
®
1000Kv, 6-pole
ESC
Dynamite 160-amp HV (max 8S)
Transmitter
Spektrum™ DX2E 2.4GHz Pistol Grip
Receiver
Spektrum SR310
Batteries
4 AA batteries (sold separately) are required to operate the
transmitter; (2) Reaction
®
11.1V 5000mAh 3S 50C LiPo Hardcase
with EC5™ connector (for 6s); (2) Reaction 14.8V 5000mAh 4S
50C LiPo Hardcase or (2) Reaction 14.8V 6000mAh 4S 80C LiPo
Hardcase with EC5 connector (for 8s) (sold separately)
Battery and Battery Charger
Choose a battery and battery charger designed to work with your boat. We recomend
either a Dynamite
®
Reaction
®
11.1V 5000mAh 3S 50C LiPo battery, a Dynamite
®
Reaction
®
14.8V 5000mAh 4S 50C Li-Po battery or a Dynamite
®
Reaction
®
14.8V
6000mAh 4S 80C. We recommend either the Dynamite
Prophet™ Sport Plus 50W AC/
DC Charger or the Dynamite Prophet Sport Duo 2 X 50W charger. Refer to your battery
and battery charger manuals for charging instructions and safety information.
NOTICE:
Never charge a battery in the boat or damage may result.
Low Voltage Cutoff (LVC)
Discharging a Li-Po battery below 3V per cell may damage your battery.The included
ESC protects the boat battery from over-discharge using Low Voltage Cutoff (LVC).
Before the battery charge decreases too much, LVC removes power supplied to the
motor. The boat will slow significantly. Once LVC is active, we recommend you return
the boat to shore immediately. Do not continue to run the boat after it slows or you
will damage your batteries.
Disconnect and remove the Li-Po battery from the boat after use to prevent trickle
discharge. Charge your Li-Po battery to about half capacity before storage. During
storage, make sure the battery charge does not fall below 3V per cell. LVC does not
prevent the battery from over-discharge during storage.
NOTICE:
Applying the throttle after the LVC will over discharge the battery and
cause battery damage.
Tip:
Monitor your boat battery’s voltage before and after boating by using a Li-Po
Cell Voltage Checker (DYN4071, sold separately).
NOTICE:
The installed 52mm diameter propeller is intended for use with 6S Li-Po
batteries. The additional 48mm diameter propeller is intended for use with 8S Li-Po
batteries. When using the larger 52mm propeller on 8S to achieve speeds greater
than 55 MPH, you must use Li-Po packs with a minimum rating of 5000mAh, 50C.
Using the larger 52mm propeller on 8S with lower-rated battery packs can lead to
battery pack failure. We recommend using 8S Li-Po in tandem, allowing for greater
battery pack efficiency, increased run time, and lower battery pack temperatures.
48-INCH CATAMARAN BRUSHLESS RTR | OWNER’S MANUAL
1. Steering Wheel
controls direction (left/right) of the model.
2. Throttle Trigger
controls speed.
3. Antenna
transmits the signal to the model.
4. ON/OFF Switch
turns the power ON/OFF for the
transmitter.
5. Indicator Lights
• Solid green light indicates adequate battery power.
• Flashing green light indicates the battery voltage is
critically low. Replace batteries.
6. ST. Trim
adjusts the “hands off” direction of the model.
7. TH. Trim
adjusts the motor speed to OFF at neutral.
8. Steering Dual Rate
adjusts the amount the rudder moves
when the steering wheel is turned left and right.
9. BIND Button
puts the transmitter into Bind Mode.
10. ST. REV
reverses the function of the steering when the
wheel is turned left or right.
11. TH. REV
reverses the function of the speed control when
pulled back or pushed forward.
For more information on the transmitter, go to www.spektrumrc.com and click on the support tab to find
the full manual for the DX2E transmitter.
1
2
6
5
3
7
8
4
11
9
10
X2
2
3
1
X2
1
2
3
ESC Calibration Procedure
The ESC has an auto calibration feature. Calibration is only necessary when
rebinding your transmitter or changing to a different transmitter brand.
1. Power OFF the ESC.
2. Ensure your transmitter is powered ON, the throttle is
not reversed, the throttle trim is neutral and the throttle travel
range is at 100%. Disable any special functions
such as ABS, etc.
3. Keep the throttle at neutral and power ON the ESC.
4. The ESC automatically calibrates the throttle range after 3 seconds.
5. A beep will sound, indicating low voltage cutoff threshold and cell
count:
1 beep
Non-protection
3 beeps
3S Li-Po
5 beeps
5S Li-Po
7 beeps
7S Li-Po
2 beeps 2S Li-Po
4 beeps
4S Li-Po
6 beeps
6S Li-Po
8 beeps
8S Li-Po
6. One long beep will sound when the ESC is ready to run.
Water Cooling Connections
1. Connect the rudder pickup to Motor In.
2. Connect Motor Out to ESC In.
3. Connect Loop 1 and Loop 2.
4. Connect ESC Out to the water outlet.
Loop 1
Loop 2
ESC OUT
WATER
OUTLET
ESC IN
MOTOR
OUT
ESC Programming Procedure
Programming can be accomplished using the Dynamite LED Program Card (DYNS3005, sold separately) or via the
transmitter. Please refer to your DYNM3875 manual for transmitter programming instructions.
Programmable Items
Programmable Value
Default Settings
1
2
3
4
5
6
7
8
1 Running Mode
Forward Only
Forward/Reverse
2 Li-Po Cells
Auto-Calculate
2S
3S
4S
5S
6S
8S
3 Low Voltage Cutoff
Threshold
Non-protection
2.8V/Cell
3.0V/Cell
3.2V/Cell
3.4V/Cell
4 Timing
0°
3.75°
7.5°
11.25°
15°
18.75° 22.50° 26.25°
5 Motor Rotation
CW
CCW
CAUTION:
If using rechargeable batteries,
charge only rechargeable batteries. Charging
non-rechargeable batteries may cause the
batteries to burst, resulting in injury to persons
and/or damage to property.
CAUTION:
Risk of explosion if battery is
replaced by an incorrect type. Dispose of
used batteries according to national regulations.
6
Binding
The included transmitter and receiver are bound at the factory.
If you need to rebind, follow the instructions below.
1. Power off the transmitter and ESC.
2. Insert the bind plug into the BIND port on the receiver.
3. Connect a fully charged battery to the ESC, then power
on the ESC. The orange LED in the receiver flashes
continuously, indicating that the receiver is in bind mode.
4. With the throttle in neutral, power on your transmitter by
pressing the bind button. The orange LED in the receiver
turns solid and the ESC will emit tones and arm when
binding is complete. The ESC is ready for use.
5. Always remove the bind plug from the receiver after
binding is complete.
You must rebind when binding the receiver to a different
transmitter.
NOTICE:
Do not attempt to bind the
transmitter and receiver if there are other
compatible transmitters in bind mode
within 400 feet. Doing so may result in
unexpected binding.
For a comprehensive parts list, see the product page on www.horizonhobby.com.
1
Getting Started
7
Range Check
Perform a range check at the beginning of each boating session, after
repair or after installation of new batteries.
1. With the boat and radio system powered on and connected, walk
away from your boat 300 feet (91.44 m).
2. Have an assistant remain with the boat to check for proper control
movement of the rudder in response to your transmitter input.
3. If everything appears to be operating correctly, prepare to operate
the boat in the water.
NOTICE:
Do not operate the motor without water cooling circulation
or damage may result.
Antenna Tube Installation
Install the receiver antenna in the tube as shown. Do not bend end of antenna over
antenna tube and place cap over it. The antenna does not have to be outside of the
tube to operate properly.
Keep the end of the antenna above the boat’s waterline to get the best transmitter
reception. Apply clear tape (DYNM0102), if desired.
NOTICE:
Do not cut or kink the receiver antenna or damage may result.
44
Battery Pack Installation
1. Loosen the 2 screws on the rear of the canopy.
2. Carefully lift the rear of the canopy and pull back to disengage the
front pin from the hull.
3. Install the battery in the compartment. If running your boat in rougher
water conditions, the use of Waterproof Loop Tape (DYNK0300) may
help secure the batteries against the foam padding on the battery
tray.
4. Connect the battery pack to the ESC power connector.
Tip:
Move the packs forward or back to adjust the center
of gravity for your boat. Move the packs toward the bow
so the bow rides lower in the water. Move the packs away
from the bow so that the bow rides higher in the water.


