SECTION 3
OPERATING THE PRINTER
33
7.
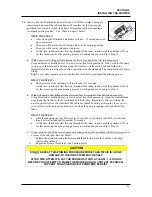
Adjust the position of the Rear Media Support Guide, so that it is centered under the width of your
media. This guide slides side to side.
8.
Adjust the position of the Media Support Wedge to
accommodate the length of your media.
Place a second piece of media onto the single piece
that is already in the hopper. Make sure the second
piece of media is against the separators.
Loosen the locking screw and reposition the wedge
so the trailing edge of the media is hitting the bend
in the wedge; as shown
9.
Place a stack of media into the hopper.
Make sure that the stack is fanned so the bottom
piece is closer to the separators then the top pieces.
Tip
: When loading an empty hopper. Place one
piece of media so it is directly against the tips of the
separators. Then place the fanned stack of media on
top of this single piece.
NOTE:
The amount of media that can be stacked
on the printer is determined by the weight of the
material. The feeder may not feed larger and
heavier media when the stack is full. If this is the
case, reduce the amount of media in the stack until
the feeder functions properly.
10.
Paper Feed Test. To check for proper media
separation and feeding. Turn the printer’s Main
Power Switch ON; then press the control panel’s
ON/OFF button. Wait about 45 seconds for the
print engine to power-up (ON/OFF button should
illuminate). Press and hold the Paper button for 4
seconds. The printer will feed one piece of media
through the printer.
Summary of Contents for iJet Press
Page 1: ...Digital Color Printer OPERATOR S GUIDE ...
Page 6: ......


