


P r i m a L u c e L a b i S r l
S p i d e r 2 3 0 u s e r m a n u a l
The display will show "Polaris Position in P.Scope = HH: MM." This indicates the orientation of the Polar Star in the
field of polar scope. At this time, this is a parameter that we do not use, then press ENTER to confirm. Screen LCD
will show "Hour Angle of Polaris = HH: MM." Press ENTER to confirm again.
The display will show "Begin Alignment? 1) YES 2) NO": press the 2 button to skip the alignment procedure (it will
be performed later). The hand pad will display “Setup”. Now we need to activate the mount automatic tracking mo-
vement. In order to do so, press ENTER, and then press the button at the bottom right of the handpad (the one
with the up arrow) until the display shows "Tracking". Press ENTER to select and press the button again with the up
arrow until it says "Solar Rate". Press ENTER to select.
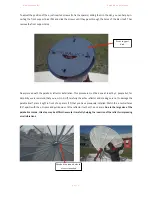
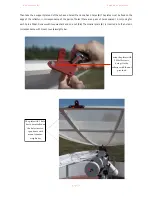
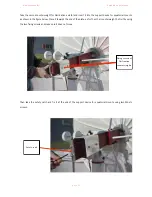
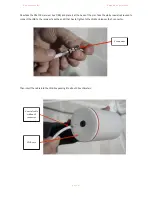
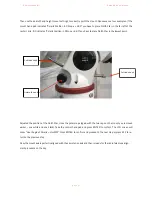
Now the mount will track the sun in its apparent motion in the sky. Take the Sun filter (
19
) and install it in front of
the finder and make sure it is fixed: before you put your eye to the finder eyepiece put, behind it, a hand with an
open palm to make sure that does not come too much light (if the filter does not work, it’s broken or is not comple-
tely mounted, light on your hand will be strong).
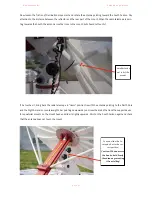
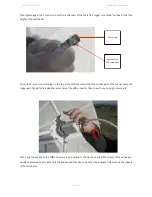
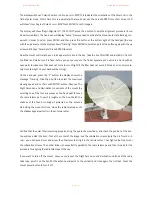
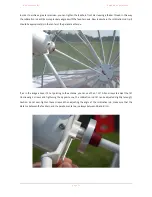
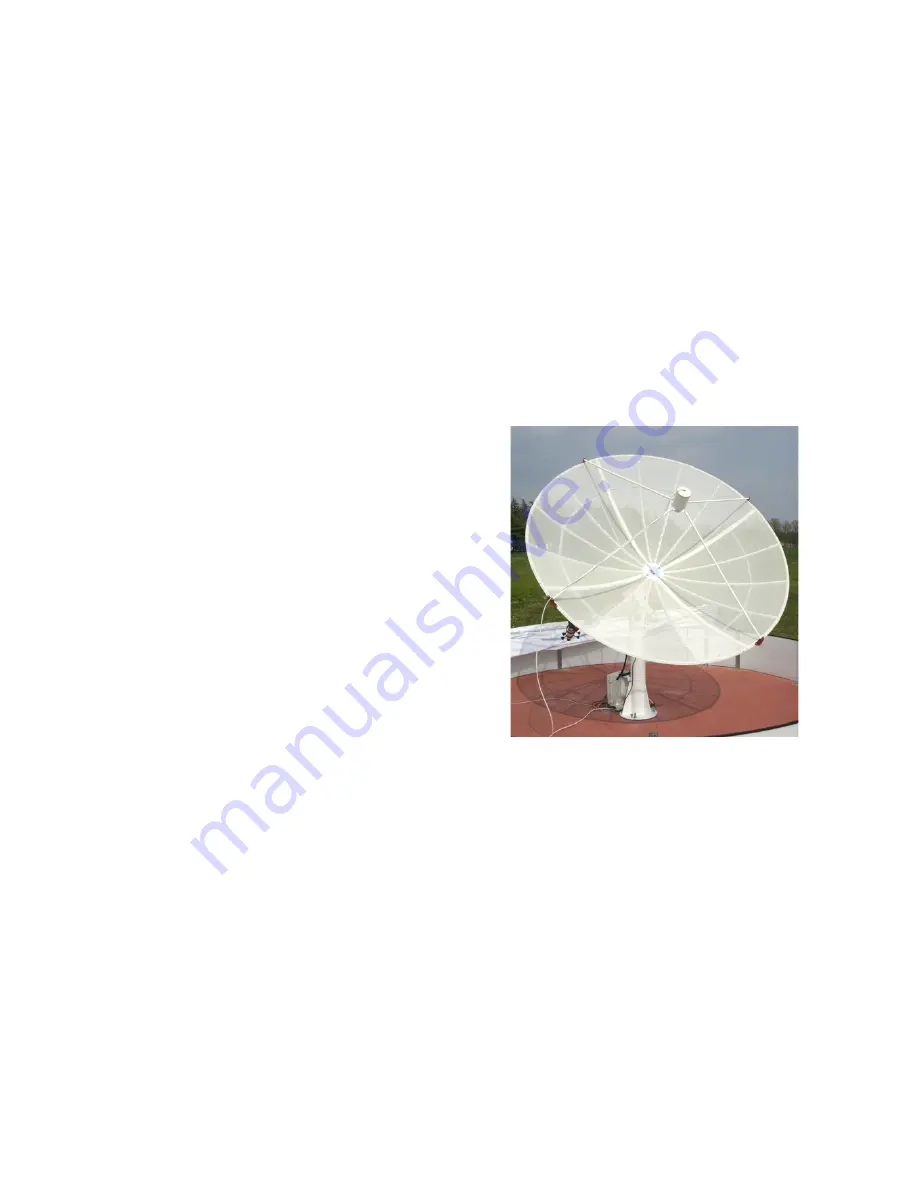
On the hand pad, press the “2” button: the display shows the
message “Tracking”. Click the 9 button to select the maximum
slewing speed and confirm with ENTER button. Now use the
Right Ascension and Declination movements of the mount (by
selecting one of the four arrow keys on the hand pad) to move
the radio telescope to point it roughly on the Sun. Watch the
shadow of the feed horn support projected on the antenna
disk. Using the mount motions, move the radio telescope until
the shadow appear perfectly in the antenna center.
!
!
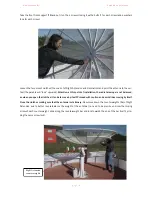
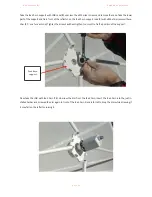
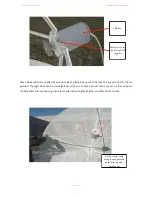
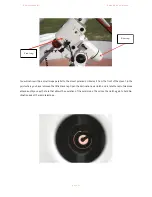
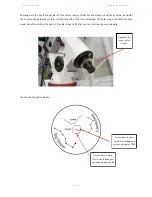
Verified that the solar filter is working properly, bring the eye to the viewfinder, and check the position of the Sun.
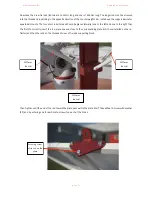
You will see a disk (the Sun): if not at the center of the image, use the collimation screws (only the 3 in front 3 or 3
rear - you unscrew a screw and screw the other two) to bring it in the reticle center. Then tighten (not too much)
the collimation screws. The optical finder is now perfectly parallel to the radio telescope and then is ready for the
procedure for aligning the radio telescope to the sky.
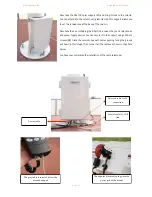
If you want to turn off the mount, now you can loosen the Right Ascension and Declination clutches of the radio
telescope, point it on the Zenith (the antenna will point to the vertical) and close again the clutches. Press the
mount power button to turn it off.
!
!
p a g e
!
3 1