


18
GROUNDCONTROL™ REMOTE FOLLOWSPOT SYSTEM™ USER MANUAL
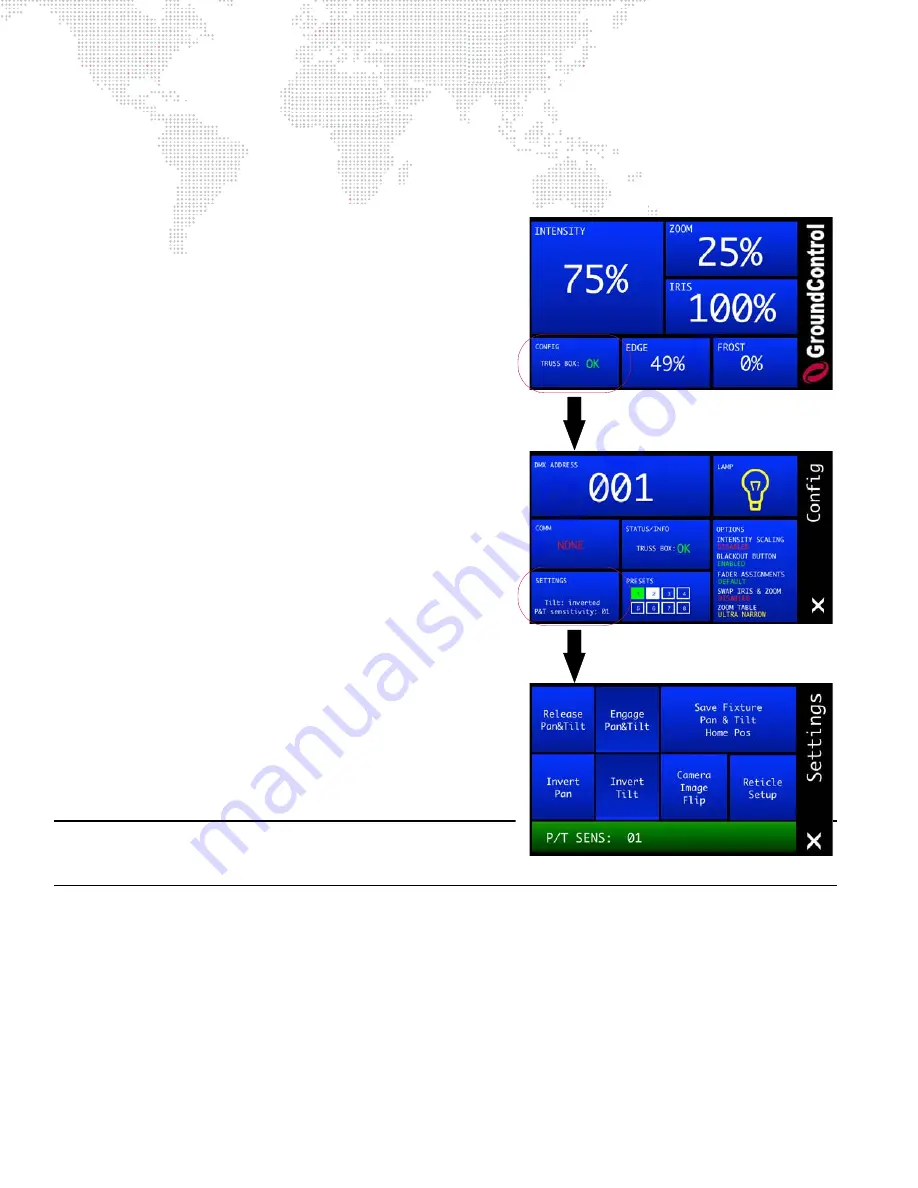
Setting Controller and Fixture Home Positions
After power up, the home position of both the Fixture and the Controller needs to be set. The home position is where
the fixture will be sent upon power-up of the GC Followspot Controller regardless of the position of the control arm.
To set home position:
Step
1. At Controller main menu, press CONFIG panel.
Step
2. At Configuration menu, press SETTINGS panel.
Step
3. At Settings menu, press
Release Pan & Tilt
and use pan/
tilt encoders below touchscreen to set home position of
fixture. (The camera image orientation may need to be
changed as well. See below for details.)
Step
4. Press
Save Pan & Tilt Home Pos
to save current fixture
pan and tilt position as "home" position.
Step
5. Move GC Controller to desired home position and then
press
Engage Pan & Tilt
.
Setting Camera Image Orientation
Before operation, the camera image orientation should also be set
so that the image on the GC Controller’s monitor is upright and
mirrored correctly. This can be done using the Camera Image Flip
feature.
To set camera image orientation:
Step
1. At Controller main menu, press CONFIG panel.
Step
2. At Configuration menu, press SETTINGS panel.
Step
3. At Settings menu, press
Camera Image Flip
until the
image in the monitor is correct. Each press of the button
will flip the image across one of its axes, either vertically
or horizontally, starting at the last set orientation.
For example:
Press 1-> image is upside-down.
Press 2-> image is upside-down and mirrored.
Press 3-> image is right-side-up and mirrored.
Press 4-> image is right-side-up and not mirrored.
Note:
The camera image setting is persistent. When the GC
Controller is powered up, the camera image will be in the same
orientation as it was when last powered down.


