Features
Δ 3-Axis Plastic Dome Camera
Δ Advanced H.264 High profile compression
Δ Support browsers: IE
Δ Support several servers, IP address, DDNS, FTP,SMTP
Δ Support single, dual, three streams
Δ Support iPhone, iPad, Android remote monitor
Δ Support connect to NVR
Δ Support ONVIF2.0
Δ Reliability and compatibility
Δ Low streams and high resolution image
Connection
Network Structure
switch/router/FOT
IPC
PC1
PC2
RJ45
DC12V
DKW3100T
IPC Fast Operation
User Manual
Please refer to the complete User manual
for more information from the CD.
HD-IP CAMERA
Specifications
Model
DKW3100T
Image Sensor
1/4" Omnivision 1 Megapixel CMOS Sensor
Resolution
1280x720
Minimum
Illumination
>1Lux
S/N Ratio
>50db
Focus Mode
Manual Focus
Day/Night
IR cut filter with auto switch, IR sensor.
Network
1 RJ45 Ethernet interface, 10/100M
adaptation
Delay
Within The LAN 0.3S
Frame Rate
25 FPS (adjustable)
Video
Compression
H.264 /JPEG
Protocol
RTSP/FTP/DDNS/NTP/SMTP
Onvif
Support Onvif 2.0
User Permission
Multi-user Classification Management
Consumption
3.0W
Power
/
Current
DC 12V/1A or POE
Lens
2 Megapixel HD
2.8-12mm Manual Zoom Lens
IR Status
IR LED:
¢
5X21PCS
IR range: 20M
Dimension (mm)
¢
135 x 100(H) mm
Weight (g)
650
Temperature
-10
~
55
℃
Humidity
0%-90%RH,Without Condensation
POE
Yes(optional)
NO.
Name
Number (pcs)
1.
HD-IP Camera
1
2.
CD
1
3.
IPC Fast
Operation
User Manual
1
Model
DKW3100T
DKW3100T
DKW3100T
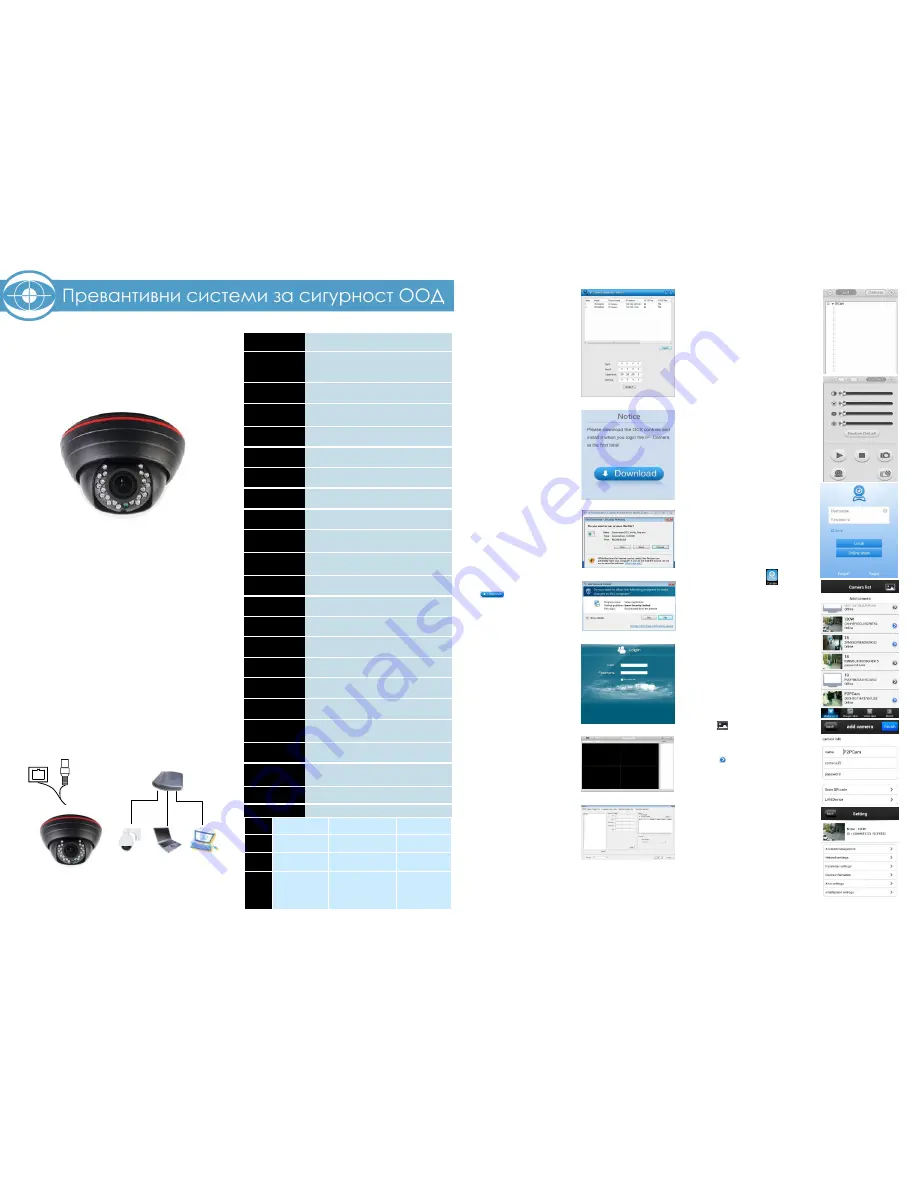
Access to the IP
Camera via IE
1. Use correct power supply.
2. Make sure the device IP address
is in the same LAN with the
router, the default IP address of
the IPC is 192.168.1.168.
3. Go to CD->IPCSearch.exe and
copy it to your computer.
4. Open IPC Search, click “Search”,
you will find the device IP, and
you also can modify the IP
information, see the picture (1)
5. Factory default IP setting:
IP Address : 192.168.1.168
Subnet Mask: 255.255.255.0
Gateway: 192.168.1.1
User name: admin
Password: admin
6. After modifying IP, click “Search”
again, you will find the new IP of
the your device. Double-click the
new IP, you can access to the IPC
via IE, or enter the IP Address in
the address bar of IE, then click
“Enter”, the download_OCX
controls interface please see the
picture (2), Please click here
to download the OCX
controls.
7. as is shown in picture (3), Click
run, the system will automatically
download the OCX.
8. Click “yes” as the picture (4),Then
it will install the OCX
,
when
complete ,Click ”OK” and refresh
the page. You will enter the login
interface, as is shown in picture
(5)
9. Enter your username and
password, you can start to access
and control your IP Camera.
Access to the IP
Camera via
Multi_window
Go to CD, find “Multi_window.exe.
“ Copy “Multi_window.exe “ to your
computer and install it, then run it.
See the picture (6):
1
. Config: Group. See the picture
(7):
Here you can add your IP
Cameras and set the Capture
Path. If you forget the IP Address,
(
1
)
(
2
)
(
3
)
(
4
)
(
5
)
(
6
)
(
7
)
You can select “List all ipcam” or
“List only unselect”, then double
click the IP info to add the
camera. You also can enter the
IP Info manually in the “IPcam
Information area”. Then you can
view the images and set the
parameters of IP Camera, such
as Alarm, Video, Net, Camuser,
Date, etc. Please refer to Multi_
window Customer Manual for
detail.
2. View the images
After adding the devices, you
can see the devices in “List” of
the main interface, you can
double _click the device to
control it to play or stop. See
the picture (8):
You also can control the devices
in “Camera”,
see the picture (9) on the right:
Access to the IP Camera
via Android mobile
Search and download the
surveillance software “Danale” to
your mobile from electronic
markets or the Mobile Assistant,
then install it. Then you can see
the icon of the software
,click it to run.
1. Login
The picture (10) shows the login
interface:
2. List
As is shown in picture (11)
2.1 Add Camera
Click “add camera”, as is shown
in picture (12):
Edit the camera name, input the
username, password, you can
input the camera ID manually or
scan the QR code directly. Click
“finish” to finish and save it.
3. Video Mode
Click
to set the Video
Mode.
4.Settings
Click
to set the IPC.As is
shown in picture (13):
4.1 User name password
management
Here you can edit the device
name, username and password.
4.2 NetWork Settings
Here you can set the local
network and WIFI according to
your need.
4.3 Basic information
Here you can view the basic
information of the IPC, including
device information, storage
information, etc.
(
8
)
(
9
)
(10)
(
11
)
(
12
)
(
13
)


