background image


11 

4. Installation


4.1 Moving to The Installation Site 

The series UPS has wheels making it easy to move the UPS to the 

installation site after it has been unpacked. However, if the receiving 

area is far from the installation site, it is recommended to move the 

UPS by using a pallet jack or a truck before unpacking the UPS. 

4.2 Unpacking and Inspection 

1.  At  the  installation  site,  the  utmost  care  shall  be  taken  when 

removing the packaging in order to avoid damaging the equipment. 

Cut  the  plastic  poly-straps  around  the  shipping  container  and 

remove the corrugated carton and the PS foam on the top of the 

UPS. With one or two people on each side of the UPS, lift the UPS 

out of the pallet. 

Warning:

  the  plastic  poly-straps  around  the  shipping  container 

are  under  tension.  While  cutting,  don

’t  face  to  them,  they  will 

spring back and may cause eye injury. 


The  shipping  materials  are  recyclable.  After  unpacking, 
save them for later use or dispose of them appropriately. 


The system may be installed and wired only by qualified 
electricians in accordance with applicable safety regulations! 

When installing the electrical wiring, please note the nominal 
amperage of your incoming feeder. 

Summary of Contents for VFI 10000T LCD

Page 1: ...Online UPS PowerWalker VFI 6000T LCD L PowerWalker VFI 10000T LCD L Manual EN Uninterruptible Power Supply System ...

Page 2: ...e Installation Site 11 4 2 Unpacking and Inspection 11 4 3 Input and Output Power Wires and Protective Earth Ground Installation 12 4 4 Operating Procedure For Connecting with The External Battery Only for S model 16 4 5 EPO Connection 17 5 Operation 18 5 1 Display Panel 18 5 2 Operating Mode 21 5 3 Turning On and Turning Off UPS 27 5 4 LCD Operation 28 6 Special Function 40 6 1 HE Function 40 6 2...

Page 3: ...8 Battery Maintenance 51 9 Communication Port 52 9 1 USB Interface 52 9 2 Dry contact Interface 52 9 3 RS 232 Interface optional 52 9 4 Intelligent slot 53 10 Software Installation 54 ...

Page 4: ...posed to direct sunlight or near heat Do not connect appliances or items of equipment which would overload the UPS e g laser printers etc to the UPS output Place cables in such a way that no one can step on or trip over them Connect UPS with the earth reliably before connecting to the building wiring terminal and external battery source must also be earthed An integral single emergency switching d...

Page 5: ...ent source batteries In order to fully disconnect the UPS first turn the input breaker in the OFF position then disconnect the mains lead Indiscriminate operation of switches may cause output loss or damage to equipment Refer to instruction before conducting any control While the UPSs work as a parallel system the external parallel cable should be reinforced insulation Ensure that no liquid or oth...

Page 6: ... grips and handles When changing batteries replace with the same quantity and the same type of batteries Do not attempt to dispose of batteries by burning them It could cause explosion The UPS may be connected to external battery module EBM Proper disposal of batteries is required Refer to your local codes for disposal requirements Do not open or destroy batteries Effluent electrolyte can cause in...

Page 7: ...00 4 3 Level 3 EFT IEC EN 61000 4 4 Level 4 SURGE IEC EN 61000 4 5 Level 4 CS IEC EN 61000 4 6 Level 3 MS IEC EN 61000 4 8 Level 3 Voltage Dips IEC EN 61000 4 11 Low Frequency Signals IEC EN 61000 2 2 Warning This is a product for commercial and industrial application in the second environment installation restrictions or additional measures may be needed to prevent disturbances ...

Page 8: ...5 2 Description of Commonly Used Symbols Some or all of the following symbols may be used in this manual It is advisable to familiarize yourself with them and understand their meaning ...

Page 9: ...he model you intend to purchase by performing a visual inspection of the Model No on the rear panel of the UPS S Model Extended backup time 3 1 Feature This series UPS is a new generation of UPS which provides the outstanding reliability and most cost performance ratio in the industrial Following benefit the product has True online double conversion technology with high power density frequency ind...

Page 10: ...lel operating UPS is up to 4 HE mode with high efficiency 0 96 save power expense for user Input or output ISO transformer compatibility Start able without battery 3 2 Electrical specifications INPUT Model No PowerWalker VFI 6000T LCD L PowerWalker VFI 10000T LCD L Phase Single Voltage 176 276VAC Frequency 45 55 54 66 Hz Current A 25 8 43 0 THDI 5 full load Power Factor 0 99 full load Rated curren...

Page 11: ...208VAC The overload capacity would be derated automatically in Line mode while the circumstance temperature is larger than 35 degree BATTERIES Model No PowerWalker VFI 6000T LCD PowerWalker VFI 10000T LCD Internal BAT number and type 20 12V 7Ah 20 12V 9Ah Current of external BAT pack 32Amax 50Amax 3 3 Operating Environment Operating Temperature 0 o C to 45 o C Operating humidity 95 Altitude 1000m ...

Page 12: ...00T LCD 5 PowerWalker VFI 10000T LCD 4 3 5 Dimensions and Weights Model No Dimensions W H D mm Net Weight kg PowerWalker VFI 6000T LCD 260 x 708 x 550 80 PowerWalker VFI 6000T LCD L 260 x 708 x 550 25 5 PowerWalker VFI 10000T LCD 260 x 708 x 550 84 PowerWalker VFI 10000T LCD L 260 x 708 x 550 29 5 ...

Page 13: ...10 PowerWalker VFI 6000T LCD L PowerWalker VFI 10000T LCD L Fig 3 1 Back View of PowerWalker VFI 6000T LCD L PowerWalker VFI 10000T LCD L ...

Page 14: ...e plastic poly straps around the shipping container and remove the corrugated carton and the PS foam on the top of the UPS With one or two people on each side of the UPS lift the UPS out of the pallet Warning the plastic poly straps around the shipping container are under tension While cutting don t face to them they will spring back and may cause eye injury The shipping materials are recyclable A...

Page 15: ...s any damage or lacking of some parts 4 3 Input and Output Power Wires and Protective Earth Ground Installation 4 3 1 Notes for installation 1 The UPS must be installed in a location with good ventilation far away from water inflammable gas and corrosive agents 2 Ensure the air vents on the front and rear of the UPS are not blocked Allow at least 0 5m of space on each side 3 Condensation to water ...

Page 16: ...ttery Cabinet Fuse in Positive Pole Negative pole Neutral Pole 30A 240VDC 60A 240VDC External Battery Cabinet Breaker in Positive Pole Negative pole Neutral Pole 32A 240VDC 50A 240VDC Torque for fixing above terminals 3 95 4 97Nm 35 44 1b in 1 It is suggested to install an external isolating device against current backfeed between Mains input and UPS see Fig 4 6 After the device is installed it mu...

Page 17: ...rance diagram 4 For PowerWalker VFI 6000T LCD UPS it is recommended to select the UL1015 8AWG 6mm2 or other insulated wire which complies with AWG Standard for the UPS input and output wirings 5 For PowerWalker VFI 10000T LCD UPS it is recommended to select the UL1015 6AWG 10mm2 or other insulated wire which complies with AWG Standard for the UPS input and output wirings 6 Ensure the capacity of m...

Page 18: ...allel mode the Jumper between JP1 and JP2 must be removed 2 Battery connection is only for S model 10 Install an output breaker between the output terminal of UPS and the load and the breaker should with leakage current protective function if necessary 11 Turn off all the loads first before connecting the load with the UPS then perform the connection and finally turn on the loads one by one 12 Aft...

Page 19: ...llowed 2 For PowerWalker VFI 6000T LCD select the UL1015 8AWG 6mm2 respectively or other insulated wire which complies with AWG Standard for the UPS battery wirings 3 For PowerWalker VFI 10000T LCD select the UL1015 6AWG 10mm2 respectively or other insulated wire which complies with AWG Standard for the UPS battery wirings 4 The external battery pack must be independent for each UPS It is forbidde...

Page 20: ...ut off the output at once by operating the EPO port manually 4 5 2 The connection Normally the EPO connector is opened without any connection on the rear panel Once the connector is closed with a wire the UPS would stop the output and enter EPO status Enable the EPO status Disable the EPO status Fig 4 8 Default EPO status To recover to normal status first EPO connector should be opened and enter L...

Page 21: ...background to amber Besides the LCD the UPS has four colorized LEDs to provide more convenient information Fig 5 1 Control Panel Table 5 1 Control Button Functions The Button Function Illustration Power on When the unit is no power and has connected with battery press this button for 100ms 1s to power on Turn on When the unit is powered on and is in Bypass mode press this button for 1s to turn on ...

Page 22: ...on Enter next menu tree Press this button for 100ms 1s to select the present menu option or enter next menu but do not change any setting Select one menu option Press this button for 100ms 1s to select the present menu option or enter next menu but do not change any setting Confirm the present setting Press this button for 1s to confirm the edited options and change the setting Table 5 2 LED defin...

Page 23: ...ification and settings through the front panel display During powering on the LCD would display the Welcome logo for several seconds and then enter to the default page which shows the UPS status summary The display automatically returns to the default UPS status summary screen when no button has been pressed for 15 minutes On the UPS status summary screen it provides the following information Stat...

Page 24: ...play The more detailed operation of LCD is illustrated in the chapter of 5 4 5 2 Operating Mode The different graphic symbol could be displayed corresponding to current operating mode or status 5 2 1 Line mode The example of LCD display in Line mode is shown in the following diagram Input 220 V 60 Hz Output 220 V 60 Hz 5400 W 273 0 V 100 The symbol of operating in Line mode Fig 5 3 Line mode ...

Page 25: ...eps once every 4 seconds 5 2 3 Bypass with output The LCD display in bypass mode with output is shown in the following diagram The UPS does not have the backup function when it is in bypass mode The power used by the load is supplied from the mains power via internal filter The UPS will beep once every 2 minutes in bypass mode Input 220 V 60 Hz Output 220 V 60 Hz 5400 W 273 0 V 100 The symbol of o...

Page 26: ... the UPS is turned on the power used by the load is supplied from the mains power via internal filter while the mains power is in normal range so the high efficiency could be gained in the HE mode Once the mains power is loss or abnormal the UPS would transfer to Line mode or Battery mode and the load is supplied continuously Input 220 V 60 Hz Output 220 V 60 Hz 5400 W 273 0 V 100 The symbol of op...

Page 27: ...tinuously Input 220 V 50 Hz Output 220 V 60 Hz 5400 W 273 0 V 100 The symbol of operating in Converter mode Fig 5 8 Converter mode 1 The function could be enabled through the LCD setting or the software Winpower etc 2 The load should be derated to 60 in converter mode 5 2 7 Warning When the warning occurs it illustrates that there are some abnormal problems during the operation of UPS Normally the...

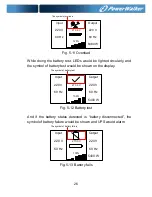
Page 28: ...fer to bypass and keep alarming The backlight of LCD would also turn to red The detailed fault table is shown in chapter of 7 Input 220 V 60 Hz Output 0 V 0 Hz 0 W 273 0 V 0 The symbol of Fault Fig 5 10 Fault 5 2 9 Other status When the UPS is overload the alarm will beep twice every second Some unnecessary loads should be get rid of one by one to decrease the loads connected to the UPS less than ...

Page 29: ... battery test would be shown on the display Input 220 V 60 Hz Output 220 V 60 Hz 5400 W 273 0 V 100 The symbol of battery test Fig 5 12 Battery test And if the battery status detected is battery disconnected the symbol of battery failure would be shown and UPS would alarm Input 220 V 60 Hz 273 0 V 100 The symbol of battery failure Output 220 V 60 Hz 5400 W Fig 5 13 Battery fails ...

Page 30: ...ton continuously for more than 1 second the buzzer will beep for 1s UPS starts to turn on 4 A few seconds later the UPS turns into Line mode If the mains power is abnormal the UPS will transfer to Battery mode without output interruption of the UPS 5 3 2 Turning on UPS without mains 1 Check all the connection is correct Check the breaker of external battery pack is in ON position 2 By pressing but...

Page 31: ...the output at once 2 A few seconds later LCD shuts down and no voltage is available from the UPS output 5 4 LCD Operation Except the default UPS status summary screen the user could get more useful information about UPS current status detailed various measurements old events which ever occurred UPS own identification and could change the settings to fit the user own requirements optimize the funct...

Page 32: ...4 Main menu tree WELCOME Alarm 41 Battery Volt 220V Battery charging Charger level 100 Status Para Num 2 Running time 0001 03 01 00 UPS status Event log Measurements Control Identification Settings Increase mode ...

Page 33: ...menu of UPS status the display would enter the next UPS status menu tree The content of UPS status menu tree is same as the default UPS status summary menu By pressing 1s the display would return the last main menu tree Fig 5 15 UPS status menu tree ...

Page 34: ...information includes the illustration the event code and the operating time of UPS when the event happened By press or 1s all the event could be displayed one by one The max number of record is 50 when the number is larger than 50 the oldest one would be changed to the newest information By pressing 1s the display would return the last main menu tree Fig 5 16 Event menu tree ...

Page 35: ... the next measurement menu tree A lot of detailed useful information could be checked here Ex the output voltage and frequency the output current the load capacity the input voltage and frequency etc By pressing 1s the display would return the last main menu tree Fig 5 17 Measurement menu tree ...

Page 36: ...tem to do the battery test at the same time 4 Clear EPO status once EPO status is enabled the UPS output would be cut off To recover to normal status first EPO connector should be opened and enter this menu to clear EPO status then UPS would stop alarm and recover to Bypass model And UPS needs be turned on by manual operation 5 Reset fault status when fault occurs UPS would keep in Fault mode and ...

Page 37: ...34 Fig 5 18 Control menu tree ...

Page 38: ...nformation and the EPO active status couldn t be cleared Clear EPO status By press 1s Status EPO signal active Clear no Fig 5 19 clear EPO status 5 4 6 The identification menu By press on the menu of Identification the display would enter the next identification menu tree The identification information includes UPS serial number firmware serial number model type would be shown here By press 1s the...

Page 39: ... using the settings Some settings would change the specification and some settings would enable or disable some functions The unsuitable option set by user may result in potential failures or protecting function loss even directly damage the load battery or UPS The most of settings could only be done while UPS is in Bypass mode ...

Page 40: ...By press on the menu of Identification the display would enter the next setting menu tree if User password is disabled If User password is enabled the user should enter the password by press and then enter the next setting menu tree ...

Page 41: ...art enabled disabled enabled AutoBypass enabled disabled enabled Short circuit clearance enabled disabled disabled Bypass voltage low limit 110 215V 176V Bypass voltage high limit 245 276V 264V Bypass frequency low limit 1 10 10 Bypass frequency high limit 1 10 10 HE voltage low limit 1 10 5 HE voltage high limit 1 10 5 HE frequency low limit 1 10 5 HE frequency high limit 1 10 5 Battery quantity ...

Page 42: ...e option would flash Output voltage 230V By press 1s Setting menu tree Output voltage 220V By press or 1s to select the wanted option Output voltage 220V By press 1s to confirm the setting The option would stop flashing after being confirmed Fig 5 22 Set rated output voltage value ...

Page 43: ...ed in HE mode It is also called economy mode Once the mains power is loss or abnormal the UPS would transfer to Line mode or Battery mode and the load is supplied continuously The great virtue is overall high efficiency 0 96 of UPS to save power for user But the disadvantage is 1 the load can not be protected as well as in Line mode for the load is directly supplied from the mains 2 the transfer t...

Page 44: ...ld be enabled through the LCD setting in Bypass mode Enter the power strategy setting menu by following chapter of 5 4 7 6 3 Parallel Function 6 3 1 Brief introduction of the redundancy N X is currently the most reliable power supply structure N represents the minimum UPS number that the total load needs X represents the redundant UPS number i e the fault UPS number that the system can handle simu...

Page 45: ...with the parallel cable and re screw the Parallel port cover which is supplied in the accessories 4 Strictly follow the chapter of 4 the wiring requirement of single UPS to perform the wiring of each UPS 5 Connect the output wires of each UPS to an output breaker panel 6 Disconnect the Jumper on JP1 and JP2 of the terminal block first and connect each output breaker to a main output breaker and th...

Page 46: ... B B B_G J1 J2 OP_N OP_L OP_G UPS 1 O P Breaker UPS 2 O P Breaker Main O P Breaker Main I P Breaker I P Ground O P Ground BAT Ground BAT PACK 1 For S model BAT PACK 2 For S model BAT Ground TO LOAD TO UTILITY Fig 6 1 Input and output Terminal Block wiring diagram ...

Page 47: ...en them is less than 1V If the difference is more than 1V check the wiring 11 Press the button of one UPS each UPS would start to turn on all the UPSs would transfer to the INV mode together Measure the output voltage of each UPS separately to check if the voltage difference between them is less than 0 5V If the difference is more than 0 5V the UPSs need to be regulated 12 Press the button of one ...

Page 48: ...om UPS to BPS switch off the main output breaker and the main input breaker the UPSs would shut down 5 Ensure the UPSs shut down totally add the new UPS and reinstall the new UPS parallel system by following step 1 to 9 of last chapter install a new parallel UPS system 6 Switch on the main input breaker and the main output breaker and set the main maintenance switch or static switch from BPS to UP...

Page 49: ... chapter install a new parallel UPS system 5 If the removed UPS or the remained UPS will be used in a stand alone mode then JP1 and JP2 on the terminal block should be connected with a short connection wire 6 Switch on the main input breaker and the main output breaker and set the main maintenance switch or static switch from BPS to UPS then set the UPS own maintenance switch from BPS to UPS and s...

Page 50: ...rt failed UPS internal fault Consult dealer Site Wiring Fault Phase and neutral conductor at input of UPS system are reversed Reverse mains power wiring Battery Disconnect Battery pack is not connected correctly Do the battery test to confirm Check the battery bank is connected to the UPS Check the battery breaker is turn on Battery low Battery voltage is low When audible alarm sounding every seco...

Page 51: ... Bat Differ The battery packs of some UPSs are disconnected Check if all the battery pack is connected Para Line Differ The mains input of some UPSs is disconnected Check the building wiring and input cable Check if the input breaker is closed Ensure the UPSs are connected to same input source Para Work Mode Differ There are different power strategy setting in parallel system The UPSs with differe...

Page 52: ...temperature Bus Over Voltage UPS internal fault Consult dealer Bus Under Voltage UPS internal fault Consult dealer Bus Unbalance UPS internal fault Consult dealer Bus short UPS internal fault Consult dealer Bus Softstart Fail UPS internal fault Consult dealer Inv Over Voltage UPS internal fault Consult dealer Inv Under Voltage UPS internal fault Consult dealer Inv Softstart Fail UPS internal fault...

Page 53: ...t power source Check the building wiring and input cable Check if the input breaker is closed Emergency supply period shorter than nominal value Batteries not fully charged batteries defect Charge the batteries for at least 12 hours and then check capacity Please have the following information at hand before calling the After Sales Service Department 1 Model number serial number 2 Date on which th...

Page 54: ...charging and over discharging The UPS should be charged once every 4 to 6 months if it has not been used for a long time In the regions of hot climates the battery should be charged and discharged every 2 months The standard charging time should be at least 12 hours Under normal conditions the battery life lasts 3 to 5 years In case if the battery is found not in good condition earlier replacement...

Page 55: ...ing is the pin assignment and description of DB 9 connector Pin Description I O Pin Description I O 1 UPS Fail Output 6 Bypass Output 2 Summary Alarm Output 7 Battery Low Output 3 GND Input 8 UPS ON Output 4 Remote Shutdown Input 9 Line Loss Output 5 Common Input 9 3 RS 232 Interface optional The RS 232 port is available for UPS monitoring control and firmware updates The cable pins for the RS 232...

Page 56: ...vice In 4 Unused Not applicable 5 GND Signal common Not applicable 6 Unused Not applicable 7 Unused Not applicable 8 Unused Not applicable 9 Unused Not applicable 9 4 Intelligent slot This series is equipped with an intelligent slot for other optional card to achieve remote management of the UPS through internet intranet Please contact your local distributor for further information ...

Page 57: ... can remotely observe the UPS via the Network enabling users to manage their system more effectively Upon AC failure or UPS battery low UPS takes all necessary actions without intervention from the system administrator In addition to automatic file saving and system shut down functions it can also send warning messages via pager e mail etc Use the bundled CD and follow the on screen instructions t...

Page 58: ...55 614 09335 00 ...

Reviews: