background image

41 

GB/MT

Introduction

 ...........................................................................................Page 42

Intended use ................................................................................................Page 42
Functionality .................................................................................................Page 42
Description of parts .....................................................................................Page 43
Scope of delivery ........................................................................................Page 43
Technical Data ............................................................................................Page 43

Safety instructions

 ...........................................................................Page 44

Battery safety information

.......................................................Page 45

Before use

 ...............................................................................................Page 45

Inserting / changing  the  battery .................................................................Page 46

Start-up

 .....................................................................................................Page 46

Switching on and off ...................................................................................Page 46
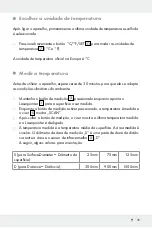
Selecting the temperature unit ....................................................................Page 46
Measuring temperature ..............................................................................Page 47
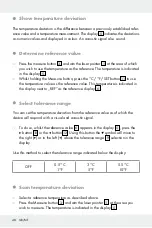
Show temperature deviation ......................................................................Page 48
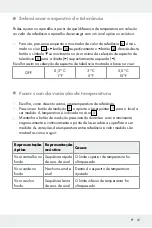
Determine reference value .........................................................................Page 48
Select tolerance range ................................................................................Page 48
Scan temperature deviation .......................................................................Page 48
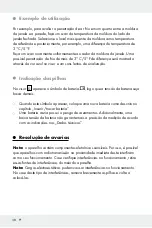
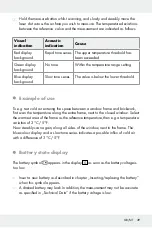
Example of use ............................................................................................Page 49
Battery state display ....................................................................................Page 49

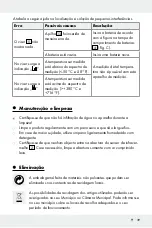
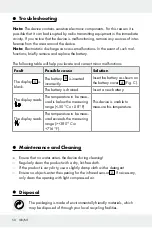
Troubleshooting

 ................................................................................Page 50

Maintenance and Cleaning

 ......................................................Page 50

Disposal

 ....................................................................................................Page 50

Warranty

 .................................................................................................Page 51

Summary of Contents for 279816

Page 1: ...ÄT Bedienungs und Sicherheitshinweise MISURATORE DI TEMPERA TURA AD INFRAROSSI Indicazioni per l uso e per la sicurezza DETECTOR TÉRMICO POR INFRARROJOS Instrucciones de utilización y de seguridad INFRARED THERMOMETER Operation and Safety Notes TERMÓMETRO A INFRAVERMELHOS Instruções de utilização e de segurança ...

Page 2: ...ón y de seguridad Página 5 IT MT Indicazioni per l uso e per la sicurezza Pagina 17 PT Instruções de utilização e de segurança Página 29 GB MT Operation and Safety Notes Page 41 DE AT CH Bedienungs und Sicherheitshinweise Seite 52 ...

Page 3: ...A B C 1 2 5 6 7 8 9 4 10 12 5 3 4 11 13 ...

Page 4: ...a 10 Puesta en funcionamiento Página 10 Encender y apagar el aparato Página 10 Seleccionar unidad de temperatura Página 10 Cómo medir la temperatura Página 11 Visualización de desviación de temperatura Página 12 Fijar valor de referencia Página 12 Seleccionar margen de tolerancia Página 12 Escanear la desviación de temperatura Página 13 Ejemplo de aplicación Página 13 Indicación de estado de la pi...

Page 5: ...se pueden comparar las desviaciones de temperatura de manera visual por colores y acús tica El puntero láser integrado se debe utilizar exclusivamente para localizar un punto de medición del objeto en cuestión en el marco de la termometría El aparato está indicado exclusivamente para uso privado y no debe utilizarse con fines comerciales o industriales Utilice el aparato solo en entornos secos o i...

Page 6: ...otón 11 Botón para C F SET 12 Botón 13 Pila de bloque de 9V Volumen de suministro 1 termómetro por infrarrojos 1 pila de bloque de 9V 1 manual de instrucciones Características técnicas Alimentación 1 x batería de bloque de 9V tipo 6F22 o 6LR61 Rango de medición de 50 C hasta 380 C de 58 F hasta 716 F Precisión de medición para T 0 C 1 5 C o 1 5 del valor de medición Precisión de medición para T 0 ...

Page 7: ...a configuración del láser así como por la no contemplación de las indicaciones de seguridad Este producto puede ser utilizado por niños mayores de 8 años así como por personas con capacidades físicas sensoriales o men tales reducidas o que cuenten con poca experiencia y o falta de conocimientos siempre y cuando se les haya enseñado cómo utilizar el apa rato de forma segura y hayan comprendido los ...

Page 8: ...mperaturas extremas que puedan influir en el funciona miento de las pilas por ejemplo acercarlas a un radiador o exponerlas directamente a la luz solar Extraiga la pila del aparato si no va a utilizar el mismo durante un período de tiempo prolongado Peligro de daños en el aparato Utilice exclusivamente el tipo de pila indicado Cuando coloque las pilas observe la polaridad correcta Esta aparece ind...

Page 9: ... mango del aparato de manera que el dedo índice pueda accionar el botón de medición 3 y el pulgar pueda pulsar los botones 10 al 12 Encender y apagar el aparato Pulse el botón de medición 3 para encender el aparato La pantalla 5 se encenderá y sonará una señal acústica breve Pulse y mantenga pulsado el botón C F SET 11 durante aprox 3 segun dos para apagar el aparato Sonarán dos señales acústicas ...

Page 10: ... puntero láser se apagará La temperatura calculada corresponde a la temperatura media de la superfi cie de medición La superficie de medición es circular El diámetro de la superficie medida S es una duodécima parte de la distancia entre la superficie y el sensor infrarrojo 2 D A continuación le presentamos algunos valores a modo de orientación S Surface diameter diámetro de la superficie 25mm 75mm...

Page 11: ...era fijar como valor de referencia La temperatura se mostrará en la pantalla 5 Mientras mantiene pulsado el botón de medición pulse el botón C F SET 11 para fijar la temperatura como valor de referencia Esta temperatura se mostrará en la pantalla junto al indicador REF como indicador del valor de referencia 6 Seleccionar margen de tolerancia Usted puede configurar el aparato de manera que este rea...

Page 12: ...pantalla rojo Secuencia rápida de señales acústicas Se ha sobrepasado el umbral térmico Fondo de pantalla verde Sin señal acústica Dentro del margen de temperatura configurado Fondo de pantalla azul Secuencia lenta de señales acústicas No se ha alcanzado el umbral térmico Ejemplo de aplicación Para comprobar por ejemplo la entrada de aire frío en una habitación entre el marco de la ventana y el mu...

Page 13: ...r daños en el funcionamiento retire las fuentes de interferencias del entorno del aparato Nota Las descargas electrostáticas pueden provocar perturbaciones en el funcionamiento Si se producen tales fallos retire la pila brevemente y colóquela de nuevo La siguiente tabla ayuda a localizar y solucionar pequeños fallos Problema Posible motivo Solución En la pantalla 5 no aparece nada La pila 13 está ...

Page 14: ...iríjase a la administración competente para obtener información sobre los puntos de recogida de residuos y sus horarios Las pilas defectuosas o usadas deben ser recicladas según lo indicado en la direc tiva 2006 66 CE y en sus modificaciones Deseche la batería y o el aparato a través de los puntos de recogida disponibles Daño medioambiental debido a un reciclaje incorrecto de las pilas Las pilas n...

Page 15: ...3 años a partir de la fecha de compra se produce un fallo de material o fabricación en este producto repararemos el producto o lo sustituire mos gratuitamente por un producto nuevo según nuestra elección La garantía quedará anulada si el producto resulta dañado o es utilizado o mantenido de forma inadecuada La garantía cubre defectos de materiales o de fabricación Esta garantía no cubre aquellos c...

Page 16: ...one Pagina 21 Inserimento sostituzione delle batterie Pagina 22 Avvio Pagina 22 Accensione e spegnimento Pagina 22 Scelta dell unità di temperatura Pagina 22 Misurazione temperatura Pagina 23 Indicazione sbalzo di temperatura Pagina 24 Impostazione valore referenziale Pagina 24 Selezione tolleranza Pagina 24 Scansione sbalzo di temperatura Pagina 25 Esempio di utilizzo Pagina 25 Visualizzazione de...

Page 17: ...nfrontare gli sbalzi di tempera tura in base a ottica colore e acustica Il puntatore laser integrato può essere utilizzato solo in fase di misurazione della temperatura per localizzare un punto di misurazione sull oggetto analizzato L apparecchio è destinato esclusivamente all utilizzo privato e non è adatto a scopi commerciali o industriali Conservare l apparecchio in luogo chiuso e asciutto Altr...

Page 18: ...F SET 12 Tasto 13 Batteria rettangolare 9 V Contenuto della confezione 1 Misuratore di temperatura a infrarossi 1 Batteria rettangolare da 9 V 1 Manuale di istruzioni Dati tecnici Alimentazione batteria rettangolare 1 x 9 V tipo 6F22 o 6LR61 Area di misurazione 50 C fino a 380 C 58 F fino a 716 F Precisione di misurazione per T 0 C 1 5 C o 1 5 del valore di misurazione Precisione di misurazione pe...

Page 19: ...bilità per manipolazione delle impostazioni laser né per l inosservanza delle avvertenze di sicurezza Questo attrezzo può essere utilizzato da bambini di età superiore agli 8 anni da persone con capacità fisiche sensoriali o mentali ridotte o da persone inesperte solo se supervisionate o preventiva mente istruite sull utilizzo in sicurezza del prodotto e solo se informate dei pe ricoli legati al p...

Page 20: ...diatamente l intervento di un medico Evitare condizioni e temperature estreme che potrebbero avere influenza sulle batterie quali ad esempio vicinanza a caloriferi irraggiamento solare diretto Rimuovere dall apparecchio le batterie non utilizzate per parecchio tempo Pericolo di danno all apparecchio Utilizzare esclusivamente il tipo di batterie indicato Prestare attenzione alla polarità corretta q...

Page 21: ...errare l apparecchio in modo tale che l indice possa toccare il tasto misurazione 3 e che il pollice possa toccare i tasti da 10 a 12 Accensione e spegnimento Premere il tasto misurazione 3 per accendere l apparecchio Il display 5 si accende e l apparecchio emette un breve segnale acustico Premere e tenere premuto il tasto C F SET 11 per circa 3 secondi per spegnere l apparecchio Vengono emessi du...

Page 22: ... è una temperatura media della superficie analizzata La superficie analizzata ha una forma circolare Il diametro della superficie analizzata S corrisponde a un dodicesimo della distanza tra la superficie e il sensore infrarossi 2 D Di seguito sono riportati alcuni valori per orientarsi S per Surface Diameter diametro superficie 25mm 75mm 125mm D per Distance distanza 300mm 900mm 1500mm Prestare at...

Page 23: ...à visualizzata sul display 5 Mentre si tiene premuto il tasto misurazione premere il tasto C F SET 11 per impostare il valore rilevato come valore referenziale Tale temperatura verrà indicata sul display come valore referenziale 6 accanto all indica zione REF Selezione tolleranza Sul prodotto è possibile impostare a quale differenza di temperatura rispetto al valore referenziale l apparecchio deve...

Page 24: ... display verde Nessun segnale All interno dell area di temperatura impostata Sfondo display blu Successione lenta del segnale L oscillazione di temperatura inferiore è superata Esempio di utilizzo Per verificare ad esempio la penetrazione di aria calda nell area tra la cornice della finestra e il muro analizzare per prima cosa la temperatura della cornice esattamente accanto alla finestra chiusa S...

Page 25: ...ccertano funzionamenti difettosi di questo genere rimuovere brevemente la batteria e inserirla nuovamente La seguente tabella aiuta a identificare e risolvere eventuali problemi Errore Causa possibile Soluzione Il display 5 non riporta nessuna indicazione La batteria 13 è inserita in maniera errata Inserire la batteria come illustrato nella figura sul co perchio del vano portabatte ria 4 fig C La ...

Page 26: ...e conseguenze negative per l ambiente a seguito di uno smaltimento non corretto delle batterie Le batterie non devono essere smaltite con i rifiuti domestici Esse possono conte nere metalli pesanti nocivi e sono soggette a smaltimento come rifiuti tossici I simboli chimici dei metalli pesanti sono i seguenti Cd cadmio Hg mercurio Pb piombo Consegnare quindi le batterie usate presso un punto di rac...

Page 27: ... garanzia decade nel caso di danneggiamento del prodotto di utilizzo o di manutenzione inadeguati La prestazione di garanzia vale sia per difetti di materiale che per difetti di fabbri cazione La presente garanzia non si estende a parti del prodotto soggette a normale usura e che possono essere identificate pertanto come parti soggette a usura p es le batterie né a danni su parti staccabili come i...

Page 28: ... substituir a pilha Página 34 Colocação em funcionamento Página 34 Ligar e desligar Página 34 Escolher a unidade de temperatura Página 35 Medir a temperatura Página 35 Mostrar variações de temperatura Página 36 Estipular valor de referência Página 36 Seleccionar o espectro de tolerância Página 37 Fazer scan da variação de temperatura Página 37 Exemplo de utilização Página 38 Indicação das pilhas P...

Page 29: ...cies de vários objectos podem ser medidas uma após a outra e as variações de temperatura podem ser compra das opticamente acusticamente e em relação à cor O Laserpointer integrado somente pode ser usado na medição de temperatura para a localização de um ponto de medição no objecto de medição O aparelho é destinado somente para o uso privado e não pode ser usado para fins comerciais ou industriais ...

Page 30: ...sor 6 Mostrador do valor de referência 7 Unidade de temperatura 8 Valor de medição 9 Escolha do espectro de tolerância 10 Botão 11 Botão C F SET 12 Botão 13 Bateria de bloco 9V Material fornecido 1 Aparelho para medição de temperatura infravermelho 1 Bateria de bloco 9V 1 Manual de instruções Dados técnicos Alimentação de tensão 1 x 9V Bateria de bloco Typ 6F22 ou 6LR61 Espectro de medição 50 C at...

Page 31: ...mento do feixe de laser é proibido Existe perigo de ferimentos Nenhuma responsabilidade é assumida para danos através de manipulação do laser como também um não seguimento dos avisos de segurança Este aparelho pode ser utilizado por crianças a partir dos 8 anos assim como por pessoas com capacidades físicas sensoriais ou mentais reduzidas ou deficiências na experiência e conhecimento se forem vigi...

Page 32: ... vazem retire as imediatamente do aparelho para evitar danos Evite o contacto com a pele olhos e mucosas Em caso de contacto com o ácido das pilhas lave imediatamente as zonas afetadas com água limpa e consulte um médico logo que possível Evite condições e temperaturas extremas que possam ter efeito sobre as pilhas por ex elementos de aquecimento radiação solar direta Retire a pilha do aparelho se...

Page 33: ...polaridade correcta ao substituir a pilha Esta é indicada na tampa do compartimento das pilhas Fig C Feche o compartimento das pilhas Agora o seu aparelho para medição de temparatura infravermelho está pronto para operar Colocação em funcionamento Segure a pega do aparelho de tal maneira que o dedo indicador possa operar o botão de medição 3 e o dedão os botões 10 a 12 Ligar e desligar Pressione o...

Page 34: ...edição 3 pressionado enquanto aponta o Laserpointer 1 para a superfície a ser medida Enquanto o botão de medição estiver pressionado a temperatura é medida e o visor 5 mostra SCAN Após soltar o botão de medição o visor mostra a última temperatura medida e o Laserpointer é desligado A temperatura medida é a temperatura média da superfície A área medida é circular O diâmetro da área de medição S é u...

Page 35: ... de temperatura A variação de temperatura é definida como a diferença entre um valor de refe rência definido anteriormente e uma temperatura medida As variações são mos tradas como valores numéricos e através de cores no visor 5 Adicionalmente uma sinal acústico soa Estipular valor de referência Pressione o botão de medição 3 a aponte o Laserpointer 1 para o local cuja temperatura queres estipular...

Page 36: ...an da variação de temperatura Escolha como descrito acima ume temperatura de referência Pressione o botão de medição 3 e aponte o Laserpointer 1 para o local a ser medido A temperatura é indicada no visor 5 Mantenha o botão de medição pressionado durante o scan e movimente vagarosamente e continuamente o ponto de laser sobre a superfície a ser medida As vairações de temperatura entre referência e ...

Page 37: ...ateria logo que a tensão da bateria seja baixa demais Quando este símbolo aparecer coloque uma nova bateria como descrito no capítulo Inserir trocar bateria Uma bateria vazia possui o perigo de vazamentos Adicionalmente uma baixa tensão da bateria não garante mais a precisão da medição de acordo com as indicações nos Dados técnicos Resolução de avarias Nota o aparelho contém componentes eletrónico...

Page 38: ... de medição 380 C e 716 F Manutenção e limpeza Certifique se de que não há infiltração de água no aparelho durante a limpeza Limpe o produto regularmente com um pano seco e que não largue fios Em caso de maior sujidade utilize um pano ligeiramente humedecido com detergente Certifique se de que nenhum objecto entre na abertura do sensor de infraver melho 2 Caso necessário limpe a abertura somente c...

Page 39: ...o Os seus direitos legais não estão limitados pela garantia representada de seguida Tem sobre este aparelho 3 anos de garantia a partir da data de compra A vali dade da garantia inicia se com a data de compra Guarde o talão da caixa como comprovativo da compra Esse documento é necessário para comprovar a compra Caso num espaço de tempo de 3 anos a partir da data da compra deste apare lho surja um ...

Page 40: ... Inserting changing the battery Page 46 Start up Page 46 Switching on and off Page 46 Selecting the temperature unit Page 46 Measuring temperature Page 47 Show temperature deviation Page 48 Determine reference value Page 48 Select tolerance range Page 48 Scan temperature deviation Page 48 Example of use Page 49 Battery state display Page 49 Troubleshooting Page 50 Maintenance and Cleaning Page 50 ...

Page 41: ...cces sively and the temperature deviations compared visually by colour and acoustically Only use the built in laser pointer for measuring temperature to locate a measuring point on the device under test The device is only intended for private use and may not be used for commercial or industrial purposes Only use the device in dry environments resp indoors Any use of the product for other or additi...

Page 42: ...nge selection 10 button 11 C F SET button 12 button 13 9V block battery Scope of delivery 1 Infrared thermometer 1 9V block battery 1 Set of instructions for use Technical Data Power supply 1 x 9V block battery type 6F22 or 6LR61 Measuring range 50 C to 380 C 58 F to 716 F Measurement accuracy for T 0 C 1 5 C or 1 5 of the measurement Measurement accuracy for T 0 C 3 C or 3 of the measurement Lase...

Page 43: ...no liability for damages arising from manipulating the laser device and for failure to observe the safety notices This product may be used by children age 8 years and up as well as by persons with reduced physical sensory or mental capacities or lacking experience and knowledge so long as they are supervised or instructed in the safe use of the appliance and understand the associated risks Do not ...

Page 44: ...f clean water and seek immediate medical attention Avoid extreme environmental conditions and temperatures which could affect batteries e g above radiators in direct sunlight Remove the battery from the device if it will not be used for a prolonged period Risk of equipment damage Only use the specified battery type When inserting the battery ensure the correct polarity has been used This is indica...

Page 45: ... so the index finger can operate the Measure button 3 and the thumb buttons 10 to 12 Switching on and off Press the Measure button 3 to switch on the device The display 5 will light up and a brief tone will sound Press and hold the C F SET button 11 for approx 3 seconds to switch off the device Two brief tones will sound When the device is no longer being used the backlight of the display swill sw...

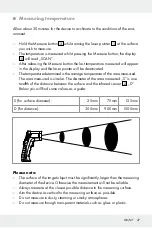
Page 46: ...he area measured The area measured is circular The diameter of the area measured S is one twelfth of the distance between the surface and the infrared sensor 2 D Below you will find some values as a guide S for surface diameter 25mm 75mm 125mm D for distance 300mm 900mm 1500mm Please note The surface of the target object must be significantly larger than the measuring diameter of the device Otherw...

Page 47: ...lue This temperature is indicated in the display next to REF as the reference display 6 Select tolerance range You can set the temperature deviation from the reference value as of which the device will respond with a visual and acoustic signal To do so whilst the reference value 6 appears in the display 5 press the button 10 or the button 12 Using this button the symbol will move to the right or t...

Page 48: ...e space between a window frame and brickwork first scan the temperature along the entire frame next to the closed window Select the warmest area of the frame as the reference temperature then e g a temperature variation of 3 C 5 F Now steadily scan again along all sides of the window next to the frame The blue colour display and a slow tone series indicates a possible influx of cold air with a dif...

Page 49: ...y Insert the battery as shown on the battery cover 4 Fig C The battery is drained Insert a new battery The display reads The temperature to be meas ured is below the measuring range 50 C or 58 F This device is unable to measure this temperature The display reads The temperature to be meas ured exceeds the measuring range 380 C or 716 F Maintenance and Cleaning Ensure that no water enters the devic...

Page 50: ...factured to strict quality guidelines and meticulously examined before delivery In the event of product defects you have legal rights against the retailer of this product Your legal rights are not limited in any way by our warranty detailed below The warranty for this device is 3 years from the date of purchase Should this device show any fault in materials or manufacture within 3 years from the d...

Page 51: ...bnahme Seite 56 Batterie einlegen wechseln Seite 57 Inbetriebnahme Seite 57 Ein und Ausschalten Seite 57 Temperatureinheit auswählen Seite 57 Temperatur messen Seite 58 Temperaturabweichung anzeigen Seite 59 Referenzwert festlegen Seite 59 Toleranzbereich auswählen Seite 59 Temperaturabweichung scannen Seite 60 Anwendungsbeispiel Seite 60 Batterieanzeige Seite 60 Fehlerbehebung Seite 61 Wartung un...

Page 52: ... chen von mehreren Objekten nacheinander gemessen und die Temperaturabwei chungen optisch farblich und akustisch miteinander verglichen werden Der integrierte Laserpointer darf ausschließlich im Rahmen der Temperaturmessung zur Lokalisierung eines Messpunkts am Messobjekt eingesetzt werden Das Gerät ist ausschließlich für den privaten Gebrauch bestimmt und darf nicht für gewerbliche oder industrie...

Page 53: ...el 5 Display 6 Referenzwert Anzeige 7 Temperatureinheit 8 Messwert 9 Auswahl des Toleranzbereichs 10 Taste 11 C F SET Taste 12 Taste 13 9V Blockbatterie Lieferumfang 1 Infrarot Temperaturmessgerät 1 9V Blockbatterie 1 Bedienungsanleitung Technische Daten Spannungsversorgung 1 x 9V Blockbatterie Typ 6F22 oder 6LR61 Messbereich 50 C bis 380 C 58 F bis 716 F Messgenauigkeit für T 0 C 1 5 C bzw 1 5 de...

Page 54: ...folgen der Sicherheitshinweise wird keine Haftung übernommen Dieses Gerät kann von Kindern ab 8 Jahren und darüber sowie von Personen mit verringerten physischen sensorischen oder mentalen Fähigkeiten oder Mangel an Erfahrung und Wissen benutzt werden wenn sie beaufsichtigt oder bezüglich des sicheren Gebrauchs des Gerätes un terwiesen wurden und die daraus resultierenden Gefahren verstehen Kinder...

Page 55: ...it klarem Wasser und suchen Sie umgehend einen Arzt auf Vermeiden Sie extreme Bedingungen und Temperaturen die auf Batterien einwirken können z B auf Heizkörpern direkte Sonneneinstrahlung Entfernen Sie die Batterie wenn sie längere Zeit nicht verwendet worden ist aus dem Gerät Gefahr der Gerätebeschädigung Ausschließlich den angegebenen Batterietyp verwenden Achten Sie beim Einlegen auf die richt...

Page 56: ...nbetriebnahme Umfassen Sie den Griff des Gerätes so dass der Zeigefinger die Mess Taste 3 und der Daumen die Tasten 10 bis 12 betätigen kann Ein und Ausschalten Drücken Sie die Mess Taste 3 um das Gerät einzuschalten Das Display 5 leuchtet auf und ein kurzer Signalton ertönt Drücken und halten Sie die Taste C F SET Taste 11 für ca 3 Sekunden um das Gerät auszuschalten Zwei kurze Signaltöne ertönen...

Page 57: ...splay angezeigt und der Laserpointer ausgeschaltet Die ermittelte Temperatur ist die Durchschnittstemperatur der gemessenen Flä che Die gemessene Fläche ist kreisförmig Der Durchmesser der Messfläche S ist ein Zwölftel des Abstands der Fläche zum Infrarotsensor 2 D Im Folgenden ein paar Werte zur Orientierung S für Surface Diameter Flächendurchmesser 25mm 75mm 125mm D für Distance Abstand 300mm 90...

Page 58: ...tlegen möchten Die Temperatur wird im Display 5 angezeigt Drücken Sie nun während Sie die Mess Taste halten die C F SET Taste 11 um den Temperaturwert als Referenzwert zu übernehmen Diese Tempera tur wird im Display neben der Anzeige REF als Referenzwert Anzeige 6 angezeigt Toleranzbereich auswählen Sie können am Gerät einstellen ab welcher Temperaturdifferenz zum Referenz wert das Gerät mit einem...

Page 59: ...nnerhalb des eingestellten Temperaturbereichs Blauer Display Hintergrund Langsame Signalton Folge Die untere Temperaturschwelle ist unterschritten Anwendungsbeispiel Um zum Beispiel das Eindringen von kalter Luft im Innenraum zwischen einem Fensterrahmen und dem Mauerwerk zu prüfen scannen Sie zunächst die Tempe ratur umlaufend am Rahmen unmittelbar neben dem geschlossenen Fenster Wäh len Sie die ...

Page 60: ...ätes Hinweis Elektrostatische Entladungen können zu Funktionsstörungen führen Entfernen Sie bei solchen Funktionsstörungen kurzzeitig die Batterie und setzen Sie diese erneut ein Die nachfolgende Tabelle hilft bei der Lokalisierung und Behebung kleinerer Störungen Fehler Mögliche Ursache Behebung Das Display 5 zeigt nichts an Die Batterie 13 ist falsch eingelegt Legen Sie die Batterie gemäß der Ab...

Page 61: ...können Möglichkeiten zur Entsorgung des ausgedienten Produkts erfahren Sie bei Ihrer Gemeinde oder Stadtverwaltung Über Sammelstellen und deren Öffnungszeiten können Sie sich bei Ihrer zuständigen Verwaltung informieren Defekte oder verbrauchte Batterien müssen gemäß Richtlinie 2006 66 EG und deren Änderungen recycelt werden Geben Sie Batterien und oder das Gerät über die angebotenen Sammeleinrich...

Page 62: ...Kassenbon gut auf Diese Unterlage wird als Nachweis für den Kauf benötigt Tritt innerhalb von 3 Jahren ab dem Kaufdatum dieses Produkts ein Material oder Fabrikationsfehler auf wird das Produkt von uns nach unserer Wahl für Sie kos tenlos repariert oder ersetzt Diese Garantie verfällt wenn das Produkt beschädigt nicht sachgemäß benutzt oder gewartet wurde Die Garantieleistung gilt für Material ode...

Page 63: ...aße 1 D 74167 Neckarsulm Model No HG00304A Version 09 2016 Estado de las informaciones Versione delle informazioni Estado das informações Last Information Update Stand der Informationen 08 2016 Ident No HG00304A082016 5 IAN 279816 ...

Reviews: