background image

Page 15  — English

 

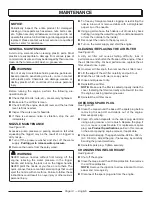
Tilt the pressure washer on its side as shown. Drain lu-
bricant into approved container.


NOTE: 

Drain the lubricant while the engine is still warm 

but not hot. Warm lubricant will drain quickly and more 
completely.

WARNING:

Do not change engine lubricant while it is hot. Accidental 
contact with hot engine lubricant could result in serious 
burns.

 

After the crankcase is completely drained, return the 
pressure washer to an upright position.

 

Fill with lubricant following the instructions in 

Adding/

Checking Engine Lubricant 

earlier in this manual. For 

amount of lubricant needed to refill, see 

Product Specifi-

cations 

earlier in this manual or the accompanying engine 

manual, if applicable.

 

Before using the pressure washer, check to ensure that 
no lubricant is leaking from the engine.

NOTE: 

Consult hazardous waste management guidelines in 

your area for the proper way to dispose of used lubricant.

PUMP MAINTENANCE

Routinely make a visual inspection of the pump. If you notice 
any leaking of lubricant around the pump oil seals, take the 
pressure washer to a qualified service center for repair.
There are no user serviceable parts to the pressure washer 
pump. Any attempt to service or alter the pump may damage 
the pressure washer and void your product warranty.

STORING THE PRESSURE WASHER

See Figure 22.

NOTE: Regular use of fuel stabilizer and pump protector 
will give you better performance of the unit and increase 
the life of the pump. 

WARNING:

While storing, keep at least 3 feet of clearance on all sides 
of this product, including overhead. Allow a minimum of 
30 minutes of “cool down” time before storage. Heat cre-
ated by muffler and exhaust gases could be hot enough 
to ignite combustible objects.

Store in a dry, covered area where the weather can’t damage it.
It is important to store this product in a frost-free area. Always 
empty water from all hoses, the pump, and the soap tank 
before storing. 


MAINTENANCE

 

Drain the fuel tank completely by running the pressure 
washer until the gas runs out. Stored gas can go stale in 
30 days.

 NOTE: 

Make sure the water supply is connected and 

turned on when allowing the pressure washer engine to 
run.

  Make sure the on/off switch is OFF 

( O ) 

and fuel valve is 

CLOSED.

  Disconnect both the high pressure hose and the garden 

hose from the pump.

 

Empty the pump by pulling on the starter grip and rope 
about 6 times. This should remove most of the liquid from 
the pump.

NOTICE:

The use of a pump protector is required after each use 

and before storing to prevent cold weather and seal 

damage during storage. Failure to use pump protector 

will void your warranty.

 

Drain the lubricant and replace with fresh, clean lubricant 
as described in 

Adding/Checking Engine Lubricant 

in 

the 

Operation 

section of this manual.

 

Disconnect spark plug wire and remove the spark plug. 
Pour about a teaspoon of clean, air-cooled, four-cycle 
lubricant through the spark plug hole into the combustion  
chamber.

 

Leaving the spark plug out, pull the starter grip and rope 
two or three times to coat the inside of the cylinder wall.

 

Inspect the spark plug and clean or replace, as necessary. 

 

Reinstall the spark plug, but leave the spark plug wire 
disconnected.

 

Clean the air filter.

 

Extend the starter grip and rope rope to check its condi-
tion. If the rope is frayed, have it replaced immediately 
by a qualified service center.

 

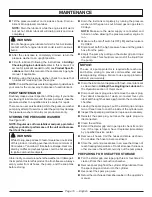
Remove all hoses. Coil the hoses and store as shown. 
Do not allow the hose to become kinked. 

  Store the unit and accessories in an area that does not 

reach freezing temperatures. Do not store near furnace or 
other sources of heat that could dry out the pump seals.

PREPARING FOR USE AFTER STORAGE

 

Pull the starter grip and rope grip three or four times to 
clean oil from the combustion chamber.

 

Remove spark plug from the cylinder. Wipe lubricant from 
the spark plug and return it to the cylinder.

 

Reconnect the spark plug wire.

 

Refuel the machine as described earlier in the operator’s 
manual.

Summary of Contents for PS80947J

Page 1: ...law and will damage the unit and void your warranty Only use unleaded gasoline containing up to 10 ethanol SAVE THIS MANUAL FOR FUTURE REFERENCE WARNING To reduce the risk of injury the user must read and understand the operator s manual before using this product TABLE OF CONTENTS Important Safety Instructions 2 Specific Safety Rules 3 Symbols 4 5 Features 6 Tools Needed 6 Assembly 7 8 Operation 9...

Page 2: ...B Starter grip and rope C Fuel tank D Oil cap dipstick E Gripping surface F Muffler G Fuel valve H On off switch I Choke J High pressure hose K Nozzles and nozzle storage L Handle M Trigger handle N Trigger with lock out O Spray wand P Soap tank C E F D L A M J I H G K N P O B Fig 1a A Combination wrench A ...

Page 3: ...handle B Connector C Spray wand A Collar B Inlet coupler C High pressure hose A A A B A B C C Fig 5 Fig 7 Fig 6 A Threaded outlet B Collar B A C B A Oil cap dipstick A A A Water intake B Screen C Garden hose A Fuel cap A OPEN B CLOSE A Fig 8 FUEL VALVE Fig 9 A B ...

Page 4: ...e B Click C Quick connect collar D Spray wand E Pull back the quick connect collar F Push the nozzle into place G Push the collar forward A B C D F E G C B B ON OFF SWITCH A OFF O B ON I Fig 10 Fig 14 A B D C Fig 16 A Threaded top B Rubber seal C Paper seal D Water intake E Pump outlet F Pump protector C B A A E F D ...

Page 5: ... THE MACHINE TO STORE THE MACHINE Fig 19 Fig 21 Fig 22 Fig 20 A A 0 028 in 0 032 in A B C A B C A Oil cap dipstick B Oil fill hole C Container A Air filter knob B Air filter cover C Air filter A B A Straightened paper clip B Nozzle ...

Page 6: ... stand on a ladder rooftop or other unstable support Keep proper footing and balance at all times Use only recommended accessories The use of improper accessories may cause risk of injury Follow the maintenance instructions specified in this manual Check damaged parts Before further use of the tool a guard or other part that is damaged should be carefully checked to determine that it will operate ...

Page 7: ... may cause serious engine problems Always refuel outdoors Never refuel indoors or in a poorly ventilated area Never store the machine with fuel in the fuel tank inside a building where ignition sources are present such as hot water and space heaters clothes dryers and the like If the fuel tank has to be drained do this outdoors into a container approved for gasoline and away from all ignition sour...

Page 8: ...ing hoses and fittings are also capable of causing injection injury Do not hold hoses or fittings Risk of Explosion Do not spray flammable liquids Flammable liquids fuel and their vapors are explosive and can cause severe burns or death Risk of Fire Fuel and its vapors are extremely flammable and explosive Fire can cause severe burns or death The following signal words and meanings are intended to...

Page 9: ...n gas Breathing carbon monoxide can cause nausea fainting or death Kickback To reduce the risk of injury from kickback hold the spray wand securely with both hands when the machine is on Electric Shock Failure to use in dry conditions and to observe safe practices can result in electric shock Chemical Burns To reduce the risk of injury or damage DO NOT USE ACIDS ALKALINES BLEACHES SOLVENTS FLAMMAB...

Page 10: ...ine HOSE STORAGE Once the high pressure hose is rolled hang it on the back of the machine using the stretch strap to secure in place ON OFF SWITCH The on off switch is used in combination with the starter grip and rope to start the engine It is also used to turn the engine off SOAP NOZZLE The blue soap nozzle is used to apply detergent at low pressure only STARTER GRIP AND ROPE The starter grip an...

Page 11: ... a hazardous condition leading to possible serious personal injury WARNING To prevent accidental starting that could cause serious personal injury always disconnect the engine spark plug wire from the spark plug when assembling parts INSTALLING THE HANDLE See Figure 2 CAUTION Be careful to avoid pinching your fingers or hands when installing the handle onto the frame n Push and hold the button on ...

Page 12: ...an any debris from the hose ASSEMBLY n Inspect the screen in the water intake n If the screen is damaged do not use the machine until the screen has been replaced n If the screen is dirty clean it before connecting the garden hose to the machine To connect the garden hose to the machine n Completely uncoil the garden hose or remove completely from reel to prevent kinks NOTE There must be a minimum...

Page 13: ...exterior vertical surfaces such as house exteriors siding fences brick concrete or stone walls etc Wash boats outdoor furniture powered or non powered garden equipment gutters window screens grills play ground equipment etc Always test in an inconspicuous area first ADDING CHECKING ENGINE LUBRICANT See Figure 7 NOTE This machine has been shipped with approximately 2 oz of lubricant in the engine f...

Page 14: ...e to do so may cause property damage Fuel system damage or performance problems resulting from the use of an oxygenated fuel containing more than the percentage of oxygenates previously stated are not covered under warranty ADDING GASOLINE TO THE FUEL TANK See Figure 8 DANGER Risk of fire and serious burns Never remove fuel cap when unit is running Shut off engine and allow the unit to cool at lea...

Page 15: ...nds Expect the trigger handle to move when the trigger is pulled due to reaction forces Failure to do so could cause loss of control and injury to yourself and others n Pull back and hold the trigger to operate the pressure washer n Release the trigger to stop the flow of water through the nozzle To engage the lock out n Push up on the lock out until it clicks into the slot To disengage the lock o...

Page 16: ...other serious personal injury To prevent damage to the outer covering n Inspect the hose before every use n Fully unwrap and straighten hose before use n Do not allow the high pressure hose to be kinked n Keep hose away from hot surfaces and sharp edges n Do not pull unit by high pressure hose n Do not allow hose to be crushed or wrapped around objects WASHING WITH DETERGENT See Figure 14 15 Assol...

Page 17: ...otected when the protector fluid exits the pump outlet MOVING THE PRESSURE WASHER See Figure 17 NOTE Never lift or carry this product using the handle and never place the unit in any position other than upright on its wheels n Turn the pressure washer off n Tilt the machine toward you slightly until it balances on the wheels then roll the machine to the desired position Do not tilt forward or side...

Page 18: ...ns could result in an eye injury or other serious personal injury n To free any foreign materials clogging or restricting the nozzle blow out or remove debris with a straightened paper clip or fine needle n Using a garden hose flush debris out of nozzle by back flushing running the water through the nozzle backwards or from the outside to the inside n Reconnect the nozzle to the spray wand n Turn ...

Page 19: ...he soap tank before storing MAINTENANCE n Drain the fuel tank completely by running the pressure washer until the gas runs out Stored gas can go stale in 30 days NOTE Make sure the water supply is connected and turned on when allowing the pressure washer engine to run n Make sure the on off switch is OFF O and fuel valve is CLOSED n Disconnect both the high pressure hose and the garden hose from t...

Page 20: ...ter Check and adjust spark plug Replace spark plug PERIODIC MAINTENANCE SCHEDULE Change engine lubricant every 25 hours when used under heavy load or in high ambient temperature Dispose of waste lubricant safely and responsibly Do not pour into sewage drains onto garden soil or into open streams Your local zoning or environmental regulations will give you more detailed instructions on proper dispo...

Page 21: ...sure nozzle installed Replace with high pressure nozzle Inadequate water supply Provide adequate water flow Trigger handle or spray wand leaks Check connections and or replace trigger handle or spray wand Nozzle is clogged Clean nozzle Air in line Hose is leaking Kink in hose Pump is faulty Squeeze trigger on trigger handle to remove air from line Replace hose Eliminate kinks in hose Contact a qua...

Page 22: ...not cover Tune ups Spark Plugs Carburetor Carburetor Adjustments Ignition Filters Oil Change Wear items Recoil Starter Rope Engine Brushes Cotter Pins Wheels Warranty is voided if the customer fails to install maintain and operate the product in accordance with the instruc tions and recommendations of the Company as set forth in the Product s operator s manual or if the Product is used as rental e...

Page 23: ..._____________________ MANUFACTURING NO ______________________________________ SERIAL NO _________________________________________________ 2700 PSI PRESSURE WASHER PS80947J 991000592 5 14 15 REV 01 WARNING This product its exhaust and other substances that may become air borne from its use may contain chemicals including lead known to the State of California to cause cancer birth defects or other r...

Reviews: