Information is subject to change without notice or obligation.
NOTE:
Dimensions in parentheses ( ) are millimeters.
Backdraft Dampers
IIBD50SS
70386 Rev
. A
(1/2) August
2022
model BD-50-SS
installation instructions
The following guidelines provide basic assembly and installation
instructions for models BD-50-SS backdraft dampers.
Carefully lift the dampers by their frames using multiple lifting points if
necessary.
Do not apply excessive force to a single point and
NEVER LIFT
UNITS BY
DAMPER
BLADES
OR
BLADE
LINKAGE.
Dampers larger than the maximum single section size are
manufactured and shipped with 1" wide x 16 gauge (1 x 1.6) splice
plates for field assembly.
Assemble sections together using #8 TEK screws 1/2" (51) min. long
as shown.
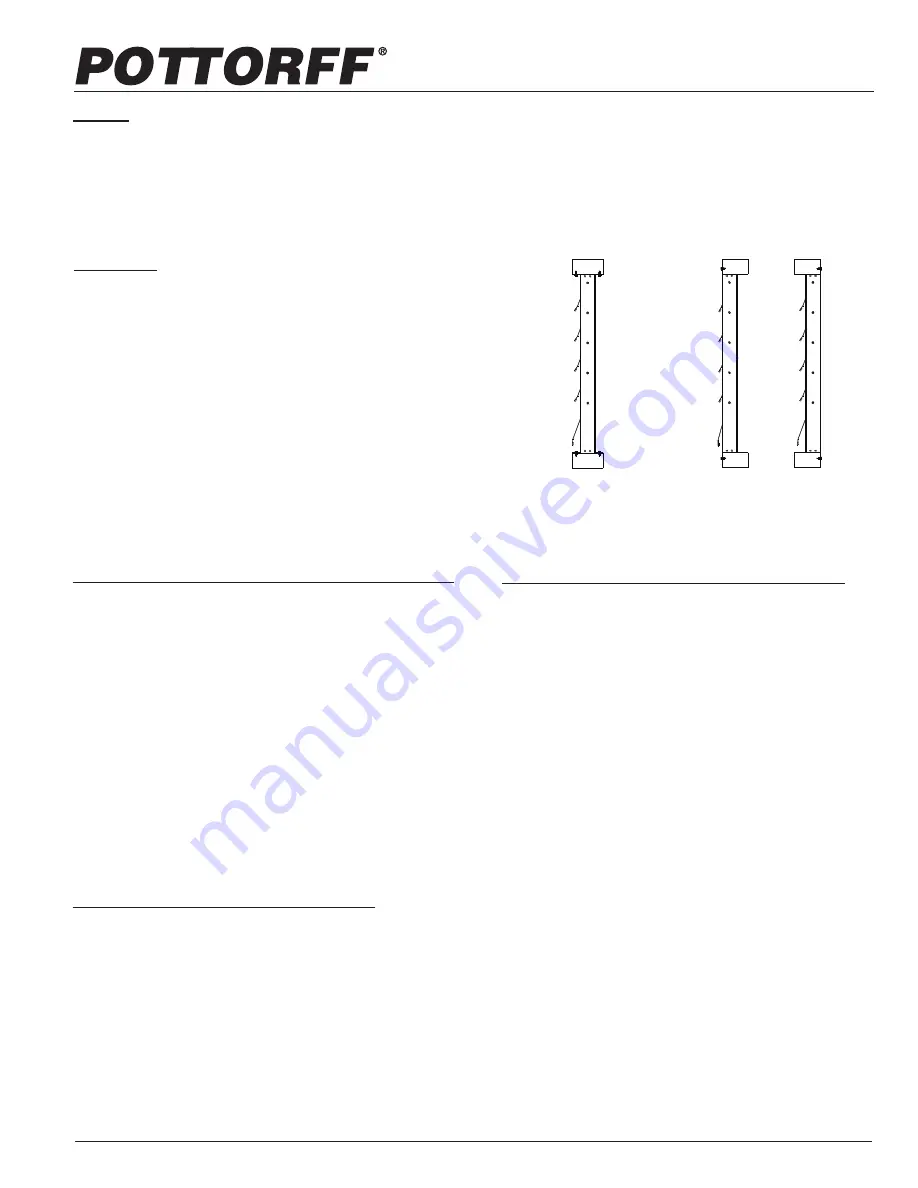
Fig.1 Standard
Frame (no flange)
Fig. 2 Front and
Rear Flange
General
Dampers
Locate all crates, boxes, cartons, etc.
Remove dampers from packaging, inspect for damage and
confirm quantities and sizes with packing list.
Notify your Pottorff representative immediately of any
shortages or shipping damage.
Inspect openings to ensure they are square and free from any
debris.
Verify that the damper will properly fit into the opening or into
the duct so that it can be installed square and will not be
racked.
1.
2.
3.
1.
2.
Openings
Preparation
POTTORFF
®
5101 Blue Mound Road, Fort Worth, Texas 76106
www.pottorff.com
Verify that the backdraft damper is square, plumb and not
racked.
Backdraft damper is approximately 1/4" (6.4) smaller than
specified duct/opening.
Insert entire backdraft damper into duct/opening. Bottom of
damper frame must sit flat on bottom of duct/opening to
prevent twisting, sagging or uplifting.
Install units using mounting clips or angles [3/8" (9.5) high
(max.) x 1" (25) wide (min.) x 20 ga. (1.0) thick (min.)]. Arrange
clips against the perimeter of the front and back of the damper
frame, securing the clips to duct work.
Minimum of two fasteners per side to be used (top, bottom, left
and right jamb). Fasteners should be spaced 12" (305) on
center. (For alternate fastening method securing the frame
directly to the duct/opening, see Multiple Section Installation
details).
1.
2.
3.
4.
5.
Installation for Dampers with Standard Frame (Fig. 1)
Verify that the backdraft damper is square, plumb and not
racked.
Inserted frame of backdraft damper is approximately 1/4" (6.4)
smaller than specified duct/opening size.
Make sure that the backdraft damper’s is flat and level when
being attached.
Secure backdraft damper’s flange using appropriate
fasteners.
1.
2.
3.
4.
Dampers with Front or Rear Flange (Fig.2)
Pre-drill fastener holes in the backdraft damper flange before
placing over opening to reduce twisting and binding.
It is recommended that a minimum of two fasteners per side
be used (top, bottom, left and right jamb). Fasteners should be
spaced 12" (305) on center.
Do not over tighten fasteners. Over tightening may damage or
twist the backdraft damper.
5.
6.
7.
Arrange damper sections with frames butted tight together to
allow splice plates to be installed. Non-marring woodworking
clamps may aid in damper alignment.
Vertical splice plates will span the overall height of the
damper. Horizontal splice plates will span the width of each
damper section.
Align the vertical splice plates with the top of the damper and
fasten to both the left and right damper frames with the TEK
screws specified above a minimum of 1/4" (6.4) and maximum
1" (25.4) from the top and bottom edges, a minimum 1/4" (6.4)
and maximum 1/2" (12.7) from side edges of the splice plate,
a maximum of 6" (152) on center. Screws may be staggered.
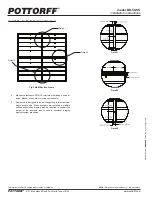
See Figure 3 and Details 1 and 2 below.
Align the horizontal splice plates with the top and bottom
frames of adjacent damper sections and fasten to both
damper frames with the TEK screws specified above a mini-
mum of 1/4" (6.4) and maximum 1" (25.4) from the side edges,
a minimum 1/4" (6.4) and maximum 1/2" (12.7) from top and
bottom edges of the splice plate a maximum of 6" (152) on
center. Screws may be staggered. See Figure 3 and Detail 3
below.
1.
2.
3.
4.
Installation for Multi-Sectioned Dampers (Fig. 3)


