BRX Power Injector Installation Guide
19
180-0192-001-R01
Use the row of punch-down blocks labeled as
Power Out to connect the pairs of each cable
binder that require the -48Vdc power to feed BRX
devices on otherwise dry pairs.
NOTE:
You should use the pre-installed tie-wraps
to secure the cable binders in place once you are
done with connecting the pairs to the
POWER
OUT
punch-down blocks
You are now ready to connect the binder cables
of the rightmost opening to the nearby DSLAM.
Table 7: Connecting BRX Power Pairs to the Cable Binder feeding into POTS connector of DSLAM
3.5 Sealing the Rubber Grommets before Installation
Once you have mounted the BRX Power Injector in its final location, you will need to apply a silicon
sealant to ensure the IP65 rating of the enclosure. We recommend the use of a sealant that meets
the MIL-A-46146 standard such as Dow Corning 3145TV rated for use from -45
˚
C to +200
˚
C.
NOTE:
If you decide to apply the sealing silicone prior to the final installation of the BRX Power
Injector, we strongly recommend you maintain the enclosure in the vertical position to ensure the
sealant material adherence to the rubber grommet and around the power cable and copper binder
cables.
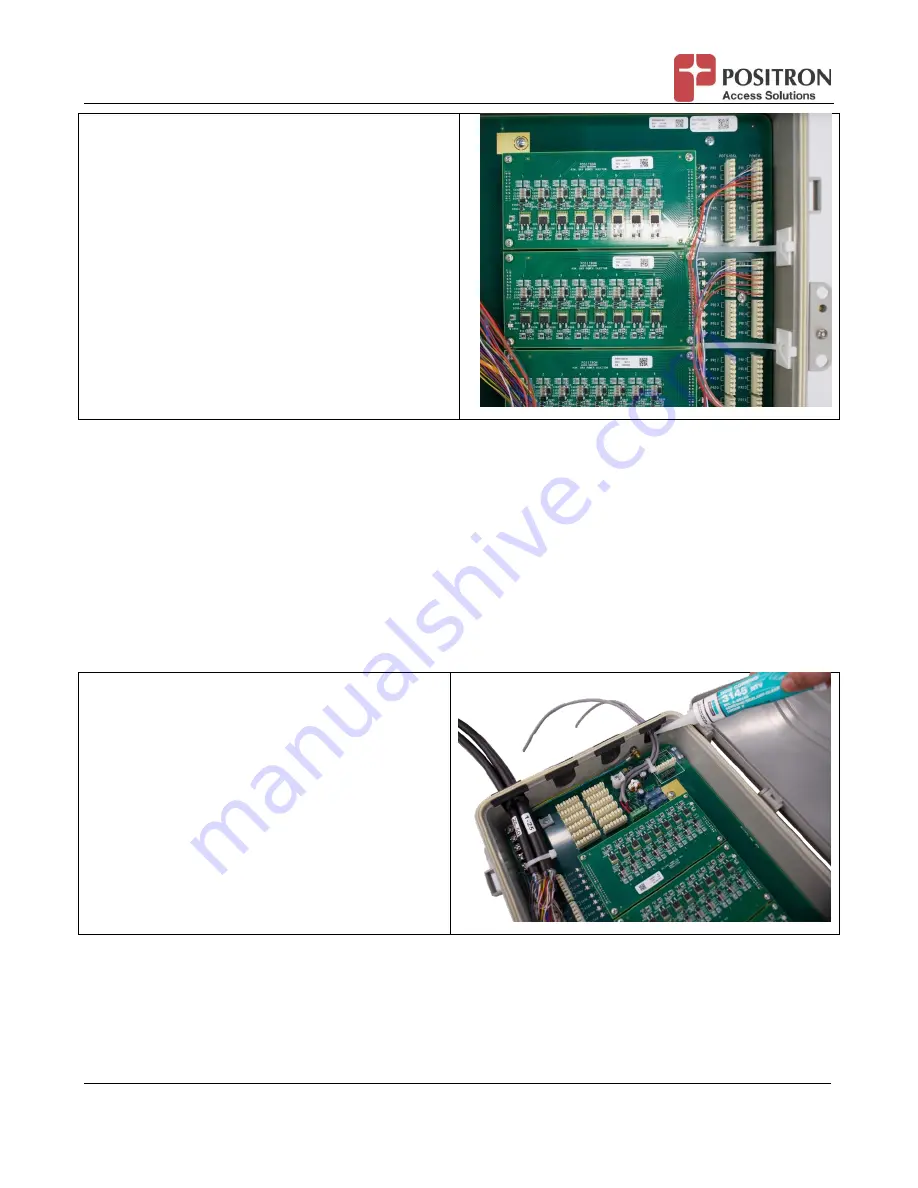
Step 1:
apply a sealing silicone to prevent water
infiltration through the opening of the rubber
grommet used to insert the Power Cable (AC,
DC or Express Power Pairs).


