background image

BIOS Setup Information 

FUDA2-S1x11 Series Panel PC User’s Manual 

4-25 


4.7   Exit 

 
Equal  to  F10,  save  all  changes  of  all  menu,  then  exit  setup  configure  driver. 
Finally resets the system automatically. 


Save Changes and Exit  

Exit system setup after saving the changes 
 

Discard Changes and Reset  

Reset the system without saving the changes. 
 

Restore Defaults  

Restore/Load Default Values for all the setup options. 
 

Summary of Contents for PEDA S1x30 Series

Page 1: ...free Panel PC With High Performance and Flexible Expansion Solution Powered by Intel Haswell ULT SoC Processor User s Manual Version 1 0 Copyright Portwell Inc 2015 All rights reserved All other bran...

Page 2: ...g Method 2 9 2 7 1 Panel Mount 2 9 2 7 2 VESA Mount 2 10 Chapter 3 Driver Installation and Touch Usage Guide 3 1 3 1 Driver Installation 3 1 3 2 Calibration of the Touch Screen 3 1 Chapter 4 BIOS Setu...

Page 3: ...ouch Usage Guide Describe the operation guide for included driver and software Chapter 4 BIOS Setup Information Specify the meaning of each setup parameters how to get advanced BIOS performance and up...

Page 4: ...on By utilizing this latest technology the fan free PEDA Panel PC can optimize thermal dissipation as well as simplify the mechanics of board and chassis to achieve an extremely reliable and stable sy...

Page 5: ...PEDA S1730 19 PEDA S1930 21 5 PEDA S2130 Panel Mount Kits Panel Size Kits pcs 12 1 10 pieces 15 10 pieces 17 18 pieces 19 18 pieces 21 5 18 pieces Screws for HDD installation M3X4L Screw 4 pieces Hex...

Page 6: ...dows 8 1 Linux I O Interface I O Interface I O Interface I O Interface Series Port Series Port Series Port Series Port 1 x RS 232 422 485 3 x RS 232 Display Display Display Display 1 x HDMI 1 x Displa...

Page 7: ...1x11 Series Panel PC User s Manual 1 4 1 4 Mechanical Dimension Front and back view of the PEDA S1230 system Side view of the PEDA S1230 system Front and back view of the PEDA S1530 system Side view o...

Page 8: ...view FUDA2 S1x11 Series Panel PC User s Manual 1 5 Front and back view of the PEDA S1730 system Side view of the PEDA S1730 system Front and back view of the PEDA S1930 system Side view of the PEDA S1...

Page 9: ...System Overview FUDA2 S1x11 Series Panel PC User s Manual 1 6 Front and back view of the PEDA S2130 system Back view of the FUDA2 S1911 system...

Page 10: ...tep 1 Loosen the thumbscrews of the HDD cover and draw out the HDD tray from the Panel PC Step 2 Install the HDD into tray with screws Step 3 Push the HDD tray back Step 4 Tighten the thumbscrews and...

Page 11: ...4 x1 signal add on card Equipped with an innovative PCI PCIe expansion module user can easily install and replace his her own expansion cards Step 1 The PEDA Panel PC has two parts IPC box and touch p...

Page 12: ...Loosen the side cover 2 screws of the expansion module by the hex screwdriver Step 8 Carefully detach the module from the main system Step 9 Loosen the screw of the expansion module Step 10 On the ba...

Page 13: ...with the touch panel display Step 16 Finish installation Add on card dimension limitation Max dimension of add on card in WEBS 5482 W is 157 x 111 mm 2 4 Memory Module Expansion PEDA S1x30 Series Pan...

Page 14: ...the four screws at back and side cover of the expansion module Step 4 Carefully detach the module from the main system Step 5 Loosen the screws and remove the L shape bracket Step 6 User can find the...

Page 15: ...ystem is ON ORANGE when OFF 2 6 I O Interfaces 2 6 1 Front View 1 TFT LCD Display with touch The Panel PC is built in a TFT LCD display and designed with a 5 wire resistive touch screen The touch scre...

Page 16: ...s of the Panel PC Status HDD LED Off N A Power in N A Working Red 3 Reset Button Press the button to restart the Panel PC 4 HDMI Type A HDMI display output 5 DP DP DisplayPort display output 6 DC in 1...

Page 17: ...232 422 485 configuration is determined by BIOS setting Check BIOS setting for details PIN No Signal Description 1 DCD DT 2 RXD DT 3 TXD 422R 4 DTR 422R 5 GND 6 DSR 7 RTS 8 CTS 9 RI 11 Gigabit Etherne...

Page 18: ...n x4 slot 16 Mounting Kits for connecting IPC box and touch panel display The PEDA Panel PC has two parts IPC box and touch panel display connecting by one single cable Use the mounting kits to make s...

Page 19: ...les 2 Fix the Panel PC with their fixture by the screws included Cut out Dimension PEDA A mm B mm C mm D mm Kits 12 1 10 118 310 256 3 X10 15 8 5 118 6 353 7 297 6 X10 17 8 5 121 8 390 343 X18 19 8 5...

Page 20: ...on the display Calibration also determines the edges of the screen s image and locates the center of the touch screen If the touch screen is not calibrated properly the active area of the touch screen...

Page 21: ...ck Setting you can choose the 9 points or 25 points linearization style 6 Click Tools to align touch with the display and verify touch accuracy Click 4 Points Calibration Linearization to match displa...

Page 22: ...3 3 7 Click Display you can select the Operation Mode 8 Click Hardware controller model and firmware version are shown 9 Click Hardware Setting you can adjust sensitivity and delay time of the touch...

Page 23: ...gainst the configuration information stored in the CMOS memory If any error is detected or the CMOS parameters need to be initially defined the diagnostic program will prompt the user to enter the SET...

Page 24: ...re and memory specifications of your system Read only Build Time The BIOS Release Date Processor Brand Name Processor Speed This value will change depend of different CPUs And please make sure the Pro...

Page 25: ...unctional group and consists of all correlated BIOS settings Menu Usage Main Display a summary of the system and configure the system date and time Configuration Configure the system interfaces system...

Page 26: ...p Hyper threading Disabled Enabled Default Enabled for Windows XP Linux and Disabled for other OS Active Processor Cores All Default 1 Select the number of physical cores to enable in each processor p...

Page 27: ...C3 report CPU C6 report Disabled Enabled Default CPU C6 report Chipset Configuration It is not necessary to make any change just take the default value BIOS Item Usage Item Specific Help High Precisi...

Page 28: ...11 Series Panel PC User s Manual 4 6 AMT Configuration BIOS Item Usage Item Specific Help Intel AMT Disabled Enabled Default Disables Enabled iAMT function Un Configure ME Disabled Default Enabled Dis...

Page 29: ...BIOS Setup Information FUDA2 S1x11 Series Panel PC User s Manual 4 7 Memory Configuration...

Page 30: ...Item Specific Help Launch PXE OpROM Policy Disabled Default Enabled Intel LAN I218 Controller Disabled Enabled Default Enable Disable Intel LAN I218 Wake on LAN Disabled Default Enabled Intel LAN I210...

Page 31: ...should be Primary Display or select Secondary Display for switchable Graphics Internal Graphics Auto Disabled Enabled Default Keep IGD Enabled based on the setup options Aperture Size 128MB 256MB Def...

Page 32: ...M 384M 416M 448M 480M 512M 1024M DVMT Total Gfx Mem 128MB 256MB Default MAX Select DVMT5 0 Total Graphics Memory size used by the Internal Graphics Device Primary IGFX Boot Display VBIOS Default HDMI...

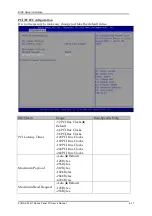
Page 33: ...e BIOS Item Usage Item Specific Help PCI Latency Timer 32 PCI Bus Clocks Default 64 PCI Bus Clocks 96 PCI Bus Clocks 128 PCI Bus Clocks 160 PCI Bus Clocks 192 PCI Bus Clocks 224 PCI Bus Clocks 248 PCI...

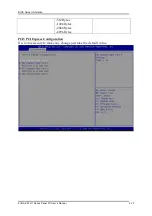
Page 34: ...Setup Information FUDA2 S1x11 Series Panel PC User s Manual 4 12 512 Bytes 1024 Bytes 2048 Bytes 4096 Bytes PCH PCI Express Configuration It is not necessary to make any change just take the default v...

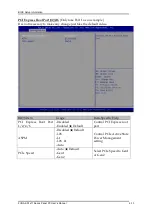
Page 35: ...t necessary to make any change just take the default value BIOS Item Usage Item Specific Help PCI Express Root Port 1 2 4 6 Disabled Enabled Default Control PCI Express root port ASPM Disabled Default...

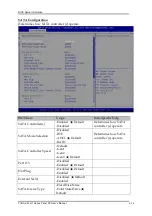
Page 36: ...s Enabled Default Disabled Determines how SATA controller s operate SATA Mode Selection Disabled IDE AHCI Default RAID Determines how SATA controller s operate SATA Controller Speed Default Gen1 Gen2...

Page 37: ...SB Configuration Configure USB controller and other advanced setting BIOS Item Usage Item Specific Help Legacy USB support Enabled Default Disabled Enables Legacy USB support AUTO option disables lega...

Page 38: ...Enabled Default Disabled EHCI Hand off Enabled Disabled Default USB Mass Storage Driver Support Enabled Default Disabled PCH USB Configuration USB Ports per Port 0 7 Disable Disabled Default Enabled C...

Page 39: ...le Hibernate Funtion ACPI Sleep State S3 Only Suspend to RAM Select the highest ACPI sleep state when the SUSPEND button is pressed Power loss function Always Off Default Always On Last State Select A...

Page 40: ...S1x11 Series Panel PC User s Manual 4 18 TPM Configuration BIOS Item Usage Item Specific Help Security Device Support Disabled Default Enabled Enabled Disabled TPM Function Super IO Configuration Ena...

Page 41: ...rial Port 0 6 Configuration BIOS Item Usage Item Specific Help WDT Controller Disable Default Enabled Timer Unit Second Default Minute Timer value 20 Default Serial Port 1 6 Disable Enable Default Set...

Page 42: ...4 20 Hardware Monitor Provide on board sensor reading information BIOS Item Usage Item Specific Help CPU Smart Fan Control Disable Default Enable Smart Fan Start Temperature 50 Default Disable Enable...

Page 43: ...4 21 Serial Port Console Configuration Configure console redirection on serial port BIOS Item Usage Item Specific Help Serial Port 1 Console Redirection Disabled Default Enabled Control Console Redire...

Page 44: ...using BIOS services ALWAYS do not allow disabling GA20 this option is useful when any RT code is executed above 1MB Choices Upon Request Always Option ROM Messages Set Display mode for Option ROM Thi...

Page 45: ...etup utility if one is available When Disabled the ROM BIOS of these host adaptors will not be able to capture Interrupt 19 Therefore you will not be able to boot operating systems from any bootable d...

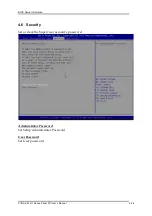
Page 46: ...p Information FUDA2 S1x11 Series Panel PC User s Manual 4 24 4 6 Security Set or clear the Supervisor account s password Administrator Password Set Setup Administrator Password User Password Set User...

Page 47: ...changes of all menu then exit setup configure driver Finally resets the system automatically Save Changes and Exit Exit system setup after saving the changes Discard Changes and Reset Reset the syste...

Page 48: ...m unit caused by failure to abide by the hints in this manual and on the unit especially the safety instructions Portwell Inc shall not be required to respect the warranty even during the warranty per...

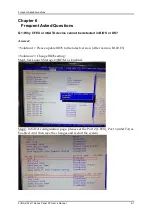
Page 49: ...device cannot be detected in BIOS or OS Answer Solution 1 Please update BIOS to the latest version After version R1 00 E3 Solution 2 Change BIOS setting Step1 Set Launch Storage OpROM as Enabled Step2...

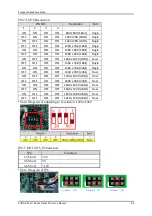
Page 50: ...User can replace the touch panel display from 12 to 21 5 but using the same IPC box Note JP4 SW2 need to be adjusted based on each panel size Jumper Location Step 1 Detach the IPC box from the panel...

Page 51: ...le ON OFF OFF ON 1280 x 1024 24bit Dual OFF OFF OFF ON 1366 x 768 18bit Single ON ON ON OFF 1366 x 768 24bit Single OFF ON ON OFF 1440 x 900 24bit Dual ON OFF ON OFF 1400 x 1050 24bit Dual OFF OFF ON...

Page 52: ...EDA touch panel display 1280 x 1024 5V To install 21 5 PEDA touch panel display 1920 x 1080 5V Q3 How to set CFEX as a system key Answer CEFX can serve as a system key so that system needs to detect t...

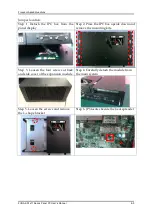
Page 53: ...he panel display Step 2 Place the IPC box upside down and remove the mounting kits Step 3 Loosen the four screws at back and side cover of the expansion module Step 4 Carefully detach the module from...

Reviews: