


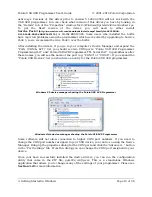
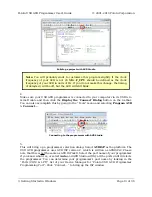


Programming FLASH .. OK!
Reading FLASH .. OK!
FLASH contents is equal to file.. OK
Leaving programming mode.. OK!
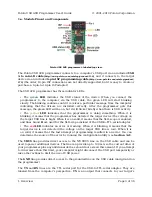
If there were no problems, the LED connected to PD1 of your AVR should now be
flashing! Note that if you are trying this on a 3pi robot and you have not yet soldered
in the optional through-hole LEDs, the flashing LED will be on the bottom of the robot.
If there was a problem, please see Troubleshooting (
) for help identifying and
fixing it.
3.b.1. Using Advanced Features of AVR Studio
This section provides a brief overview of the programming features of AVR Studio that were
not covered in
. You will not typically need to use of these advanced features,
but it is good to know about them for the rare occasions when you will need them. Please
see the Atmel’s AVR Studio documentation for more detailed descriptions of these features.
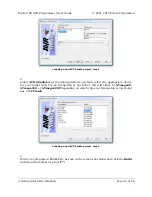
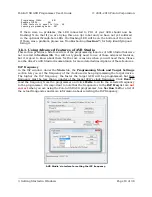
ISP Frequency
In the ISP window, under the
Main
tab, the
Programming Mode and Target Settings
section lets you set the frequency of the clock used when programming the target device.
The higher the ISP frequency, the faster the target AVR will be programmed, but this
frequency must be less than a quarter of the target AVR’s clock frequency. Click
Read
to
read the frequency from the programmer and click
Write
to write the selected frequency
to the programmer. It is important to note that the frequencies in the
ISP Freq
list are
not
correct
when you are using the Pololu USB AVR programmer. See
for a list of
the actual frequencies and more information about selecting the ISP frequency.
AVR Studio’s interface for setting the ISP frequency.
Pololu USB AVR Programmer User's Guide
© 2001–2010 Pololu Corporation
3. Getting Started in Windows
Page 16 of 36