background image

Manual


LCD Television

Questions? Need some help?

 This manual should help you understand your new product. 

 If you have questions, call our helpline number found on the 

insert with this icon:


Or visit www.polaroid.com.

Summary of Contents for DEFINIA

Page 1: ...l LCD Television Questions Need some help This manual should help you understand your new product If you have questions call our helpline number found on the insert with this icon Or visit www polaroi...

Page 2: ...Menu 20 How to Customise Picture Settings 21 How to Customise Audio Settings 22 How to Customise ARC Aspect Ratio Control 23 How to Use Picture in Picture PIP Functions 24 How to Setup Analogue TV AT...

Page 3: ...ned in this user s manual Only use attachments and accessories specified by the manufacturer If wall mounting your TV be sure to use a VESA complaint wall mounting kit Always remove the power cord fro...

Page 4: ...HDMI Licensing LLC 2007 by All rights reserved Polaroid and Polaroid and Pixel are trademarks of Polaroid Corporation Changes are periodically made to this document Changes technical inaccuracies and...

Page 5: ...ed inside the TV s cabinet The UK is going Digital Find out if you already have a digital signal or when your area will switch off the old signal by visiting http www digitaluk co uk Even if you don t...

Page 6: ...he following materials These items are all you need to set up and operate your LCD TV in its basic configuration Note The Power Cord may differ depending on country Package Contents Introduction to Yo...

Page 7: ...he insert with the phone icon at the bottom of this page for the service number for your area Improved Digital Teletext Services MHEG 5 Bring faster access to on screen interactive information service...

Page 8: ...ed Subwoofer Output Provide maximum flexibility and a design to fit your space and style Automatic Volume Control Option Reduces volume increases during commercial breaks PC Connectivity It is simple...

Page 9: ...ence the instructions included in the wall mounting kit sold separately To remove the TV stand from your LCD TV follow the instructions below 1 To prevent damaging the surface of the LCD TV place the...

Page 10: ...Remove the 4 screws on the speaker brackets and Speaker Brackets put the speaker brackets and screws in a safe place 2 Remove the 4 screws on the speaker box Speaker Box 3 Disconnect the 2 sets of sp...

Page 11: ...the wall outlet 3 Insert the two supplied AAA batteries into the remote control using the instructions below 4 Connect any other audio video equipment to your LCD TV using the instructions in the sec...

Page 12: ...e OSD menu press to select a sub menu item MENU Press once to display the OSD On Screen Display menu Press again exit SOURCE Press to choose from different input signal sources Press to turn LCD TV On...

Page 13: ...cables red and white ANT IN Connect antenna cable to the ANT IN from antenna to receive standard or digital television Composite A V Outputs Connect to the Composite VIDEO and AUDIO L R inputs on AV...

Page 14: ...PT Switch to TV when waiting for required text page REVEAL Display hidden info i e solutions for puzzle or quiz EXPAND Enlarge the top 1 2 or bottom 1 2 of TELETEXT page TIME SUB PAGE Press to access...

Page 15: ...s in 10 minute intervals SUB TITLE ATV Analogue show information DTV digital toggle SUB TITLE On Off GUIDE ATV Analogue press to navigate DTV digital display 7 days EPG SOUND Select sound according to...

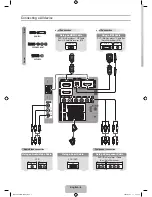
Page 16: ...oid com Connecting Your LCD TV to A V Devices This TV offers many different options for connecting your A V devices Connecting your device to your TV using higher quality video connections will bring...

Page 17: ...ces are capable of this type of connection For the best viewing experience connect your TV to an HD digital cable satellite box HD DVD player and or other HD A V device using the HDMI connection Make...

Page 18: ...r visit www polaroid com Connect a VGA cable to the D SUB VGA input on the TV and the VGA output on a PC To also receive sound connect an audio cable to the PC AUDIO IN jack on the TV and AUDIO OUT ja...

Page 19: ...TV Connecting Your LCD TV s Power Cord Power Cord Power cord will vary depending on country AC Power Switch 1 Connect the power cord into the AC IN located in the back of the TV and the other end to t...

Page 20: ...sconnect the main voltage please turn off the AC Power Switch or remove the power plug from the socket TURN ON Once all of your connections have been made and the AC Power Switch is ON press the butto...

Page 21: ...press OK 4 Press the or button to select your preferred Language and press OK 5 Press the or button to highlight Start Channel Scan and press OK to start Channel Scan When the Channel Scan Progress re...

Page 22: ...ion How to use the Main Menu and Sub Menu 1 With the power on press MENU on the remote control The OSD On Screen Display Main Menu will appear 2 Press or to select the main menu option Press to enter...

Page 23: ...s BACKLIGHT Adjust the backlight level of the screen CONTRAST Control the difference between the brightest and darkest regions of the picture BRIGHTNESS Control the overall brightness of the picture C...

Page 24: ...Automatic Volume Correction Automatically adjust the volume by lowering the speaker output when the volume is high or by raising the speaker output when the volume is low Switch to ON or OFF to enabl...

Page 25: ...ck strips at the top and bottom or sides of the screen PANORAMIC Expand 4 3 broadcasts to fit the 16 9 screen by expanding the image at the edges of the screen This creates less distortion at the cent...

Page 26: ...mponent S VIDEO as the sub picture NOTES The LCD TV has to be connected two AV sources at least and then PIP function can be activated To change channels in PIP picture please switch PIP picture to ma...

Page 27: ...nu or press EXIT to exit the menu Channel Options MAIN MENU OPTION Automatic Program Search Search and store all available channels SUB MENU OPTION Country Choose a county SUB MENU OPTION Start Channe...

Page 28: ...ement and press OK to enter the edit menu 4 Use the button to highlight Rename and press OK to enter the Channel Naming menu 5 In the Channel Naming menu press or to select the programme that you want...

Page 29: ...ettings 5 Press OK to confirm your setting 6 Press MENU to return to the previous menu or press EXIT to exit the menu Channel Options MAIN MENU OPTION DTV Output Recording Record all available channel...

Page 30: ...he MENU button on the remote control to display the on screen Main Menu Use the buttons to select Channel Options and press 3 Use the buttons to highlight DTV Output Recording Press OK to enter the se...

Page 31: ...se the buttons to highlight Channel Scan Press OK to enter the sub menu 4 Press to Country and press OK 5 Use the buttons to select your desired country and press OK 6 Press to highlight Confirm and p...

Page 32: ...it the menu SETUP Options Banner Display Time Adjust the display time of the banner Switch to 3 5 or 10 seconds Subtitle Language Choose your preferred subtitle language Audio Language Choose your pre...

Page 33: ...the MENU button on the remote control to display the on screen Main Menu Use the buttons to select Channel Options and press 3 Use the buttons to highlight New Channel Alert Press OK to enter the sett...

Page 34: ...TV SUBTITLE menu Press the button to display more detailed information about the selected channel Press the GREEN button to display the DTV Multi Audio menu Press the YELLOW button to display the DTV...

Page 35: ...turned on in DTV mode press TV button to select DTV source 2 Press the GUIDE button on the remote control to display the EPG 3 When the EPG appears on the screen the following options will be availabl...

Page 36: ...Profiles available is three users 3 Press the BLUE button on the remote control to rename or edit Users Profiles see picture 3 below 4 Press the GREEN button on the remote control to enter All Channel...

Page 37: ...Screen Display OSD Sub Menu Options Language Select language for the OSD OSD Contrast Adjust the OSD contrast OSD Brightness Adjust the OSD brightness Transparency Adjust the OSD transparency Return R...

Page 38: ...o update the current status 5 Enter the PIN Personal Identification Number by using numeric buttons 0 9 6 Press MENU to return to the previous menu or press EXIT to exit the menu Setup your Child Lock...

Page 39: ...to select Preferences and press 3 Use the buttons to highlight On Timer Press OK to enter the sub menu 4 Press highlight TV on after Press OK to set the timer 5 Enter the desired hours and minutes by...

Page 40: ...nectivity only appears in VGA mode Sub Menu Options Auto Image Automatically adjust picture H Position Adjust the horizontal position of the picture V Position Adjust the vertical position of the pict...

Page 41: ...e Display the source of the main picture Main Format Main picture input format Sub Source Display the source of the sub picture Sub Format Sub picture input format Sound Mode Display the sound mode in...

Page 42: ...umber indicates your selection and the second page number shows the current page being displayed 3 Press TELETEXT to toggle between the following text modes TEXT MIX PAT OFF TEXT Mode MIX Mode PAT Mod...

Page 43: ...he HOLD button on the remote control to stop automatic page change Display The STOP symbol will be displayed at the top left hand corner of the screen and the automatic page change will stop 2 Press t...

Page 44: ...all mount size 200 x 100 LCD Specifications Panel Size 37 94cm Brightness 500 cd m2 Contrast Ratio 1000 1 Resolution 1366 x 768 Inputs Composite A V 1 Component YPbPr 1 S Video with Audio 1 VGA D Sub...

Page 45: ...Sub with Audio 1 HDMI with Audio 2 Composite A V Output 1 RF Input 1 SCART Input 2 Power Source AC 100 240V 50 60HZ Power Consumption 310W Dimensions Weight HxWxD 816 x 1067 x 270mm 36 1kg VESA wall...

Page 46: ...Make sure the video source is properly connected to desired source Make sure the correct input mode is selected The fluorescent lamp may have reached the end of its life Contact an authorized service...

Page 47: ...icture is too dark Select a different APC mode Check the Brightness of Picture Settings The fluorescent lamp may have reached the end of its life Contact an authorized service center Remote control do...

Page 48: ...pness of Picture Settings The picture moves The source signal may be weak The provider may be experiencing difficulties Check input connections The picture is doubled or tripled The source signal may...

Page 49: ...ENGLISH 47 Questions Need some help Call our helpline number found on the insert with this icon Or visit www polaroid com 20071024...

Reviews: