Polaroid CIA-01036B User Manual Download Page 1

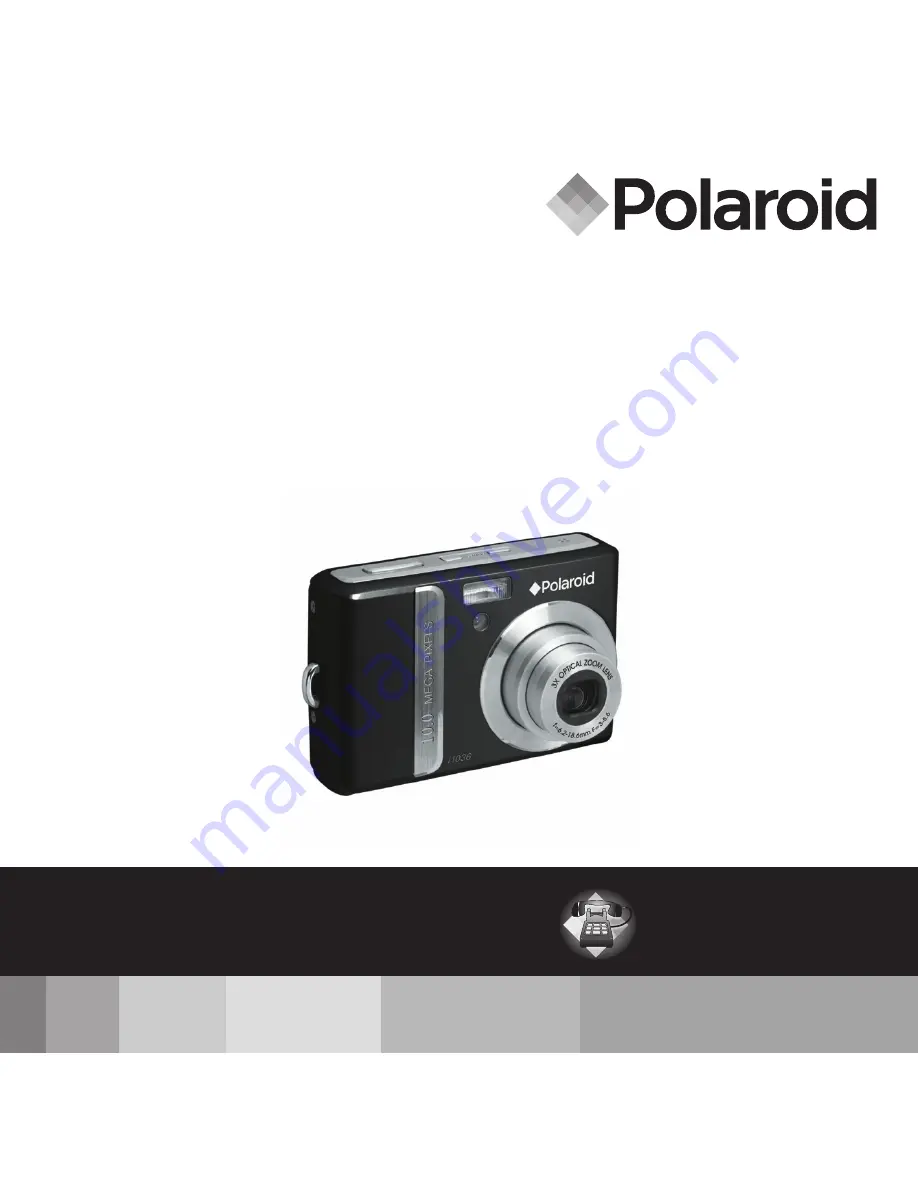
10.0 Megapixel Digital Camera 

i1036

User Guide

Questions?

Need Some Help?

This manual should help you 

understand your new product.

or visit 

www.polaroid.com/support.

If you still have questions, call 

our help line found on the 

insert with this icon:

DIGITAL QUALITY, POLAROID SIMPLICITY™

Summary of Contents for CIA-01036B

Page 1: ...Guide Questions Need Some Help This manual should help you understand your new product or visit www polaroid com support If you still have questions call our help line found on the insert with this i...

Page 2: ...era Information 8 Battery Information 9 2 Introduction 10 Camera Features 10 Package Contents 11 Camera Views 12 Camera Buttons 14 Navigation Control 14 Camera Memory 16 Internal memory 16 External st...

Page 3: ...mage Stabilizer 29 Setting the Zoom Control 29 Using Flash 30 Setting the Focus Mode 31 Using the Function Manual 31 My Mode 32 Resolution 32 Quality 33 EV Compensation 33 White Balance 34 ISO 35 Mete...

Page 4: ...aying Movies 57 Playing Voice Recording 58 Playing Voice Memo 59 Deleting an Image Video Audio 59 Using the Delete Button 59 Setting Playback Menu 60 Setting Slideshow 61 Deleting Files 62 To delete a...

Page 5: ...ing File Numbering 75 Setting TV Out 76 Setting LCD Brightness 76 Setting Battery Type 76 Setting Memory Kit 76 Reset All 77 8 Installing the Software onto a Computer 78 Installing the Software 78 Sof...

Page 6: ...mera User Guide www polaroid com Folder Structure 84 File Naming 84 11 Troubleshooting 86 12 Getting Help 87 Polaroid Online Services 87 ArcSoft Software Help 87 13 Specifications 88 Specifications 88...

Page 7: ...imits are designed to provide reasonable protection against harmful interference in a residential installation This equipment generates uses and can radiate radio frequency energy and if not installed...

Page 8: ...y cause undersired operation Trademark Recognition Windows 98 2000 ME XP are registered trademarks of Microsoft Corporation in the United States and or other countries Windows is an abbreviated term r...

Page 9: ...damage to the product and possibly cause an explosion When the camera is used for an extended period of time it is normal for the camera body to feel warm Download all pictures and remove the batteri...

Page 10: ...nch CCD image sensor 2 7 inch color LCD display 32MB internal flash memory with optional external SD SDHC card Supports up to 4GB of SD card and up to 32GB of SDHC card Sleek metallic finish Easy to u...

Page 11: ...1036 The CD ROM includes Polaroid i1036 Camera Driver PC ArcSoft MediaImpression PC Mac ArcSoft Print Creations PC Mac Adobe Acrobat Reader PC Mac User Guide in PDF format USB Cable Wrist Strap 2 x AA...

Page 12: ...w polaroid com Camera Views Front View Back View Flash Zoom Lens Self timer LED AF Assist Lamp Microphone MENU FUNC DISP SET Zoom buttons Play button LCD screen Menu button SET button 4 way navigation...

Page 13: ...036 Digital Camera User Guide www polaroid com Top View Image Stabilizer button Speaker Shutter button Power button Bottom View Battery door Tripod socket SD card door Left Right View Hand strap retai...

Page 14: ...yback mode If the camera is turned on press to toggle camera between the Playback or Record mode Zoom Press the zoom buttons to change zoom magnification Menu Press to enter the menu Function Delete I...

Page 15: ...d video playback 4 In the Menu press to exit a submenu or to navigate through the menu selections Up Face Tracking Rotate 1 In the Menu press to navigate through the menu and submenu selections 2 In t...

Page 16: ...ernal memory Expanding Your Camera s Memory Your camera supports SD cards of up to 4GB in size It also supports SDHC card with a maximum capacity of 32GB If there is a memory card inserted in the SD c...

Page 17: ...MENU FUNC Inserting the Battery FollowtheseinstructionstoinserttheAAbatteryintothebatterycompartment Please read Battery Information on page 9 before inserting removing the battery 1 Open the battery...

Page 18: ...up to 32GB in size Follow these instructions to insert the SD SDHC card 1 Make sure the power is off before inserting a SD SDHC memory card 2 Swing on the SD card door in the direction of the arrow an...

Page 19: ...yback mode Initial Settings When you turn on your camera for the very first time you will be asked to establish the initial settings of your camera When you turn the Power button on the Language Menu...

Page 20: ...the Record mode Switching between Record mode and Playback Mode Press the Play button to switch between Record and Playback modes Selecting the Record mode options section Maximize the quality and ea...

Page 21: ...following illustrations shows the LCD screen layout and the icon descriptions Record Mode Screen Layout 307 307 ISO AUTO F 3 0 F 3 0 1 30 1 30 0 0EV 0 0EV 10M 1 2 3 4 5 14 16 19 15 18 17 20 6 7 8 10 1...

Page 22: ...ettings 14 ISO Displays ISO settings 15 Focus area Use to frame subject you wish to capture 16 Shutter speed Displays shutter speed settings 17 Aperture value Displays aperture settings 18 Shake warni...

Page 23: ...k mode Indicates playback mode 2 Protect Indicates the file is protected 3 Movie clip Indicates the file is a movie 4 Button intro Indicates the button to press on the camera to play a movie or audio...

Page 24: ...tro Indicates the button to press on the camera to play a movie or audio file 5 File no Total no Indicates the file number over the total number of files in the memory card 6 Battery Indicates battery...

Page 25: ...button to press on the camera to play a movie or audio file 4 File no Total no Indicates the file number over the total number of files in the memory card 5 Battery Indicates battery power level 6 Sto...

Page 26: ...ress the DISP button repeatedly to change the LCD display from one type to another In Record Mode the LCD display can be changed into any of the following 307 307 10M 307 307 0 0EV 0 0EV 10M ISO AUTO...

Page 27: ...1 01 01 57 SET 27 27 27 27 2009 01 01 01 57 2009 01 01 01 57 SET 10M OSD on Full OSD on OSD off NOTE LCD display cannot be changed for the following situations Manual exposure mode Recording movie or...

Page 28: ...ton halfway down The camera automatically adjusts the focus and exposure When the camera is ready to take the photo the focus frame turns green the shutter speed and aperture value are displayed When...

Page 29: ...y mechanically adjusting the lens while digital zoom is activated through the menu settings Press to zoom in Press to zoom out Zoom buttons 1 Press the Zoom buttons to zoom in or zoom out an image 2 T...

Page 30: ...ipped with five flash modes Auto The flash fires automatically whenever extra lighting is needed Red eye reduction The flash fires twice to reduce the red eye effect Always on The flash fires whenever...

Page 31: ...photography If Macro is enabled you can capture the detail and sharpness of a very close image by fixed focus Please refer to page 88 for the macro focus range 307 307 10M Macro enabled PF Pan Focus W...

Page 32: ...options the items on the menu bar changes synchronously to the corresponding available settings Resolution The Resolution function is used to set the resolution before you capture the image Changing...

Page 33: ...ion of your camera may be misled into giving the wrong readings The EV Compensation function allows you to adjust the exposure value and correctly expose your images Available for still images only Fi...

Page 34: ...t sunny conditions Cloudy Ideally used for cloudy conditions Tungsten Ideally used for indoor photos with tungsten or halogen lighting without a flash Flourescent 1 Ideally used for indoor photos with...

Page 35: ...00 3200 3M 16 9 2M VGA 6400 16 9 2M VGA Auto N 10M AWB ISO AUTO ISO AUTO ISO 50 ISO 100 ISO 200 ISO 800 ISO 400 0EV NOTE If the ImageStabilizer is enabled ISO is automatically set to Auto and cannot b...

Page 36: ...D display changes Normal N 10M AWB ISO AUTO V N S R G BW 0EV Icon Item Description Normal The camera records normally Vivid The camera captures the image with more contrast and Sepia Images are captur...

Page 37: ...tup other capture settings To go to Record Menu Set the camera to Record mode See Switching between Record Mode and Playback Mode on page 20 1 Press MENU to launch Record Menu OFF OFF Record Mode Driv...

Page 38: ...ghtness See Using Aperture Priority Mode on page 44 Shutter Priority This feature lets users adjust the shutter speed and the camera automatically selects the aperture value to match the brightness M...

Page 39: ...This feature is used to capture warm candle light effects Night Portrait This feature is used to capture portrait pictures with night or dark background Soft Skin This feature enhances skin tone and...

Page 40: ...ng to auto detect faces to capture portraits photos without the help of others When more than two faces are detected AF is automatically activated The camera starts a count down and captures a picture...

Page 41: ...is detected NOTE When capturing an image with several faces face tracking function may take up more time tracking faces for the first time Using Intelligent Scene Mode With the Intelligent Scene Mode...

Page 42: ...r No Display modes are enabled when the shutter button is pressed halfway down The table below shows the modes supported by Intelligent scene Icon Intelligent Scene Modes Description Portrait This mod...

Page 43: ...jects with closed eyes After shooting when the camera detects that the subject has blinked a menu selection appears to ask the user whether to save the image or not This feature saves time in managing...

Page 44: ...r the adjust mode 3 Use the or DISP keys to select the aperture value options 4 Press the shutter button to capture the image 307 307 10M SET Adjust F 3 0 F 3 0 Displays the aperture value Using Shutt...

Page 45: ...utter speed options or use the or DISP keys to select the aperture value options 4 use the or DISP keys to increase or decrease the aperture or shutter speed values 307 307 SET Adjust F 3 0 F 3 0 1 30...

Page 46: ...to go through the selection 3 Press the SET button to save and apply changes Record Mode Drive Mode AEB AF Area AF Lamp Sharpness OFF OFF 10 sec 2 sec Double Burst Off 10 2 x2 OFF The table below show...

Page 47: ...nges Record Mode Drive Mode AEB AF Area AF Lamp Sharpness OFF OFF On Off OFF ON Setting the AF Area AF stands for Automatic Focus This feature determines the area on which the camera focuses To set AF...

Page 48: ...ISP keys to go through the selection 3 Press the SET button to save and apply changes Record Mode Drive Mode AEB AF Area AF Lamp Sharpness OFF OFF Auto Off OFF Setting Sharpness This function allows y...

Page 49: ...ton to save and apply changes Saturation Contrast Digital Zoom Date Stamp Auto Review OFF OFF High Normal Low The table below shows the available Saturation settings Icon Item Description High Enhance...

Page 50: ...iew OFF OFF Intelligent Zoom Standard Zoom Off OFF The table below shows the available Saturation settings Icon Item Description Intelligent Zoom Enlarges the image digitally with almost no distortion...

Page 51: ...ime Off OFF Saturation Contrast Digital Zoom Date Stamp Auto Review OFF OFF To set Date Stamp 1 From the Record menu select Date Stamp 2 Use the or DISP keys to go through the selection 3 Press the SE...

Page 52: ...Mode AEB AF Area AF Lamp Sharpness OFF OFF OFF NOTE Sound cannot be recorded while pressing the control When the maximum capacity for a single video has been reached simply press the shutter button ag...

Page 53: ...orts two file upload standards Single File Uploader The maximum movie file size is up to 100 MB YouTube Uploader The maximum movie file size is up to 1 GB Most uploaded movie length ranges within 5 mi...

Page 54: ...for a YouTube movie is up to 10 minutes Recording Voices 1 From the Record mode menu select Voice The Voice Recording screen layout is displayed on the LCD display 3 Press the Shutter button to start...

Page 55: ...e 23 Still Image Movie Audio Clip 27 27 27 27 2009 01 01 01 57 2009 01 01 01 57 SET 10M 27 27 27 27 2009 01 01 01 57 2009 01 01 01 57 SET 10M 27 27 27 27 2009 01 01 01 57 2009 01 01 01 57 SET 27 27 27...

Page 56: ...ded movie The displayed image is the first frame of the movie clip Locked File Indicates that the image has been locked Locked files cannot be edited or deleted Voice Record Indicates a voice recordin...

Page 57: ...d rewind speed of up to 4x 27 27 27 27 2009 01 01 01 57 2009 01 01 01 57 SET 5 During playback use the to control volume Press the T button to increase volume Press the W button to decrease volume 6 P...

Page 58: ...ding 1 Put the camera into Playback mode 2 Use the navigation controls to scroll through the saved images When viewing a voice recording file the LCD display displays the screen layout of Audio clips...

Page 59: ...e the to control volume The volume icon appears on the screen Press the T button to increase volume Press the W button to decrease volume 5 Press the key to pause playback Press the key again to resum...

Page 60: ...epeat steps 4 to 7 9 To close the Delete function and go back to viewing insingle navigation mode select Cancel Setting Playback Menu The Playback menu allows you to edit images delete files records v...

Page 61: ...ve through the options Select whether to Continue or Exit the slideshow 6 Press the SET button to apply selected option To view slideshow 1 From the Slideshow menu use the or DISP keys t to move throu...

Page 62: ...e files to delete at the same time All Delete all files Slide Show Delete Protect Red eye Correction Voice Memo Photo Edit Single Voice Only Multi All To delete a single file 1 Select Single in the De...

Page 63: ...e attached voice memo and go back to Playback mode NOTE The Voice Only submenu is disabled if the current image displayed at the time you access the Delete menu does not have any attached voice memo T...

Page 64: ...2 The Protect submenu is displayed on the LCD display Select available settings Single Select one file to Lock Multi Select multiple files from the thumbnail view to lock Lock All Lock all files Unlo...

Page 65: ...red files to protect are marked 5 Press the MENU button A confirmation selection appears 6 Select Yes 7 Press the SET button to lock files and go back to Playback mode Yes Cancel Changeprotectsettings...

Page 66: ...Correction 1 Set the camera to Playback mode 2 Press the or keys to scroll and select an image 3 Press the MENU button to launch the Playback menu 4 Select Red Eye Correction 5 Select Start 6 Press th...

Page 67: ...the or keys to scroll and select an image 3 Press the MENU button to launch the Playback menu 4 Select Voice Memo 5 Select Start then press the SET button to start recording 30 sec 30 sec Time left n...

Page 68: ...5 Press the or keys to scroll and select an option As you move through the selection the preview on the LCD display changes synchronously The succeeding table shows the available settings Icon Type De...

Page 69: ...ack menu 4 Select Trim The Trim screen layout is displayed on the LCD display 5 Use the control to change size SET 5M SET 5M Shows the approximate loca tion of the displayed area Current image size 4...

Page 70: ...amera to Playback mode 2 Press the or keys to scroll and select an image to resize 3 Press the MENU button to launch the Playback menu 4 Select Resize The Resize submenu is displayed on the LCD displa...

Page 71: ...till be displayed startup even if the selected image was deleted Setting DPOF The Digital Print Order Format DPOF function allows you to mark still images in your memory card for printing and allows y...

Page 72: ...ect Reset on the DPOF submenu A confirmation message appears 2 Select Yes 3 Press the SET button to reset DPOF settings Yes Cancel Reset DPOF NOTE You can specify up to 99 copies for DPOF If you speci...

Page 73: ...ecord Playback Menu 2 Use the or keys to change the menu tab to Setup menu 3 Use the or DISP keys to move through the menu selections 4 To select an item press the SET button or 5 Change the submenu s...

Page 74: ...ode the camera eventually turns off power Available settings are 1 min 3 min and 5 min 1min Sounds Power Save LCD Save Date Time Language File Numbering OFF 1 min 3 min 5 min Off 1min 3min 5min OFF Th...

Page 75: ...anguage of the on screen display OSD menu 1 Use the navigation control to scroll through the list and select the desired language 2 Press the SET button to confirm and apply settings Language Select O...

Page 76: ...ght Enhances LCD brightness Normal Normal LCD brightness TV Out LCD Brightness Battery Type Memory Kit Reset All NTSC Alka Bright Normal Setting Battery Type Use this function to select the battery ty...

Page 77: ...memory is empty the Copy to Card function is disabled Reset All Use this function to reset the camera to its factory settings However the following settings are exceptions and not affected by Reset Da...

Page 78: ...For better quality graphics and sound when watching your video clips on the computer it is recommended to install DirectX version 9 0 or above To download visit www microsoft com 1 Before you begin c...

Page 79: ...ows complete with soundtrack Upload your files easily to YouTube Or share them through simple email attachments or popular photo printing ArcSoft Print Creations A family of fun and easy print project...

Page 80: ...included CD ROM 2 Download movie files from your digital camera to your computer 3 Open ArcSoft software and select Video 4 Select the movie file you want to upload and click Upload to YouTube icon 5...

Page 81: ...Add Remove Program Properties in Control Panel and select Polaroid Digital Camera program then click Add Remove button 2 The confirmation dialogue box appears please click Yes to confirm removing the...

Page 82: ...in 1 cable to the USB port on the bottom of your camera 4 Connect the other end of the cable to the TV s AV input port 5 The LCD screen turns black and all images and video clips are displayed on the...

Page 83: ...the Camera to a Printer You You can print your photos directly using a PictBridge compatible printer 1 Turn on your camera 2 Set PictBridge settings 3 Connect the camera to the printer using the USB...

Page 84: ...aptured images using the Auction mode are saved in this folder _UTUBE Captured videos using the YouTube mode are saved in this folder Folder names begin with a 3 digit number from 100 to 999 and follo...

Page 85: ...the file number Plug in a new memory card NOTE Do not change the folder and file names in the memory card using your PC It may be unable to playback the data using the camera Need help with your digi...

Page 86: ...e memory card with a new one or delete unnecessary images LCD screen displays File locked This file is locked Unlock the file See Protecting Unprotecting Files on page 64 LCD screen displays Card lock...

Page 87: ...001 E mail eurosupport arcsoft com For China ArcSoft China Support Center Hangzhou Tel 86 571 88210575 E mail support arcsoft com cn Web http www arcsoft com cn new support For Japan ArcSoft Japan Sup...

Page 88: ...lovenian Greek Swedish Norwegian Finnish Danish Arabic Indonesian Malay Thai Japanese Korean Simplified Chinese Traditional Chinese Aperture F 3 0 5 6 Shutter Type Mechanical and Electronic Shutter Sp...

Page 89: ...Voice Rec Resolution Still Image 10M 3648 X 2736 3 2 3648 X 2432 8M 3264 X 2448 5M 2592 X 1944 3M 2048 X 1536 HD 1920 x 1080 VGA 640 X 480 Movie Clip Size 16 9 640 X 480 320 X 240 YouTube White Balanc...

Page 90: ...Still Image Mode Image Resolution 10M Quality Fine Metering Multi White Balance for Pictures Auto ISO Auto Effect Normal AF Area wide Flash Intensity Auto EV Compensation 0EV Photo Frame N A Sharpnes...

Page 91: ...Balance Auto Effect Normal Sharpness N A Saturation N A Contrast N A Focus Mode Normal Setup Mode Auto Review on Digital Zoom Auto System Sound sound 1 LCD Brightness Normal Power Save 1min Date Time...

Page 92: ...a User Guide www polaroid com Questions Need some help This manual should help you understand your new product If you have questions call our customer service help number Look for the insert with this...

Page 93: ...93 Polaroid i1036 Digital Camera User Guide www polaroid com US0709 Part No UMI1036US001...

Page 94: ......

Reviews: