11.50
9928487 R01 - 2018 RANGER XP 1000 Service Manual
© Copyright Polaris Industries Inc.
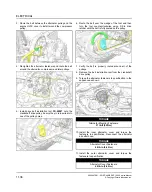
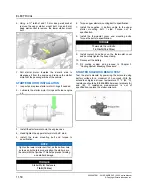
6. Using a ¼" ratchet and 10 mm deep well socket,
remove the upper starter mount bolt. Use an 8 mm
deep well socket to remove the lower starter mount
bolt.
7. Pull starter motor towards the driver's side to
disengage it from the engine and remove the starter
motor out the passenger side of the vehicle.
STARTER MOTOR INSTALLATION
1.
Inspect and replace starter motor O-rings if needed.
2.
Lubricate the starter motor O-rings with clean engine
oil.
3.
Install the starter motor onto the engine case.
4.
Hand tighten the upper starter motor bolt / stud.
5.
Install the lower mounting bolt and torque to
specification.
NOTE
Tighten the lower starter bolt first, as the bottom hole
acts as a pilot hole to properly align the starter drive
(bendix) with the flywheel. This helps prevent binding
and starter damage.
TORQUE
Starter Motor Fasteners:
7 lb-ft (10 Nm)
6.
Torque upper starter mounting bolt to specification.
7.
Install the negative (-) battery cable to the upper
starter
mounting
bolt
/
stud.
Torque
nut
to
specification.
8.
Install the thermostat cover and mounting bolts.
Torque the bolts to specification.
TORQUE
Thermostat Cover Bolts:
7 ± 1 lb-ft (10 ± 1 Nm)
9.
Install coolant hose back on the thermostat cover
and securely tighten the hose clamp.
10. Reconnect the battery.
11. Fill cooling system and proceed to Chapter 3
“Cooling System Bleeding Procedure”.
STARTER SOLENOID BENCH TEST
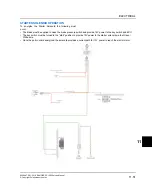
Test the start solenoid by powering the solenoid using
battery voltage for a
maximum of 5 seconds
. With the
solenoid energized at room temperature 77 ° F (25 ° C),
resistance should be
2.5 Ω ± 20%
between terminals (A)
and
(B).
If
resistance
measurement
is
out
of
specification, replace the starter solenoid.

