10.39
ELECTRICAL
10
STARTER SYSTEM
Troubleshooting
Starter Motor Does Not Turn
• Battery discharged. Low specific gravity
• Loose or faulty battery cables or corroded connections
(see Voltage Drop Tests)
• Related wiring loose, disconnected, or corroded
• Poor ground connections at battery cable, starter motor
or starter solenoid (see Voltage Drop Tests)
• Faulty key switch
• Faulty kill switch
• Faulty starter solenoid or starter motor
• Engine problem - seized or binding (Can engine be
rotated easily with recoil starter?).
Starter Motor Turns Over Slowly
• Battery discharged - low specific gravity
• Excessive circuit resistance - poor connections (see
Voltage Drop Test below)
• Engine problem - seized or binding (Can engine be
rotated easily?)
• Faulty or worn brushes in starter motor
• Automatic compression release inoperative
Starter Motor Turns - Engine Does Not Rotate
• Faulty starter drive
• Faulty starter drive gears or starter motor gear
• Faulty flywheel gear or loose flywheel
Voltage Drop Test
The Voltage Drop Test is used to test for bad connections. When
performing the test, you are testing the amount of voltage drop
through the connection. A poor or corroded connection will
appear as a high voltage reading. Voltage shown on the meter
when testing connections should not exceed .1 VDC per
connection or component.
To perform the test, place the meter on DC volts and place the
meter leads across the connection to be tested. Refer to the chart
on 10.27 to perform voltage drop tests on the starter system.
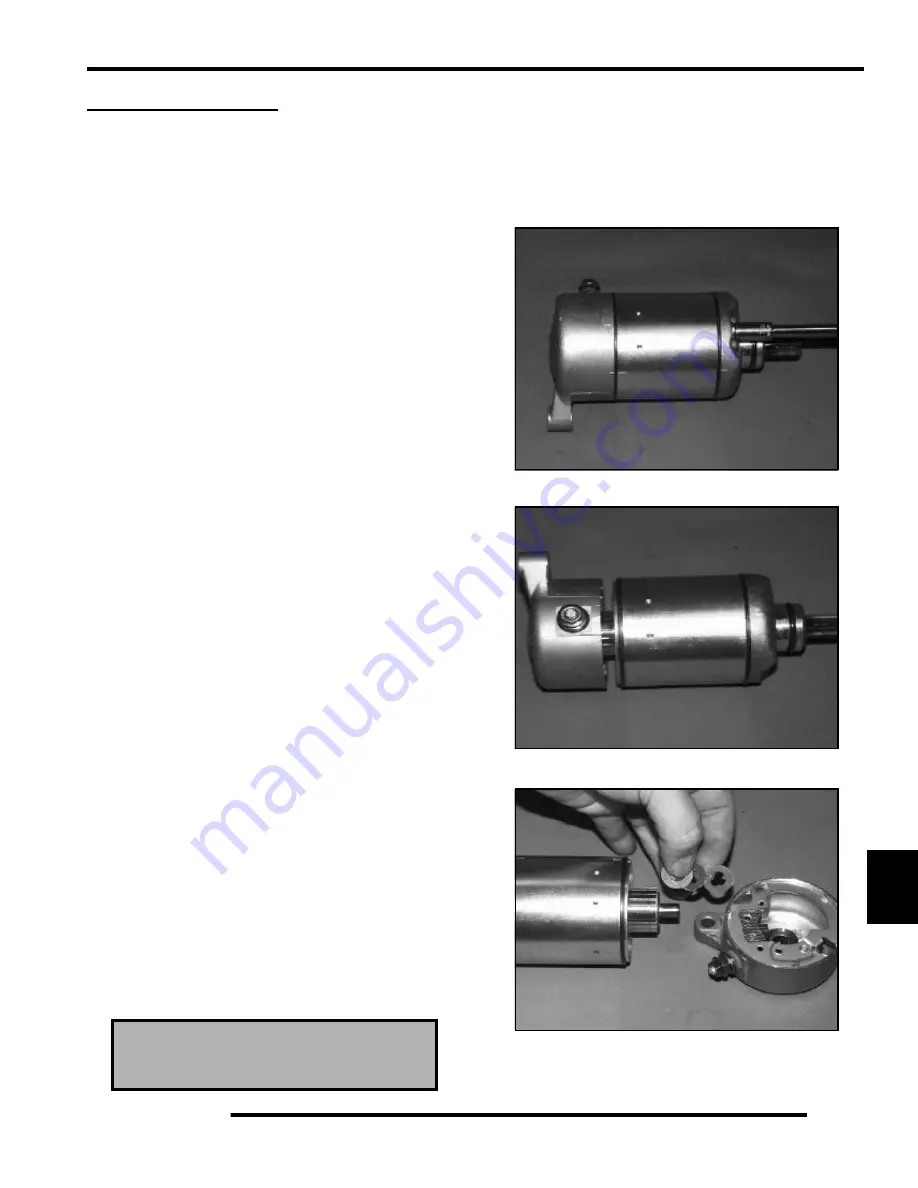
Starter Motor Disassembly
NOTE: Use only electrical contact cleaner to clean
starter motor parts. Some solvents may leave a
residue or damage internal parts and insulation.
1. Note the alignment marks on both ends of the starter motor
casing. These marks must align during reassembly.
2. Remove the two bolts, washers, and sealing O-Rings.
Inspect O-Rings and replace if damaged.
3. Remove brush terminal end of housing while holding other
two sections together.
4. Remove shims from armature shaft.
NOTE: All shims must be replaced during
reassembly.
Voltage should not exceed
0.1 DC volts per connection
Summary of Contents for Ranger 500 2x4 2007
Page 1: ......
Page 20: ...1 18 GENERAL INFORMATION SAE Tap Drill Sizes Metric Tap Drill Sizes Decimal Equivalents ...
Page 82: ...3 23 ENGINE 3 Cylinder Head Exploded View EH50PL EFI Shown A A ...
Page 153: ...4 45 ELECTRONIC FUEL INJECTION 4 Fuel Pump Circuit Ignition Coil Circuit ...
Page 157: ...4 49 ELECTRONIC FUEL INJECTION 4 Diagnostic Connector Circuit ...
Page 296: ...10 10 ELECTRICAL POWER DISTRIBUTION MODULE NON EFI MODELS PDM Operation ...
Page 309: ...10 23 ELECTRICAL 10 EFI Cooling System Break Out Diagram PDM RD WH Key On 12 V Power ...
Page 332: ...10 46 ELECTRICAL Transmission Switch Circuit Differential Solenoid Circuit ...
Page 333: ...10 47 ELECTRICAL 10 Charging System Circuit Cooling Fan Circuit ...
Page 334: ...10 48 ELECTRICAL AWD Circuit ...
Page 339: ...WD 1 WIRE DIAGRAM RANGER 500 2X4 4X4 CHASSIS ...
Page 340: ...WD 2 WIRE DIAGRAM RANGER 500 2X4 4X4 DASH ...
Page 341: ...WD 3 WIRE DIAGRAM RANGER 500 EFI 4X4 CHASSIS PAGE 1 OF 2 ...
Page 342: ...WD 4 WIRE DIAGRAM RANGER 500 EFI 4X4 CHASSIS PAGE 2 OF 2 ...
Page 343: ...WD 5 WIRE DIAGRAM RANGER 500 EFI 4X4 DASH ...
Page 344: ...WD 6 WIRE DIAGRAM RANGER 500 EFI 4X4 BREAKOUTS ...
Page 345: ...WD 7 WIRE DIAGRAM RANGER 500 2X4 4X4 BREAKOUTS ...


