9
I
NSTALLING AND
S
ETTING UP THE
S
CANNER
Please follow the step-by-step procedures described below to install the Plustek
scanner.
Attention
Choose a Proper Site First!
Always place your scanner on a level,
smooth and strong surface before proceeding
the scanner setup or any scanning task.
Tilted or uneven surface may cause paper-
feeding errors, scanner damage or personal
injury.
Avoid using the scanner in a dusty
environment. Dust particles and other foreign
objects may damage the unit.
Step 1. Connecting the Scanner to Your Computer
Attention
Please make sure the scanner is turned OFF
before you plug or unplug the scanner power
adapter.
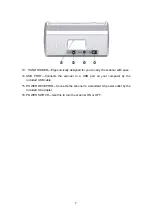
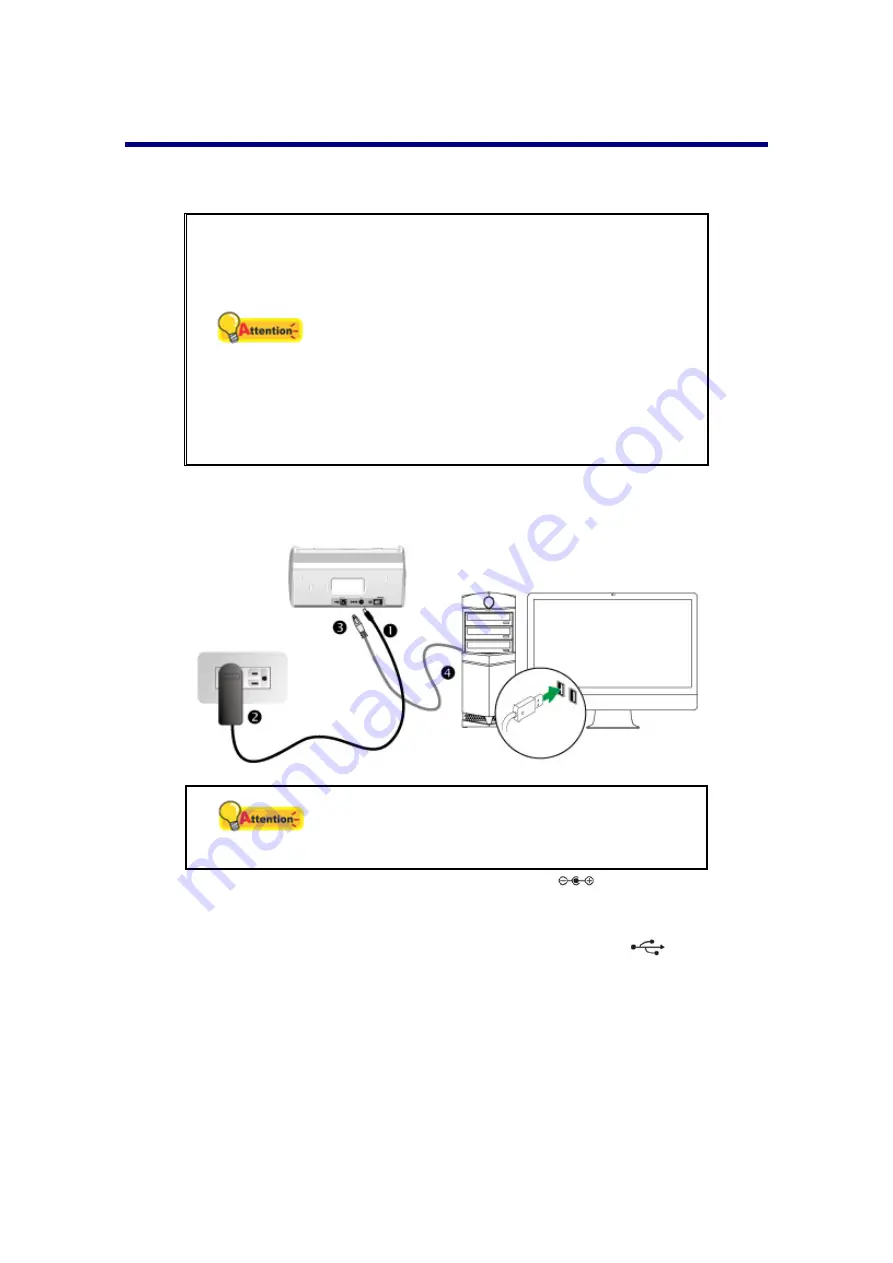
1. Plug the AC adapter into the scanner’s power receptor
.
2. Plug the other end of the AC adapter into a standard AC power outlet.
3. Plug the square end of the included USB cable to the USB port
at the rear of
the scanner.
4. Plug the rectangular end of the USB cable to an available USB port on your
computer.
Step 2. Installing the Software
1. Switch on the scanner power from the rear of the scanner.
Summary of Contents for SmartOffice PS286 Plus
Page 2: ...Scanner User s Guide SmartOffice ...
Page 44: ...40 Dimensions W x D x H 263 x 128 x 148 mm 10 36 x 5 02 x 5 83 ...
Page 48: ...9 The TWAIN Interface 9 Scan Settings 9 How to Scan ...
Page 92: ...9 Program Window Overview 9 Configure Scan Profiles 9 Scan Images with Scan Profiles ...
Page 123: ...9 Scanner Connection 9 Standby Mode ...
Page 128: ...Scanner User s Guide SmartOffice ...
Page 162: ...32 Net Weight 1 66 Kgs 3 66 Lbs Dimensions W x D x H 263 x 128 x 148 mm 10 36 x 5 02 x 5 83 ...
Page 166: ...9 Button Configuration Window Overview 9 Common Scan Parameters 9 Using the Scanner Buttons ...

