


Page 10/68
After inserting the rechargeable batteries, close the battery compartment cover and place the
device in front of you. Now connect the medical power adapter with its power cable to the wall
socket and check whether voltage is present (green light diode at the top of the medical power
adapter lights up). Then connect the 12V charging cable of the medical power adapter to the
device.
The inserted rechargeable batteries will now be charged automatically. The charging time of
the batteries depends on the charge level of the batteries. The maximum battery charging time
is 3 hours for the supplied rechargeable batteries.
2.4 Switching the device on and off
To switch on the device, briefly press the On/Off button. The screen switches on immediately
and the device is booted. The device is ready for use after approx. 25 seconds. After inserting
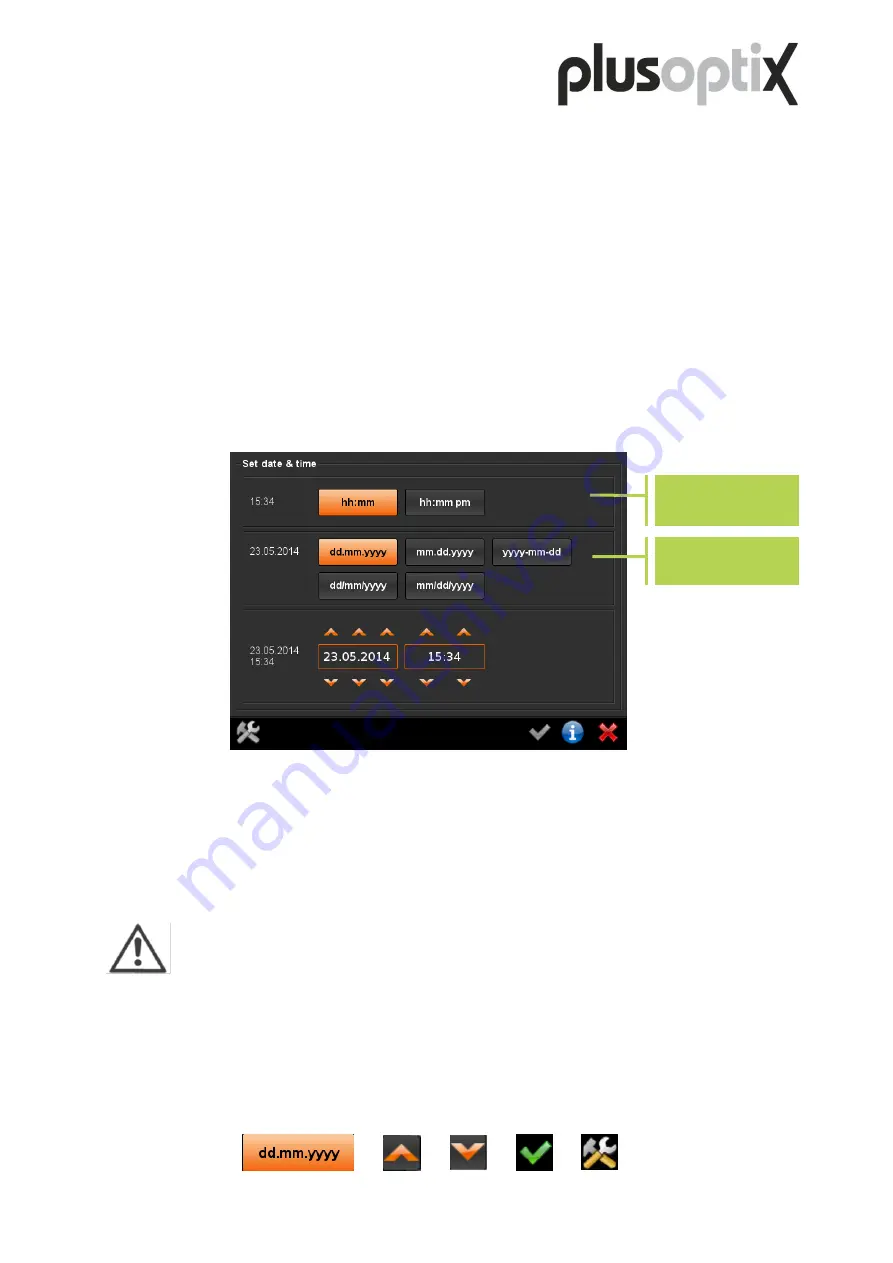
the batteries, the date and time settings page is displayed on the screen.
The time and date format selected is highlighted in color (1). Set the current date and time by
touching the orange arrows (2 or 3). Use Checkmark button (4) to confirm your entries. You
can change the date and time as well as the display formats at a later stage in Settings (5)
(see chapter 4.1.2 "Customize basic settings").
Note:
If the device is not used for 30 seconds, the screen switches off automatically
(stand-by mode). Touch the screen to reactivate it. If the device is not used for 5
minutes, the device switches-off completely. To switch on again, you need to press
the On/Off button. These two time windows can be individually adjusted in Settings
(5) (see chapter 4.1.2 "Customize basic settings").
To switch off the device, briefly press the On/Off button. The screen switches off immediately
and the device is shut down. If the screen does not switch off, press and hold the On/Off
button until the screen switches off.
1)
2)
3)
4)
5)
Buttons for
time format
Buttons for
date format
Screenshot 1: Setting date and time